How to Add an Operation on the Theatre App
Adding an Operation in the Theatre App allows the Practitioner to book an Operation on the Theatre List whilst on the move, using a mobile device. Practitioners can make changes to the Operation Details should any of the details change, without having to sign into the Web App.
Please Note: In order to Add an Operation a Theatre List will first need to be created. For more information on how to Create a Theatre List on the Theatre App, please refer to the user manual: How to Add a Theatre List using the Theatre App.
- Navigate to the GoodX Theatre App website by typing /app/gxtheatre/ at the end of the GoodXWeb App URL (Uniform Resource Locator) and press the Enter key on the keyboard.
![]()
- The GoodX Theatre screen will open.
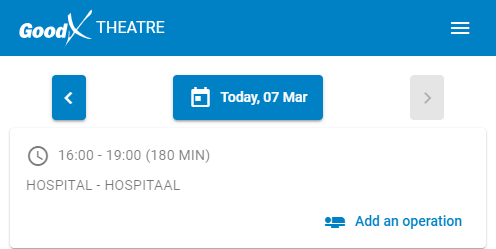
Please Note: All Theatre Lists that have been added will appear on the GoodX Theatre screen.
- Click/Tap on the Add an Operation button corresponding to the desired Theatre List.
![]()
- The Add an Operation screen will open.
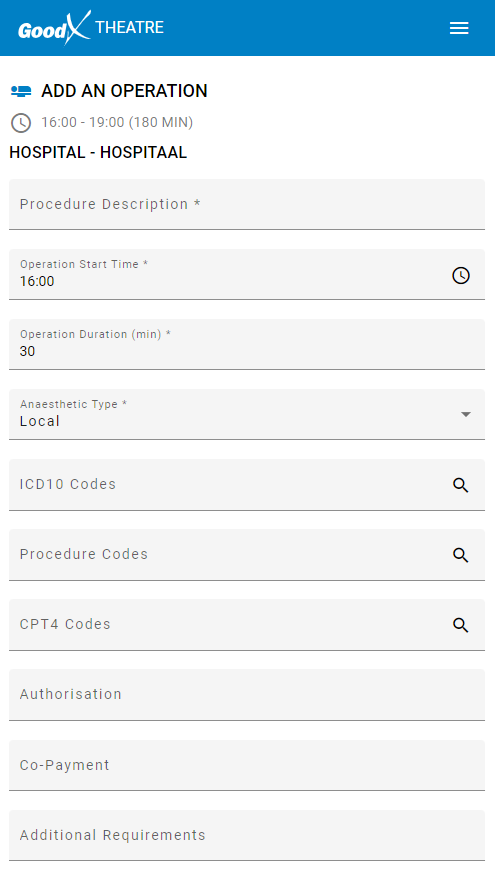
Please Note: All Fields that are marked with an * (asterisk) are mandatory fields, which need to be completed in order to save the Operation Details.
- Click/Tap on the Procedure Description field to enter the desired information.

- Click/Tap on the Operation Start Time field to enter the desired Time that the Operation will begin.

Please Note: The Time that appears in the Operation Start Time field by default is the first available Time, the Operation can be scheduled.
- Click/Tap on the Operation Duration (min) field to enter the desired number of Minutes for the Operation.

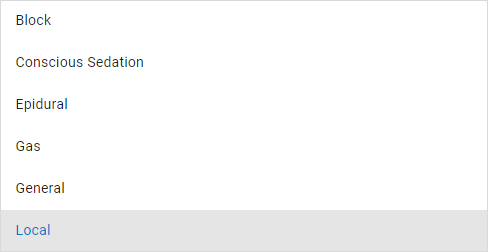
- Click/Tap on the Anaesthetic Type drop-down menu.

- Select an Option from the list that will become available.
- Click/Tap on the ICD10 field to enter the desired ICD10 Code or Name of the Diagnosis.

- A list of ICD10 Codes will appear as you type, from which you can make a selection. Only 1 character is needed for the list to appear.)

Please Note: If you take too long to make a selection the list will disappear.
- Click/Tap on the Procedure Codes field to enter the Code or Name of the desired Procedure.

- A list of Procedure Codes will appear as you type, from which you can make a selection. Only 1 character is needed for the list to appear.)

Please Note: If you take too long to make a selection the list will disappear.
- Once a Procedure Code has been added a new Average Duration (minutes) field will appear with the average time that this Procedure should take as an estimation.

- Click/Tap on the Use button to change the Duration of this Operation to the suggested average time.
![]()
Please Note: The Duration of the Operation will be updated on the Operation Duration (minutes) field, Theatre List, and the Operation Booking on the GoodX Web App.
- Click/Tap on the CPT4 Codes field to enter the desired CPT4 Code.

- Click/Tap on the Authorisation field to enter an Authorisation number.

Please Note: When a Patient belongs to a Medical Aid they first need to obtain Authorisation before Surgical Procedures are done, otherwise they will not pay.
- Click/Tap on the Co-Payment field to enter a Rand Value that will need to be paid as a Co-Payment.

- Click/Tap on the Requests or Additional Requirements field to type in the free text field.

- Click/Tap on the Admin Note field to type in the free text field.

- Click/Tap on the Clinical Note field to type in the free text field.

- Click/Tap on the Debtor field to search for and select the desired Debtor.

- A list of Debtors will appear as you type, from which you can make a selection. Only 1 character is needed for the list to appear.

Please Note: The Debtors that appear on the list, are Debtors who have already been created on the GoodX Web App. Debtors that have not been created will first need to be created before they can be linked to an Operation.
- Click/Tap on the Patient field to select the desired Patient.
![]()
- A list of Patients associated with the selected Debtor will appear, from which you can make a selection.

Please Note: If the Debtor is the only person on their account, they will be automatically listed as the Patient.
- Click/Tap on the Cancel button to close the Add an Operation screen without saving and return to the GoodX Theatre screen.
![]()
- Click/Tap on the Save Operation button to save all the information added to the Operation. The Add an Operation screen will close and you will be redirected to the GoodX Theatre screen.
![]()
- A notification will appear to advise that the Operation has successfully been created.
![]()
- An indication will appear on the corresponding Theatre List to advise a Theatre Booking has been made.
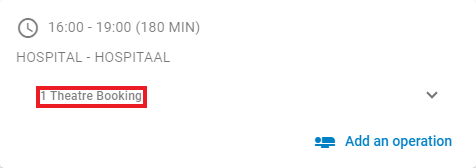
- Click/Tap on the Theatre Booking drop-down menu to see the details of the Booking.
![]()
- The basic details of the Operations that have been booked will appear.
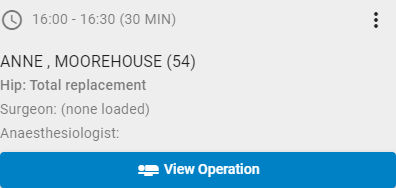
- Click/Tap on the View Operation button to see all the details, or to make changes to the Operation.
![]()
- For more information regarding making changes to the information of the Operation, please refer to the user manual: How to Edit an Operation on the Theatre App.