The Capture Values screen is designed for recording your counted units following your Stock Take. This screen facilitates both Firstand Second Counts, streamlining and enhancing accuracy in the Stock Takeprocess.
The Contents of This User Manual:
Complete
Bulk Capure
Filters
Column Options
Columns
Page Options
This user manual will start on the Stock Take screen.
For more information regarding the Stock Take screen, please refer to the user manual: Stock Take View Screen (Web).
Double-Click on the desired Snapshot line.
The Capture Valuesscreen will open.
Complete
Allows you to complete all changes made to the Stock Take.
Click on the Complete button to save all changes that have been made to the Stock Take.
?Please Note: Once you have completed your First Count you will move on to the Second Count. For more information regarding Stock Take, please refer to the user manual: How to Capture Stock Values: First Count.
Bulk Capture
Allows you to capture multiple items using a barcode scanner.
Click on the Bulk Capture button to capture several items in the same counting location at the same time.
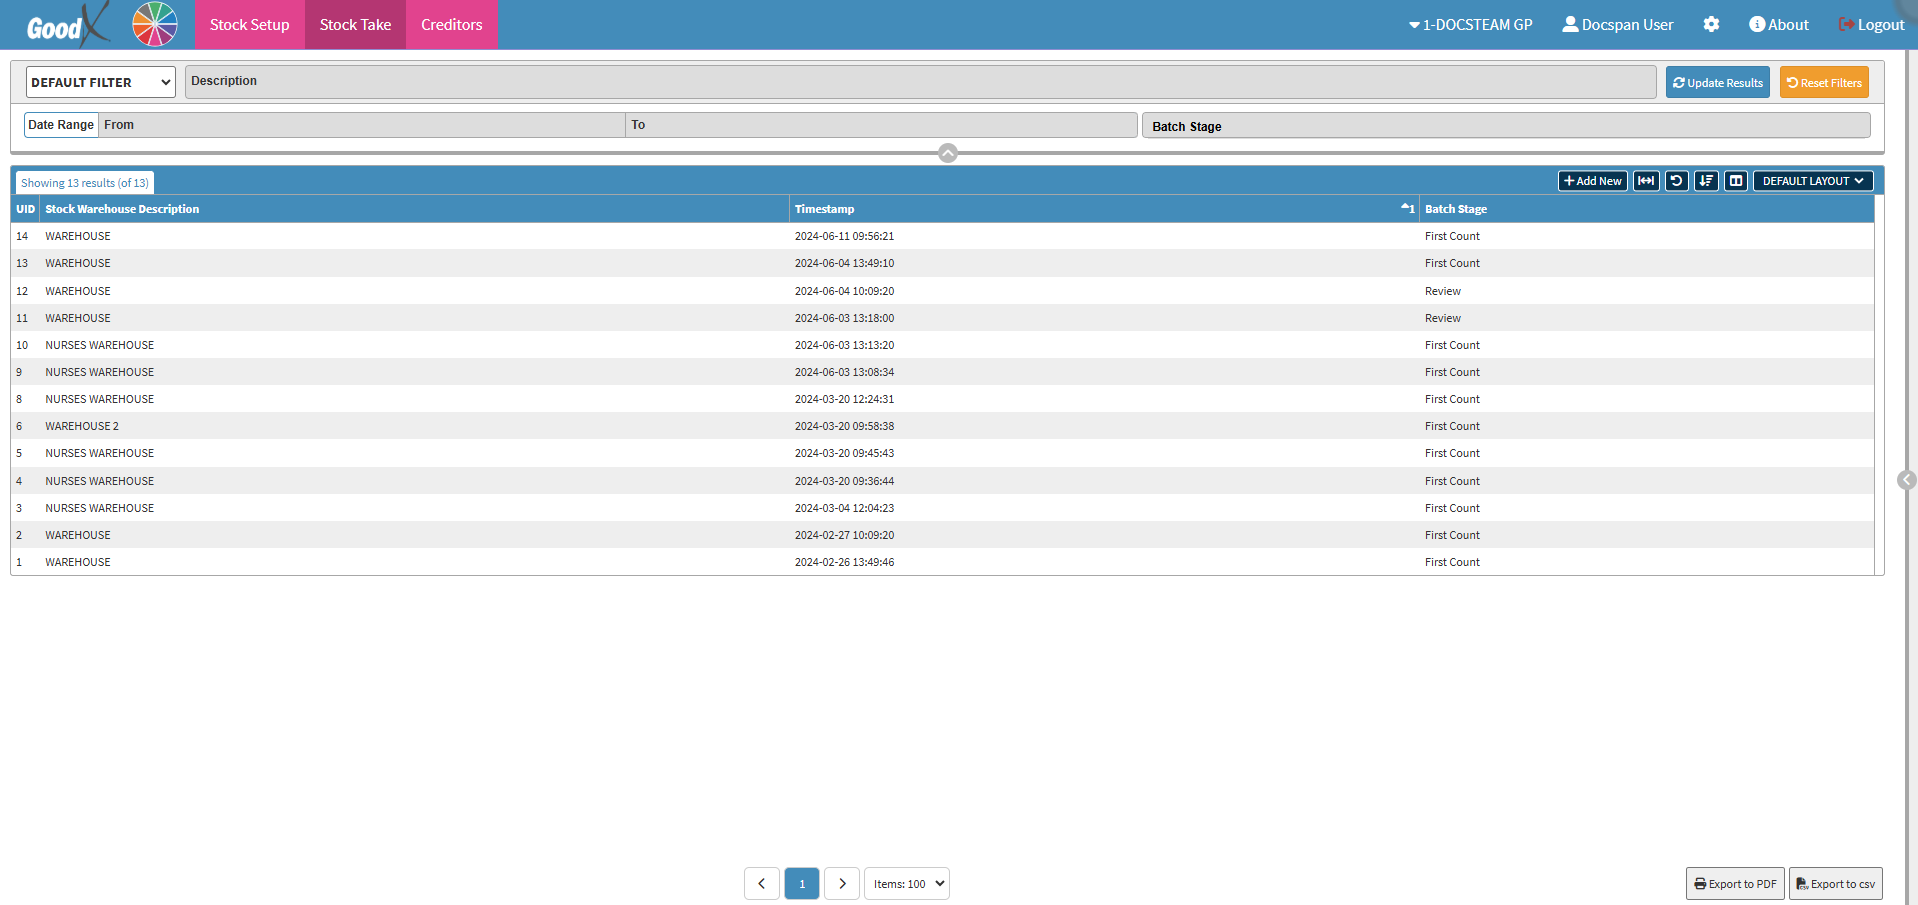
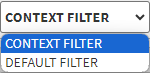
Filters are tools or functionalities that allow you to narrow down or refine the results displayed on the Capture Value List screen.
Click on the Filter drop-down menu to select how the screen will be filtered.
Context Filter:Gives extra filter options to refine the information of the List.
Default Filter:Predetermined filters that will always be available to search with.
Click on the Description field to enter the Description of the desired Stock Item.
Click on the Counting Location drop-down menu to select the desired Counting Location.
Click on the Captured First Qty slider button if you do not wish to filter by First Count.
Click on the Captured First Qty slider button a second time to filter by First Count.
Click on the Captured First Qty slider button a third time to show all Stock Items, regardless of First Count.
Click on the Update Results button to refresh the Report List after the Filters have been selected.
Click on the Reset Filters button to clear the Filters that have been set.
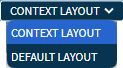
Columns Options
Several additional Options are available for the Columns. These additional Options are to help the User adjust the list, refine the Search and give more specific results.
Click on the Enable/Disable Inline Editing button to do a Stock Count.