Invoice Lines provide a detailed breakdown of the services and items billed on an Invoice, ensuring that Patients and Medical Aids can clearly see what is being charged. This user manual guides users through adding Diagnoses, Billing Codes, quantities, and Authorisation details, updating prices, and managing liabilities, while also showing how to use balanced billing, Prescribed Minimum Benefits, and Easy Events. Following these steps ensures that Invoices are accurate, complete, and transparent.
The Contents of This User Manual:
Invoice Lines
Invoice Totals
Easy Events
Invoice Line Options
This user manual will start with the Invoice Lines details, which will be displayed in the middle of the Invoice screen.
Invoice lines are the individual Procedures, Products, and Items listed on an Invoice. They correspond to the services provided by the Practice to the Patient. Each Invoice line usually includes a description of the item or service, the quantity, unit price, and total price. Invoice Lines provide a detailed breakdown of the charges, showing the Patient exactly what each item or procedure costs.
The Item Number displays the line number that identifies the Procedure or Items being billed.
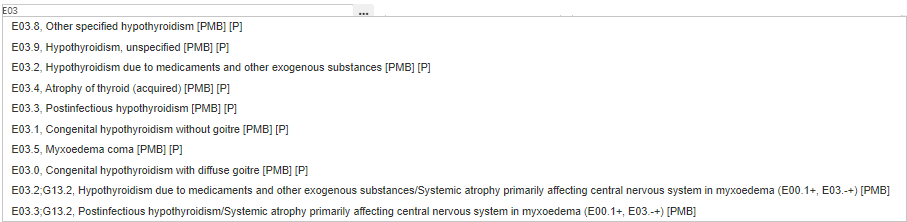
Click on the Diagnosis field to manually enter the Diagnosis Code, if known.
A list of ICD-10Codes will populate as you type.
Alternatively, Click on the ... (ellipse) button to search for the Diagnosis code in the ICD-10 Builder screen.
The ICD-10 Builder screen will open.
Click on the Search ICD-10 field and enter the details of the diagnosis you want to add to the Invoice. The list will filter automatically as you type.
💡Please Note: ICD-10 Codes can be searched for by using the Diagnosis Code or the Name of the diagnosis.
Click on the desired ICD-10Code.
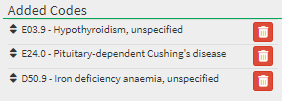
The selected ICD-10Code will be added to the Added Code list section of the ICD-10 Builder screen.
💡Please Note: More than one ICD-10 Code can be added to the list.
Click on the Remove button to remove the ICD-10 Code from the list.
Click on the Save button to add the Diagnosis codes to the Invoice.
The selected Diagnosis codes will be added to the Diagnosis field.
Click on the Clear All ICD-10 Codes button to remove all the diagnoses from the Diagnosis field.
Click on the Copy ICD-10s in First Line to all Lines button to copy the ICD-10 Codes added in the first billing line to all the lines which the Practitioner will bill, or has already billed.
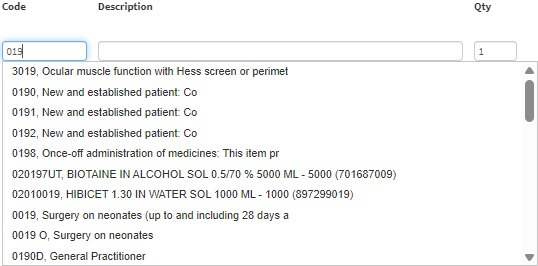
Click on the Code field to enter the desired Billing Code. You can type either the code or the name to start the search.
A list of Billing codes will populate as you type to select the desired code to add the Item to the Invoice.
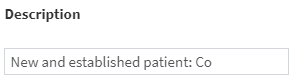
The Description field will be filledin automatically once the Code field has been completed.
Click on the Qty field to enter the desired number of the specific item you would like to add to the Invoice.
💡Please Note: When a GMED billing item is added to an Invoice and the user changes the quantity, the quantity used when posting will automatically be saved as the favourite quantity, provided that Self-Learning is enabled in the Settings. For more information regarding this Self-Learning setting, please refer to the user manual: Entity Settings Panel.
Click on the Repeat Items in Single Line button torepeat the Invoice line multiple times.
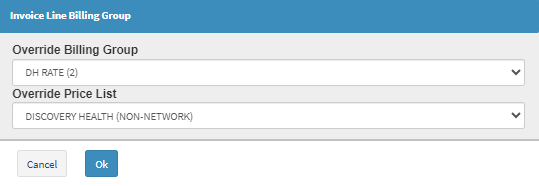
Click on the Invoice Line Billing Group button to override the Price List associated with the line item being billed. The current Price List used by default on the specific line item, will correspond to the Price List of the entire Invoice.
The Invoice Line Billing Group screen will open.
Click on the Override Billing Group drop-down menu to select the desired option from the list that becomes available.
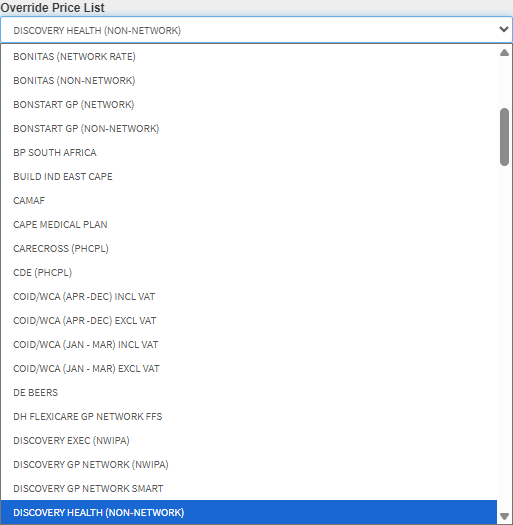
Click on the Override Price List drop-down to select a different Price List to apply to the Invoice Line, instead of using the default one.
💡Please Note: The Lists which appear on the drop-down menus of the Invoice Line Billing Group screen will be dependent on the Price Lists loaded on the system for the Practice.
Click on the OK button to override the default Price List with the option which has been selected.
The Amount Price associated with the Item/Procedure of the current line will automatically be updated with the new price of the selected Price List
The MA Liable displays the amount of the specific line item for which the Medical Aid will be liable for payment when posted, and the Invoice Line will automatically be updated with the new price of the selected Price List.
The Patient Liable displays the amount for the specific Item or Procedure of the current line for which the Debtor or Patient will be liable, and the Invoice Line will automatically be updated with the new price of the selected Price List.
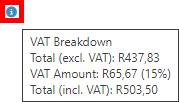
Hover over the VAT Information icon to view the VAT Breakdown.
Click on the Toggle the Lines Balancing field button to open the relevant fields to apply balanced billing.
💡Please Note: Balanced billing is the practice of charging a Patient the difference between the Practitioner’s fee and the amount covered by the Medical Aid. This typically occurs when a Practitioner charges more than the rate agreed upon by the Medical Aid scheme. If the Medical Aid does not fully reimburse the cost of a procedure or service, the remaining balance is billed directly to the Patient. Balanced billing is not always permitted and depends on whether the Practitioner has a contractual agreement with the Medical Aid. In cases where such an agreement exists, the Practitioner may be required to accept the Medical Aid’s rate as full payment, and balanced billing would not be allowed.
Click on thePrivatecheckbox to make the Patient liable for that specific Invoice line. The line will be marked as private and excluded from the Medical Aid claim.
Click on the Authfield to enter the Authorisation Number confirming pre-approval for the specific Item or Procedure billed on this line.
Click on the Copy Authorisation code in the first line to all Lines button to copy the Authorisation codes added in the first billing line to all the lines.
💡Please Note: When Authorisation Numbers have already been set up for specific billing codes, the codes will be automatically added to the Invoice.
For more information regarding how to set up Authorisation, please refer to the user manual: Authorisation Setup.
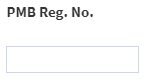
Tick the PMB checkbox to indicate that the line item is covered by Prescribed Minimum Benefits.
Click on the PMB Reg No. field to enter theunique reference number issued by the Medical Aid or Insurance when a Patient is registered for a Prescribed Minimum Benefit (PMB) condition.
Invoice Totals
Displays a summary of the financial amounts on the Invoice. It includes the total amount before VAT, the VAT amount itself, and the final total inclusive of VAT. This provides a clear overview of what is being billed and ensures transparency for both the Patient and the Medical Aid.
Click on the Invoice Total drop-down menu to view a breakdown of the total.
Easy Events
Shortcut buttons to other features. Saves time and allows the user to create forms for the Patient from the Invoice Details screen.
Click on the relevant button of the desired form to create a new form for the Patient.
💡Please Note: Easy Events can be set up to suit the needs of the Practice. For more information on how to set up Easy Events, please refer to the user manual: Easy Events.
Invoice Line Options
Additional actions are available on the Invoice Line.
Click on the Resetbutton to revert all lines on the Invoice to their default state, removing any custom settings or triggers that were applied.
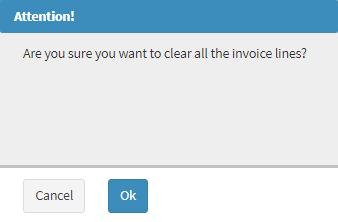
Click on the Delete button to remove all the lines added to the Invoice.
An Attention pop-up will appear to ask whether the user is sure to clear all the lines of the Invoice.
Click on the OK button to clear all the lines of the Invoice.
Click on the Add button to add a new line to the Invoice. As many lines can be added as needed.
Click on the Refresh button to update the line if any changes have been made, ensuring all information is current.
Click on the Deletebutton to remove the desired line.