The Posted Invoices sidebar provides quick access to all relevant functions and information linked to a Posted Invoice, allowing you to work efficiently without navigating away from the screen. It centralises Debtor details, account actions, workflow tools, communication options, and ERA access in one organised space. Using this sidebar ensures smooth navigation, accurate invoice management, and faster handling of account-related tasks.
The Contents of This User Manual:
Posted Invoices Sidebar: Bulk Action Buttons
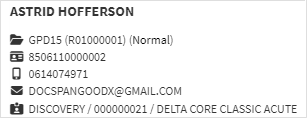
Debtor Demographic Information
Sidebar Buttons
Communication Buttons
This user manual will start on the Invoice Management tab, Posted Invoices sub-tab.
For more information on how to navigate to the Invoice Management tab, please refer to the user manual: Reports Segment.
Select the desired Posted Invoice.
Click on the Sidebar Expander to open the Posted Invoices sidebar.
The Posted Invoices sidebar will open.
An explanation of the Posted Invoices Sidebar will be given below:
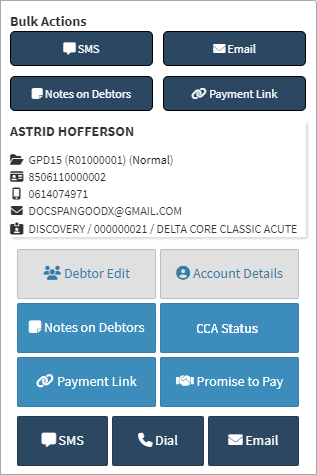
Posted Invoices Sidebar: Bulk Action Buttons
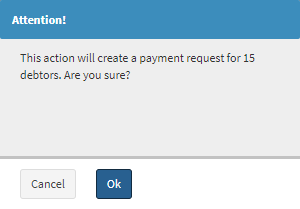
Bulk Actions are additional options that are available to the user for quick and easy access to relevant Workflow Events.
?Please Note: For the Bulk Actions to work, more than one Posted Invoice should be selected.
Click on the SMS button to send a Bulk SMS.
For more information on how to send a Bulk SMS, please refer to the user manual: Send an SMS.
Click on the Payment Link button to send a Payment Link to the Debtor.
For more information on how the Payment Link button works, please refer to the user manual: Send Payment Request WebApp.
Click on the Promise to Pay button to make a note of when the Debtor will pay for the invoice.
For more information on how the Promise to Pay function works, please refer to the user manual: Promise to Pay.
Communication Buttons
Communication buttons are also located on the Posted Invoices sidebar in order to make communication easier to the Debtor, either by sending an SMS or Email or Phoning the Debtor directly.