WA: Observation / Diagnosis and Treatment Planning Overview
The Observation / Diagnosis and Treatment Planning Chart is a graphical tool / function for organising all the important information about the Patients teeth and mouth (Imperfections, Fillings, Replacements) when the Doctor does the Consultation and Billing before, during and after the Appointment.
- The contents of this User Manual will consist of the following information:
- Observation / Diagnosis Mode
- Treatment Planning Mode
- Odontogram Layers
- Clinical Notes
- Dental Chart Screen Buttons
- Log in to the GoodX WebApp using your GoodX username and password.
- From the Diary screen, click on the correct Patient booking.

- The Sidebar will open on the right-hand side of the screen.

- Click on the Dental button.
![]()
Please Note: The Dentist can still access the Clinical screen from the Diary Sidebar. Click on the drop-up arrow to open the Clinical button.

- The Diagnosis / Observations screen will open.
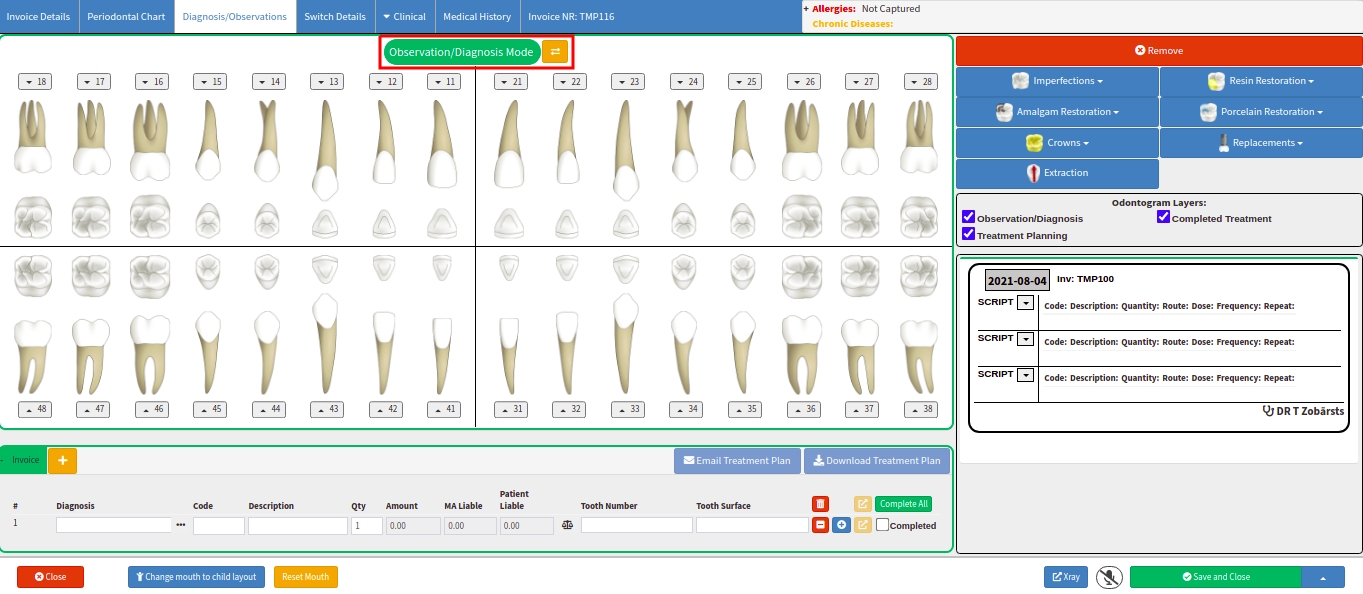
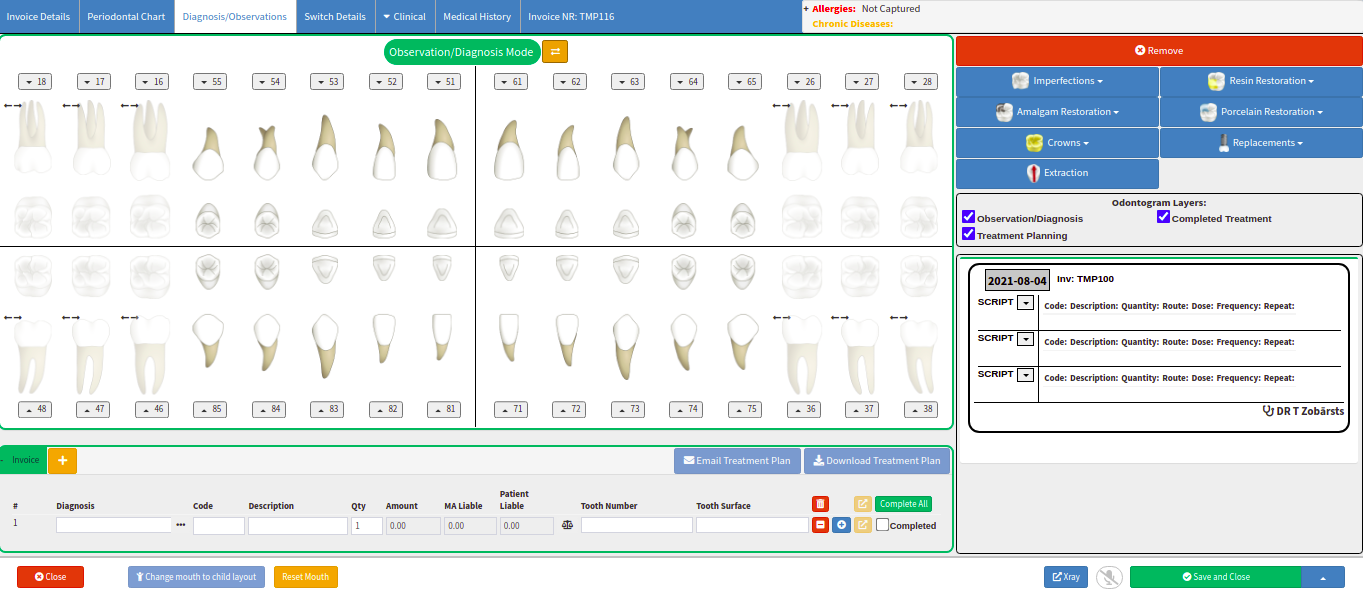
- Click on the Change mouth to child Layout button at the bottom of the screen to change the chart.
![]()
- The Dental chart will change and display the Child layout and the teeth numbers for a Child's mouth.
Observation / Diagnosis Mode
In the Observation / Diagnosis Mode, the Dentist will complete the chart after closely observing the Patients mouth. He will then identify the nature of the problems by doing an examination of the mouth.Every tooth that has a problem on it after the Doctor did the examination can be marked with the applicable option that will be discussed further down.
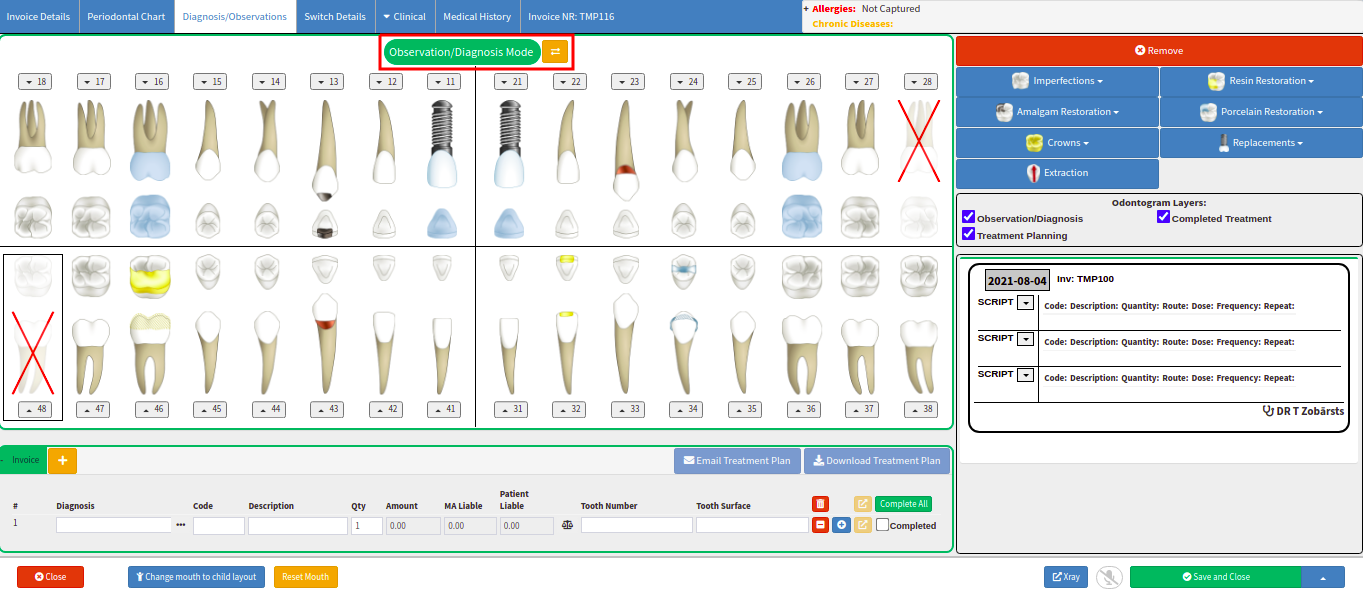
Please Note: Refer to the Observation / Diagnosis Mode link or related button to open the Manual for an extensive explanation of the Observation / Diagnosis Mode Screen.
Treatment Planning Mode
- Click on the orange button next to the Observation / Diagnosis Mode heading to change the mode to Treatment Planning Mode.
![]()
- The Treatment Planning Mode screen will open.
Please Note: The Observations and Diagnosis that were made and completed on the Dental Chart will display on the Treatment Planning Mode screen. The Dentist can now decide where and what to start with.
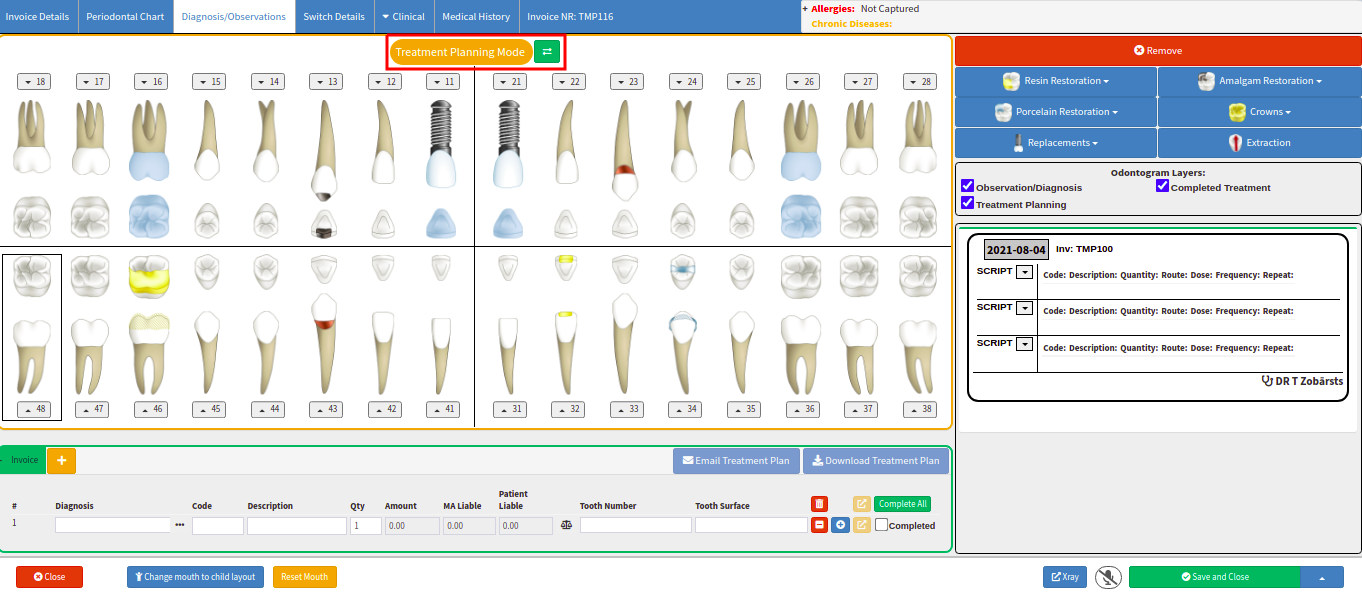
Please Note: Refer to the Treatment Planning Mode link or related button to open the Manual for an extensive explanation of the Treatment Planning Mode Screen.
Odontogram Layers
The Odontogram Layers will determine what information the Dentist wants to display on his Dental Chart. Dentists use an Odontogram to keep track of information about a Patients mouth. The Chart shows how many permanent teeth the patient has, which ones have been restored, and other relevant data on the Chart.
- Tick the Observation / Diagnosis option to display the Observation and Diagnosis information on the Patient Dental Chart.
- Tick the Treatment Planning option to display the Treatment Planning information on the Patient Dental Chart.
- Tick the Completed Treatment option to display the Procedures that's been completed on the Patient Dental Chart.
Clinical Notes
All the Invoices, Estimates, and Clinical Notes made on a tooth when clicking on the Add Note option will display under the Clinical Notes section with a date stamp, the user who created the note, and the Treating doctor's Initial and Surname.
- Click on the drop-down arrow next to the Clinical Note name.

- A drop-down menu will open with options the user can perform on the Clinical Event.

Please Note: The screen that opens using the following options will depend on what Clinical Events are done for the specific Patient. If a Quick Note is done, the Quick Note Event screen will open. If a Script is done, the Script Event screen will open. This will be applicable to all the Clinical Events.
View
- Click on the View button to open and view the Note that the Dentist made. The Quick Note Workflow Event screen will open.
![]()
Edit
- Click on the Edit button to open and edit / update any information on the Note that the Dentist made. The Quick Note Workflow Event screen will open.
![]()
- Click on the Print button to print out the Note that the Dentist made. The Print screen will open.
![]()
- Click on the Email button to email the Note that the Dentist made. The Email Workflow Event screen will open.
![]()
Graph
- Click on the Graph button to open and view the Note in a graph style that the Dentist made. The Graph screen will open.
![]()
Delete
- Click on the Delete button to delete the Note that the Dentist made. The Delete Workflow Event will open to confirm why the Note is being deleted.
![]()
Dental Chart Screen Buttons
- Click on the Close button to exit the Dental Chart screen without saving the information.
![]()
- Click on the Xray button to open the Xray integration to take an Xray for the Patient. The Xray button will open a new screen with the Xray software that the Practice is using.
![]()
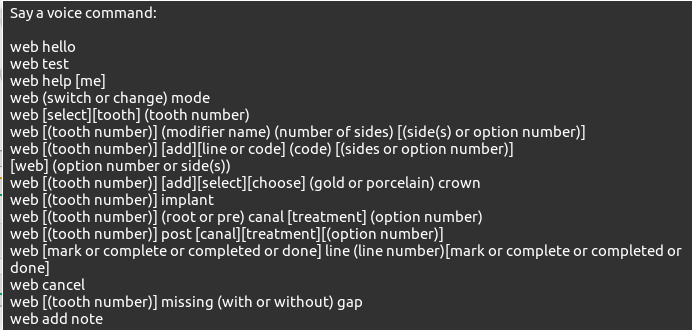
- Click on the Mic button to enable the Voice Recognition function. A program's ability to accept and interpret speech or understand and follow spoken commands is known as Voice Recognition.
![]()
- A black block with Voice Commands will open. The user can repeat the following Commands to use the Voice Recognition function.
- Click on the History button to view the Dental History of the Patient.
![]()
- The Mouth History screen will open. The user can see on the History screen what was done in the Patient mouth and when it was done.
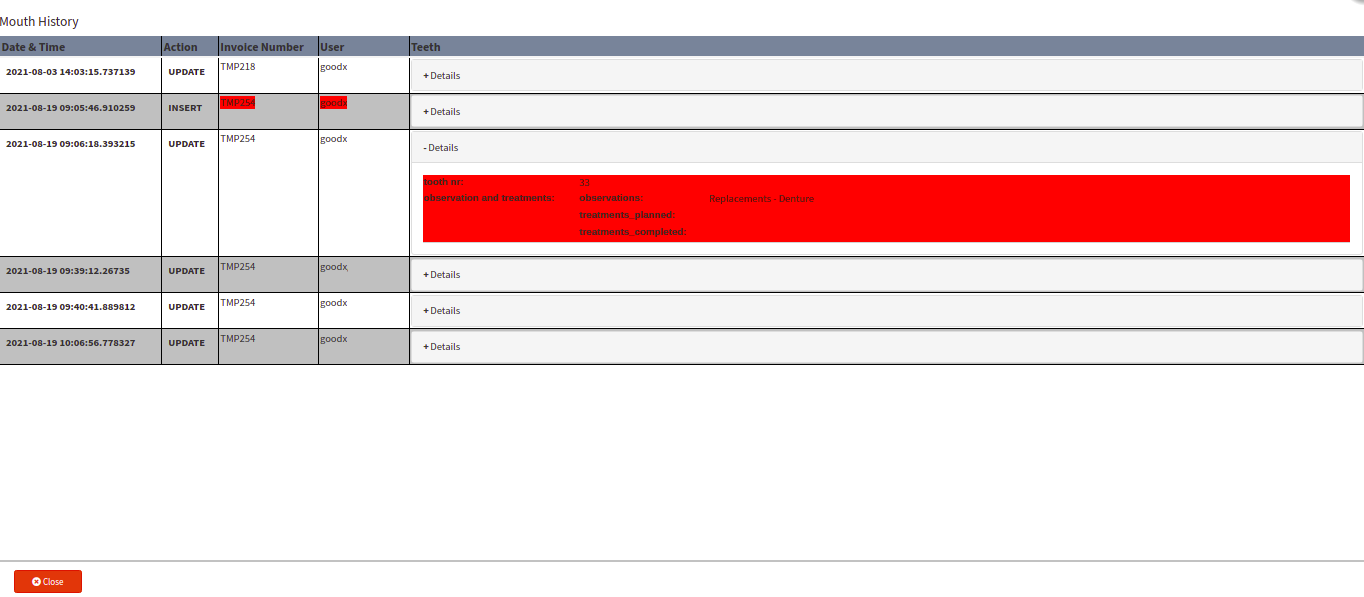
- The following Columns will display on the Mouth History screen:
- Date & Time: The Date and Time will display the date and time stamp when the Procedure was done.
- Action: The Action will display what the user has done. Is it information that was updated or new information that was inserted?
- Invoice Number: The Invoice Number will display the Estimate or Invoice Number for this specific Procedure that was done. An invoice number is a unique number allocated to the billing that was posted. This can be used as a reference in the system, in communication and to see the audit trail of that number.
- User: The User will display the username of the person who performed the Action on the system. GoodX works according to users. This is the person who has a login name and is using the login name to open GoodX. The username will show on all the transactions and any changes what was made on the system.
- Teeth: The Teeth will display all the details about the Observation / Diagnosis that were made and / or the Treatment that took place in the Patients mouth.
- Click on the Save and Close drop-up arrow for more options:

- Click on the Save button to save the information captured on the Dental Chart Screen.
- Click on the Save Lines To New Macro button to save the lines captured as a Macro.
- Click on Save and Close to save the Invoice or the changes made.
![]()