The Patients screen serves as a central tool for searching and filtering Patients that have been captured on the system, enabling you to locate a Patient's information using specific criteria fields quickly. By applying filters such as demographic details and account information, you are able to narrow down searches to find exactly the Patient record you need. This not only saves time but also ensures accuracy when accessing or updating Patient information. The Patient screen supports efficient workflow management, reduces administrative errors, and helps your Practices maintain well-organised Patient records for both clinical and financial purposes.
The Contents of This User Manual:
Filters
Screen Columns Action Buttons
Columns
Page Options
Patients Sidebar
This user manual will start on the Patients screen.
For more information on how to navigate to the Patients screen, please refer to the user manual: Debtors Segment.
Filters
Filters are tools or functionalities that allow you to narrow down or refine the results displayed on the Patients screen.
Click on the Default Filter drop-down menu to select the filter style you wish to use.
Click on the Name field to filter on the Patient's name.
Click on the Surname field to filter on the Patient's surname.
Click on the ID No. field to filter on the Patient's ID number.
Click on the Cell No. field to filter on the Patient's cellphone number.
Click on File No. to filter on the Patient's file number.
Click on the Date of Birth field to filter on the From date from the date picker that becomes available.
Click on the Date of Birth field to filter on the To date from the date picker that becomes available.
?Please Note: An error will appear if the To date is set earlier than the From date.
Click on the Age field to filter From the age of the Patients you wish to filter on.
Click on the Age field to filter To the age of the Patients you wish to filter on.
Click on the Gender drop-down field to filter on the Patients' gender.
The Active Patients slider is automatically set to show all the Active Patients.
Click on the Active Patients slider to show All Patients.
Click on the Active Patients slider to show Inactive Patients.
Click on the Update Results button to refresh the Patient List after the filters have been selected.
Click on the Reset Filters button to clear the filters that have been set.
Screen Columns Action Buttons
Several additional Options are available for the Columns. These additional Options are to help you adjust the Report to refine the search and give more specific results.
Click on the Select All Results button to select all the results currently displayed on the list.
Click on the Expand Widths button to auto-fit the Column Width to the information within all columns.
Click on the Reset Widths button to restore the original Widths after any modifications were made.
Click on the Sort Columns button to sort the Columns in the order that you desire.
Click on the Default Layout drop-down menu to select the type of layout that will be used for the screen.
?Please Note: You are able to create and save personalised layouts by using the Save Layout feature, which will display in the drop-down. For more information on how to create your own customised layouts, please refer to the user manual: How to Save Column Layouts on List Screens.
Columns
All the information on the Patients screen is divided into Columns to logically group related information together.
File No.: A unique number automatically assigned to each Patient file in the system.
Date of Birth: The Patient’s birth date, used for age and identification purposes.
Name: The Patient’s first name(s).
Surname: The Patient’s Surname.
ID No.: The Patient’s identification number (such as ID card, passport, or driver’s license number).
Gender: The Patient’s gender as recorded in the system.
Inactive Reason: The reason a Patient’s file has been marked as inactive (e.g., transferred, deceased, or no longer attending the Practice).
Cell No.: The Patient’s cellphone number.
Email: The Patient’s email address for communication.
Page Options
All the additional options that are available for the page.
Click on the Previous button to navigate to the previous page.
Click on the Page Number button to navigate to the desired page.
Click on the Next button to navigate to the next page.
Click on the Items drop-down menu to select the number of items that will be displayed on the screen.
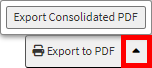
Click on the Export to PDF button to save a PDF file of all the data as a comprehensive report.
Click on the Export to PDF drop-up menu to access the Export Consolidated PDF option that allows you to generate a single document that combines all the data from multiple sources to provide an overview.
Click on the Export to CSV button to save the Report in a CSV format.
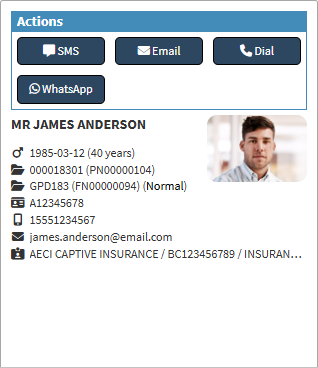
Patient Sidebar
The sidebar is an extended screen with shortcut buttons on the right-hand side, where more options are available for the Patient screen.