The Client Portal
The GoodX Client Portal is a communication and workflow platform that is used to communicate, process, manage and keep track of user issues and requests. Registered users are able to log and view support requests (tickets) in the GoodX Management System. Users administrating more than one installation can register on all the installation's contact lists and thereafter have access to all the tickets of the installations which are applicable to the specific practice or bureau. The Client Portal is used by GoodX Clients, such as Practices and Bureaus.
- This user manual will consist of the following information:
- First Time User Registration
- Open Tickets
- Log New Ticket
- Closed Tickets
- Help & Library
- Change User and Logout
- Log in to the GoodX Web App using your GoodX username and password.
- The Diary screen will open.
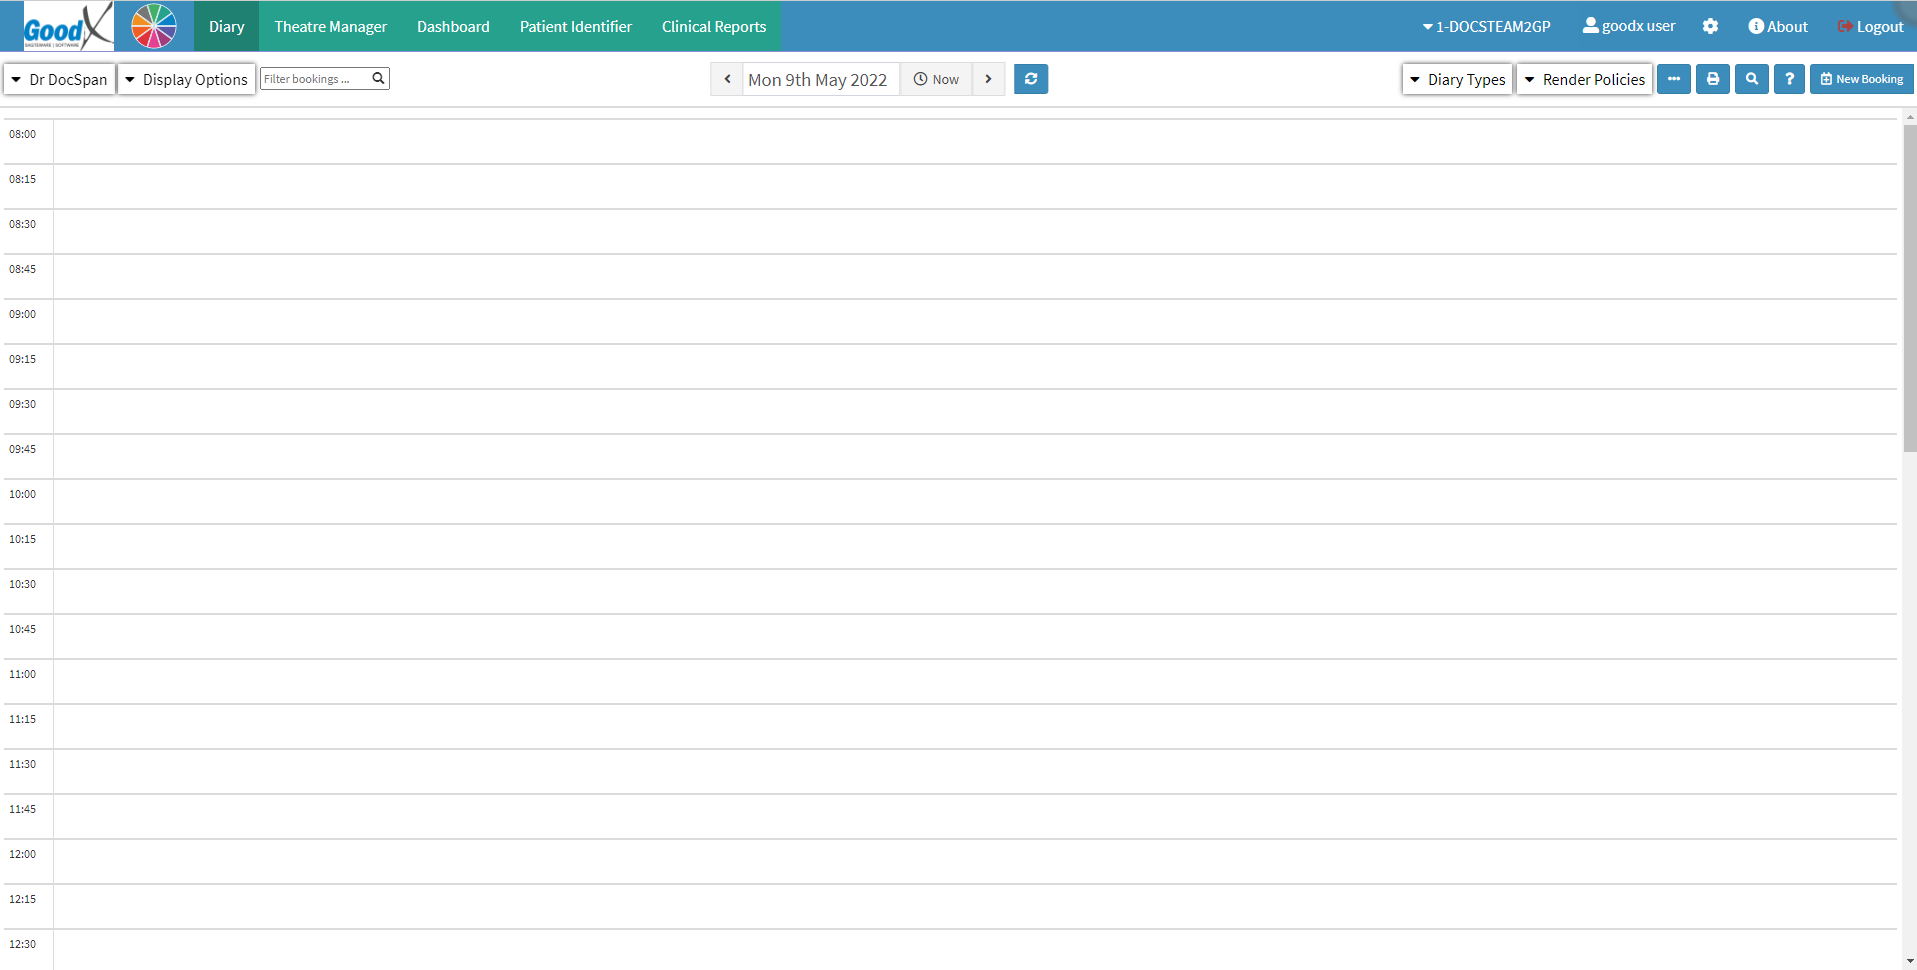
- Click on the Navigation Wheel on the Navigation Bar.

- The Navigation Wheel will expand.

- Click on the Client Portal button in the centre of the Navigation Wheel.


- The Client Portal screen will open.

First-time User Registration
A first time user is required to initially contact the Practice's FCL to add the user's name and email address to the Practice's installation contact list. Once that has been completed, the user will need to go forth with the registration process as shown in the examples below, which is a quick and simple process.- Click on the Register button on the Client Portal.
![]()
- The Register Account screen will open.

- Click on the Email Address field to Type in the user email address that was registered under the installation's contact list.

- Click on the Send OTP button to send a One-Time Pin to the user's email address for identification verification.
![]()
- An email containing an OTP will be sent to the user's email address for identification verification.

- Return to the Register Account screen on the Client Portal.

- Click on the OTP field and Type the given OTP from the received email.

- Click on the Password field and Type a new password made up of a unique code/phrase/string of characters, for future Client Portal access.

- Click on the Finish Registration button.
![]()
- The user will be redirected to the Login screen where their email and new password can be used to log in to the Client Portal.

- For more information on how to log in to the Client Portal, please refer to the user manual: How to Log In to the Client Portal.
Open Tickets
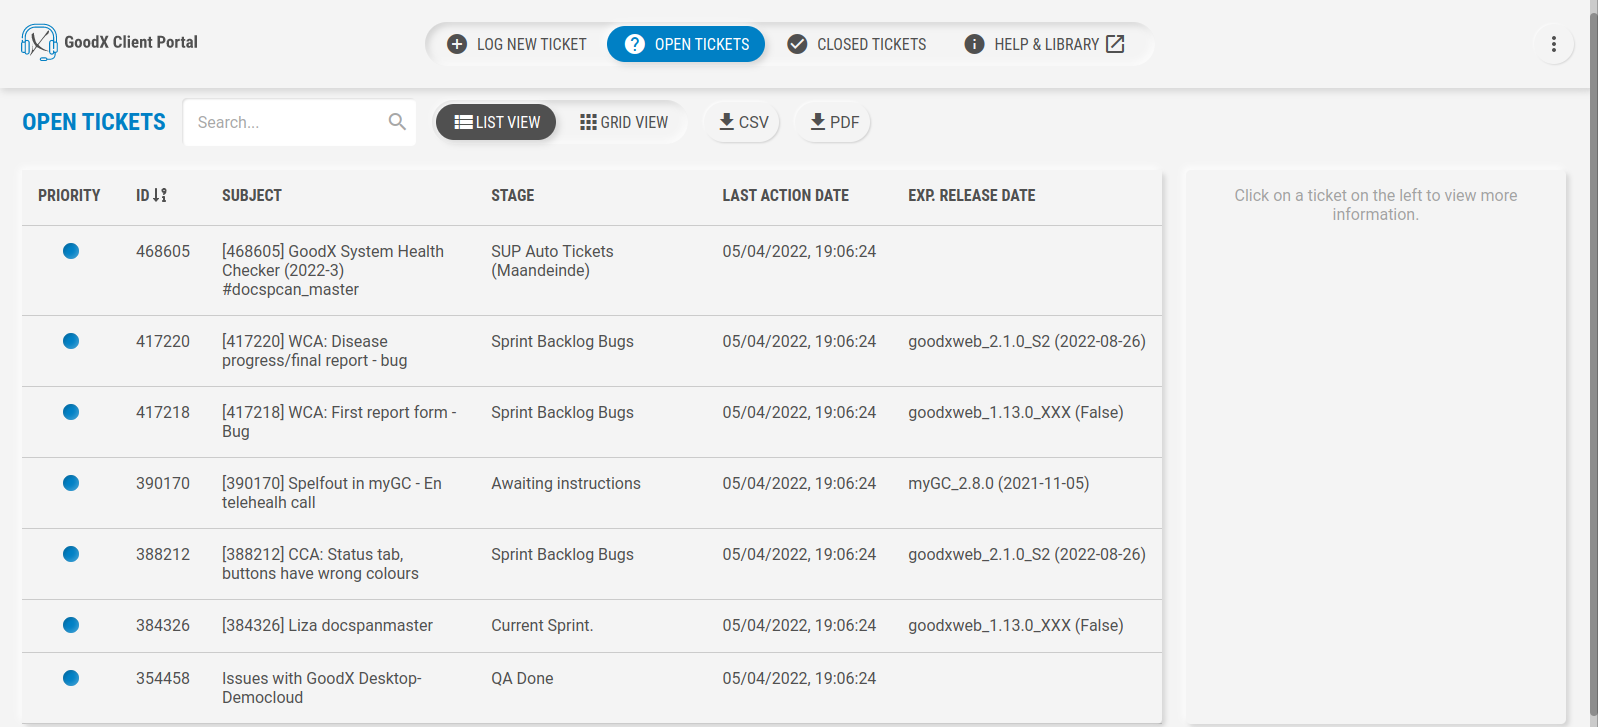
Open tickets are issues or requests that have not been tended to, or completed as of yet. The Client Portal will automatically start on the Open Tickets screen.
- By default, the Open Tickets screen will open when the user logs in to the Client Portal.
- For more information on how to log a ticket, please refer to the user manual: Log a New Ticket (Client Portal).
- The Open Tickets screen will be explained:

- Search: The user is able to easily filter through tickets if the ticket's name or ID number is known to that user. Only one character is required before results start filtering.
- Various viewing methods are available to the user to make the organisation of tickets a simpler task. An explanation of each column will be given:

- List View: The Client Portal automatically defaults to the List View, which results in the tickets displaying beneath each other, forming a list.
- Click on the List View button to sort the tickets into a list.
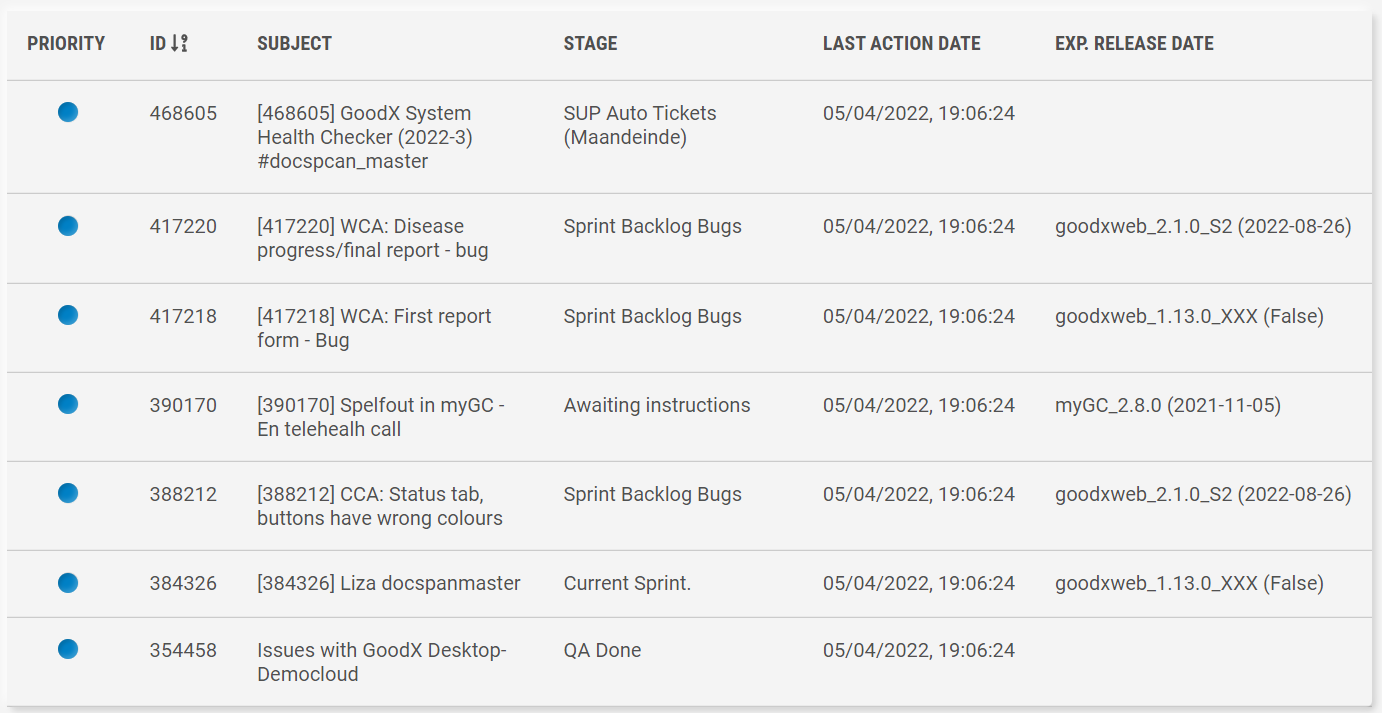
Please Note: Only List View will allow users to sort the tickets by ascending and descending order.
- Ticket information in List View will be divided into various columns.

- An explanation of each column can be found below:
- Priority: The urgency/severity of the ticket. The severity gives the FCL an idea of how quick the ticket needs to be attended to.
- ID: The system automatically allocates a unique Identification Number to each ticket created, which assists with the identification of the ticket.
- Subject: The topic of the ticket that is being logged. The Subject is important as the FCL will immediately be informed regarding what the Ticket is about and what the problem is.
- Stage: Which phase of the process the ticket is currently in.
- Last Action Date: The date, as well as time, that the ticket was last worked on by the GoodX team.
- Exp. Release Date: The expected date on which the necessary changes on the ticket are to be completed and rolled out for Client use.

- Grid View: The tickets will be displayed in a card/block formation, creating a grid.
- Click on the Grid View button to sort the tickets into a grid.
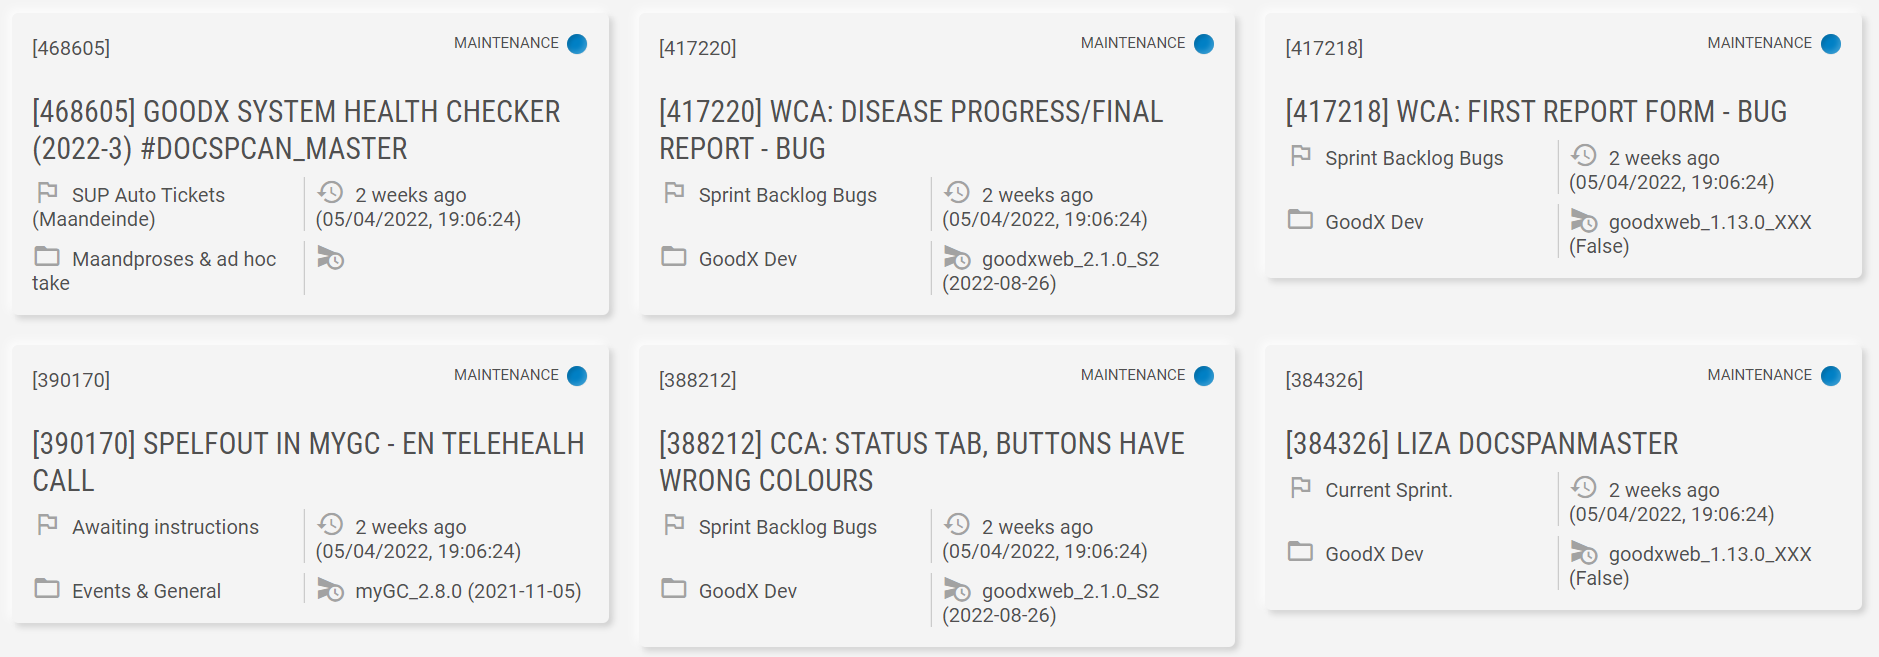
Please Note: The Grid View tickets cannot be sorted into any ascending or descending order. Both the Open Tickets and Closed Tickets screens contain the same viewing options and ticket fields, and the above explanations relate to either screen.
- Click on the Download Tickets to CSV button to download an offline copy of the tickets into a CSV (Comma Separated Value) format for future use.
![]()
- Click on the Download Tickets to PDF button to download an offline copy of the tickets into a PDF (Portable Document Format) format for future use.
![]()
Log New Ticket
If a user requires any assistance regarding an error on the system, or whether the user would like to suggest a new possible function, a ticket can be logged.
- Click on the Log New Ticket button.
![]()
- The Log a New Ticket screen will open.

- For more information on how to log a new ticket, please refer to the user manual: Log a New Ticket (Client Portal).
Closed Tickets
Once issues or requests have been dealt with, the ticket will be moved to Closed Tickets. Once the issue or request has been handled, the Development Stage will also change to Done or Audited (Done).

Please Note: Refer to the Open Tickets section in this user manual for a detailed explanation regarding the available fields.
Help & Library
When a user requires help on how to navigate around the Client Portal, the Help & Library button is available to redirect the Client to a user manual with additional information regarding the Client Portal.
- Click on the Help & Library button.
![]()
- The Client Portal user manual will open in the GoodX Learning Centre, which will explain all the features and functions of the Client Portal.
Change User and Logout
Users that are managing more than one installation can register on all the installation's contact lists, and will have access to all the tickets of all the installations thereafter. Having access to various ticket lists is made easier by the Change User feature on the Client Portal. Users are also able to log out of the Client Portal when not in use, to prevent unauthorised individuals from accessing the information found on the Client Portal.
- Click on the Kebab menu button to access additional options.
![]()
- The Kebab menu will open.

- Click on the drop-down menu if the user would like to change profiles to view the tickets of a different install.

- Select the desired install from the list that has become available.
- Click on the Logout button to sign out of the Client Portal.
