The Stock Take Count Report contains key details for inventory management at the Practice by comparing actual stock counts against recorded quantities, identifying variances, and confirming if discrepancies have been accepted. It ensures stock accuracy, regulatory compliance, and efficient inventory management, helping to prevent shortages, reduce waste, and maintain the availability of critical medical supplies.
💡Please Note: A Stock Take: Count Report will only be visible to a Super User once a Stock Take has been posted.
The Contents of This User Manual:
Post
Filters
Context Filter
Default Filter
Screen Columns Action Buttons
Columns
Page Options
This user manual will start on the Stock Take screen.
Double-click the Stock Take which you want to see the Count Report for.
The Captures Value screen will open.
💡Please Note: The Capture Values screen will be blank as you have already captured all the values and accepted any variances. For more information on how to Capture Values for a Stock Take, please refer to the user manual: How to Capture Stock Values: First and Second Count.
Click on the Count Report tab.
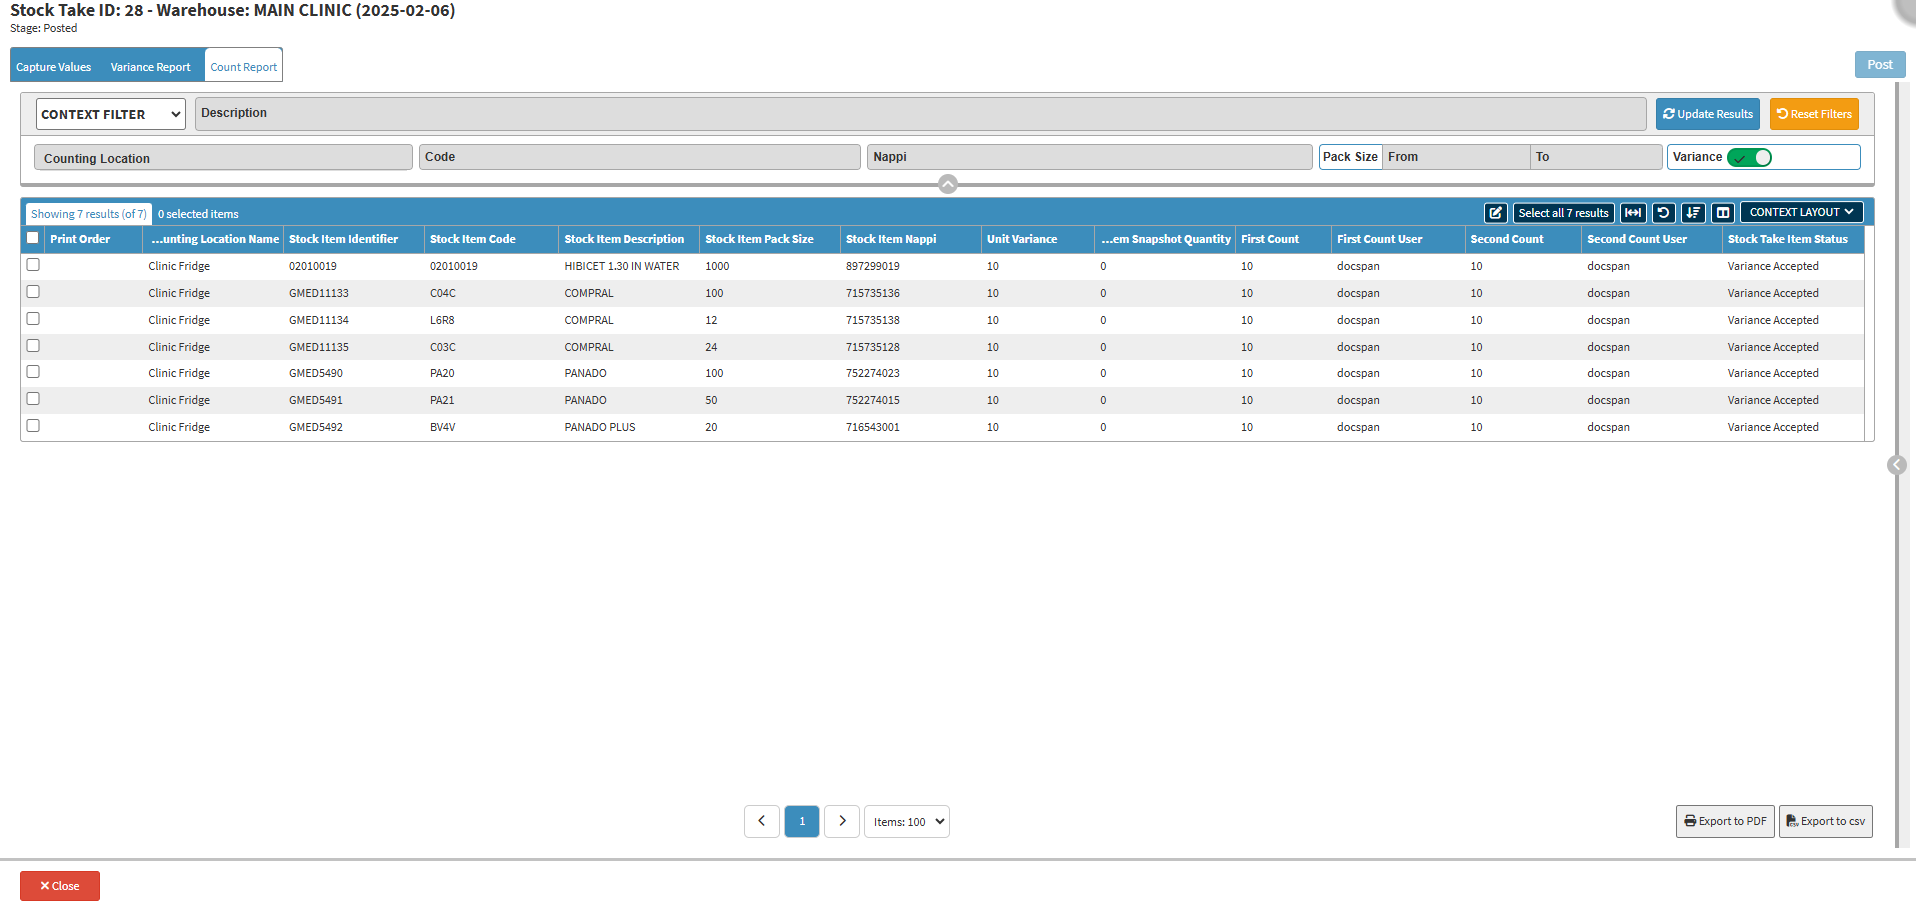
The Count Report screen will open.
Post
The Post button will be greyed out as the Stock Take has been posted.
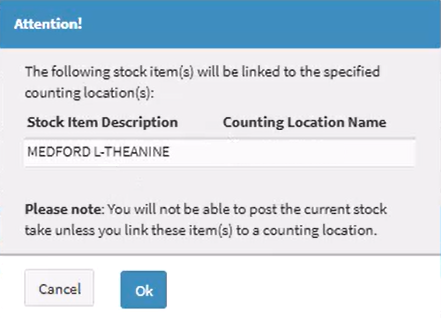
💡Please Note: If you Post and changes have been made after the first and second count, an Attention screen will appear indicating these changes, and the changes will have to be posted separately.
Filters
Allows you to narrow down or refine the results displayed on the Count Report screen.
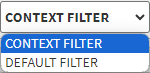
Click on the Filter drop-down menu to select how the screen will be filtered.
Context Filter: Gives extra filter options to refine the information on the list.
Default Filter: Predetermined filters that will always be available to search with.
Context Filter
Click on the Description field to enter the details of the Stock Item that you want to filter to.
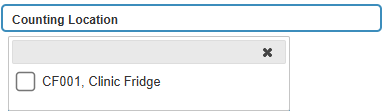
Click on the Counting Location drop-down menu to select thedesired option.
💡Please Note: The Counting Locationson the list, are the ones that have been set up for the Warehouse where the Stock Take was done.
Click on the Code field to enter the Item Code of the item you are searching for.
Click on the Nappi field to enter the Nappi Code of the item you are searching for.
Add the size range in the Pack Size field to specify the range for filtering the results according to Pack Sizes, indicating both the From and To sizes.
The Variance slider is set by default not to show only items with Variences.
Click on the Variance slider to show all items on the Count Report regardless of the Stock Take Item Status.
Click on the Variance slider a second time to only show the items that do not have variances.
Click on the Update Results button to refresh the Report List after the Filters have been selected.
Click on the Reset Filters button to clear the Filters that have been set.
Default Filter
Click on the Description field to enter the details of the Stock Item that you want to filter to.
Click on the Counting Location drop-down menu to select thedesired option.
💡Please Note: The Counting Locationson the list, are the ones that have been set up for the Warehouse where the Stock Take was done.
Screen Columns Action Buttons
Several additional Options are available for the Columns. These additional Options are to help the User adjust the screen, refine the Search and give more specific results.
Click on the Select All Results button to select all the results currently displayed on the screen.
Click on the Expand Widths button to auto-fit the column width to the information within all columns.
Click on the Reset Widthsbutton to restore the original Widths after any modifications are done.
Click on the Sort Columnsbutton to sort the Columns in the order that you desire.
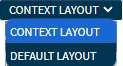
Click on the Context Layout drop-down menu to select the type of layout that will be used for the screen.
💡Please Note: The Screen Columns Action options will depend on the layout that was selected for the screen.
Columns
All the information on the Count Report screen is divided into Columns to logically group related information together.
💡Please Note: The Columns displayed will depend on the layout that is chosen for the screen.
Stock Counting Location Name: The name of the Counting Location where the item is.
Stock Item Identifier: The code allocated to the stock item, used to identify it.
Stock Item Code: The code of the stock item.
Stock Item Description: The Name of the stock item.
Stock Item Pack Size: The number of individual items in the pack.
Stock Item Nappi: The unique identifier given to ethicals and surgicals in a Hospital, or medicines and materials/consumables in a Medical Practice that enables the electronic transfer of information throughout the healthcare delivery chain.
Unit Variance: Indicates whether an item has a variance on it.
Stock Take Item Snapshot Quantity: The number of items that were on the system when the snapshot was taken.
First Count: The number of items that were counted within the first stock take.
First Count User: The name of the User that captured the values of the first count.
Second Count: The number of items that were counted within the first count.
Second Count User: The name of the User that captured the values of the first count.
Stock Take Item Status: The stage within the Stocktake that the item is.
Page Options
All the additional Options that are available for the Page.
Click on the Export to PDF button to save the Report as a PDF file.
Click on the Export to CSV button to save the Report in a CSV format.