Hospital Clinical Screen Sidebar: Navigation and Use
Completion requirements
Why Use This Function:
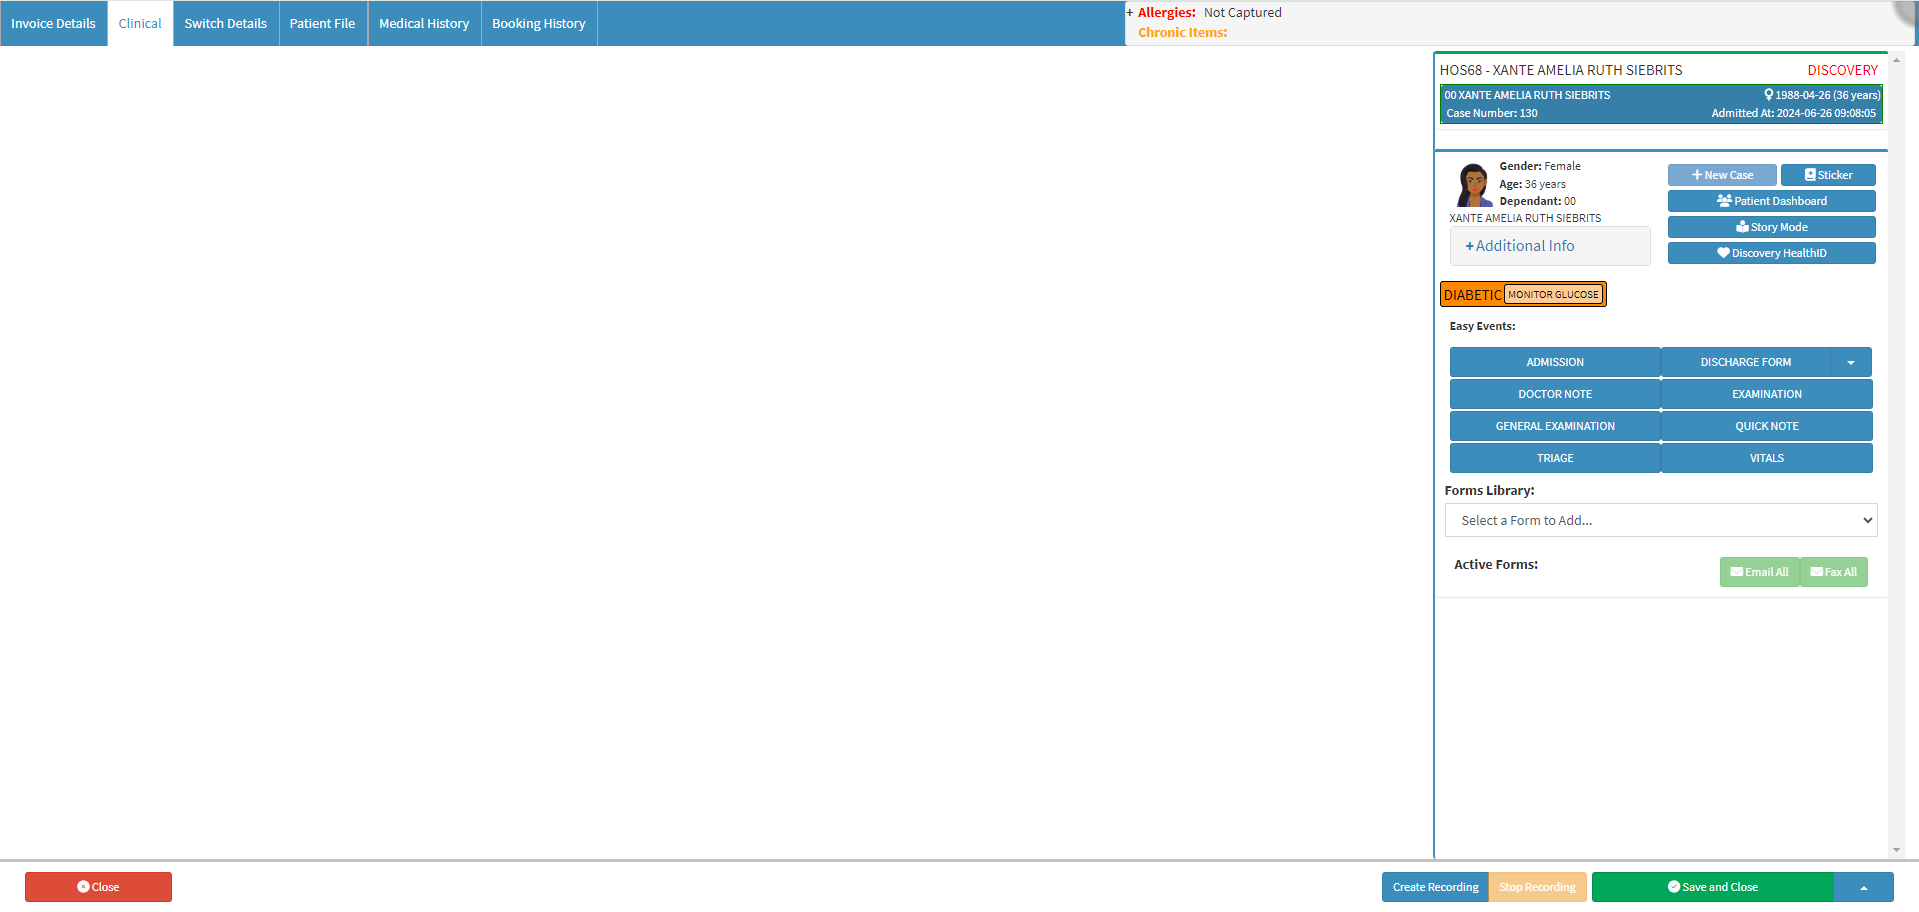
The Clinical screen sidebar is located on the right-hand side of the Clinical screen, providing additional functionalities specifically relevant to the Patient's clinical information. This sidebar offers tools and information that are applicable and beneficial for efficiently managing the clinical case.
The Contents of This User Manual:
Debtor and Patient Information
Patient Demographic Information
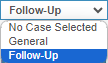
Select a Case
Quick Access Buttons
New Case
Sticker
Patient Dashboard
Story Mode
Discovery HealthID
Smart Stickers
Easy Events
Forms Library
Active Forms
This user manual will start on the Clinical screen.
The Clinical sidebar is automatically open on the Clinical screen.
Debtor and Patient Information
Basic Information of the Debtor and Patient to whom this Clinical file belongs.
Debtor Number (HOS68): The system-generated Account Number of the Debtor.
Debtor Name and Surname (XANTE AMELIA RUTH SIEBRITS): The name and last name of the person who is responsible for the payment of the Account.
Medical Aid (DISCOVERY): The Name of the company with whom the Debtor has Medical Aid or Insurance.
Dependant Number (00): A number allocated to the Patient, for Patients that have Medical Aid, this will correspond to the dependant number on the Medical Aid policy.
Patient Name (XANTE AMELIA RUTH SIEBRITS): The full name and surname of the Patient.
Gender, Date of Birth and Age (♀️ 1988-04-26 (36 years)): The medical gender, date (yyyy-mm-dd) when the Patient was born and the current age of the Patient.
Case Number: The auto-generated number that identifies the Patients case.
Admitted At: The Date (yyyy-mm-dd) and Time (hh:mm:ss) the Patient was admitted to the facility.
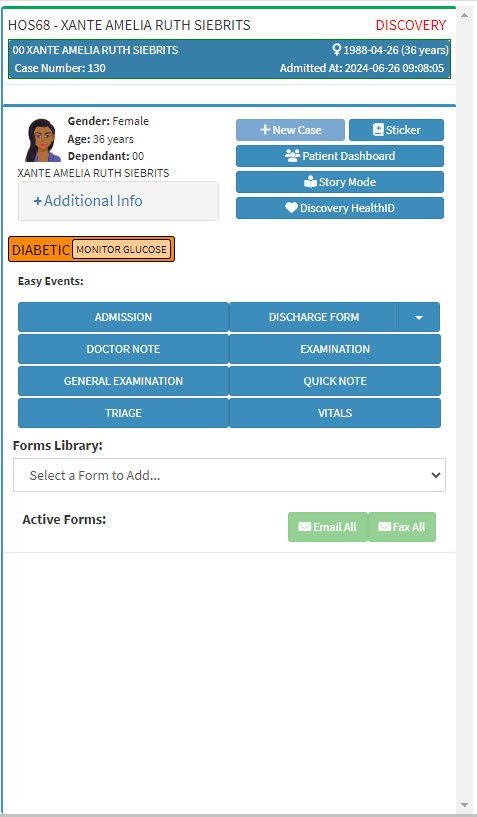
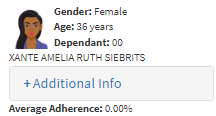
Patient Demographic Information
More information regarding the Patient's Demographic Information.
Profile Picture: An image that identifies the Patient.
Gender: The medical-related Gender of the Patient.
Age: The current Agein years to indicate how old the Patient is.
Dependant: A number allocated to the Patient, for Patients that have Medical Aid, this will correspond to the dependant number on the Medical Aid policy.
Patient Name: The full name and surname of the Patient.
Click on the Additional Info panel to expand more information about the Patient.
Address Line 1(27 Freya Road): The house number and street name associated with the residential address.
Address Line 2(Valhalla, Centurion): The name of the suburb associated with the residential address of the Patient.
Address Line 3(Gauteng): The province that is associated with the residential address of the Patient.
Cell No. (0817650595): The mobile number where the Patient can be reached.
Email (xars88@gmail.com): The Patient's email address.
Medical Aid Number (815949471): The Medical Aid membership number of the Patient.
?Please Note: All Debtor and Patient information is pulled through from the Patient's file and can be changed, if the need arises. For more information regarding how to edit and update the information, please refer to the user manual: View or Update Debtor and Patient Information.
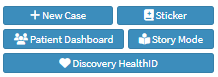
Quick Access Buttons Gives you immediate access to other features of the software from the sidebar.
New Case
Allows you to set up a new Case Type, that can be used to classify the type of case.
Click on the New Case button to add a new type of case that you would like to use to classify a Clinical case.
An Attention! pop-up will appear.
Click on the Enter a Case Description field to enter a name for your Case Type.
Click on the Ok button to save your changes.
The New Case Type will now be available on the Select a Case drop-down menu.
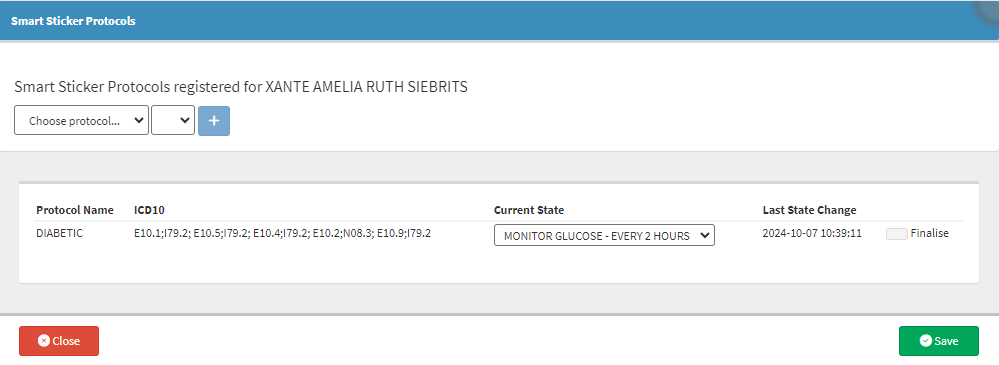
Sticker
Allows you to add and manage Smart Stickers for the Patient.
Smart Stickers enable Practitioners to set up medical guidelines that describe a process to be followed, to investigate a particular set of findings in a Patient or the method which should be followed to control a certain disease. Smart Sticker Protocols are used as treatment plans for specific conditions which will inform the Patient when to do certain tasks with regard to their condition.
?Please Note: When the Patient has been registered for a PMB condition or has a Chronic medical condition, the Smart Stickers can be used as an indicator. The Smart Stickers can also be used as reminders of next appointments or if a task needs to be completed. For more information on this function, please refer to the user manual: Adding a Smart Sticker Protocol.
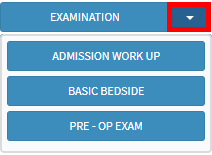
Easy Events
Previously set up, quick access buttons to the forms you use the most.
Click on the desired form button that you want to use to open it on the Clinical screen.
Click on the drop-down menu on the desired form's button to access your Workflow event templates.
For more information regarding setting up your Easy Events, please refer to the user manual: Easy Events.
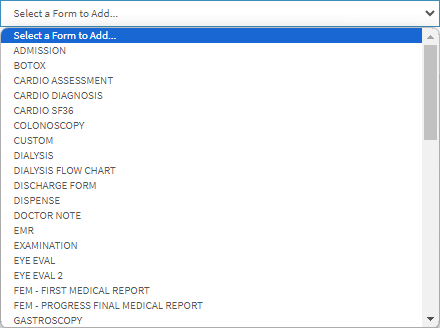
Forms Library
All the forms that are available for you to use.
Click on theForms Library drop-down menu on the Clinical sidebar.
Select thedesired form.
?Please Note: The forms that appear on the list, are the ones that have been loaded for your Practice.
Active Forms
Forms that have been added to the Patient's clinical file for this appointment.
Once a form has been selected from the Forms Library it will be added to the Active Forms section.
Click on the Email All button to attach all forms in the Active Forms section to an email.
Click on the Fax All button to send all the forms in the Active Forms section via Fax.
Click on the Copy button to duplicate the desired form.
Click on the Delete button to remove the form from the Active Forms list.