Text size
Line height
Text spacing



What is the “PDF Printover” feature?
The PDF Printover feature lets patients complete custom or unique forms electronically. Essentially, it transforms non-editable documents into interactive files that clients can easily fill out digitally.
The PDF Printover Form feature lets your practice create unlimited templates, so you can complete forms digitally instead of printing and filling them out manually.
This is particularly effective when importing third-party documents or using custom practice forms, as the system can be configured to automatically populate the patient's details directly into the form.
Custom forms designed for client completion are typically linked to the myGC application, which is provided free of charge. This platform serves as a centralised portal where patients can review account details, clinical data, or general forms the practitioner requires before a consultation. While these specialised forms are discussed more comprehensively in the clinical files section, you are encouraged to contact your liaison to discuss any unique requirements specific to your practice.
Please note that extensive support for clinical PDF Printovers may be considered an additional service, which could incur a service fee for the user.

| Date of Change | Changes | Editor |
| 2026 05 14 | Established Page | Chendene Barnard |
| 2026 09 22 | Spell-check | Chendene Barnard |
| GoodX Course: PDF Printover

The GoodX Click&Learn Courses https://courses.goodx.co.za/
How does the manual PDF Printover work?
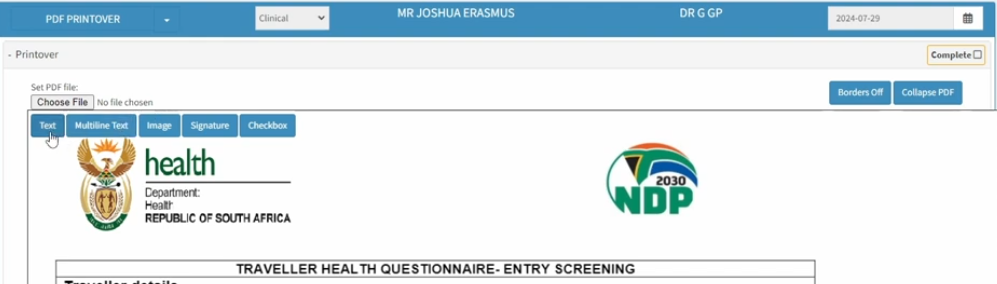
Should you receive a non-editable document that is reflected under your clinical documents, you can convert it into an editable format by selecting the "+ Create PDF Printover" button.

Alternatively, you can import a non-editable document by selecting "PDF Printover" from your clinical forms library and then choosing the required file from your desktop or the device where it is saved.
Once you select the form to import as a PDF Printover, the document will display, allowing you to add, adjust, and configure fields to meet the practice's needs.
You must manually configure the form to define fields for manual entry or specify where patient information should be automatically populated. This ensures consistency for the specific form or PMB being created. You will have access to specialised tools to ensure the necessary fields are available for the patient to complete, while preventing them from entering information in irrelevant or unnecessary fields.
How do I add a new PDF Printover?
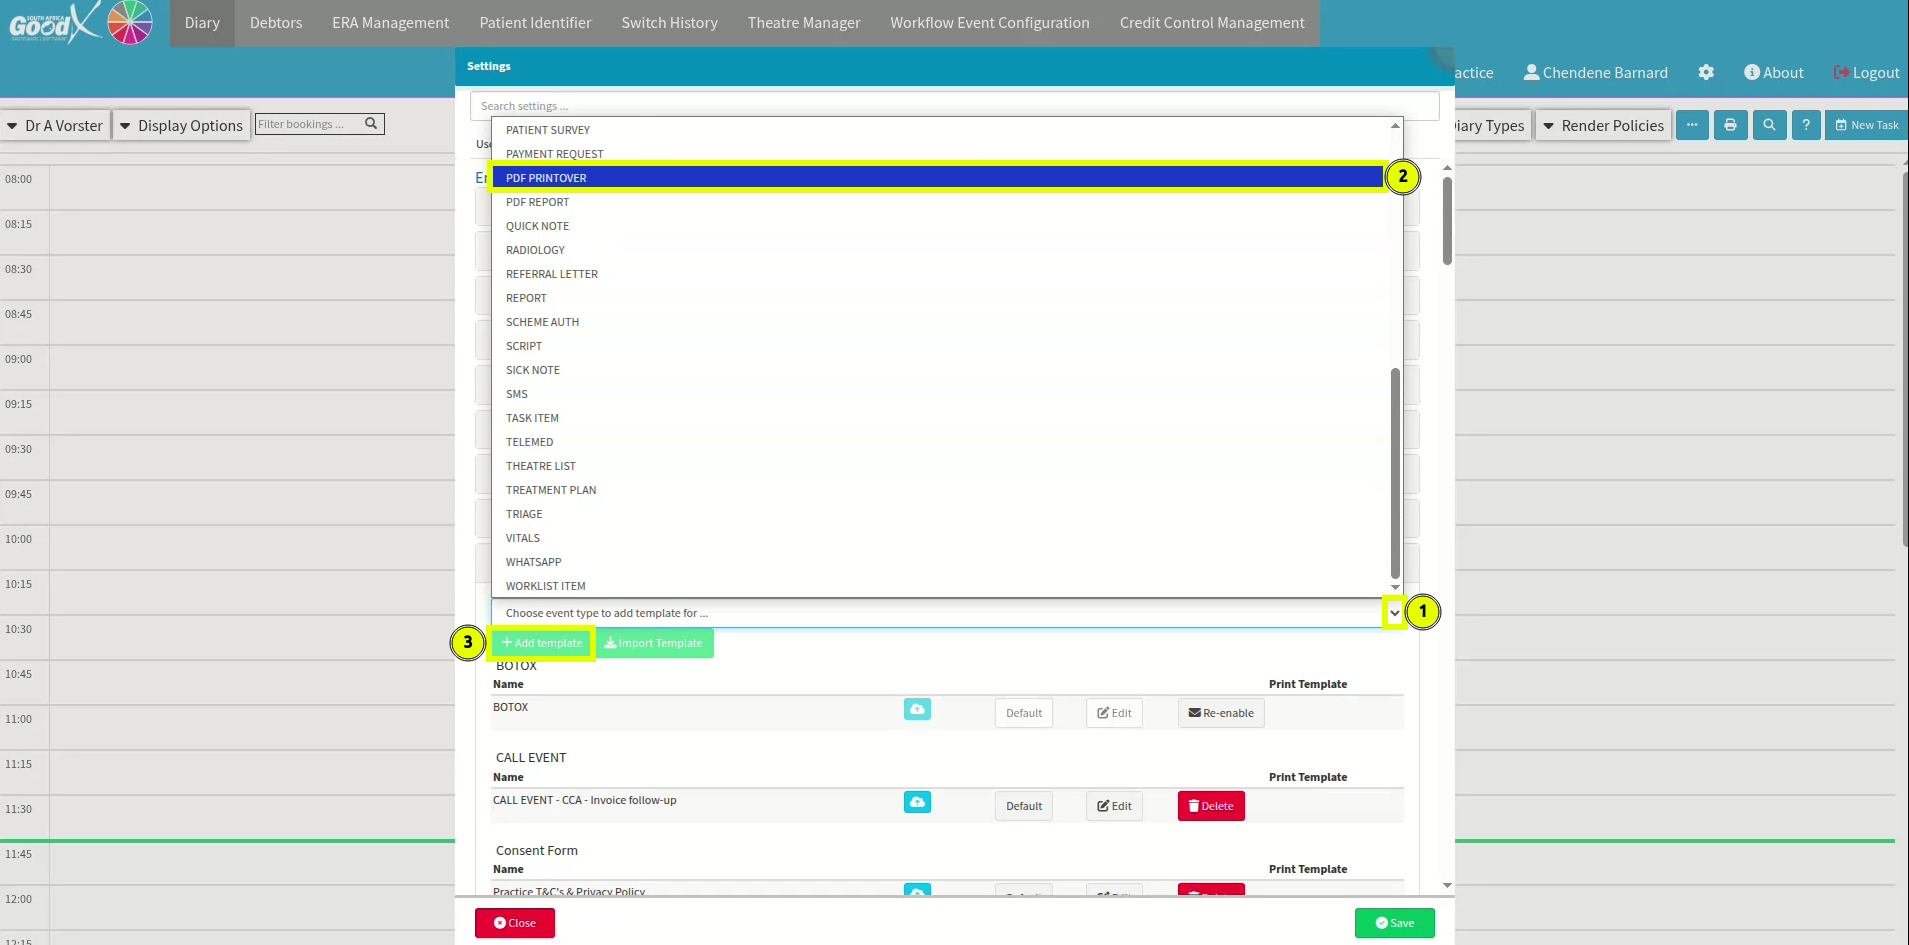
To add a new PDF Printover, select the Site Settings icon located at the top right of your screen, adjacent to the "About" section. Select the Entity Settings tab, then navigate to the Workflow Event Settings section and expand it. Within the library, use the dropdown menu to locate and select the PDF Printover template. Once identified, select the + Add Template button to complete the process.
How do I edit the once-off manual PDF Printover?
Pre-populated fields eliminate the need for patients to complete the same document multiple times because of misplaced or incomplete data. If you need help with a form, contact your liaison for guidance. You can add text fields, image spaces, signature prompts, or checkboxes to denote relevant options. Once your document has been imported, the file will be displayed alongside the available edit menu.
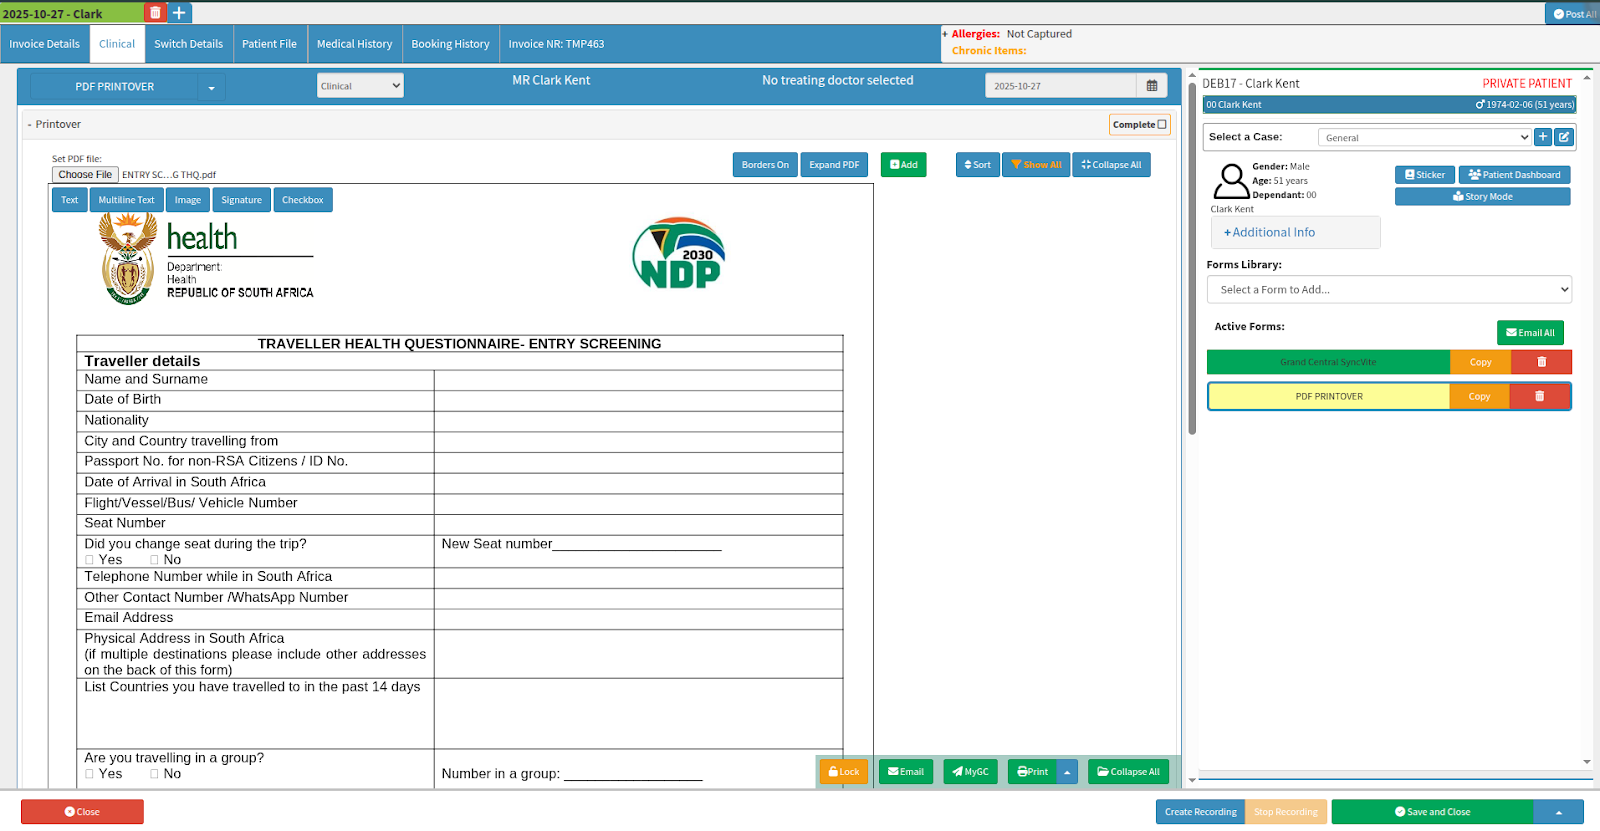
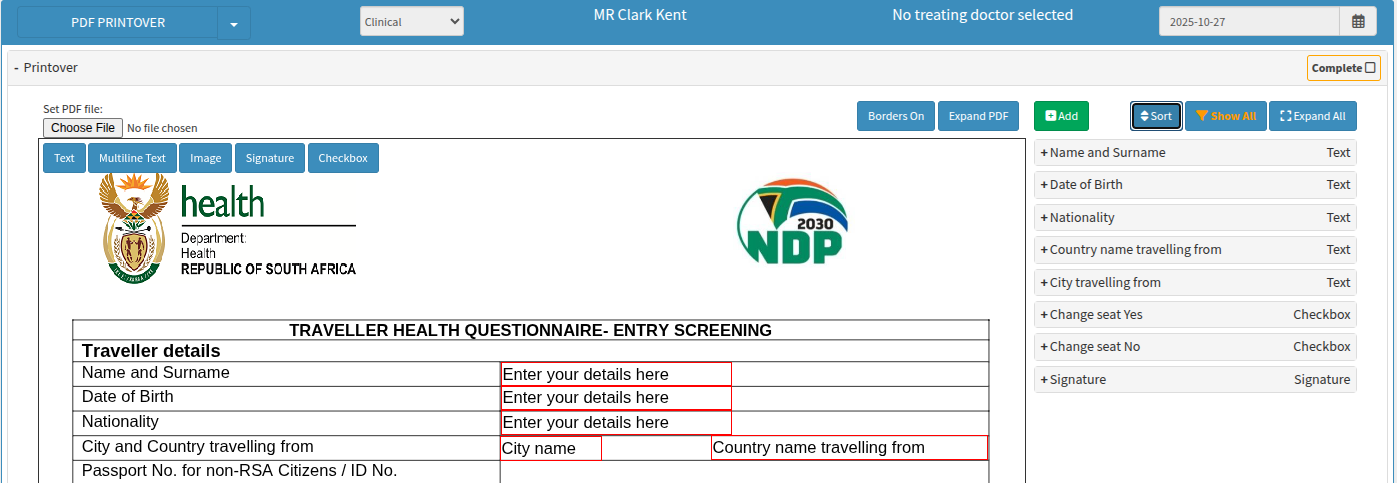
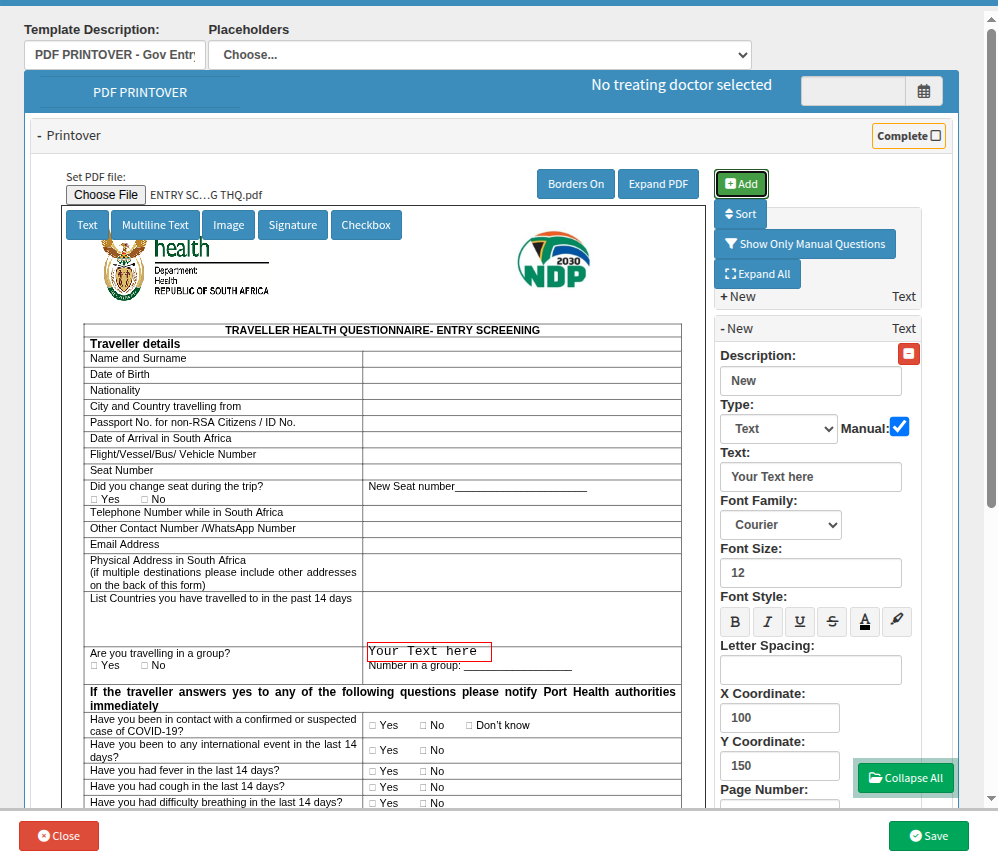
Selecting the Text button automatically generates a menu item and adds a text area to the document. This field must be positioned using a drag-and-drop action to the specific area where the patient is required to enter information.
Although there is no distinct highlight around the box to indicate it can be moved, clicking and holding the mouse within the text area activates a grab icon to reposition the text box in the template setup. This allows you to accurately reposition the box to the desired location on the form for the patient to complete.
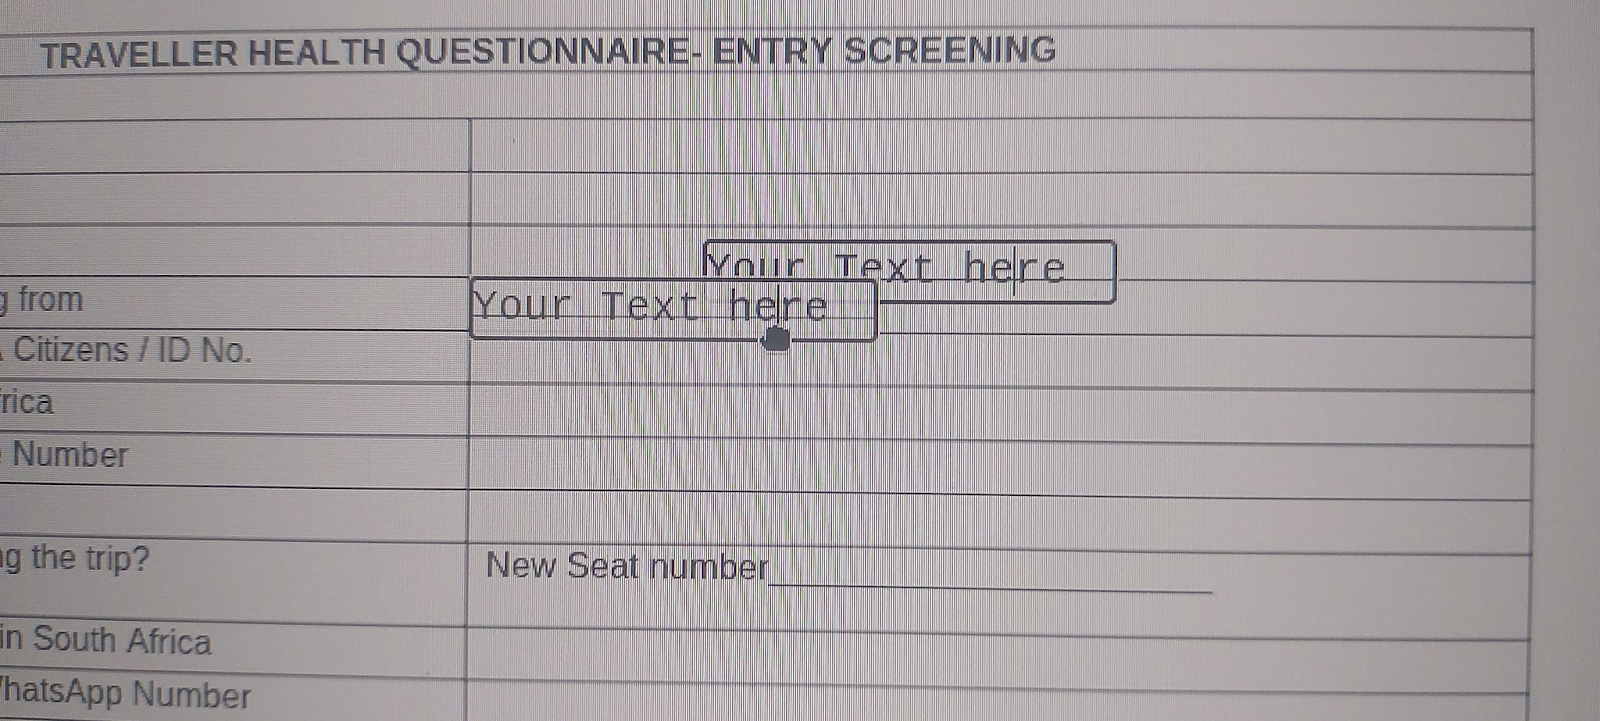
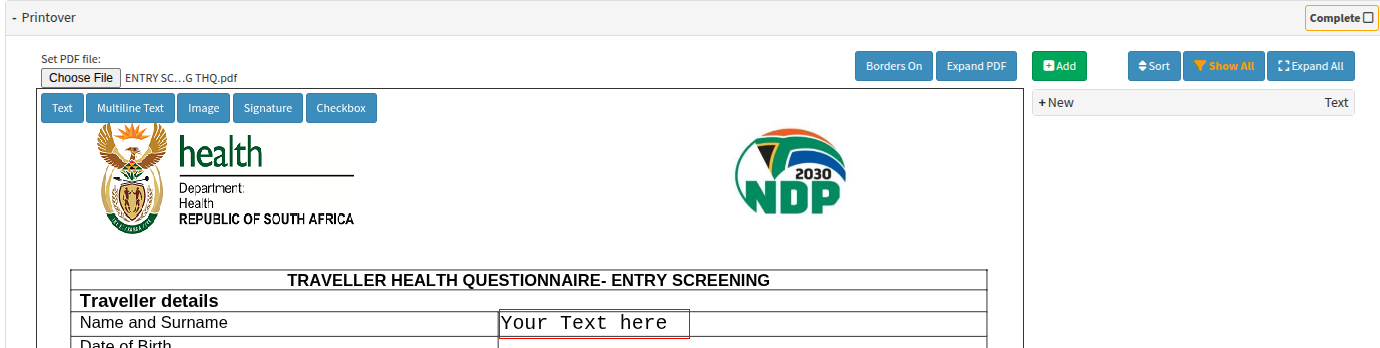
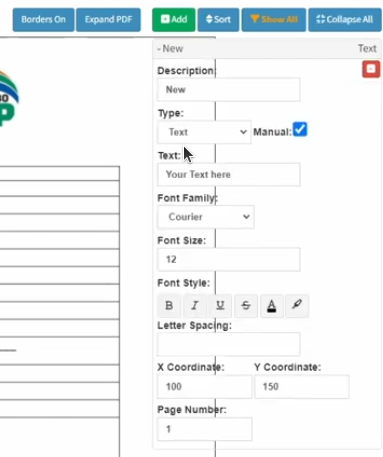
Selecting the + New menu option provides access to the editing settings for that specific text area. To remove the red outline, you can select the Borders On button, which toggles the visibility of the text area's boundaries. Please note that when you add a new item, the borders are automatically set to visible by default; therefore, it is recommended to toggle this setting once the form layout has been finalised.
As you populate the document with entry fields, rename each item to match its corresponding field on the form. This practice lets you see at a glance whether any sections have been missed and makes it much easier to identify and update specific text areas if changes are needed in the future.
You can rename the text area to track form completeness, and customise the visible text prompt. Additionally, you can adjust the font size and select from three of the most commonly used font families to ensure the added text aligns with the original document's style.
If you need an alternative font, contact your client liaison to see whether they can accommodate your request. Please be aware that such customisations may incur additional fees.
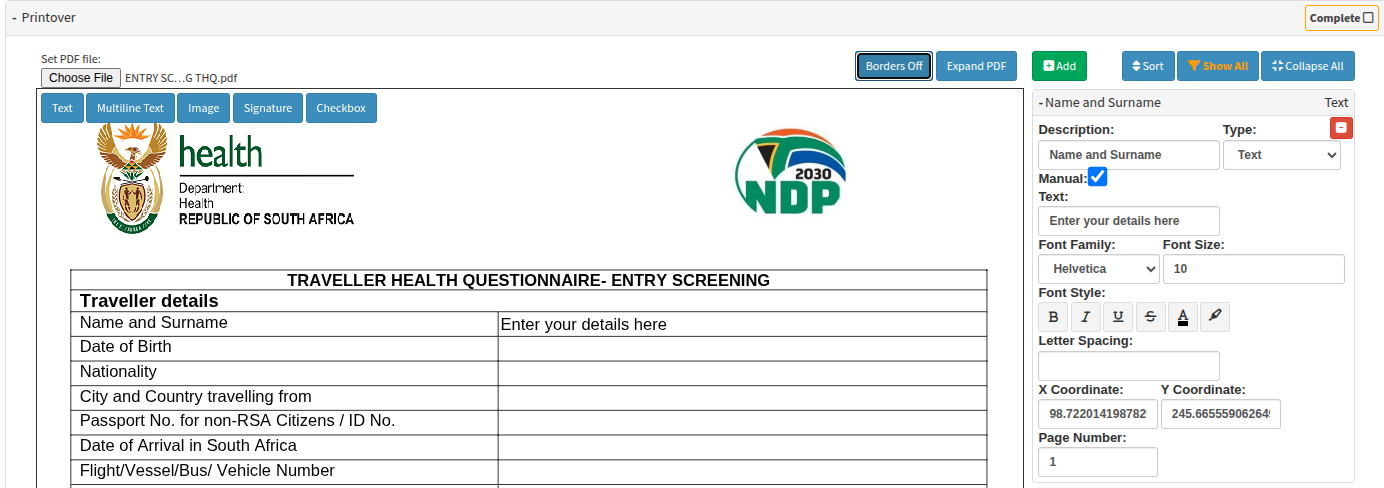
When adding new items, they will automatically populate at the top of the menu. To reorder them, select the Sort toggle to arrange the list from top to bottom in the order they were added.
Please note that adding a new item will not reset your existing list; however, the most recent addition will always appear at the top by default. We recommend toggling the sort order once the form is complete to ensure a logical sequence.
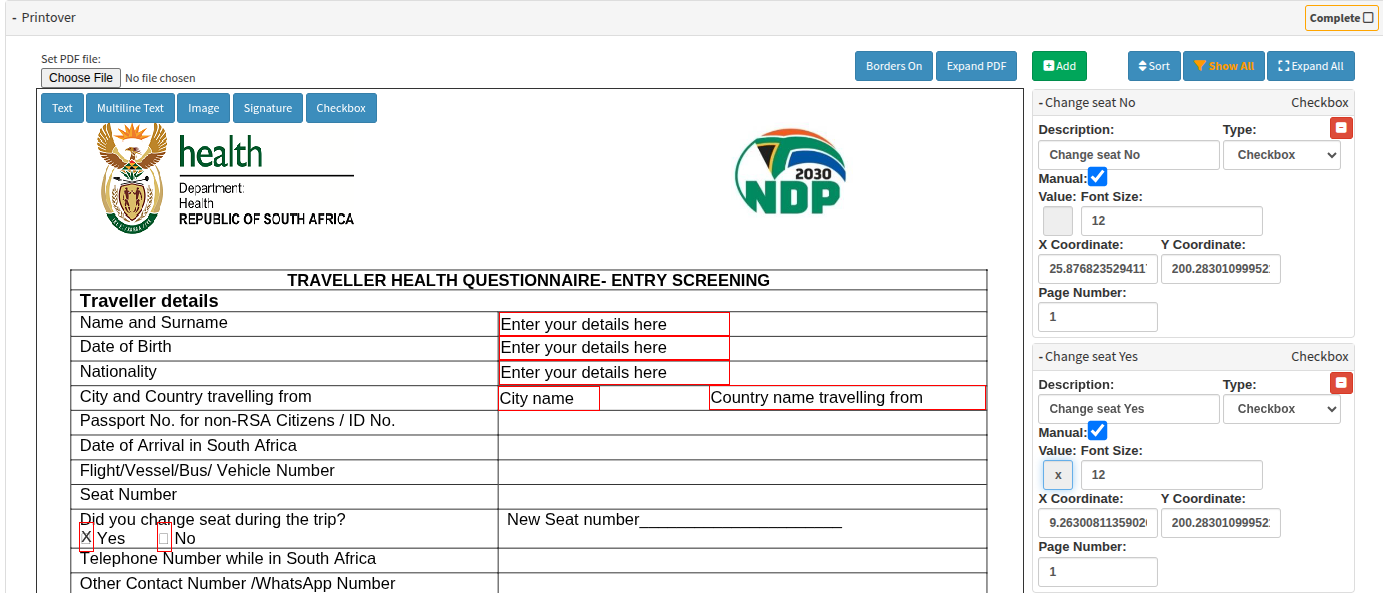
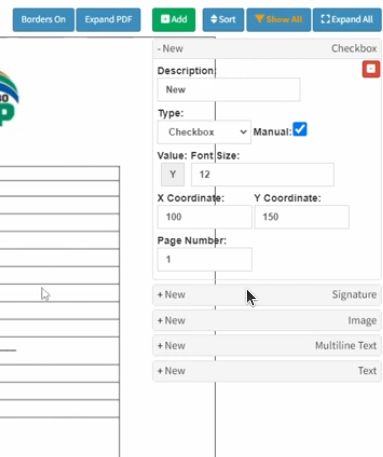
When adding a checkbox, the value defaults to "Y." Clicking the populated checkbox toggles it between a blank state and an "X" value for the patient to complete. Please remember to toggle all checkboxes to a blank value if patient input is required.
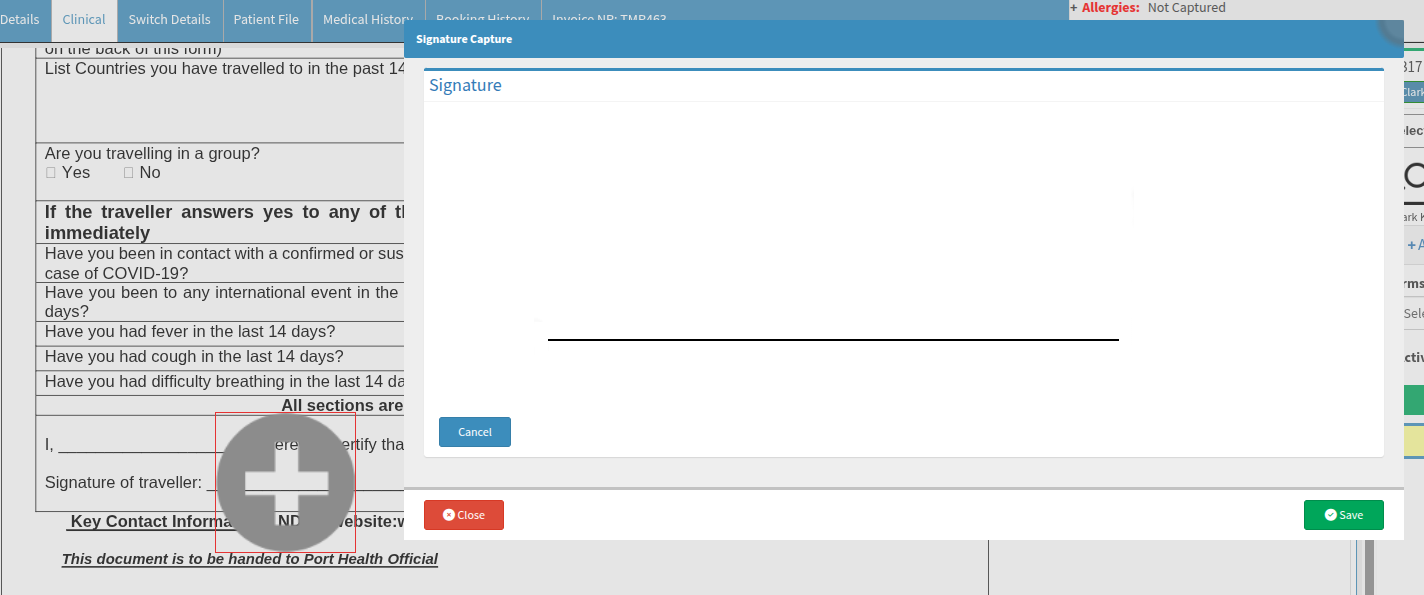
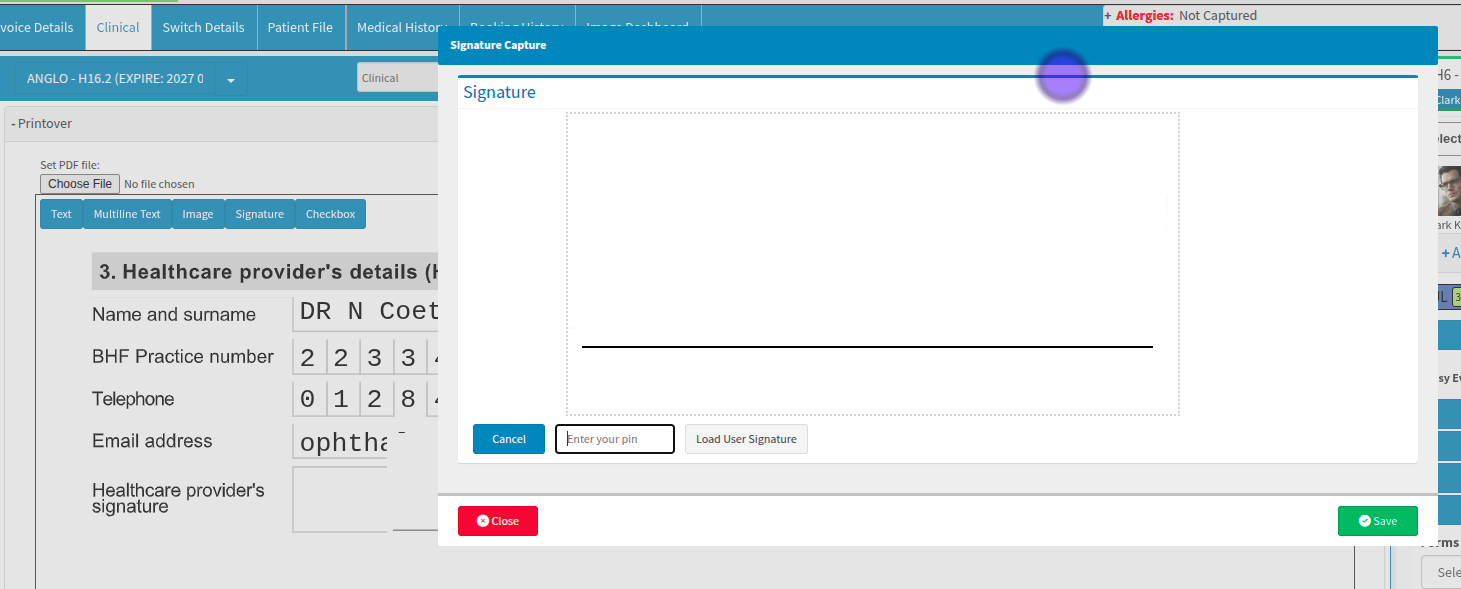
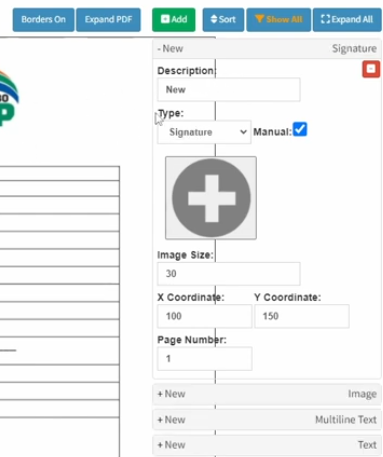
Where a signature is required, a default icon—appearing as a plus sign—will be visible. When the patient selects it, the system will prompt them to provide an electronic signature. When adding a signature on the patient PDF printover, the practitioner may need to sign. If the user does not have a set PIN and uploaded signature, they will not see this PIN option. To load a signature through a PIN, the user must have an active saved signature uploaded and protected by a PIN.
If the default signature icon or any added image appears too large for the document layout, you can adjust the dimensions via the side panel. This allows you to scale the element down to fit precisely within the designated signing area or form field. Best practice is to enter the signature field and select Save so a blank signature appears, which you can then realign to the correct position.
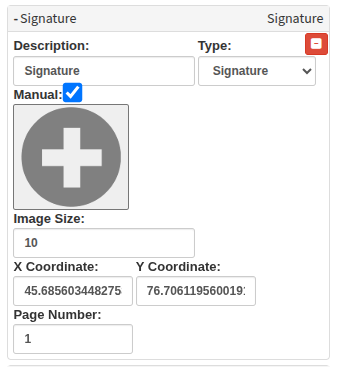

The specific type of editor you have added will be clearly visible both in the side panel and on the individual item itself. This dual-visibility ensures you can easily distinguish between text fields, checkboxes, and signature prompts while managing your document layout.
How does the automatic PDF Printover work?
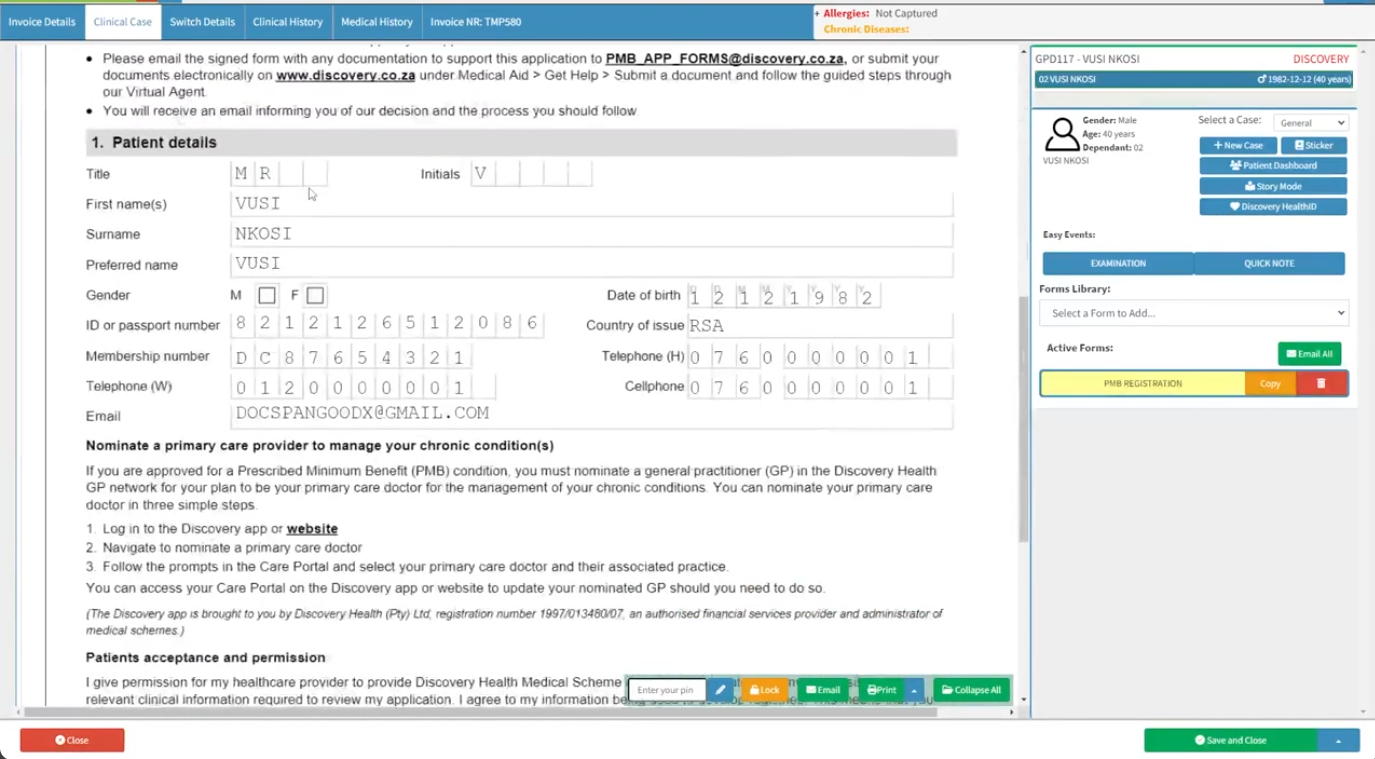
If your clinical documents already include PDF Printover files with predefined fields, selecting these documents will automatically populate those areas with the relevant patient or clinical information. This integration ensures that the required data is pulled through seamlessly, presenting you with a pre-filled form that minimises manual entry and maintains clinical accuracy.
Automatic PDF Printover is set automatically when you perform setup, edits, and adjustments within the Entities workflow event setup, rather than directly in a specific patient's clinical form area. Modifications made at the patient level are temporary and do not persist beyond that specific instance. Conversely, customisations applied at the entity template level are permanent and will govern all future versions of that document. To ensure recent updates are reflected in the system, reselect the template from the PDF Printover dropdown within the clinical form.
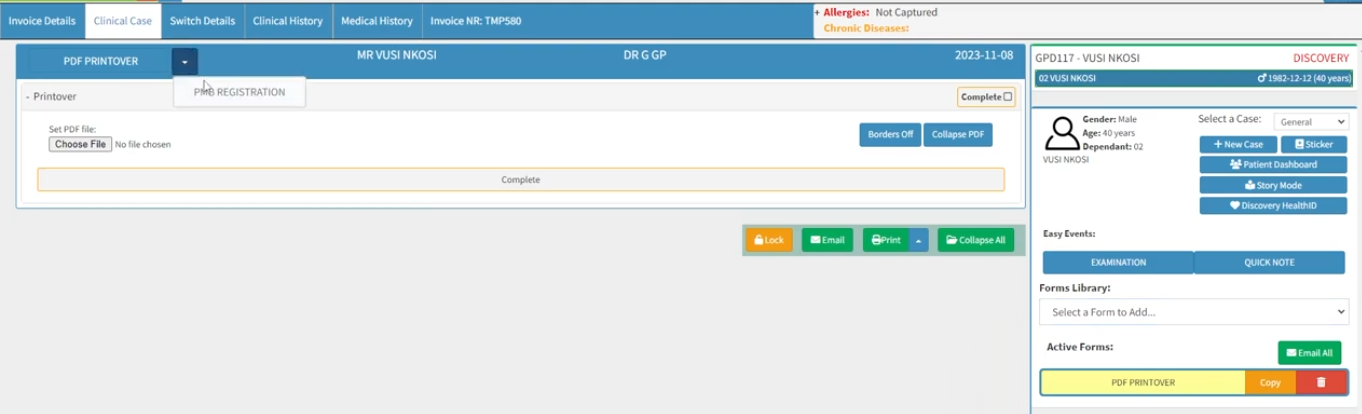
The process for configuring these templates and their associated functionality follows the same principles outlined in the preceding sections, "How do I add a new PDF Printover" and "How do I edit the once-off manual PDF Printover?". By applying these established methods, you can ensure that your permanent entity templates are correctly structured and ready for automated use across the practice.
As soon as the selected document is loaded, the relevant clinical fields will automatically populate with the available data. This automated process ensures the form updates instantly with the necessary information, streamlining the transition from document selection to final review.
Please ensure that these forms are always marked as completed, followed by selecting the "Save" and then the "Close" options. Following this sequence ensures all captured data and clinical updates are finalised and stored in the system.
From the clinical interface, once a practitioner has selected a PDF form, they have several options for distribution and management:
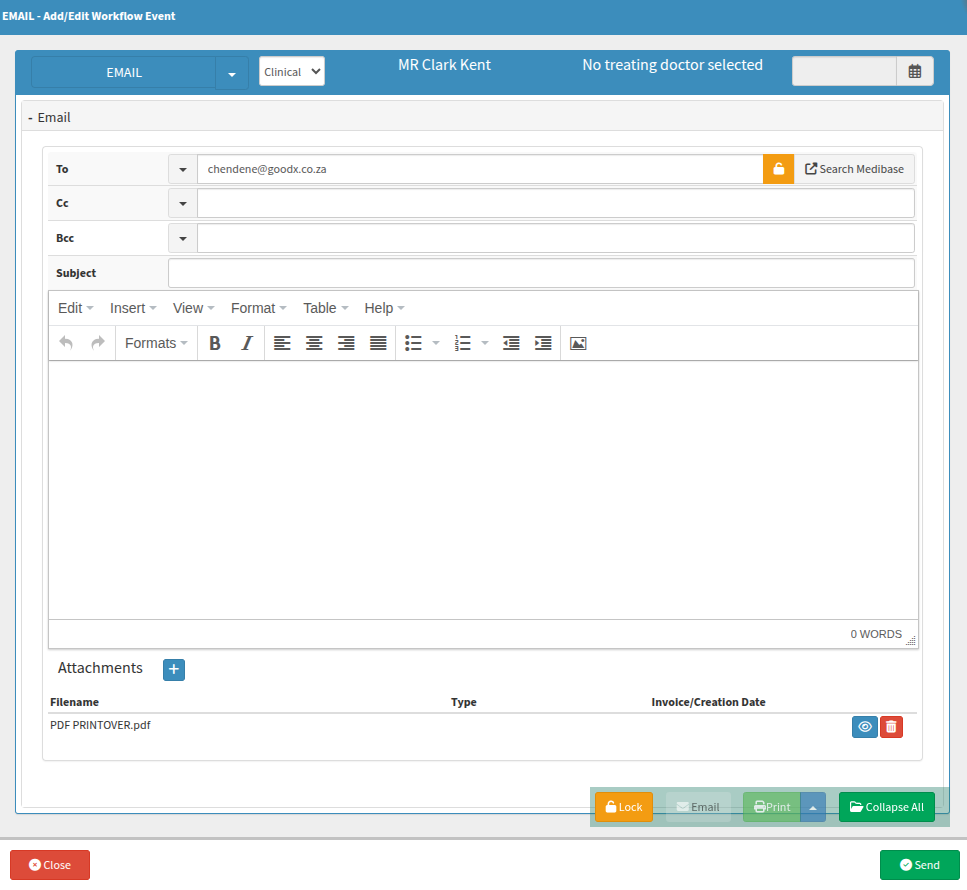
Email: Select the Email button to send the converted, editable form directly to the patient. You can include additional documents or forms via the Attachments feature. The system will automatically populate the message using your pre-configured email templates.
MyGC: Select the MyGC button to transmit the editable form to the patient's MyGC dashboard, allowing them to access and complete it within their personal portal.
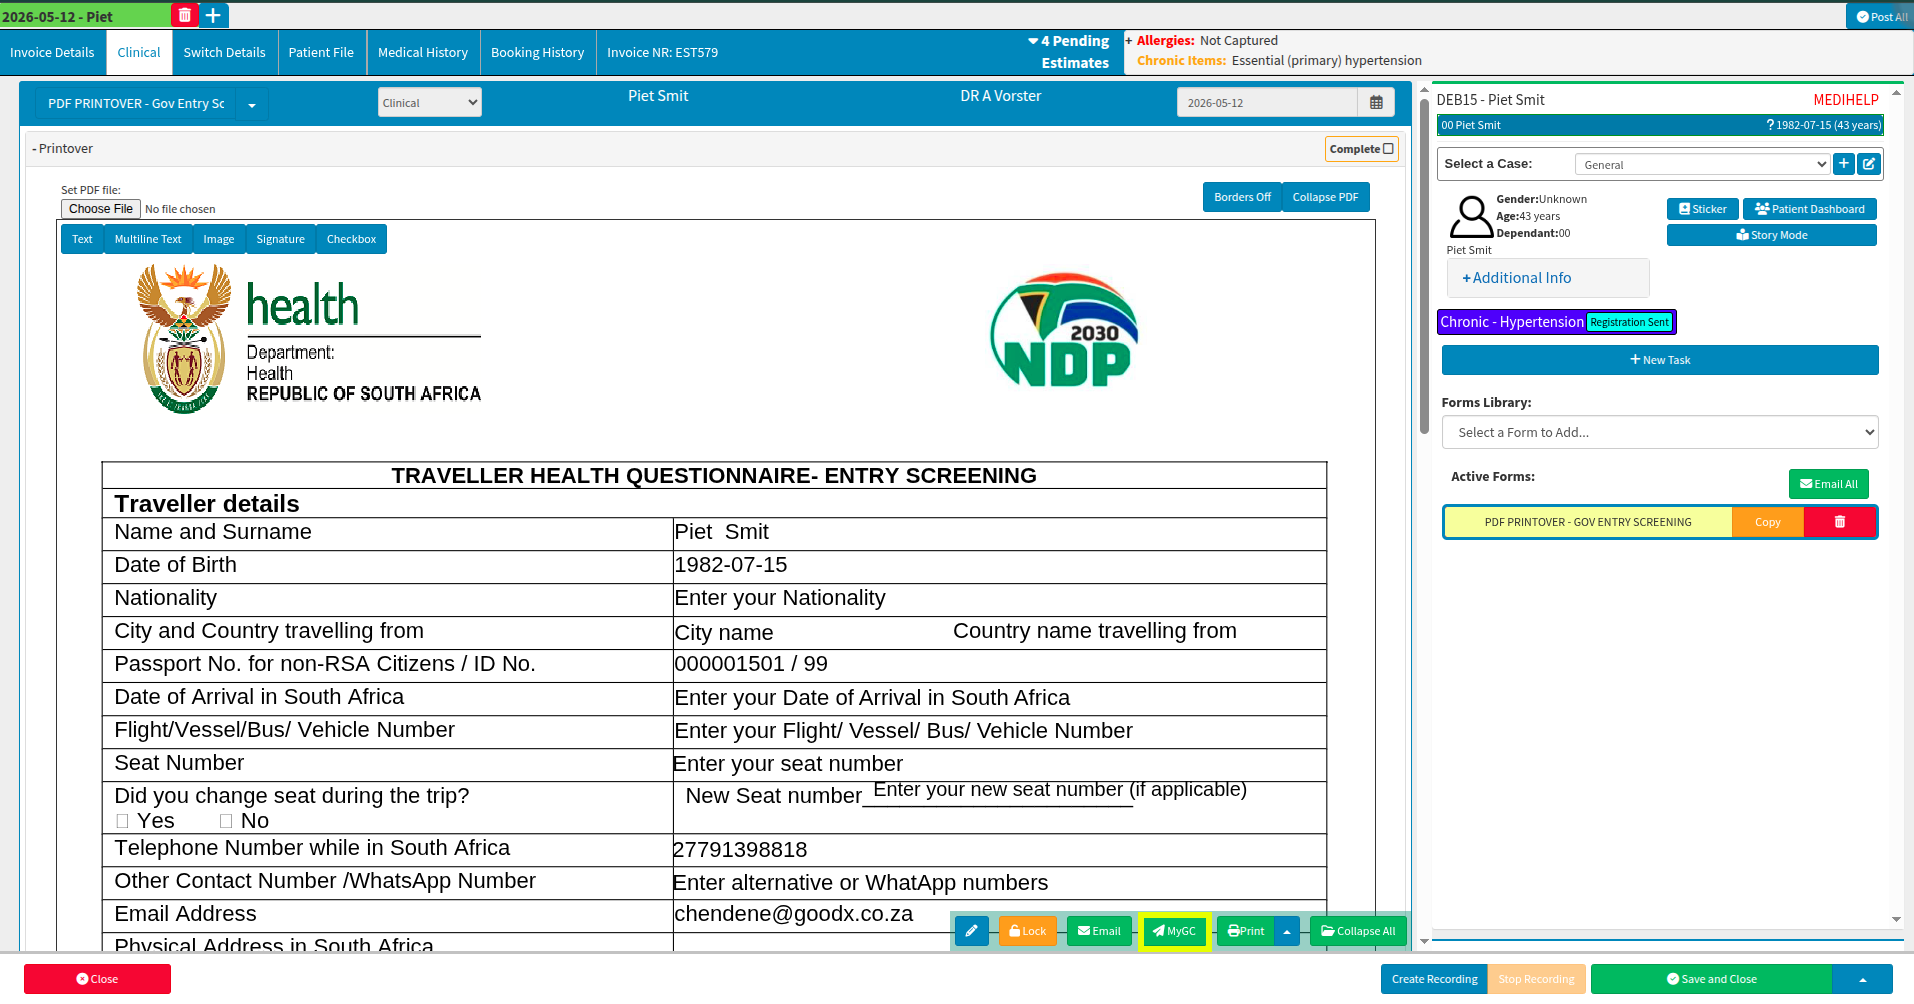
Save Locally: Access the Print dropdown to save a copy of the editable document directly to your local device.

Where else do I build an automatic PDF Printover?
To begin the setup, select "Configuration" from the navigation wheel and then navigate to the "Workflow Event Configuration" tab. This path lets you access the settings needed to manage and customise your clinical document workflows effectively.

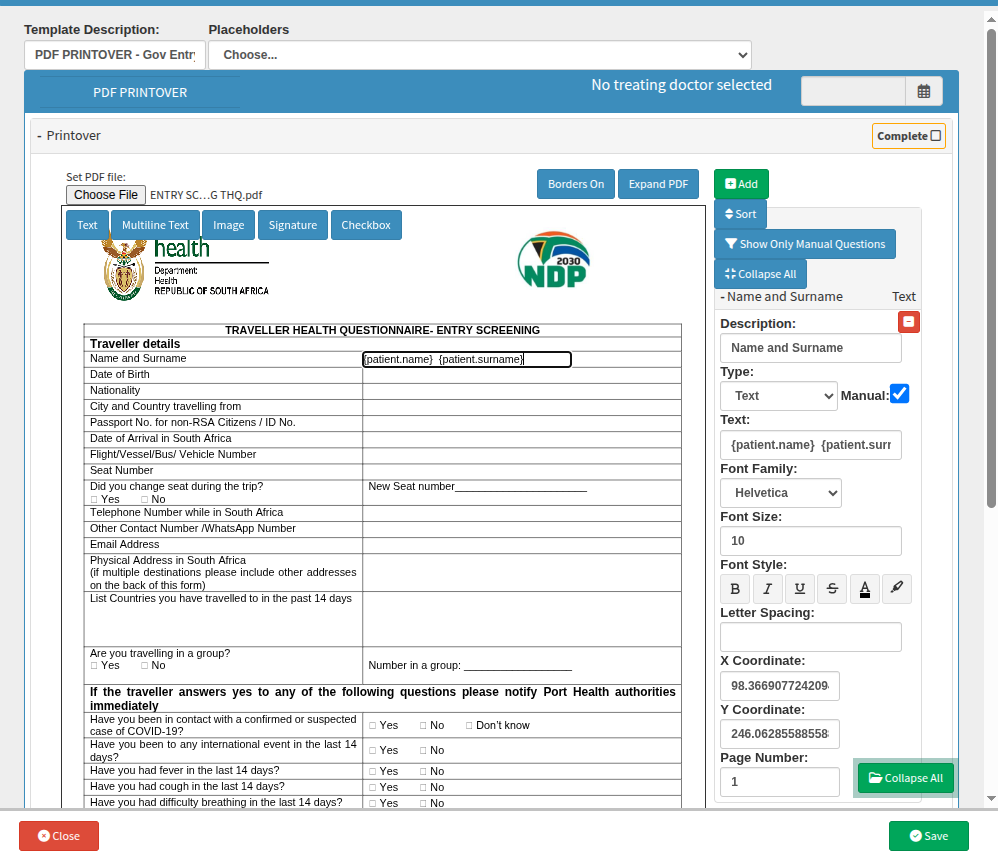
Select "+Add new" to create a new PDF Printover and navigate to the required template. Rename the template immediately to keep it easily identifiable as your list expands and prevent accidental selection of the wrong form. Once you have selected the file, the edit menu will become available. Please note that the interface view is slightly constrained to make it easier to select placeholders, which ensure patient details automatically populate when the file is opened in the clinical workspace.
When adding new text, the box will appear in the centre of the screen, where you must drag and drop it into the desired position.
If you select placeholders, they will automatically be inserted into the text box or area currently being edited. Should you require further clarification or encounter any uncertainty during this process, please get in touch with your GoodX representative for additional assistance.
Once you have finalised the necessary pre-populated fields and specific requirements, you can save the form for future selection. This ensures the template is readily available for ongoing use throughout your practice, maintaining consistency across your clinical documentation.
Scenario: The process of registering a PMB on behalf of the patient?
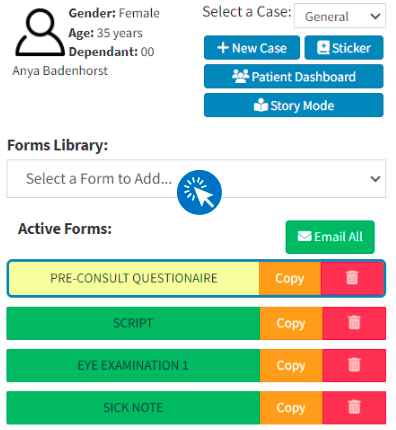
Prescribed Minimum Benefits (PMBs) are registered via the clinical module. To begin this process, select "Diary" from the navigation wheel and navigate to the "Diary" tab. Once you have identified and selected the relevant diary entry, click the "Clinical" button located in the side panel. From there, go to the "Clinical case" tab, then use the "Forms Library" in the side panel to select the form required for PMB registration.
Because the PMB is a PDF Printover document, you must first select that specific form type from the library to access the necessary template. Once the PDF Printover type is active, you can use the dropdown to choose the customised template previously created for your practice.
It is recommended to rename each template according to its specific purpose—for example, "PDF Printover PMB Registration - SureMed"—to maintain an organised list. As the system does not provide a preview of the document before selection, clear and descriptive naming ensures you can quickly identify the correct form. This prevents your library from becoming cluttered as you add more templates.
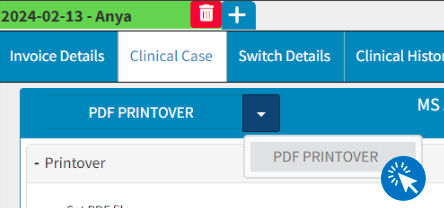
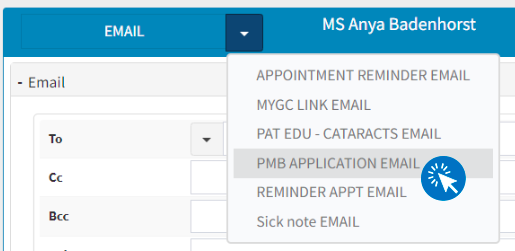
Similarly, if a corresponding email template has been created, it may be selected when sending the completed PMB registration form. Choosing the correct template automatically populates the required fields and attaches the finalised, signed document. Please ensure the patient or applicant signs the form before sending it.
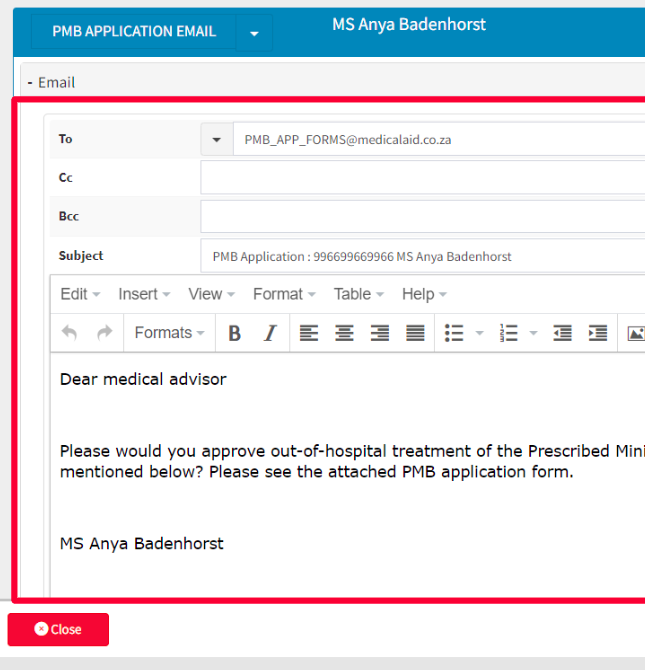

Upon completing these steps, always remember to save your progress and close the window to ensure the completed form is correctly updated and stored. This final action confirms that all captured information is finalised within the system record.
