Linking Clinical Data allows Clinical Data from a Patient’s original file to be linked to a newly created file, ensuring that the Patient’s clinical history remains intact and accessible without the need to recapture information.
A new file is created when a Patient is no longer associated with the original Debtor under which the file was initially created. This will occur when the Patient moves to their own Medical Aid, gets married, is divorced, or when a Dependant moves to a different Medical Aid Scheme or option separate from the Main Member.
💡Please Note: A new file needs to have already been created for the Patient you want to link the Clinical Data to. For information regarding how to create a new Debtor, please refer to the user manual: How to Create a New Debtor.
This user manual will start on the Diary screen.
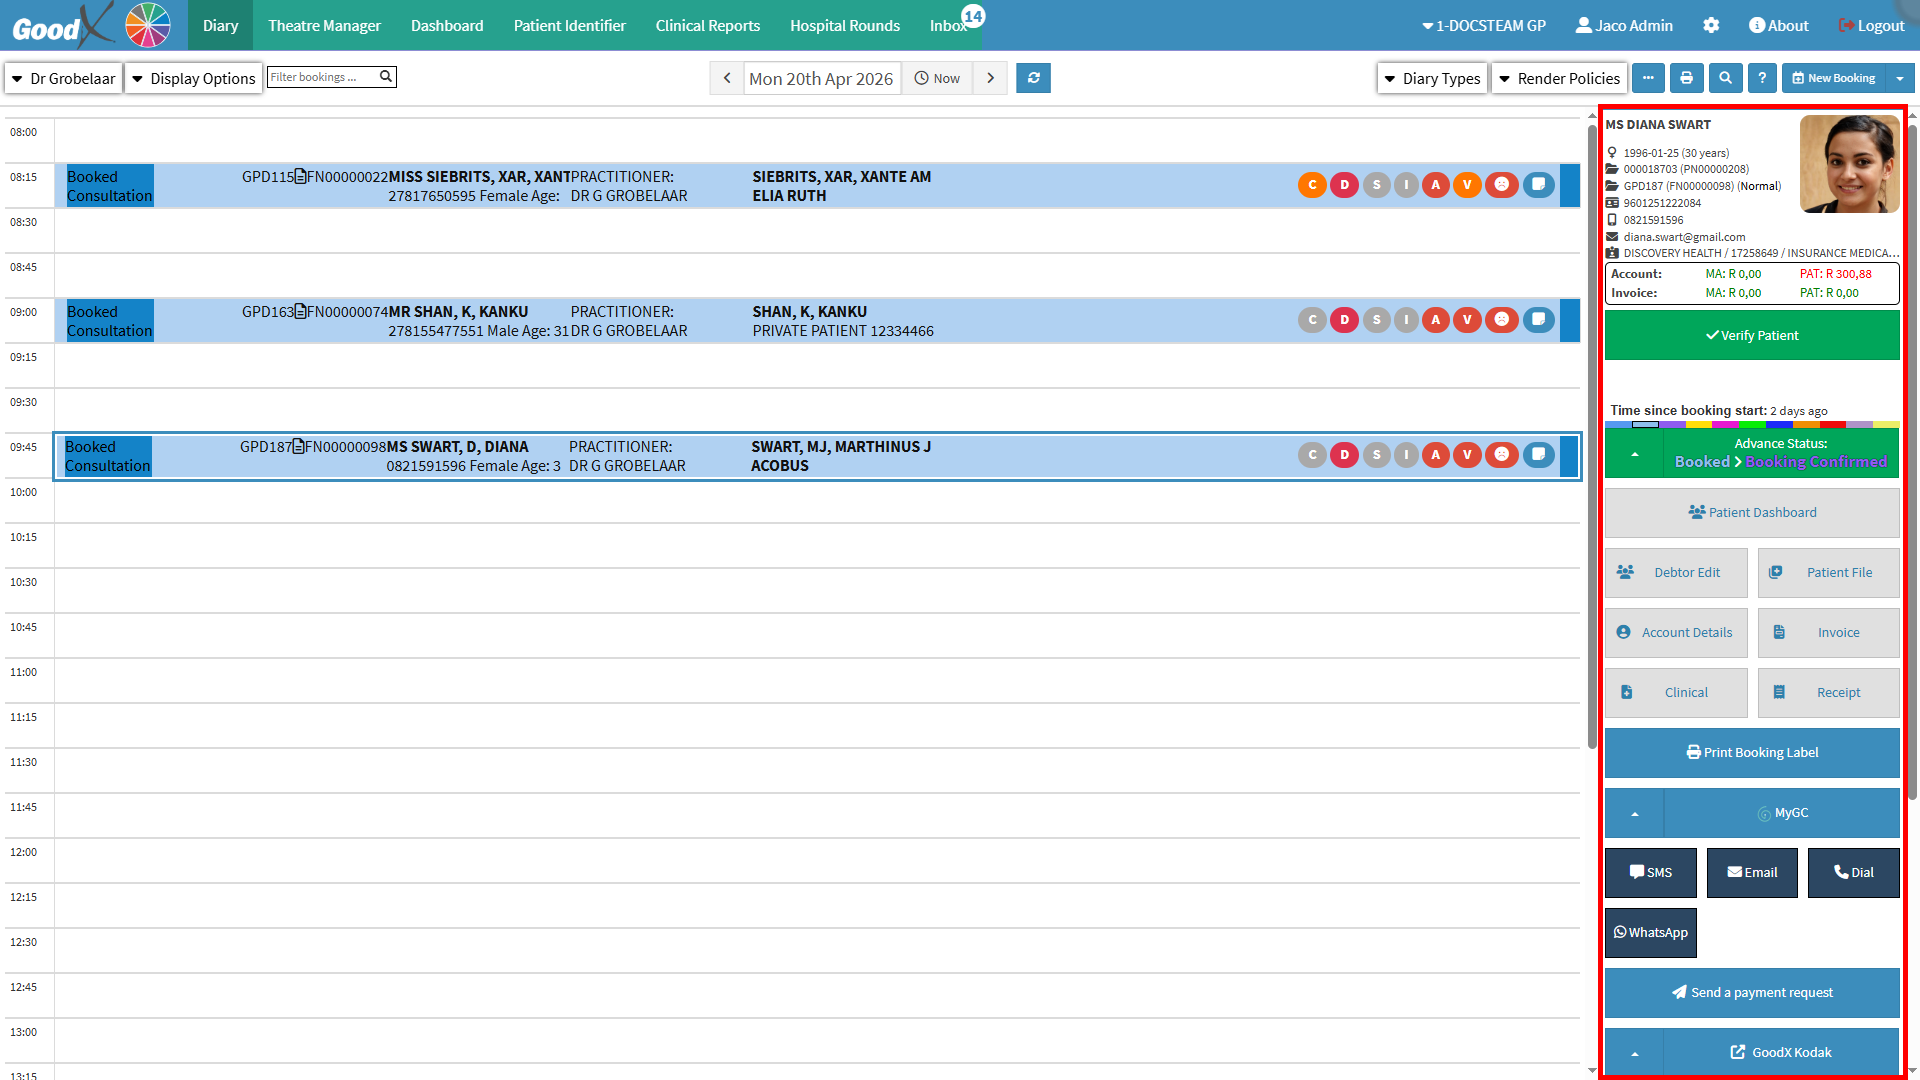
Click on the Booking of the Patient whose Clinical Data you want to link to a new file.
The Diary sidebar will open.
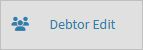
Click on the Debtor Edit button.
The Debtor Details screen will open.
For more information regarding the Debtor Details screen, please refer to the user manual: Web 1.19 - Debtor Details.
Click on the Link Patient button in the Patient Details section.
The Link Patient screen will open.
Click on the Search for Patient to Link field to search for and select the existing Patient file you want to link to the current Patient.
💡Please Note: You can search for the Patient using either their name, surname, ID number or Medical Aid number.
Both Patients will now be displayed on the right-hand side of the screen.
Click on the Preferred button to copy the Clinical Data from the selected Patient to the new one.
Click on the Unlink button on the Patient you want to remove from the old Debtor file grouping.
Click on the Clear List button to clear all the Patients linked to this group.
Click on the Save Current Configuration button to save the linking of the Clinical Data to the preferred Patient.
An Attention! pop-up will appear, asking you to enter your PIN.
Click on the OK button to proceed.
Click on the Save button to save all the changes that have been made.