A Widget is a component on a Customisable Form that you can use to input data, make selections or trigger actions on the specific Field/Pill where the Widget has been set up. A Widget can be a Text/Number field, drop-down menu, etc.
This is standard information automatically included in relevant sections of a Customisable Form, streamlining your documentation process.
This user manual will start on an Editable Section screen in the Custom forms.
Click on the Add Widget button to create a new Widget for this section.
For more information on How to Use Widgets, please refer to the user manual: How to Use Widgets.
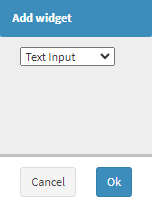
The Add Widget screen will open.
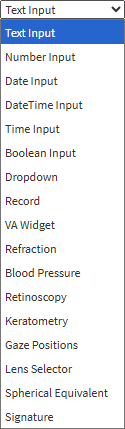
Click on the Text Input drop-down menu to select what type of Widget will be added.
Text Input: Text field becomes available where information can be entered.
Number Input: The numeric field will become available where a value can be entered.
Date Input: Click on the Date field to select a specific day from the date picker that becomes available.
DateTime Input: Click on the Date and Time fields to select the precise moment of an event from the date picker that becomes available.
Time Input: The time field becomes available to record the specific hour and minute.
Boolean Input: A toggle or checkbox becomes available to indicate a true/false or yes/no result.
Dropdown: Selection can be made from a list of options.
Record: Record section will be added to the form.
VA Widget: The Visual Acuity section will be added.
Refraction: Refraction fields will be added where the results can be entered.
Blood Pressure: Systolic and Diastolic fields will be added, where the results of a blood pressure test can be entered.
Retinoscopy: Fields will be added where the results of the Retinoscopy can be entered.
Keratometry: Fields will be added where the results of the Keratometry can be entered.
Gaze Positions: Gaze Positions fields will be added where the results can be entered.
Lens Selector: Lens Selector fields will be added where the results can be entered.
Spherical Equivalent: The field will be available on the form where the Spherical Equivalent can be entered.
Signature: A Digital signature pad becomes available for the Practitioner or Patient to sign the form.
Click on the Ok button.
The Widget will be added.
Click on the Text field to add a Name to the Widget.
Tick the Self Learning checkbox to mark this Widget as Self-Learning.
💡Please Note:Self Learning fields will remember the information that has been entered previously. This ensures that you can select the option, and there is then no need to input the data again, saving you time.
Click on the Delete button to remove the Widget.
Click on the Widget for more options.
Click on the Machine Key field to add the key that is associated with the Machine you want to integrate with the system.
💡Please Note: To import data from the machine the Practice is using, a ticket must be created asking for the integration and the Machine Key. The Dev team will provide you with the Machine Key, which you will then have to enter into the system. Once the Machine Key is added, the system will be able to input the correct information into the relevant fields.