The customisable Examination form provides a flexible digital framework that allows Practices to design clinical forms that reflect their specific workflows, specialities, and reporting requirements. By configuring only the fields and options that are relevant to the type of care being provided, unnecessary information is removed, reducing clutter and improving accuracy during data capture.
This setup supports fast and consistent documentation, enabling Practitioners to record observations in a structured format that mirrors their real-world workflow. Custom forms also promote standardisation across teams, improve clinical efficiency, and ensure that essential information is captured in a way that enhances clinical decision-making, reporting, and Patient care.
The Content of This User Manual
Add a New Sub-panel
Add a New Section to a Sub-panel
Section Options
Image Assessments
Pills
Widgets
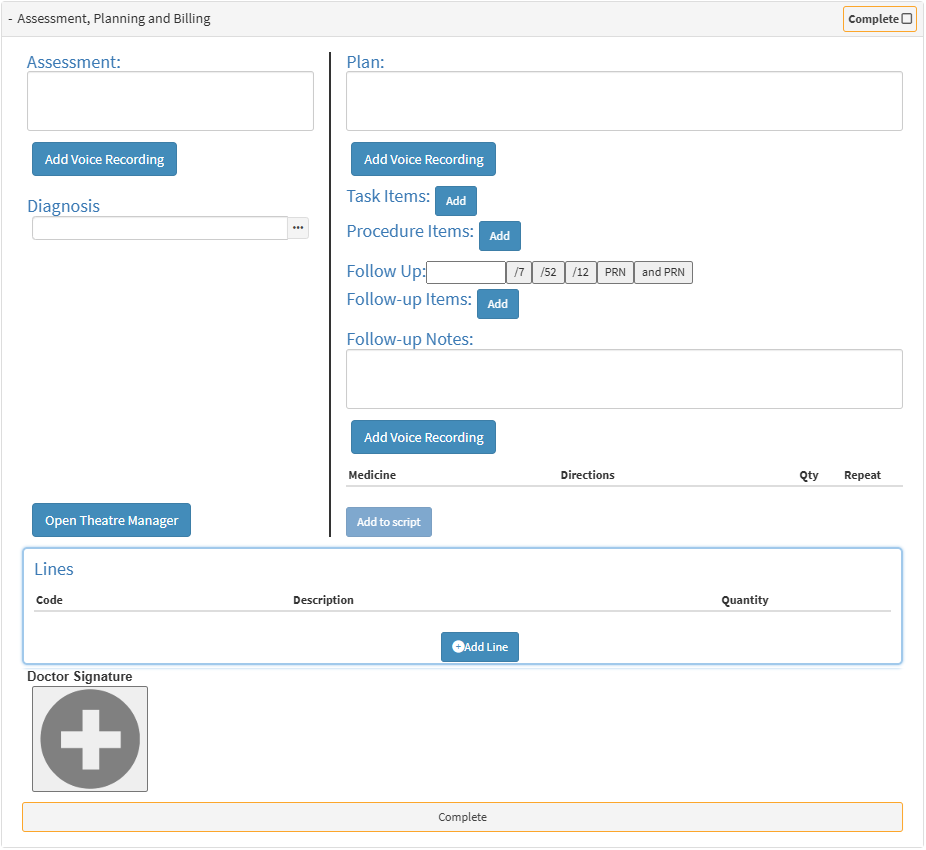
Assessment, Planning and Billing
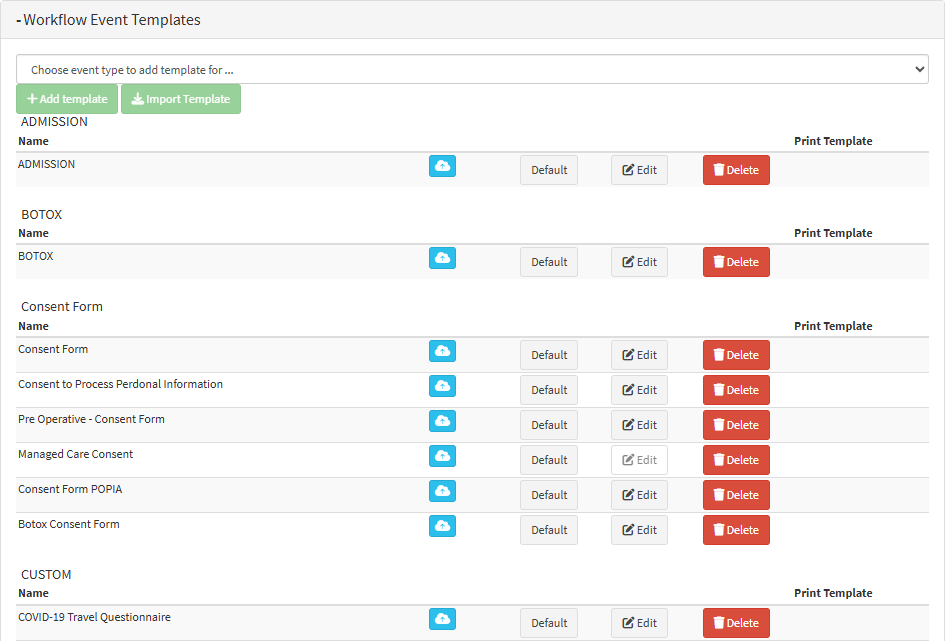
This user manual will start on the Entity Settings screen.
For more information on how to navigate to the Entity Settings screen, please refer to the user manual: How to Navigate the Settings screen.
Click on the Workflow Event Templates panel.
The Workflow Event Templates panel will expand.
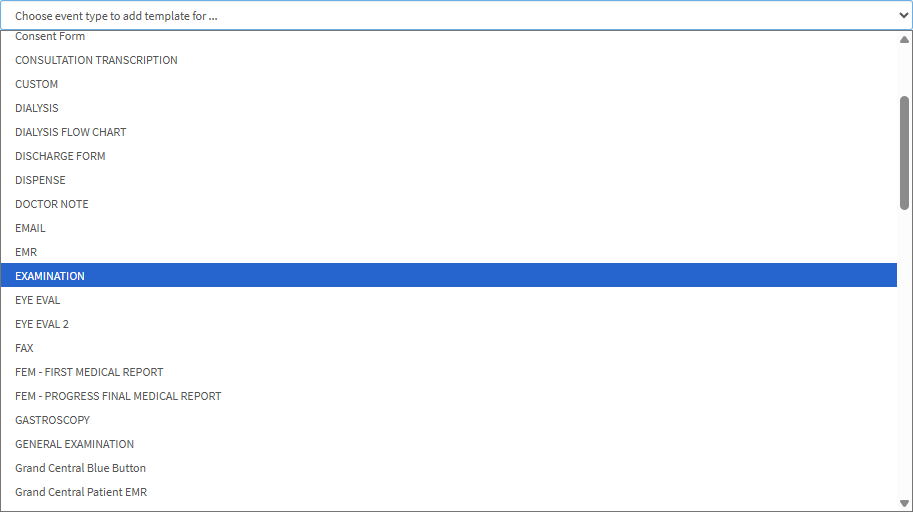
Click on the Choose Event Type to Add Template for... drop-down menu and select the Examination Event.
Click on the Add Template button.
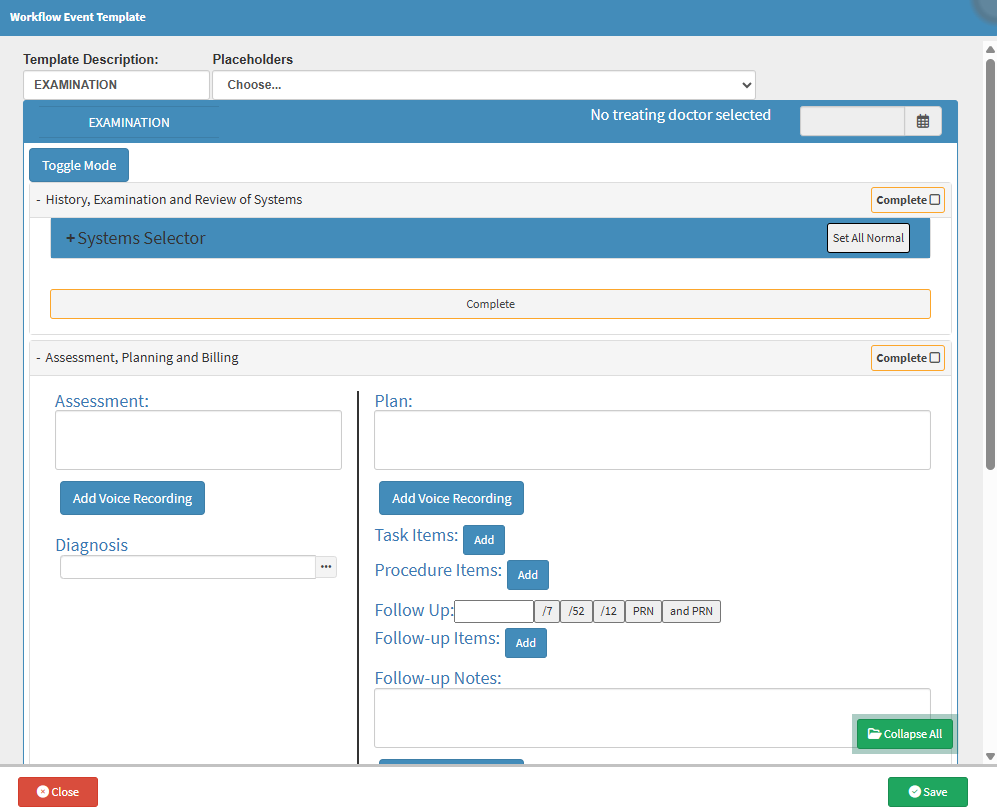
The Examination Workflow Event Template screen will open.
Click on the Template Description field to add a Name for your new form.
Click on the Toggle Mode button.
The Editing option of the Sub-panels within the History, Examination and Review of Systems panel will open.
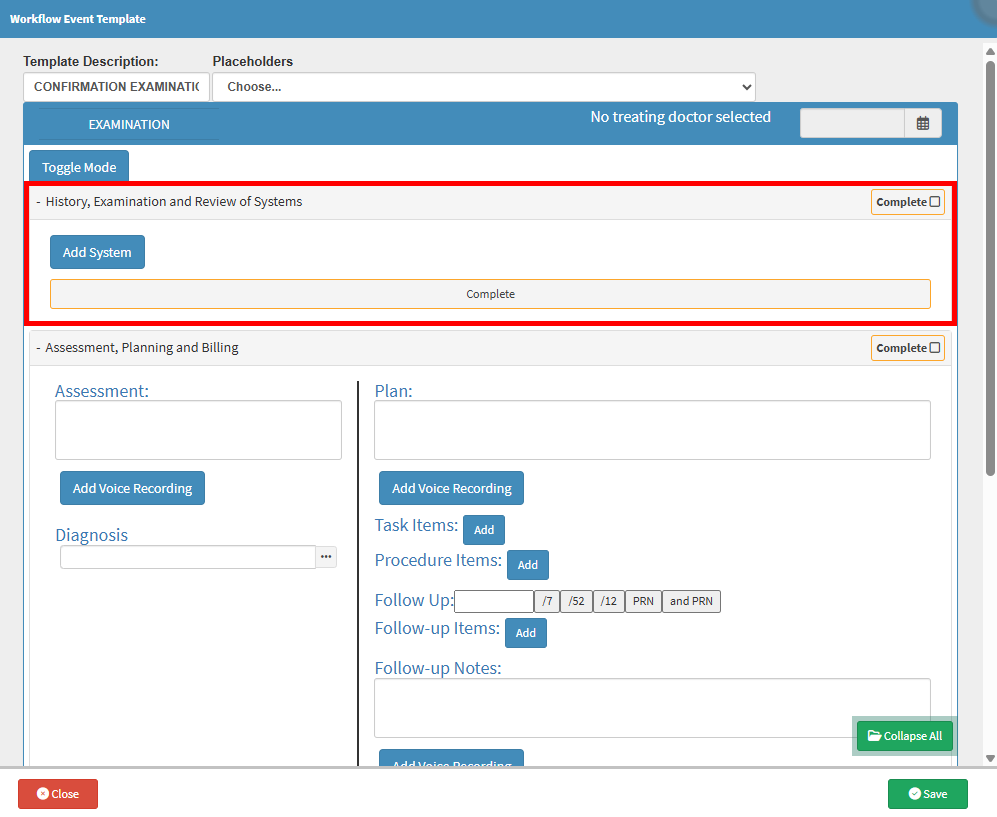
Add a New Sub-panel
In order to section the information in an orderly way your form will be split into different sections by means of Sub-panels. Each Panel will need to be set up individually with the information you require. Sub-panels are also known as Systems.
Click on the Add System button to add a blank Sub-panel to your form.
A new Panel will be added where you are able to build the next Section of your form.
Click on the Text field to change the Name of the Panel.
Tick the Copy Forward checkbox to mark that the information in this panel will be on the form each time the form is opened.
Tick the Auto Expand checkbox to mark that this panel will be expanded each time the form is opened.
Tick the System Notes checkbox to mark that this panel will be able to add System Notes.
Another checkbox will become available to Split System Notes.
Tick the Split System Notes checkbox to split the System Notes.
Click on the Panel to expand for more options.
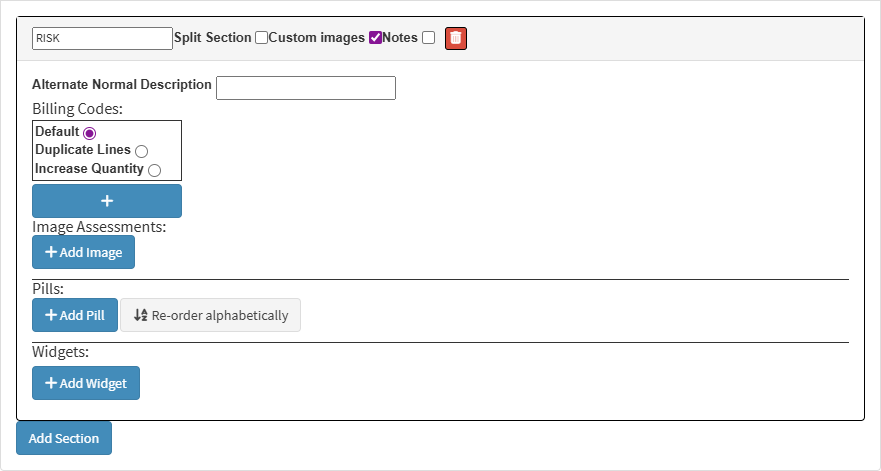
Add a New Section to a Sub-panel
Click on the Add Section button.
A New Section will open.
Click on the Text field to add the Name of the Section.
Tick the Split Section checkbox to divide Images, Conclusions and Widgets for both the left and right sides of the body.
Tick the Custom Images checkbox to be able to upload your Images onto the form.
Tick the Notes checkbox to add an automatic Text field where notes can be made that are relevant to the section.
Click on the Delete button to remove the entire Section.
Click on the Panel to expand for more options.
Section Options
All the available options within the New Section.
Click on the Alternate Normal Description field to enter an alternative description for the section, other than the name of the section.
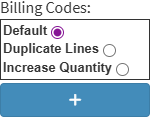
Billing Codes: The Billing Codes that will apply automatically as soon as this section is actioned.
Click on the relevant Radio button to make a selection:
Default:The Billing Code added will only have a quantity of one, whether actioned on one or both sides of the body.
Duplicate Lines: When both the left and right side have been actioned, there will be two billing lines invoiced.
Increase Quantity: When both the left and right side have been actioned, there will be one billing line with a quantity of two.
Click on the AddBilling Code button that will be populated in the Lines section of the Assessment, Planning and Billing of theform.
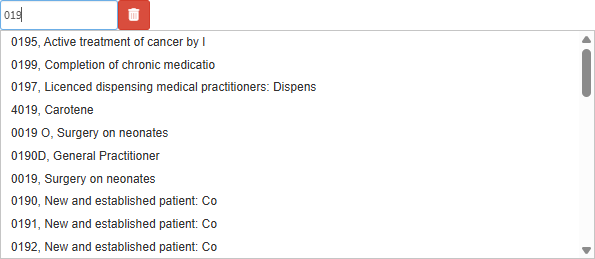
Click on theBilling Code field to enter the desired Billing Code. Type the Code or the Name of the Code to start the search. Only 1 character is required to start the search.
💡Please Note: Medicine and Material items can be added here.
Click on the Delete button to remove the Billing Code.
Image Assessments
Images that relate directly to the Examination that is being performed.
💡Please Note: If the Section has been marked as a Split Section, you are able to upload images for the Left and Right sides of the body.
Click on the + Add Image button to upload the desired Image that you want to use during the Examination.
💡Please Note: You will be able to draw on the Images to make observations during the consultation.
Pills
A Pill can be seen as a procedure or action performed on the Patient. When you add a Pill you can link a Diagnosis, Billing Codes and Considerations that will automatically be added to the Assessment, Planning and Billing sectionof the form when selected.
Click on the + Add Pill button to create a new Pill for this section.
Click on the Re-order Alphabetically button to re-order the pills added in alphabetical order.
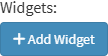
Widgets
A Widget is a component within the section that you can use to input data, make selections or trigger actions within the specific section where the Widget has been set up. A widget can be a text/number field, drop-down menu etc.
Click on the + Add Widget button to create a new Widget for this section.
A comprehensive overview of the Patient's condition following the completion of all diagnostic tests. The Treatment Plan will be determined based on the Assessment of the Patient's condition. Billing is determined by the tests conducted, with each test's Billing Code automatically added for fast and efficient billing.
💡Please Note: Within this Section, you are able to add information that will populate by default every time the form is used. For more information regarding each field and option within this section, please refer to the user manual: Assessment, Planning and Billing Section Settings.
Click on the Save button to save the contents of the custom Examination form that you have just set up.
The Examination that was set up will appear on the Workflow Event Template list.
💡Please Note: The Template has not been saved as yet and has been highlighted in red; the Template will first need to be Saved.
Click on the Save button to save all changes that have been made.
💡Please Note: Once the custom Examination formhas been successfully saved it will no longer be highlighted in red.