Glossary: Web 1.19 - Patient Details
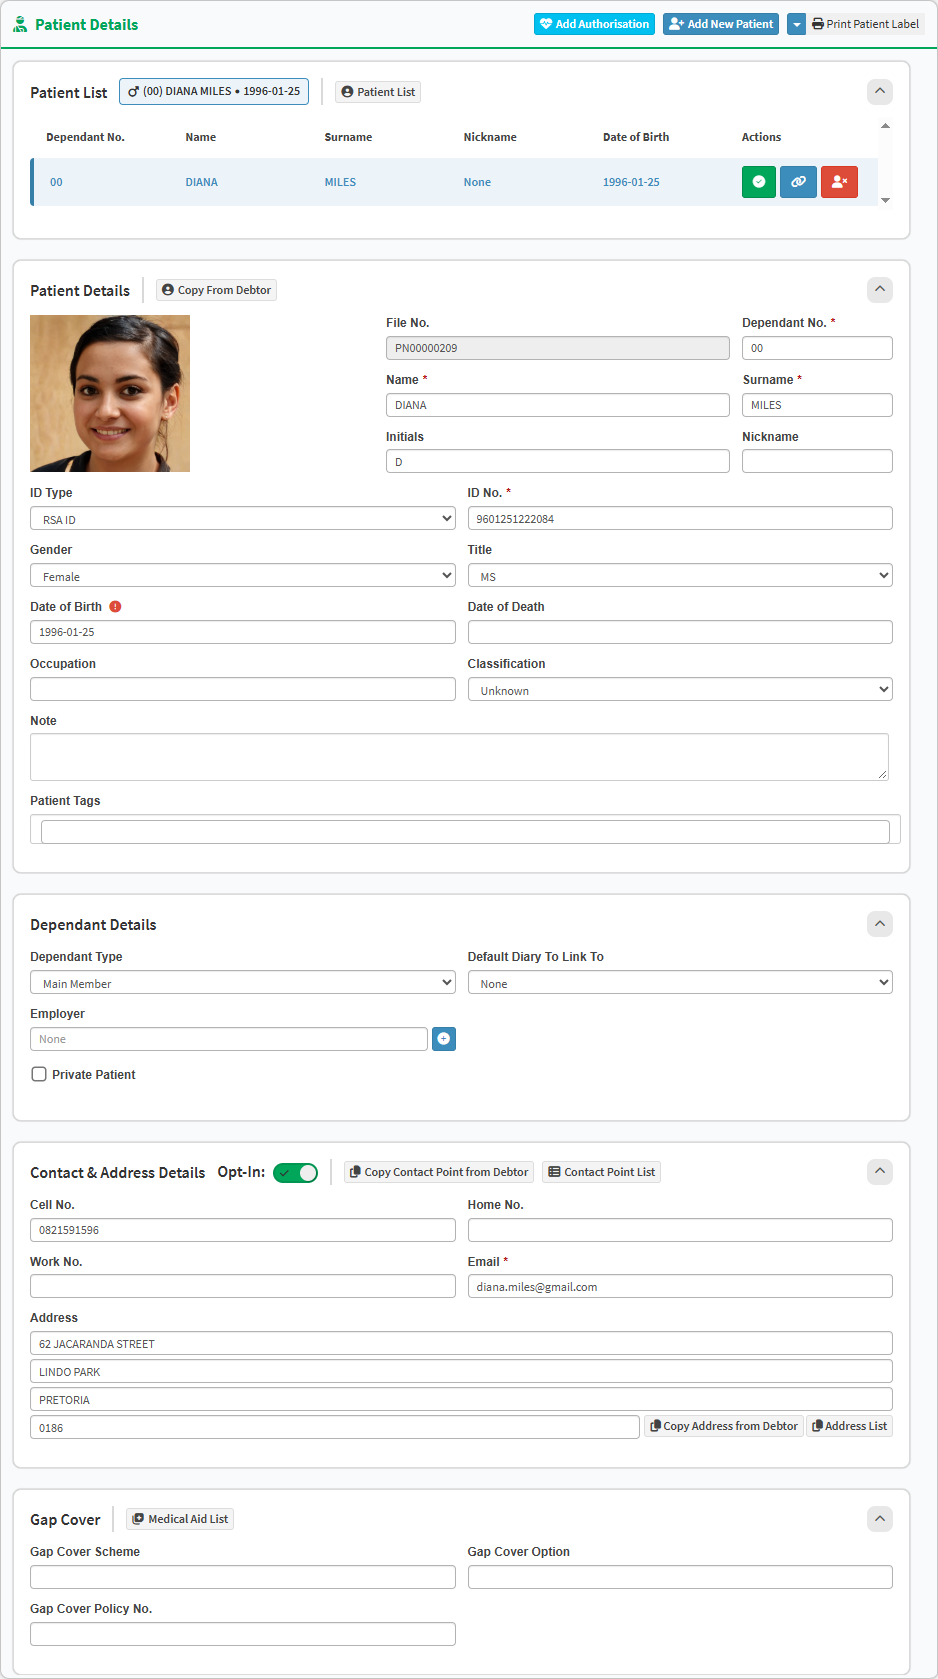
Why This Matters? Managing Patient Details accurately ensures that all clinical and administrative records within the Practice are synchronised and up to date. Capturing comprehensive data, from demographic information to Gap Cover details, allows for seamless communication and precise financial processing for every Patient and Dependant. Maintaining these records correctly supports the Practitioner in providing quality care while ensuring that the Debtor and Medical Aid requirements are met without administrative delays.
Sections
Patient Action Buttons
Patient List
Patient Details
Dependant Details
Contact and Address Details
Gap Cover
Patient Action Buttons
Add Authorisation: Allows the practice to request medical aid approval for specific treatments or procedures. For details, see Authorisation Setup .Add New Patient: Add a new dependant or family member under the active debtor's account . For details, see How to Add New Dependants (Patients) . Print Patient Label: Download the patient's details as a PDF file. For details, see Print Patient Label .
Patient List
Patient List: Redirects to the Patients List screen. For details, see Patients List Screen: Navigation and Use .Dependant No.: Number linked to a dependant, assigned by the medical aid provider.Name: Name of the dependant.Surname: Surname of the dependant.Nickname: Preferred name of the dependant.Date of Birth: Date of birth of the dependant.Validate/Benefit Check: Verify the patient's medical aid details, active status, and real-time benefits. For details, see Patient Validation, Dependant Data, New Debtor Import and Benefit Check .Link Patient: Link a patient to an existing patient. For details, see Link to Existing Patient .Mark as Inactive: Set the patient's status to inactive, preventing new bookings or transactions.
Patient Details
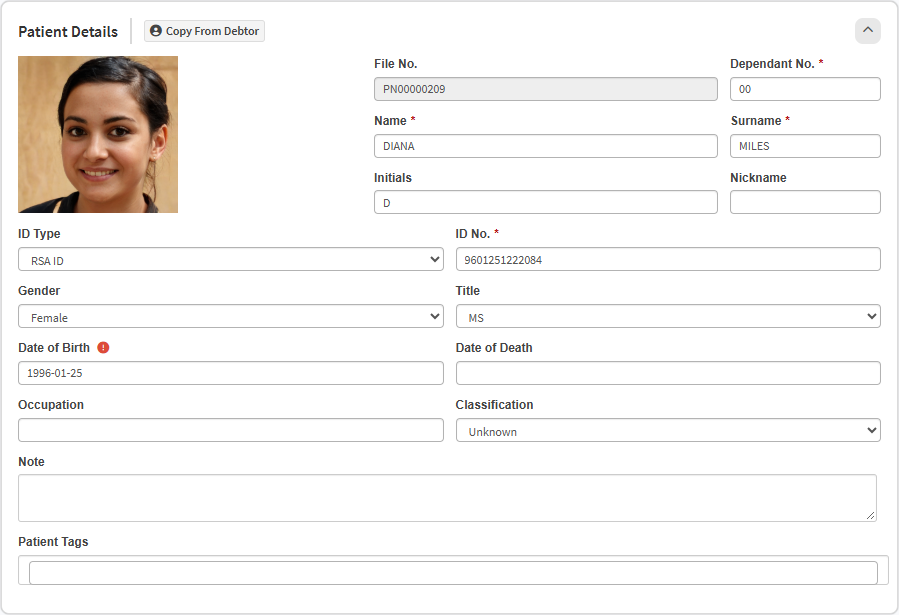
Copy From Debtor: Copy the debtor's information to the patient details.Patient Image: Add a picture to the Patient file. For details, see Video Capture Screen: Navigation and Use. File No.: File number of the Patient.Dependant No.: Number linked to a dependant, assigned by the medical aid provider.Name: Name of the patient.Surname: Surname of the patient.Initials: First letter(s) of the patient's given name(s).Nickname: Preferred name of the patient.ID Type: Document category used to identify the patient.ID No.: Patient's identification number.Gender: Indicates the patient's gender.Title: The honorific title of the patient.Date of Birth: Patient's date of birth.Date of Death: The date of death if the patient is deceased.Occupation: Patient's current job or profession.Classification: Categorises the patient for medical or administrative purposes.Note: Additional notes or specific observations regarding the patient.Patient Tags: Assigns custom tags to easily identify, filter, or label the patient. For setup, see Patient Setup .
Dependant Details
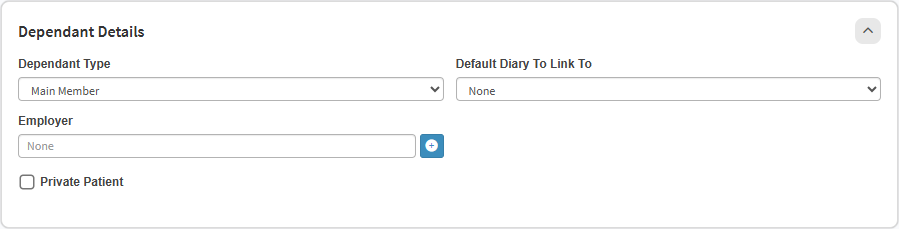
Dependant Type: Specify the patient's relationship to the main medical aid member.Default Diary to Link to: Specify the default diary bookings will be linked to.Employer: Add the patient's current employer. For details, see Create New Employer .Private Patient: Checkbox used to indicate that the patient is not covered by a medical aid and will be billed privately.
Contact and Address Details
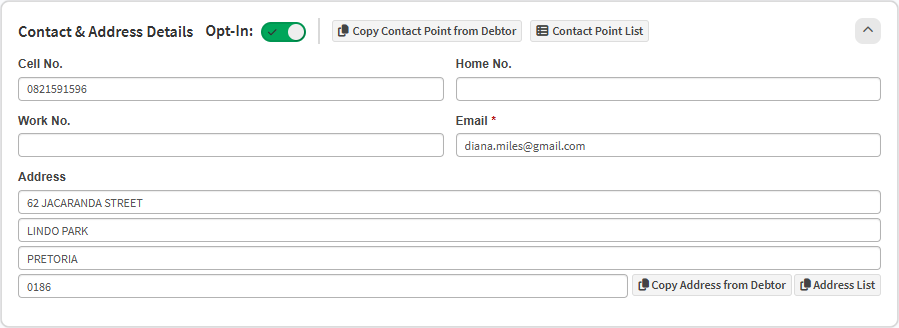
Copy Contact Point from Debtor: Copy the debtor's existing contact details into the patient's fields.Contact Point List: Open the Contact Point List screen. For details, see Debtor Add/Edit Contact Point Screen Navigation .Cell No.: Mobile telephone number of the patient.Home No.: Home landline telephone number of the patient.Work No.: Workplace telephone number of the patient.Email: Email address of the patient, validated for required formatting like an @ sign, and highlighted in red if invalid.Address: Physical or postal street address of the patient, supports Google Maps auto-fill or manual entry.Copy Address from Debtor: Copy the debtor's existing address details into the patient's address fields.Address List: Open the Address List screen. For details, see Debtor Add/Edit Address Screen Navigation .
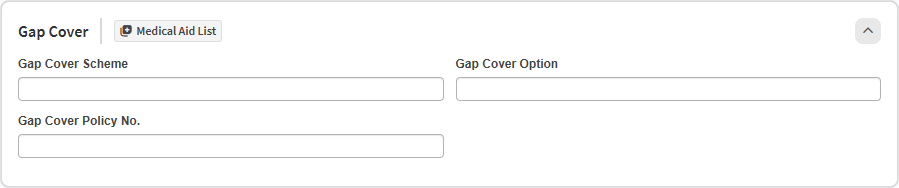
Gap Cover
Medical Aid List: Open the Medical Aid List screen. For details, see Medical Aid Option Links - Patient Navigation and Use Screen .Gap Cover Scheme: Search for and select the patient's Gap Cover provider. For details, see GAP Cover .Gap Cover Options: Search for and select the specific Gap Cover plan or option.Gap Cover Policy No.: Policy or membership number associated with the Gap Cover.
Last modified: Wednesday, 11 November 2026, 10:39 AM