Treatment Plan Workflow Event: Navigation and Use
Why Use This Function:
The Dental Treatment Workflow Plan is used to link a Treatment Plan to a Patient or Debtor, ensuring that all planned procedures are accurately recorded. This includes the estimated cost of the treatment, allowing for clear financial tracking, as well as any additional notes made by the Practitioner to guide the treatment process. This structured approach helps streamline patient care and ensures that all relevant details are documented for efficient workflow management.
💡Please Note: Ensure that you are on the Dental Entity.
- This user manual will start on the Diary screen.

- Click on the desired Booking.

- The Diary sidebar will open.

- Click on the Dental drop-up button.

- Click on the Clinical button.

- The Clinical screen will open.

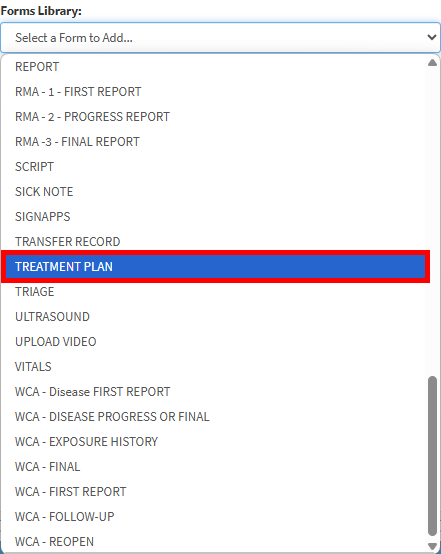
- Click on the Forms Library drop-down menu and select Treatment Plan.
- The Treatment Plan will open on the left.
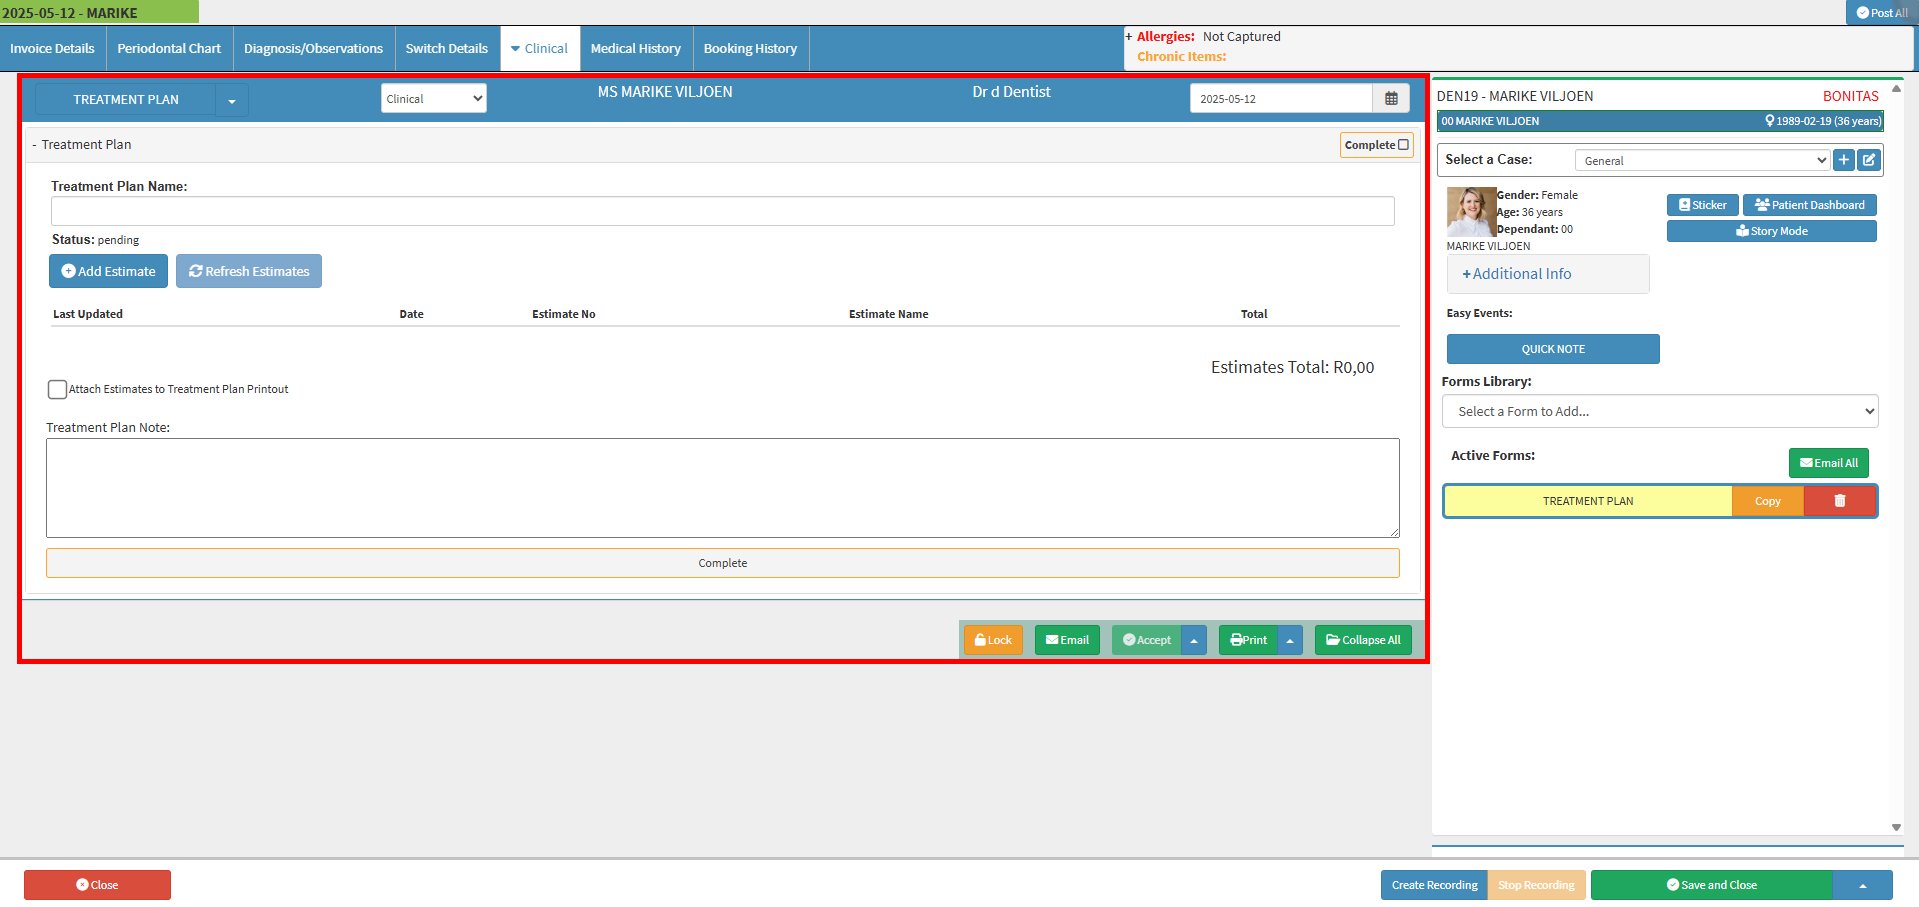
- Click on the Treatment Plan drop-down menu to select any previously set up Treatment Plans.

- For more information on how to set up a Treatment Plan template, please refer to the user manual: How to Set Up the Dental Treatment Plan Workflow Event.
- Click on the Admin drop-down menu.

- Click on the Treatment Plan Name field to enter the Treatment Plan name.

- Click on the Add Estimate button to select an Estimate from the List available.
![]()
- The Pending Estimates screen will open.

💡Please Note: The Estimates have to be set up beforehand. For more information on how to set up Estimates, please refer to the user manual: How to Create Dental Invoices/Estimates From The Diagnosis/Observation Screen.
- Click on the Select button to add the Estimate.
![]()
- The Estimate will now display on the screen.

- Last Updated: Displays the most recent date the Estimate was modified.
- Date: Shows the creation date of the Estimate.
- Estimate No: A unique identifier assigned to the Estimate.
- Estimate Name: The designated name of the Estimate.
- Total: The total amount of the Estimate in your Practice's set-up currency.
- Click on the View button.
![]()
- The Estimate will open for viewing, printing, or downloading.
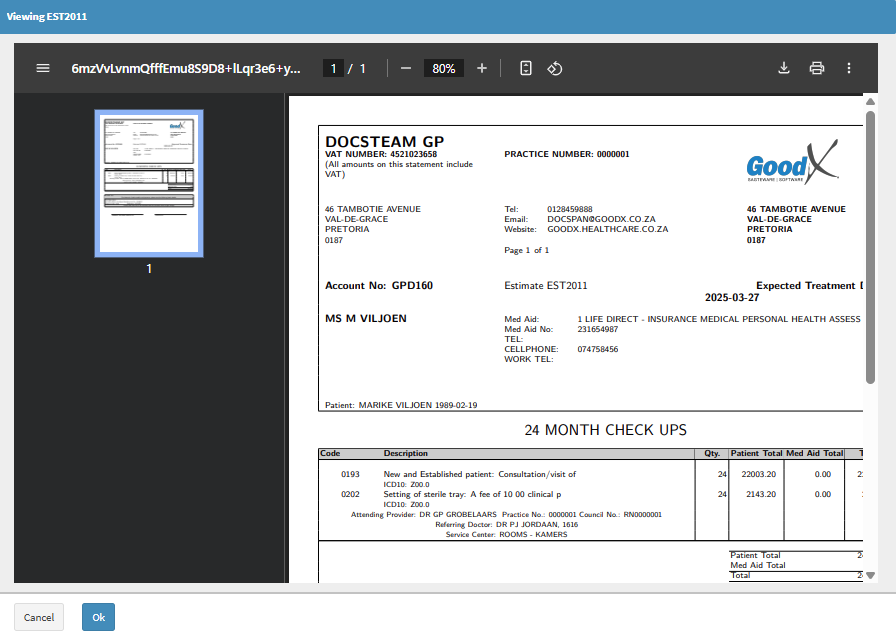
- Click on the Ok button once you are done viewing.
![]()
- Click on the Delete button to delete the Estimate.
![]()
- Tick the Attach Estimates to Treatment Plan Printout if you wish to attach the Estimates to the Treatment Plan printout.
![]()
- Click on the Treatment Plan Note field to add any additional notes.

- Click on the Lock button to lock the Treatment Plan.
![]()
💡Please Note: This action will be logged on the system should you unlock it after locking it.
- Click on the Email button to email the Treatment Plan to the Debtor.
![]()
- For more information on Emails, please refer to the user manual: Send an Email.
- Click on the Fax button to send the Treatment Plan via Fax.
![]()
- Click on the Accept drop-up menu for options to become available.
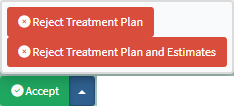
- Click on the Accept button if the Debtor accepted the Treatment Plan.
- The following pop-up will appear to say the Treatment Plan will lock, and all fields will display as accepted.
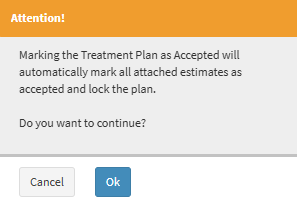
- Click on the Ok button if you wish to accept and lock the Treatment Plan.
![]()
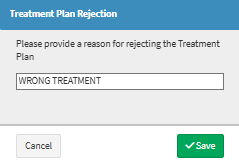
- A Treatment Plan Rejection pop-up will appear asking to provide a Reason for rejecting the Treatment Plan.
- Click on the Reject Treatment Plan button to reject the treatment plan.
![]()
- An Attention pop-up will appear, indicating that rejecting the Treatment Plan will change the status to Pending.
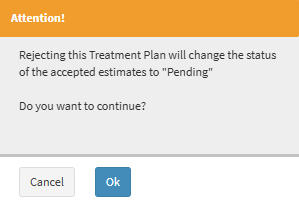
- Click on the Ok button to accept.
![]()
- A Treatment Plan Rejection pop-up will appear asking to provide a Reason for rejecting the Treatment Plan.

- Click on the Save button to reject the Treatment Plan.
![]()
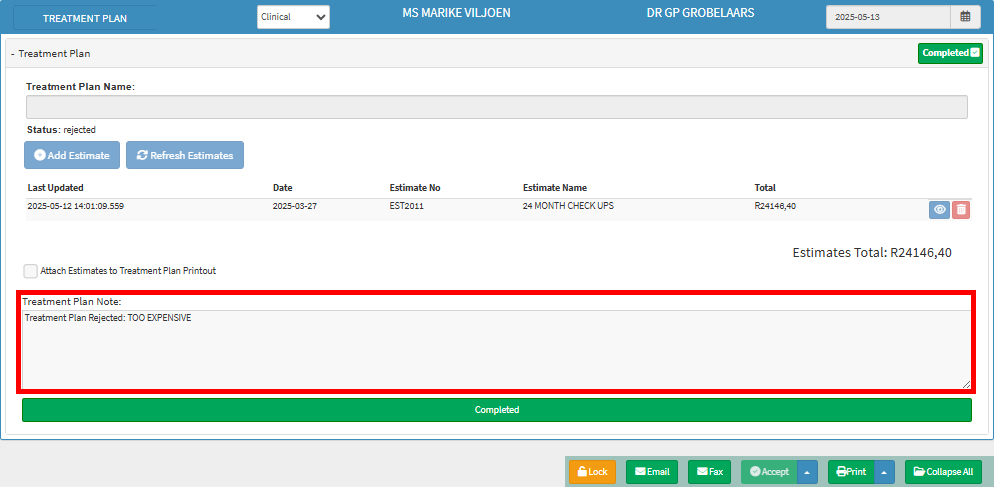
- The rejected Treatment Plan reason will appear in the Treatment Plan Notes.
- Click on the Print drop-up to download the Treatment plan to a PDF.

- Click on the Print button to print the Treatment Plan.
![]()
- For more information on Downloading and Printing Treatment Plans, please refer to the user manual: Download Treatment Plan.
- Click on the Collapse All button to collapse the treatment plan.
![]()