Transaction Batch (Multi Invoice) Screen: Navigating and Use
Why Use This Function:
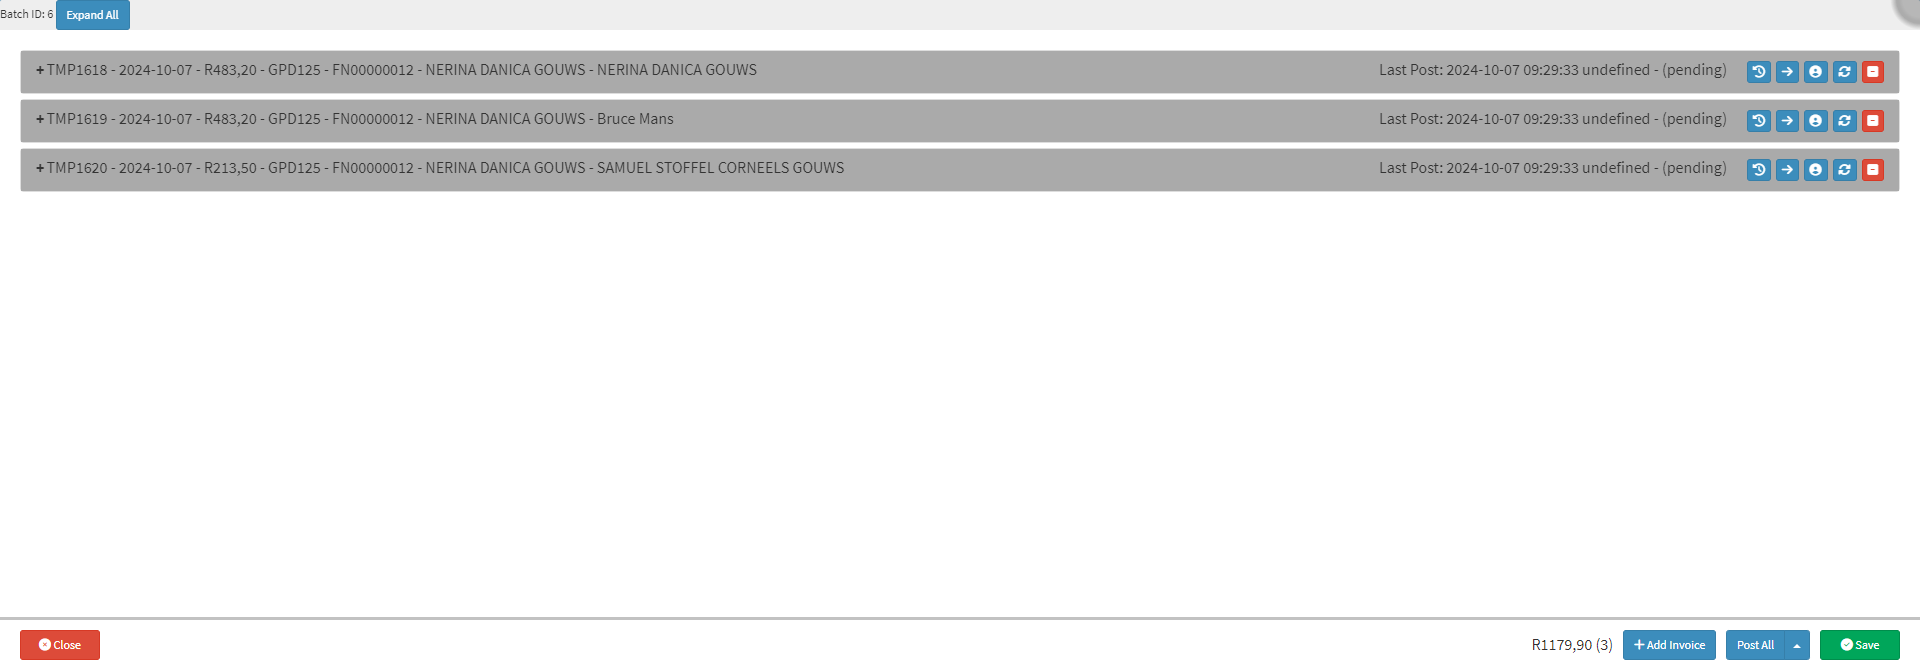
Gives you access to view a group of Invoices that have been created and saved in the system but have not yet been finalised or posted. This is useful if you need to review, edit, or verify the Invoices before officially posting them, preventing premature or incorrect entries into the system.
The Contents of This User Manual:
Filters
Screen Columns Action Buttons
Columns
Select
Page Options
This user manual will start on the Transaction Batch List screen.
Filters are tools or functionalities that allow you to narrow down or refine the results displayed on the Transaction Batch List screen.
Click on the Description field to enter a description of the batch you are searching for.
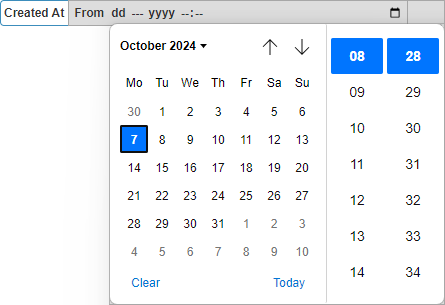
Click on the Created At field to open a Date and Time Picker to choose the Date and Time you want the search to start.
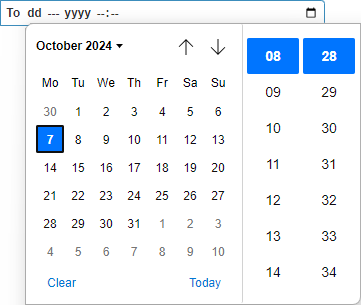
Click on the To field to open a Date and Time Picker,and Select the Date and Time the search will end.
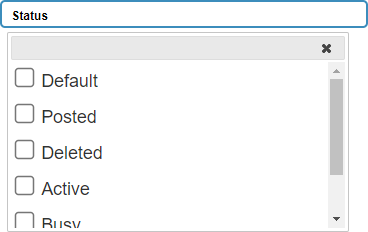
Click on the Status drop-down menu to select the desired Status by which the list will be filtered.
Tick the checkbox of the desired Status.
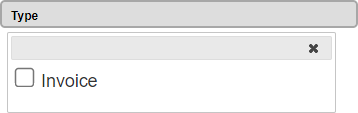
Click on the Type drop-down menu to select the desired Type by which the list will be filtered.
Tick the checkbox of the desired Type to make a selection.
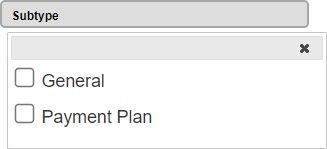
Click on the Subtype drop-down menu to select the desired Subtypeby which the list will be filtered.
Tick the checkbox of the desired Subtype to make a selection.
Click on the Update Results button after all the filters have been set up.
Click on the Reset Filters button to empty all filter columns.
Screen Columns Action Buttons
Several additional Options are available for the Columns. These additional Options are to help you adjust the List, refine the Search and give more specific results.
Click on the Enable/Disable Inline Editing button.
The Description field will become available to Edit.
Enter the desired information into the Description fields that have become editable.
Click on the Save button to save the changes made.
Click on the Expand Widths button to auto-fit the Column Width to the information within all columns.
Click on the Reset Widths button to restore the original Widths after any modifications are made.
Click on the Sort Columns button to sort the Columns in the order that you desire.