Setting up the Workflow for PMB Conditions using Smart Sticker Protocols allows you to create an automatic workflow that will be followed when a Patient is eligible for PMB benefits.
Using the suggested workflow will assist the Practice to streamline the process of how Patients are registered for PMB conditions and also to easily maintain the PMB status of the Patient.
The contents of this user manual will consist of the following information:
Overview of Setup
Create and Setup the PDF Printover forms for each Medical Aid Option
Create an Email Template that will be used when the registration is submitted to the relevant Medical Aid
Create a Smart Sticker Protocol for Patients who are eligible for PMB Benefits
Add the Patient to the PMB Registration Smart Sticker Protocol
Overview of Setup
Certain setup needs to be done in order for the suggested workflow to work.
Please Note: Set up will only be done once.
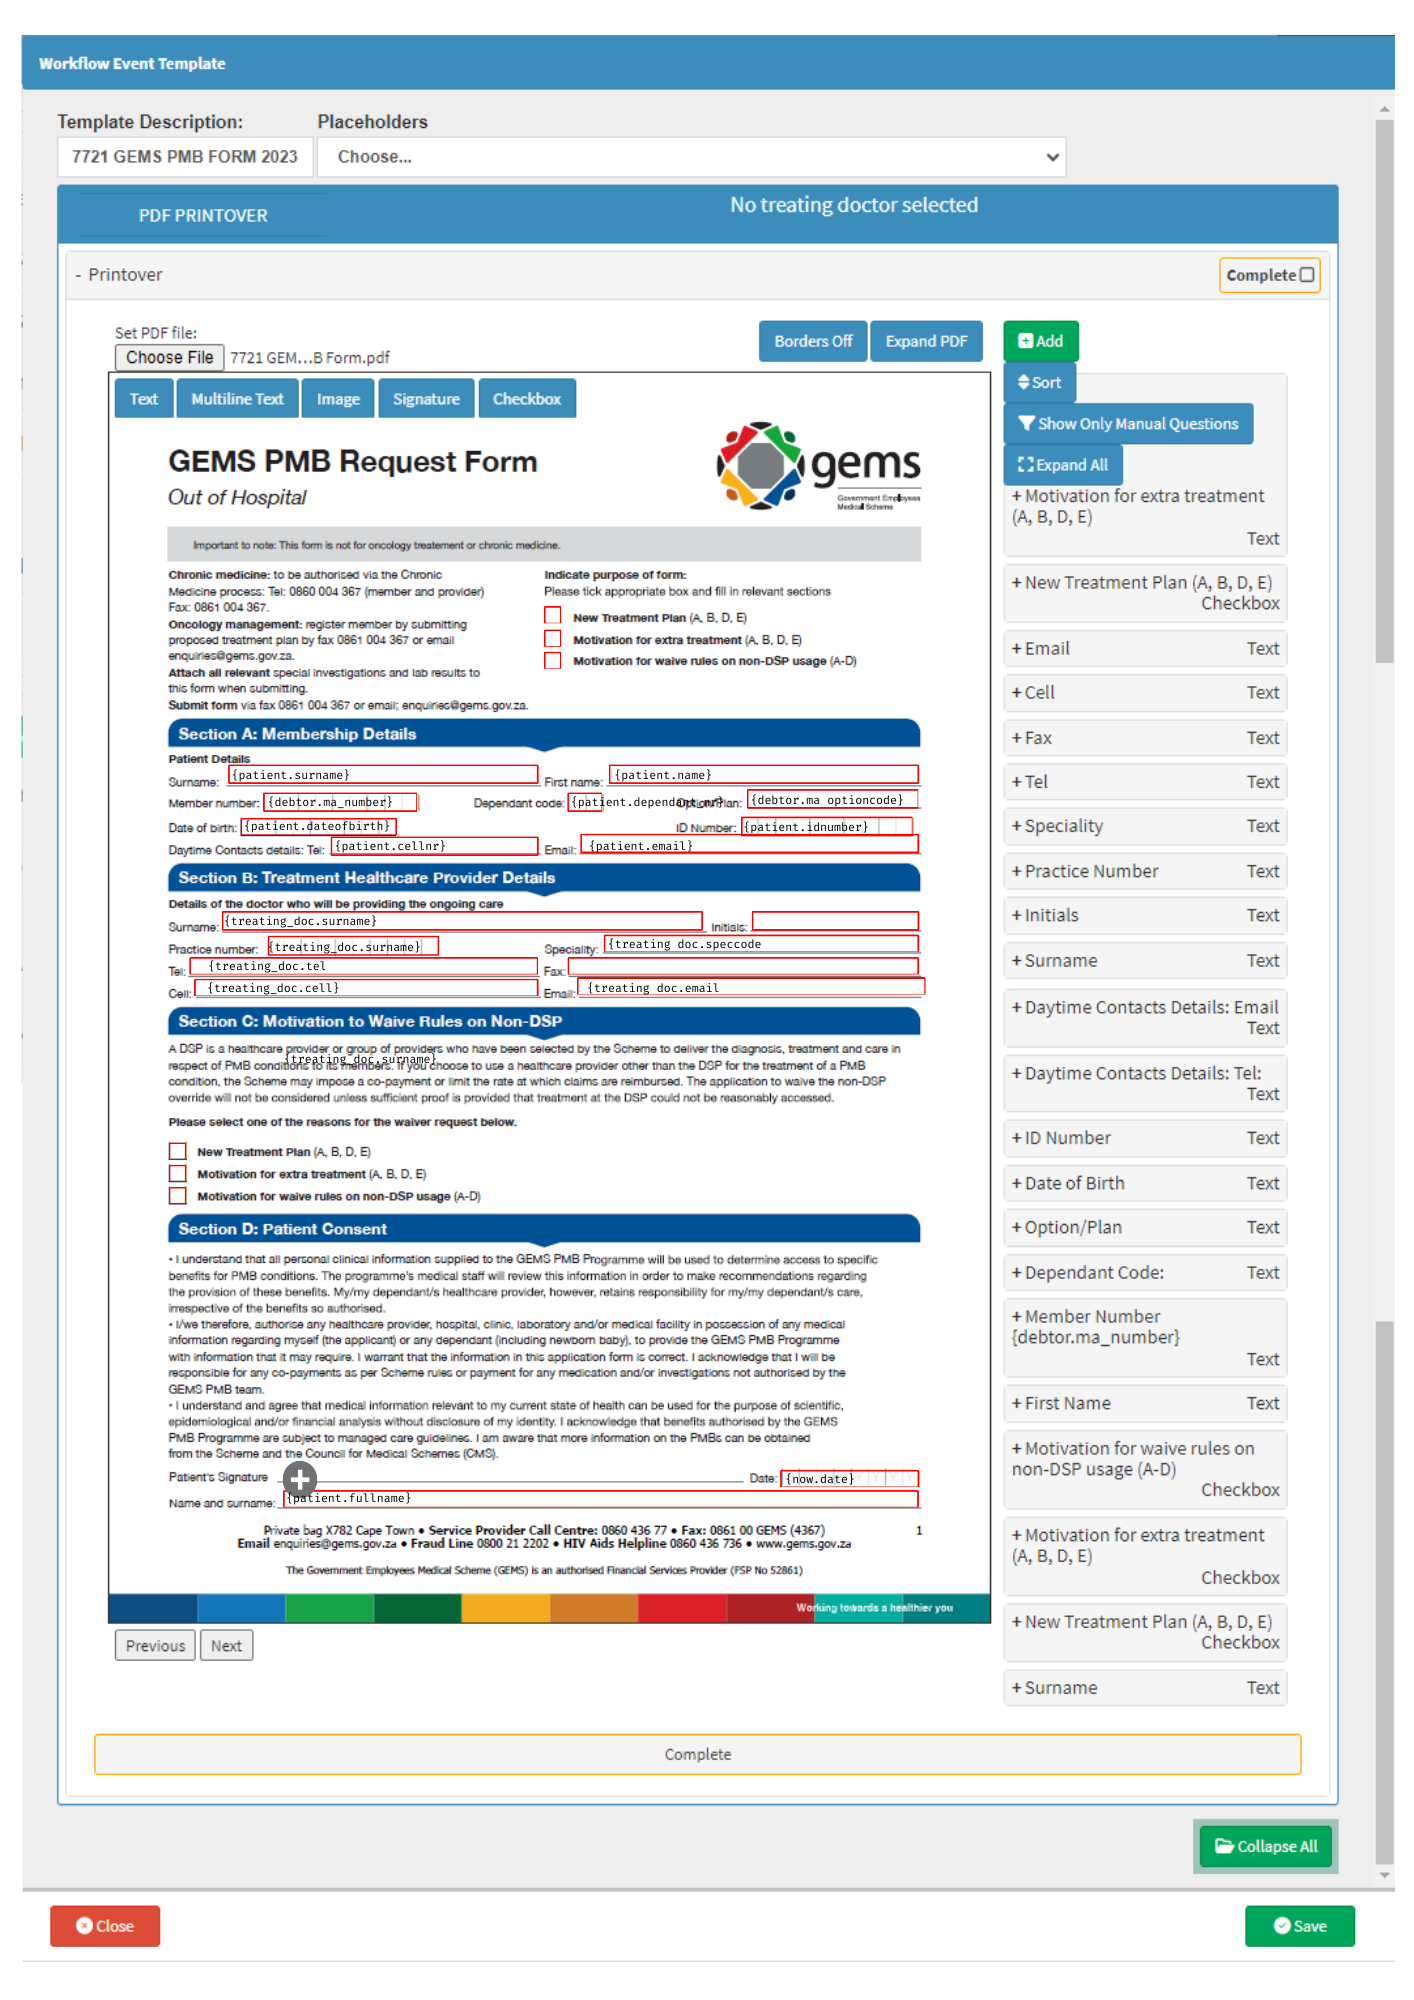
Create and Setup the PDF Printover forms for each Medical Aid Option
Using the PDF Print Over Workflow Event, you are able to plot the information using Placeholders so that when the form is generated the information will be pulled through from the Patient's file into the respective fields.
Please Note: There are several PDF Printover Templates that have already been plotted and set up with the placeholders. Please enquire with your FCL to find out if the forms you are going to use have been set up to save time. Your FCL will be able to upload the required forms which have already been plotted and configured.
Create an Email Template that will be used when the registration is submitted to the relevant Medical Aid
Creating an Email Template that will be used when a PMB registration is submitted will ensure that all the relevant information is included when the submission is made to the Medical Aid.