E-mail Templates Setup
E-mail Templates allow users to create standard E-mails to send out to Debtors/Patients. When sending E-mails users can select the relevant template that will be sent. Creating E-mail Templates saves time and creates uniformity when communicating with patients via E-mail.

New E-mail Template
The user is able to create a new E-mail Template to use when they would like to send out E-mail communication.


Edit Template section




Please Note: Macro options may differ depending on the selected Category of the Email Template being created.


Please Note: Multiple Macros can be used by repeating the steps of selecting from the Add Macro drop-down menu and adding the Macro to the text. The user is able to type in between the Macros to ensure that the Macros are added in the relevant places of the E-mail text.


Edit an Existing E-mail Template




- The contents of this user manual will consist of the following information:
- New E-mail Template
- Edit an Existing E-mail Template
- Delete an Existing E-mail Template
- Log in to the GoodX Desktop App with your GoodX username and password.
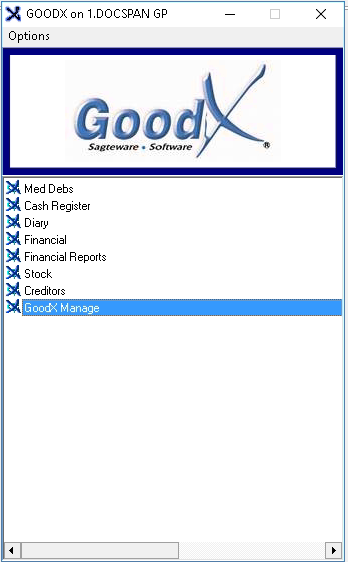
- From the Navigator, Double Click on the GoodX Manage module.

- The GoodX Manager screen will open.

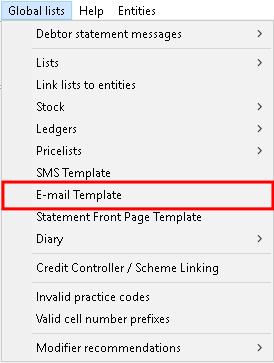
- Click on the Global lists menu on the menubar.

- Click on the E-mail Template sub-menu option.
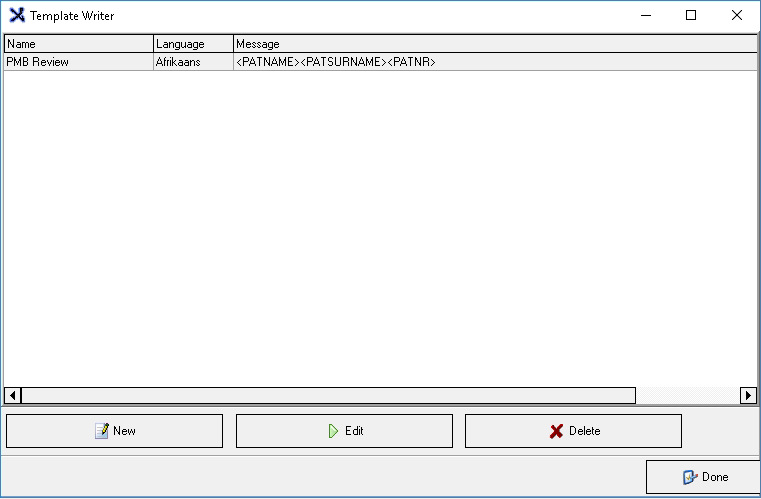
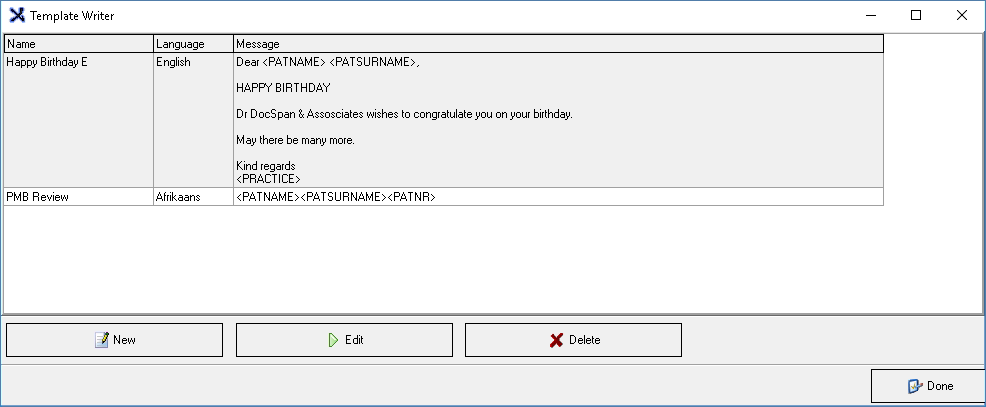
- The Template Writer screen will open.

- Templates that have been set up will be listed and the information will be divided into columns:

- Name: The name that has been allocated to the E-mail Template.
- Language: The language used in the content of the E-mail.
- Message: The full content of the E-mail message.
New E-mail Template
The user is able to create a new E-mail Template to use when they would like to send out E-mail communication.- Click on the New button to set up a new E-mail Template.

- The Template Writer screen will open.

- Type in the relevant information or Select the relevant option from the drop-down menus:
- E-mail Text Box: A free text field where the content of the E-mail will be written. There is no character limit in the Email text box.

- Click on the Email Text Box field to type in the contents of the E-mail, use the macros as explained in the Add Macro section of this user manual to pull through certain information from the system when the E-mail is sent.

Edit Template section

- Type in the relevant information or Select the relevant option from the drop-down menus:

- Template Name: A short description of what the E-mail is for. The Template Name field is a single-line text field.

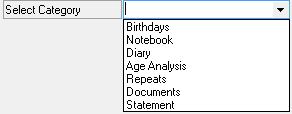
- Select Category: The location where the E-mail will be used.
- Click on the Select Category drop-down menu to select an appropriate option.

- Birthdays: E-mail communication that will be sent on a Patient's/Debtor's birthday.
- Notebook: E-mail communications that are sent from the Notebook.
- For more information regarding how the Notebook works, please refer to the user manual: Notebook.
- Diary: E-mail communication that is sent from the Diary.
- For more information regarding the Diary, please refer to the following user manual: Overview of the Diary.
- Age Analysis: E-mail communications that are sent from the Age Analysis Report.
- For more information regarding the Age Analysis Report, please refer to the user manual: Monthly Reports: MedDebs - Age Analysis.
- Repeats: E-mail communication sent regarding the repeat of prescriptions.
- Documents: E-mail communication sent with regards to any documents on the system.
- Statement: E-mail communication sent from the Statement.
- For more information regarding Statements, please refer to the user manual: Setup a New Statement.

- Select Language: The language that the E-Mail will be written in.
- Click on the Select Language drop-down menu to select an appropriate option:

- Afrikaans: The E-mail will be written in Afrikaans.
- English: The E-mail will be written in English.

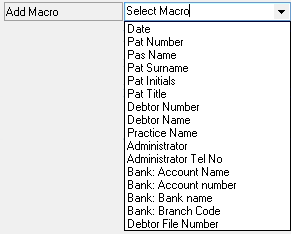
- Add Macro: Allows the user to select a Macro to build the content of the E-mail. The macros available on the drop-down menu will be determined by the selected category. Macros will auto-fill the information relating to the particular Patient or Debtor. Macros will customise and personalise the E-mail and save time by not having to look up and type out the information on hundreds of E-mails.
- For more information on what each Macro is used for, please refer to the user manual: Placeholders.
- Click on the Add Macro drop-down menu to select an appropriate option.

Please Note: Macro options may differ depending on the selected Category of the Email Template being created.
- Click on the desired option to make a selection.

- Click on the Add button next to the selected macro to add the desired macro to the E-mail text field.

Please Note: Multiple Macros can be used by repeating the steps of selecting from the Add Macro drop-down menu and adding the Macro to the text. The user is able to type in between the Macros to ensure that the Macros are added in the relevant places of the E-mail text.
- Subject: A short description of what the E-mail is about.

- Click on the Subject text field to input a relevant heading for the E-mail Template.

- Click on the Add Macro drop-down menu to add macros to the subject to personalise and customise the subject of the E-mail.

- Please refer to the Add Macro section in this user manual for an explanation of how to use the macros.
- Click on the Cancel button to close the New Template Writer screen without saving the content of the E-mail that was created.

- Click on the Save button to save the content of the E-mail that was created. The New Template Writer screen will close and return to the Template Writer screen.

- The newly created E-mail Template will be added to the Template list.
Edit an Existing E-mail Template
Allows the user to make changes to an existing E-mail Template.
- Click on the desired E-mail Template to which the user would like to make changes.

- Click on the Edit button.

- The Template Writer screen of the selected item will open.

- Make the necessary desired changes.
- Click on the Cancel button to close the New Template Writer screen without saving the changes that were made.

- Click on the Save button to save the content of the E-mail that was changed. The New Template Writer screen will close and return to the Template Writer screen.

Delete an Existing E-mail Template
Allows the user to delete an E-mail Template when they are no longer going to use the Template.
- Click on the desired E-mail Template that the user would like to delete.

- Click on the Delete button.

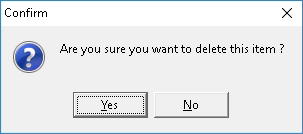
- A Confirm pop-up will appear to ask whether the user would like to delete the selected E-mail Template.

- Click on the No button to close the pop-up and not delete the selected E-mail Template.

- Click on the Yes button to delete the selected E-mail Template and return to the Template Writer screen.

- Click on the Done button to exit the Template Writer screen and return to the GoodX Manager screen.

Last modified: Friday, 2 December 2022, 9:35 AM