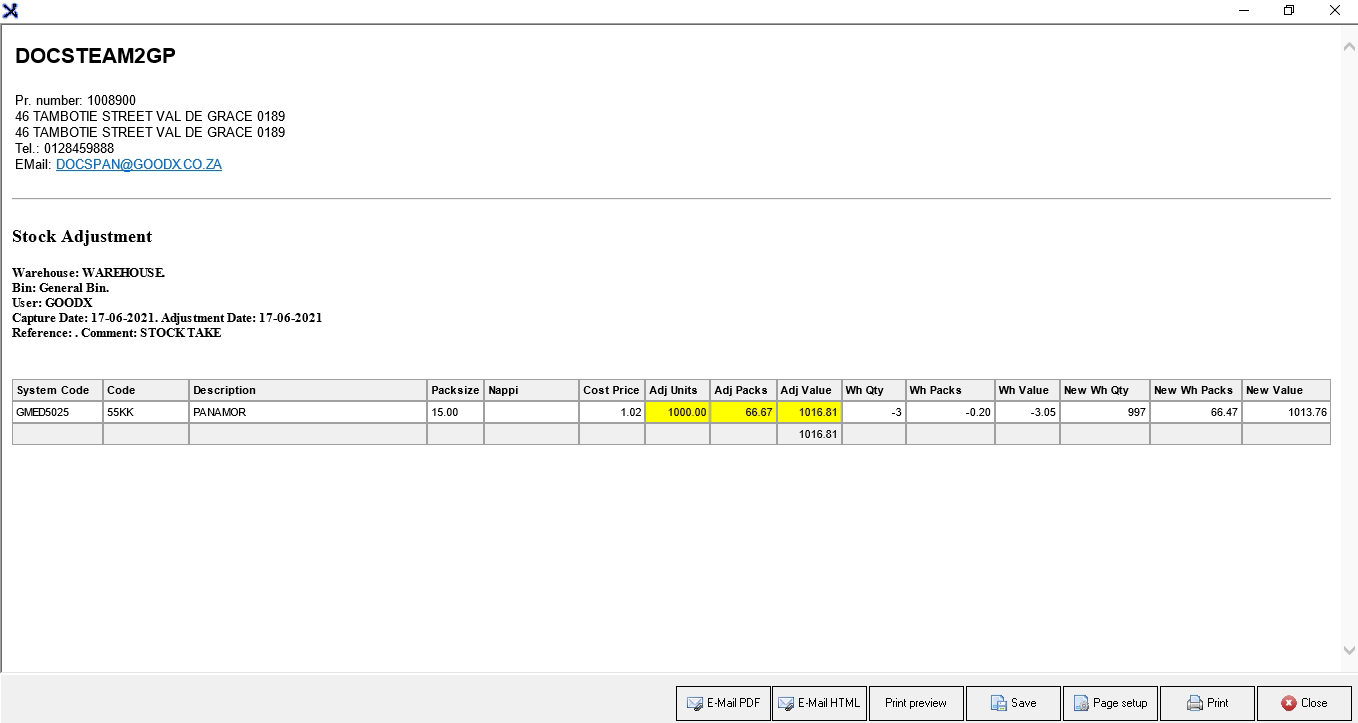
Whenever a report is Printed on the GoodX Desktop App options will appear at the bottom of the screen that can be used to:
Email PDF: Attaches the report in a .pdf format to the email.
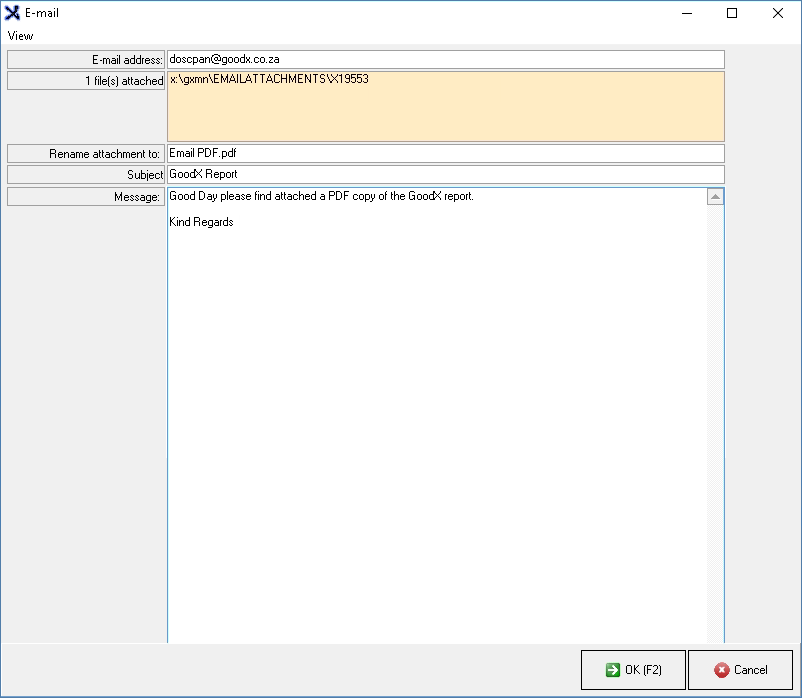
The Email screen will open with the Report attached as a PDF.
Click onCancelto close without sending the Email.
Clickon OK (F2)to send the report.
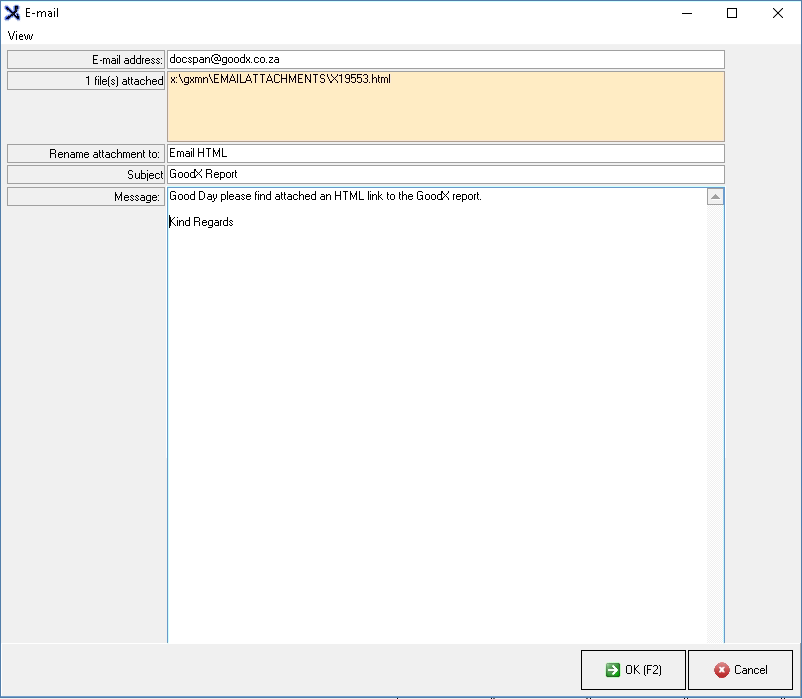
Email HTML: Sends the email with an HTML link.
The Email screen will open with the reports HTML link attached
Click on Cancel to close without sending the Email.
Click on OK (F2) to send the report.
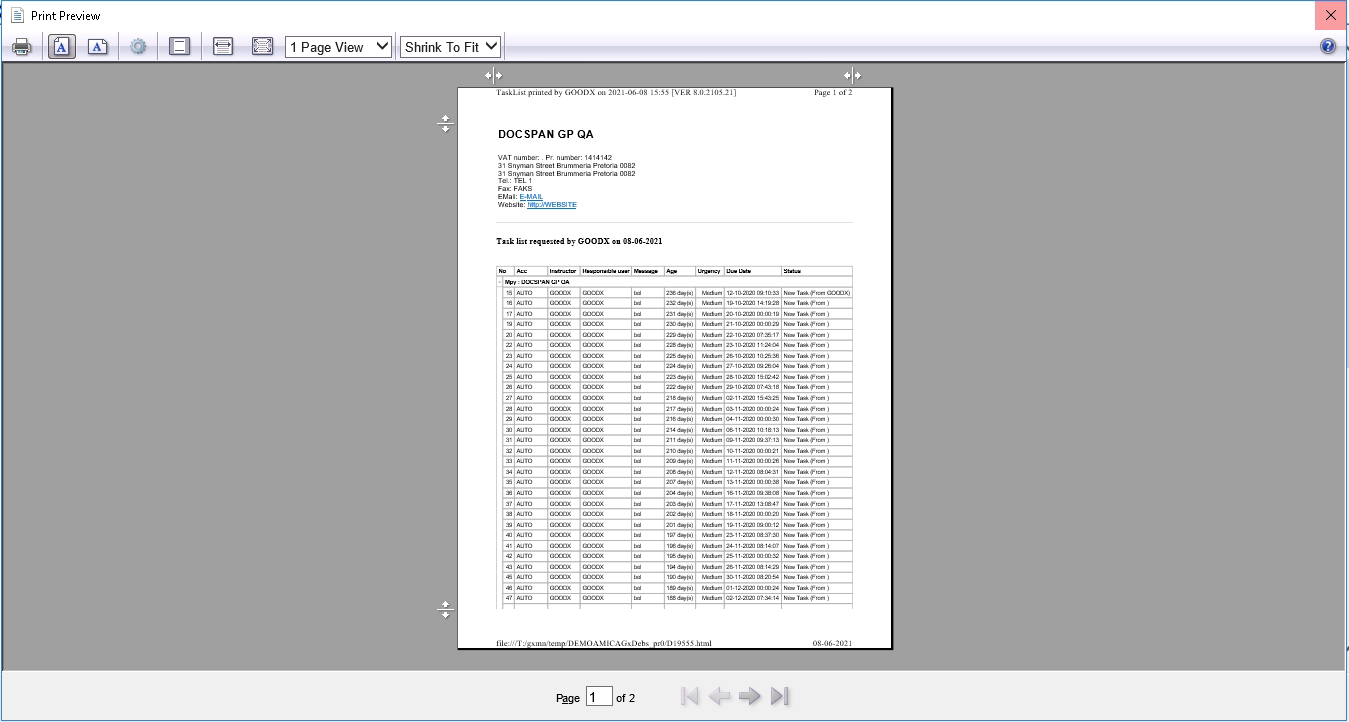
Print Preview: APreview of how the list will look when a hard copy is printed.
The Print Preview screen will open where the report can be viewed as it will print.
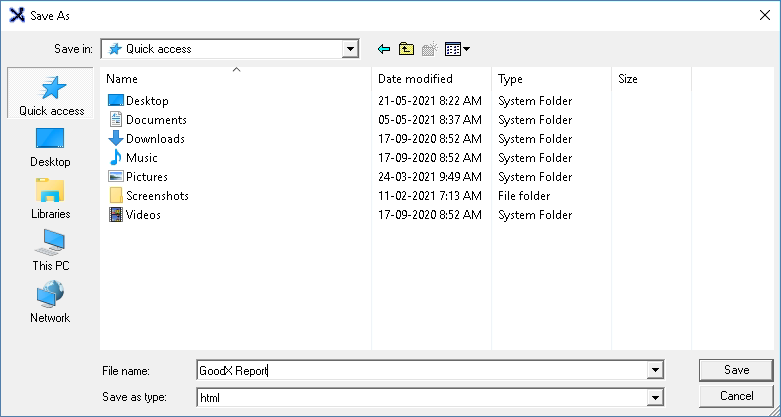
Save: Allows the user to save a digital copy to the computer.
The Save As screen will open.
Navigate to where the user would like to save the file.
File Name: Add a unique file name to the file.
Save as Type: Select the file type from the drop-down menu that the file will save as.
Click on Cancel to close without saving.
Click on Save to save the file.
Page Setup: Parameters and settings regarding how the report will save.
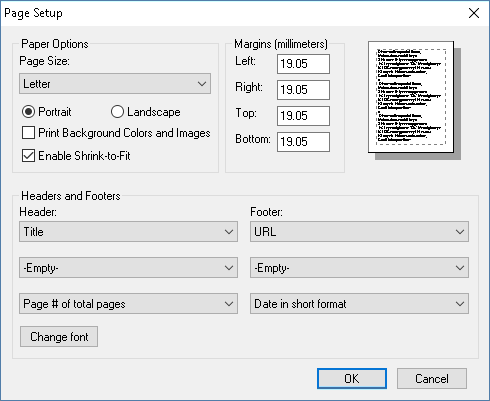
The Page Setup screen will open.
Please Note, these settings have been set to default and it is not recommended to change any of these settings and parameters.
Paper options: All the options regarding the paper that will be used when printing the report.
Paper Size: The size of the paper that will be used.
Portrait: The orientation of the printed report will be a portrait.
Landscape: The orientation of the printed report will be landscape.
Print background Colours and Images: If there are any images or colours they will only be printed if this option is ticked.
Enable Shrink to fit: Will fit the report to the size of the paper that was selected when this option is ticked.
Margins (Millimetres): The space between the edge of the paper and where the text begins. This is measured in millimetres.
Left: The left side of the page.
Right: The right side of the page.
Top: The top of the page.
Bottom: The bottom of the page.
Headers and Footers: A header is the top margin of each page, and a footer is the bottom margin of each page. Extra information can be added to the printout of the report.
Header: A total of 3 header options can be added to the report, make a selection from the drop-down menus.
Empty: Nothing will be printed.
Title: The name of the report, for example, Age Analysis.
URL: The file URL of the report.
Page Number: The number of the page.
Page # of total pages: Advises the number of the page of the total number of pages that will be printed, for example, Page 1 of 2.
Date in short format: The date the report was printed in short format
Date in Long format: The date the report was printed in long format for example Tuesday, 08 June 2021
Time: The current time in a 12-hour format for example 2:36 PM
Time in 24 hr format: The time in a 24-hour format, for example, 22:15.
Custom: A custom message can be added to the header.
Footer: A total of 3 footer options can be added to the report, make a selection from the drop-down menus.
Empty: Nothing will be printed.
Title: The name of the report, for example, Age Analysis.
URL: The file URL of the report.
Page Number: The number of the page.
Page # of total pages: Advises the number of the page of the total number of pages that will be printed, for example, Page 1 of 2.
Date in short format: The date the report was printed in short format
Date in Long format: The date the report was printed in long format for example Tuesday, 08 June 2021
Time: The current time in a 12-hour format for example 2:36 PM
Time in 24 hr format: The time in a 24-hour format, for example, 22:15.
Custom: A custom message can be added to the footer.
Change Font: This allows the user to change the font to customise the look of the report to their preferences.
ClickonCancel to close without saving.
Click onOK to save the changes that have been made.
Print: Prints a hard copy to the pre set up printer.
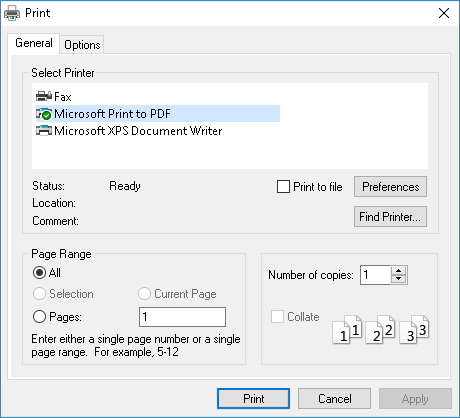
The Printscreen will open.
Select Printer: Select an option of the preset up printer that will be used to print the report.
Page Range: This allows the user to select the range of pages that will be printed.
All: Will print all the pages on the report.
Selection: This allows the user to only print a selection of the pages.
Current Page: Will only print the current page that is being displayed.
Pages: This allows the user to add which pages they would like to be printed.
Number of Copies: How many copies of the report the user would like to print.
Collate: Will print all the same page numbers together instead of in page sequence.
Click on Cancel to close without printing.
Click on Apply to apply any changes that were made.
Click on Print to sent to report to the selected printer.
Close: Closes the screen and returns to the screen of the report that was generated.