How to Make Bookings Once Logged In
Why Use This Function:
Bookings on myGC will allow a User to make a booking to schedule a visit with their preferred Practitioner, from the myGC app instead of calling the Practice to make a Booking. Past and Future Bookings can be viewed whilst the User is logged into the myGC app.The Contents of This User Manual:
- Make Booking
- Who the Booking is For
- Existing Patient
- New Patient
- Feedback
- This user manual will start on the myGC Dashboard screen.

- There are 2 ways that a booking can be made:
- Book an Appointment from the Quick Actions section
- Bookings from the Navigation panel
Book an Appointment from the Quick Actions section
- Click on the Book An Appointment button in the Quick Actions section.
![]()
Bookings from the Navigation panel
- Click on the Hamburger menu button ot expand the Navigation panel.

- Click on the Bookings button.
![]()
- The Find a Doctor screen will open.

- Click on the Search button to search for Practitioners using specific filters.

- For more information on how the search feature works, please refer to the user manual: Search.
- Practitioners that have bookings available will have timeslots in the Today's/Tomorrow's Availability section below their name.

- If there are no available bookings, a message will advise: No Availability.

- Click on the desired Timeslot button to make a booking for that specific time.
![]()
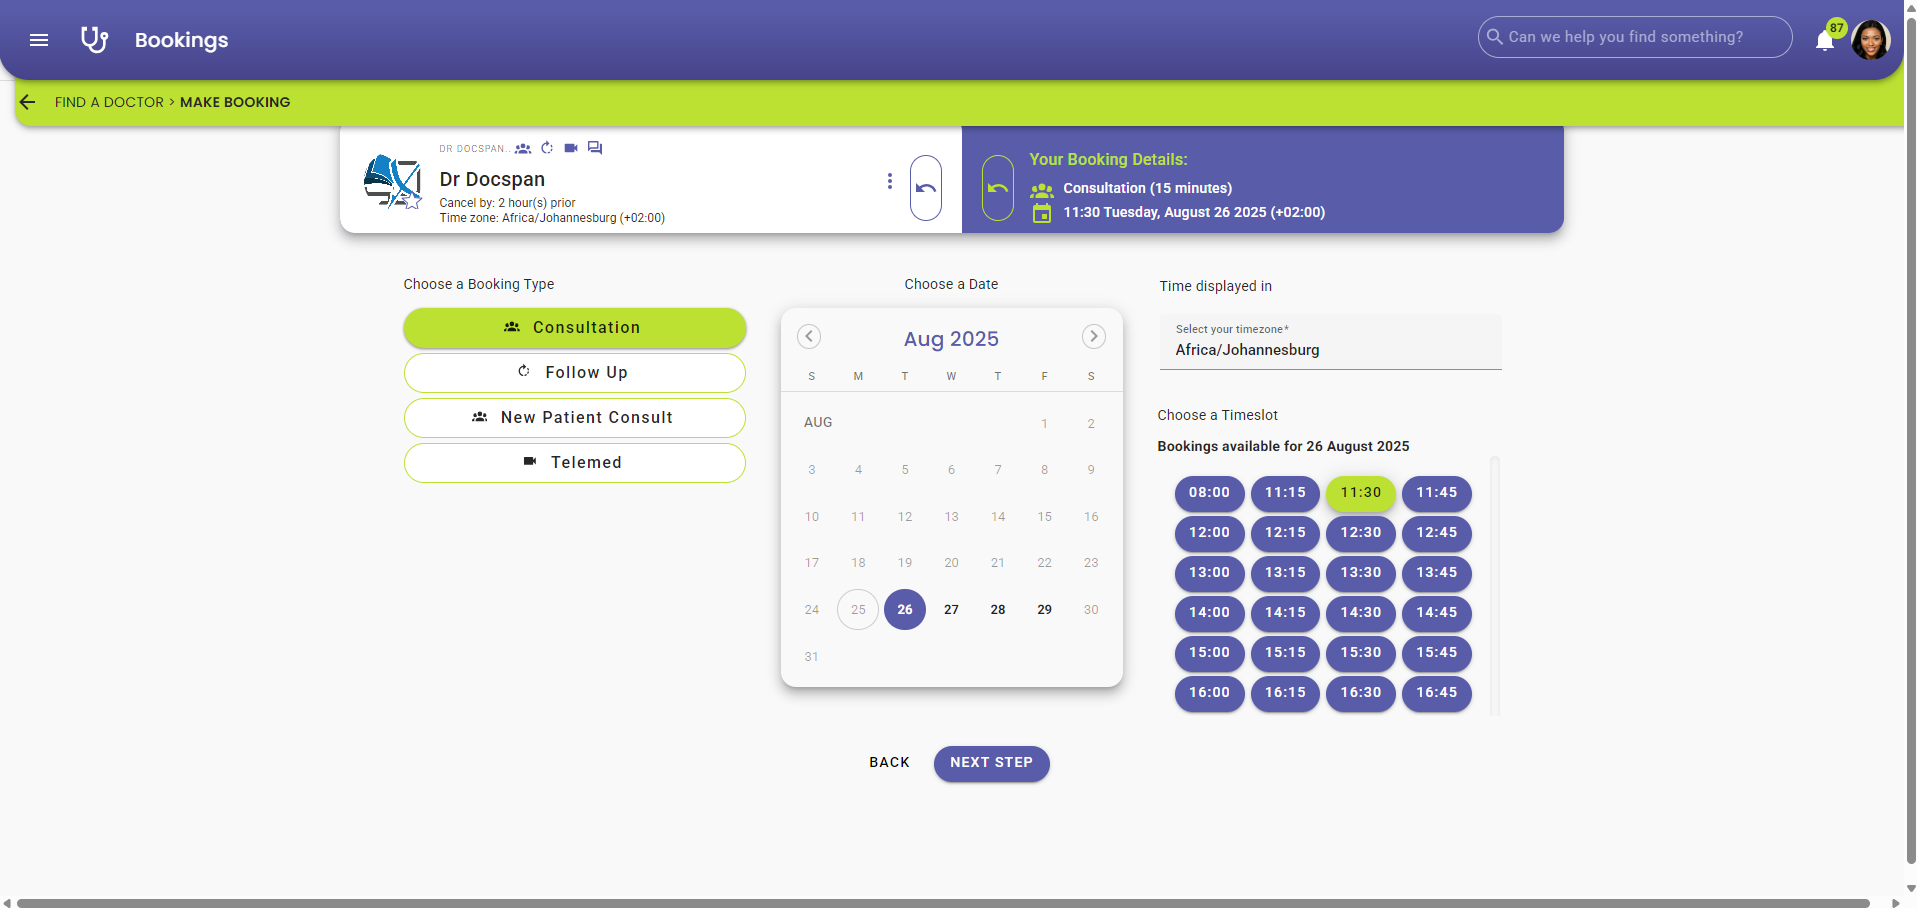
- The Make a Booking screen will open.

- The details of the Practitioner you are making a booking with will display.

- The Your Booking Details section will display the information about the booking you are making.

- Click on the button of the desired Booking Type in the Choose a Booking Type section to select the appropriate option.

💡Please Note: The Booking Types that are listed will correspond to the types of bookings that are available at the Practice.
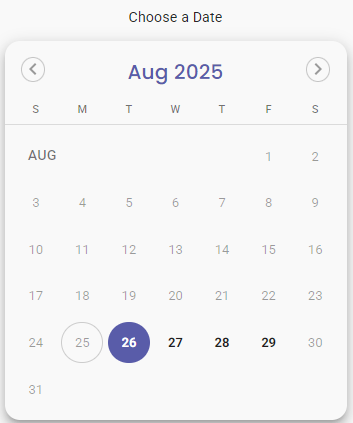
- Click on the desired Date on the calendar to select the day the booking will be made for.

💡Please Note: The Date will be selected by default according to the date of the booking timeslot you chose.
- Click on the Select your Timezone field to change the timezone if the need arises.

💡Please Note: The Practitioner's calendar will update to show the correct time for the booking if the time zone differs.
- Click on the Timeslot button of the desired time to make a selection for that specific time.

💡Please Note: All available times will be listed, and the selected time will be highlighted.
- Click on the Next Step button to continue.
![]()
- The Who is the Patient For This Booking? screen will open.

- Click on the Choose a Patient For This Booking drop-down menu to select the Patient for whom the booking is.
💡Please Note: By default, the Patient who is logged in is selected. If there are other Patients linked to the logged-in user, they will also be listed.
- Click on the Complete Medical Aid button to add the Medical Aid details of the Patient for whom the booking will be.
![]()
💡Please Note: Completing Medical Aid details is not mandatory, but can save you time at the Practice as the information is already completed.
- The Select Medical Aid Details screen will open.

- Click on the Make Booking button to complete the booking.
![]()
- The Feedback screen will appear, where the User is able to rate their experience.

- For an extensive explanation of the Feedback screen and how to rate the experience of making a Booking, please refer to the user manual: myGC Dashboard: Navigating the Feedback Screen.
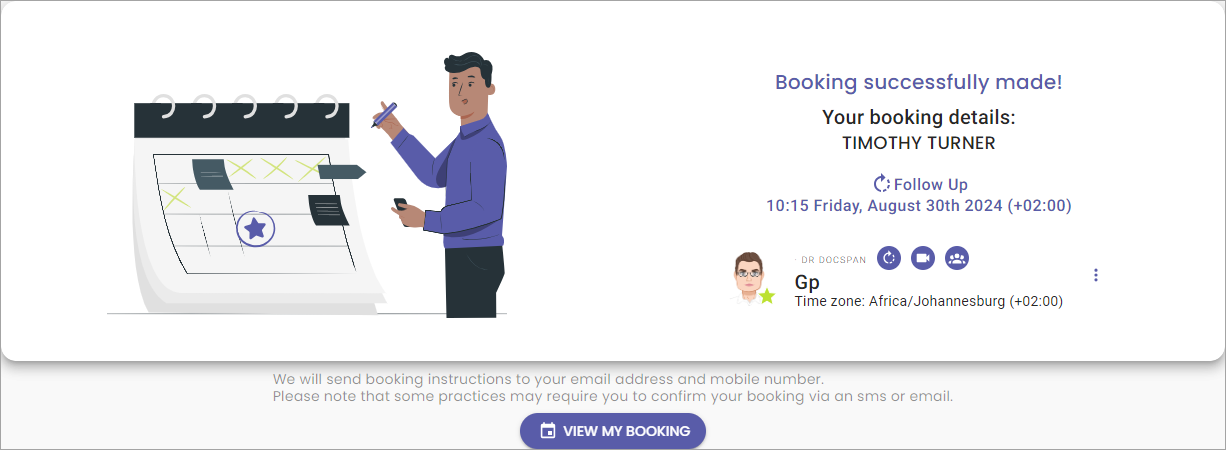
- Once the booking has been made the Your Booking Details screen will open with the detailed summary of the booking that was made.

- Click/Tap on the View My Booking button to see the details of the booking that has just been made.
![]()
- The Booking that was made will display in the Upcoming bookings section on the Bookings tab.

Last modified: Tuesday, 26 August 2025, 11:59 AM