Telehealth (Telemed) for the Practitioner with COVID-19 Pre-screening Questionnaire
The main purpose of the Telemed function (video appointment) is to enable face-to-face communication between the Practitioner and the Patient in different locations. It is a popular alternative to phone calls for Practices
and provides individual Patients with an inexpensive means of consulting/communication with Practitioners.
The setup of the Telemed function must be complete before it can be used.
Summary of the process:
- SETUP TELEMED: Firstly, you need to set up the Telemed function in your GoodXWeb Diary Settings.
- SIGN GOODX ONLINE PAYMENT AGREEMENT: Contact GoodX to complete and sign the GoodX Software Online Payment Agreement if you want to use the online payments.
- SEND INFO TO ALL PATIENTS: Send bulk SMS and email invitations to myGC to communicate that Telemed is now available to patients.
- SEND LINK: Send a myGC link via SMS to the patient for registration.
- BOOKING MADE: The patient registers on myGC and requests a Telemed consultation.
- TELEMED CONSULTATION: On the booked time, start the Telemed consultation with the patient in GoodXWeb.
- SEND INVOICE: Email the invoice to the patient from your GoodXWeb Diary after the Telemed consultation.
- SEND PAYMENT REQUEST: Send an SMS or email payment link to the patient for payment of the account.
- RECEIVE PAYMENT: The payment made by the patient will reflect in your bank account after two business days.
- POST PAYMENT ERA: Payments into your account will be accompanied by an ERA in your GoodXWeb for quick allocation to invoices.
Further User Manuals after Setup:
- Telemed for the Practitioner
- Telemed Booking / Call for the Patient (myGC)
- Telemed pre-screening Questionnaire for the Patient (myGC)
- Step 1: Send out Bulk SMS to Existing Patients of the Doctor:
- The Practice will send out a bulk SMS to all patients with a LINK informing them about the Telemed functionality. If the patient wants to book a Telemed appointment they must click on the link in the SMS.
- The Patient will book an online telemed consultation via the link that was sent out on myGC. A pre-screening questionnaire will also be completed to determine if the patient is low risk or a high-risk patient.
- The appointments will display on the Doctors Diary with a booking icon indicating the risk of the patient. This will be calculated after the Patient completed the pre-screening Questionnaire.

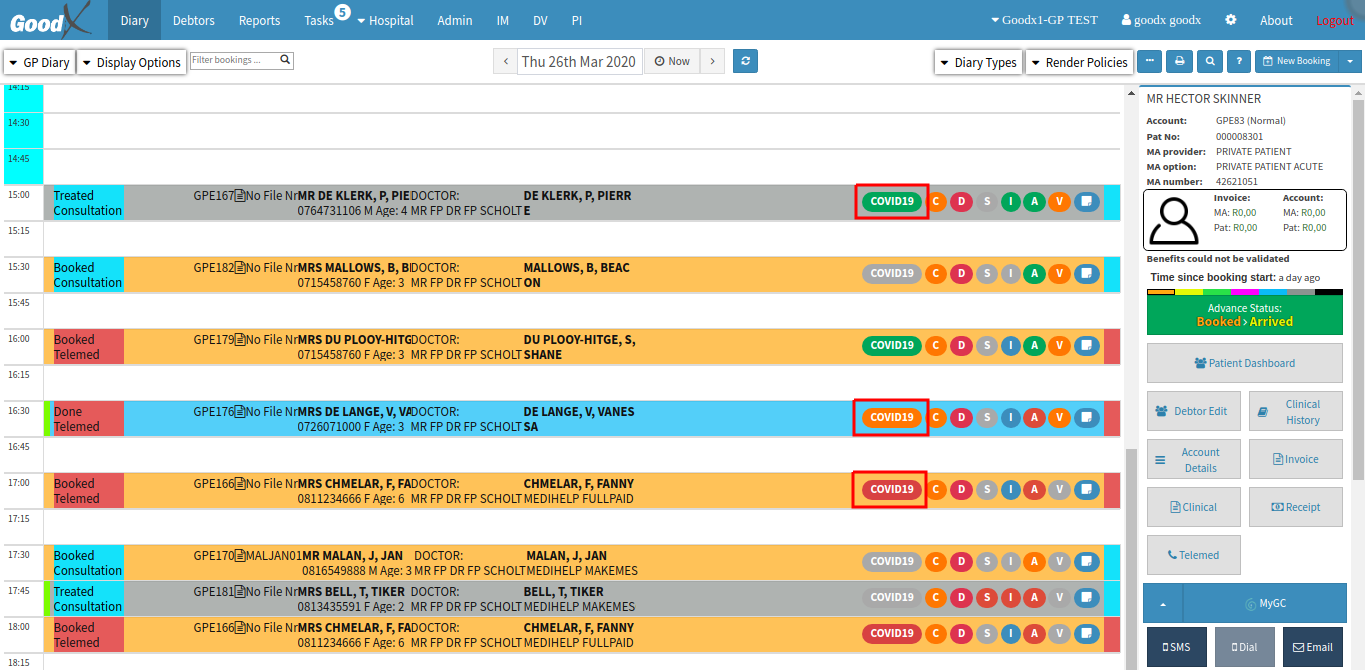
TAKE NOTE: If it's a NEW Patient that has not been to the Practice before the Debtor must FIRST be created on the system after the booking was made.
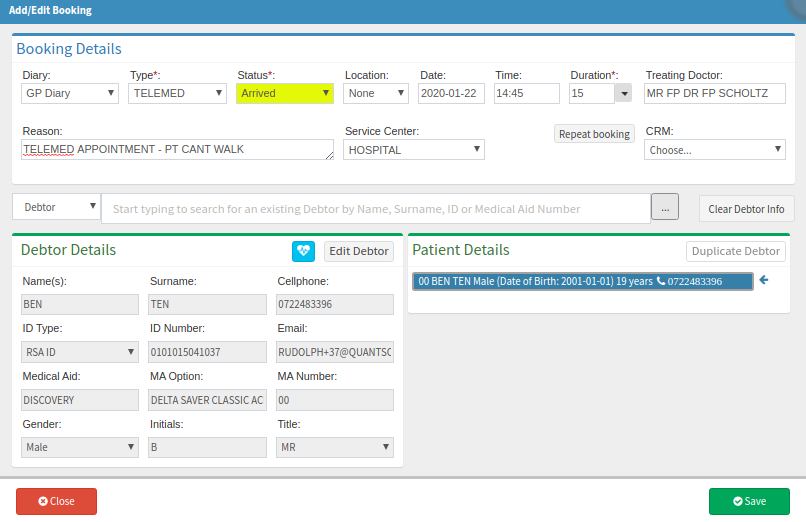
- To book in a telemed appointment, follow the normal booking steps, from the Diary, double click on a timeslot.
- The Add/Edit Booking screen will open, in the "Booking Type" field, select TELEMED as the booking type. Complete the rest of the required (*) details and Save the booking.
Please follow the link Create New Debtor if you are unsure of how to Open a new Debtor.
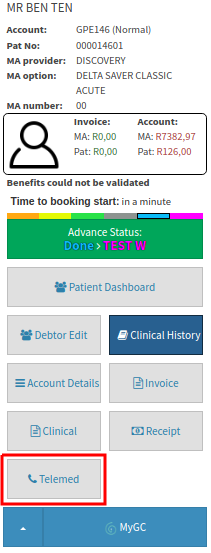
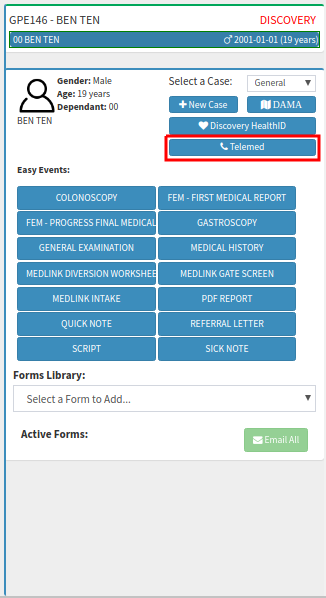
Telemed for the Doctor: From GoodX Web >> On the Telemed booking that was made >> On the sidebar select the Telemed button >> Click on the green telephone button >> Call will Connect
to Patient.
- On the booking time, click on the Telemed button >> from the Sidebar to start the video consult with the Patient.
TAKE NOTE: Make sure your video and microphone are turned ON and 'Allowed' in your browser settings.
- The Patient's telemed will connect.
- The Patient will answer the incoming video call by also clicking on the green telephone button when the call connects on their side.
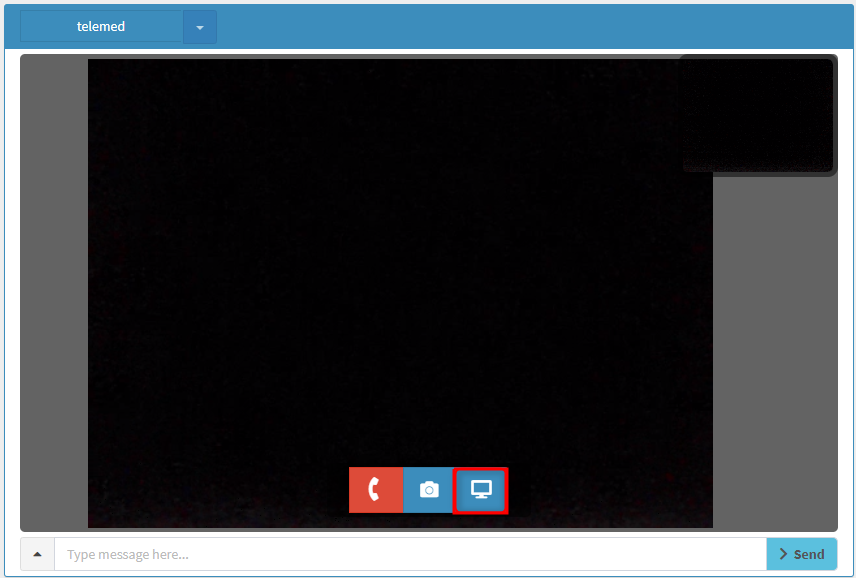
- The Doctor and Patient will now be able to communicate/consult via video as seen below.
- When done with the call, click on the red telephone button to end the call.

SCREEN SHARING: This button was created specifically for Physios to share their screen with their patients to demonstrate specific exercises, but is available to everyone using Telemed.
- Screen sharing has been added to Telemed. This can be done by clicking on the 'Start Screen share' button as soon as the Doctor is connected with another user.
- The Doctor will have the ability to share either the entire screen, a single application, or a single Chrome tab, whichever fits the Doctors needs.
TAKE NOTE: You can also access the Telemed button from the Clinical screen.
- From the Diary Sidebar, >> click on Clinical >> on the Clinical Sidebar the telemed button will be displayed.
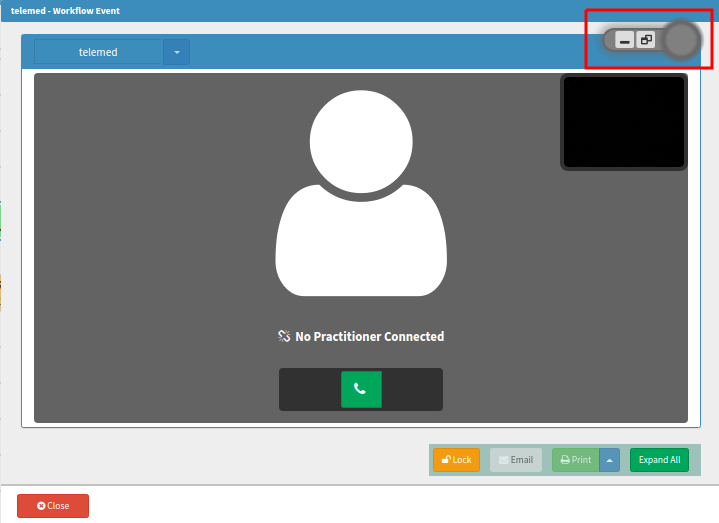
- Grey Floater Icon: IF the Doctor wants to do clinical notes and/or add images he can click on the 'grey circle; in the corner of the screen. This is called a floater. This will enable the Doctor to minimise the video call and access the Clinical screen to do his clinical notes.

- When you click on the floater, it will expand with two options:
- Minimise - this will enable you to minimise the current window and open another screen
- Restore - this will expand your screen to full screen
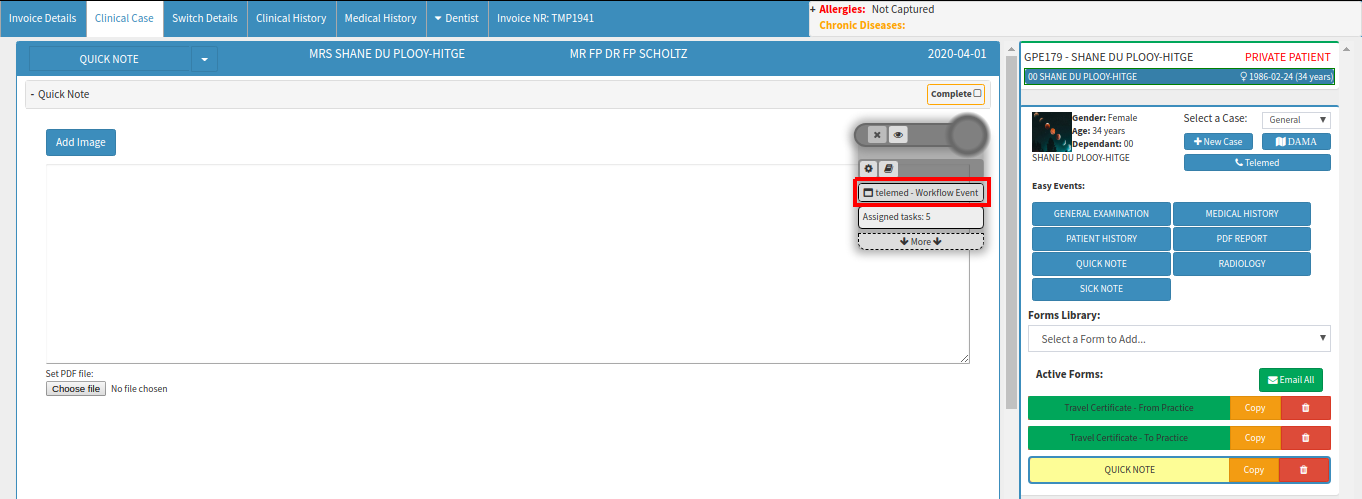
- If you click on the minimise button, you can then open the Clinical screen to access a Quick Note for notes and/or images during the video consultation.
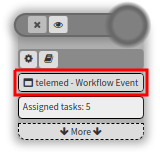
- The floater will still be visible on your screen with a shortcut to the screen you are busy on.
- If you want to access the screen you are busy on, click on the shortcut on the floater, in this case, the Telemed - Workflow Event as seen on the example below.
TAKE NOTE: IF the Doctor wants to do his/her notes after the consultation, the following steps apply.
- When the Doctor is done with the video consult, they can do their Clinical Notes and upload images under the Quick Note Form.
- To upload an image click on the Add Image button.

- Click on the Load from External Upload to select the image that was taken
- Select the image and click on Save

- The image and notes will display under the Note.
- When done, complete the Form and Save and Close

- The booking will automatically change colour when the status triggers to Treated/Done
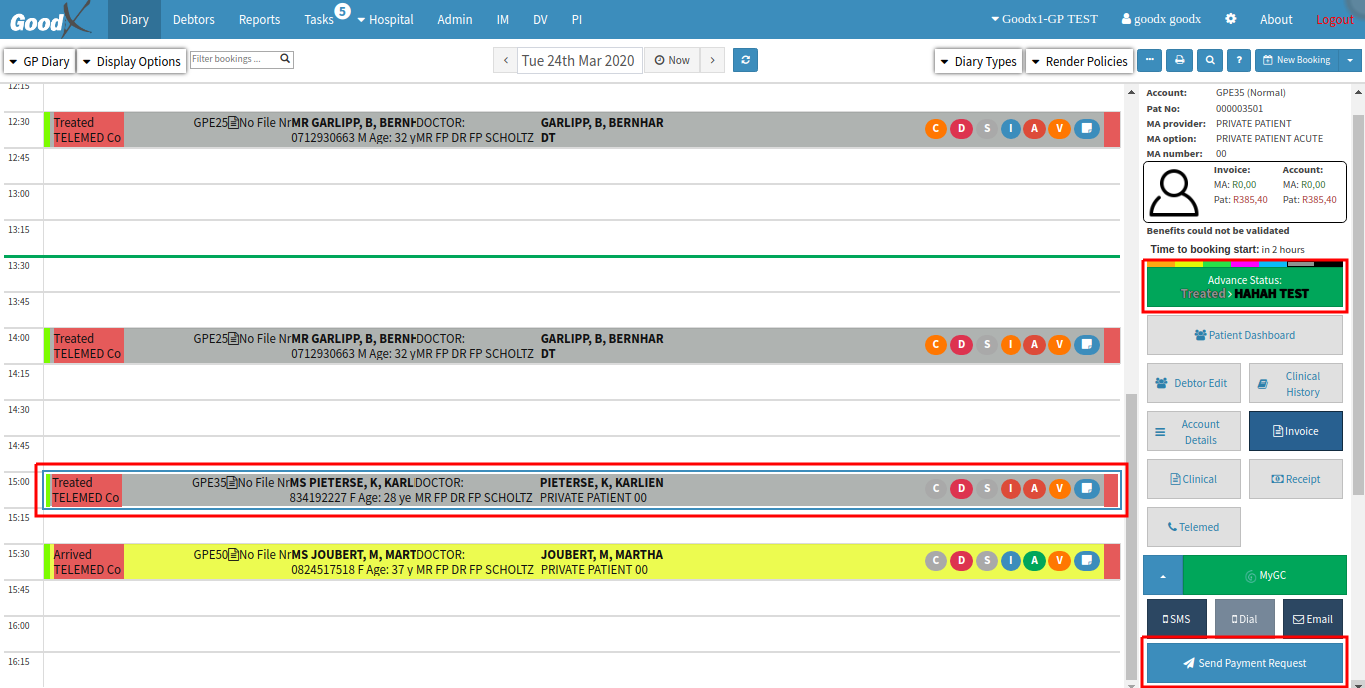
- The Doctor can send an FNB Payment Request for the Invoice billed to the Patient after the video consultation for them to settle the account.
TAKE NOTE: After the patient settled the account via the payment request it will pull through on a Payment Link ERA the next day. The Doctor can then allocate the payment to the patient's account.
![]()
- Payment Request response will pop up. Click on OK to close.

