Account Details: Navigating the Estimate Invoices Tab
Why Use This Function:
The Estimate Invoices tab in the Account Details screen helps the User manage and review all Estimate Invoices linked to a Debtor in one place. It allows for quick access to invoice breakdowns, printing or downloading of selected invoices, and performing bulk actions when needed. This improves workflow efficiency and ensures clear communication with Patients regarding expected costs.
The Contents of This User Manual:
Filter
Columns
Estimate Invoice Options
Selected Estimated Invoices Actions
This user manual will start on the Account Details screen of the desired Debtor.
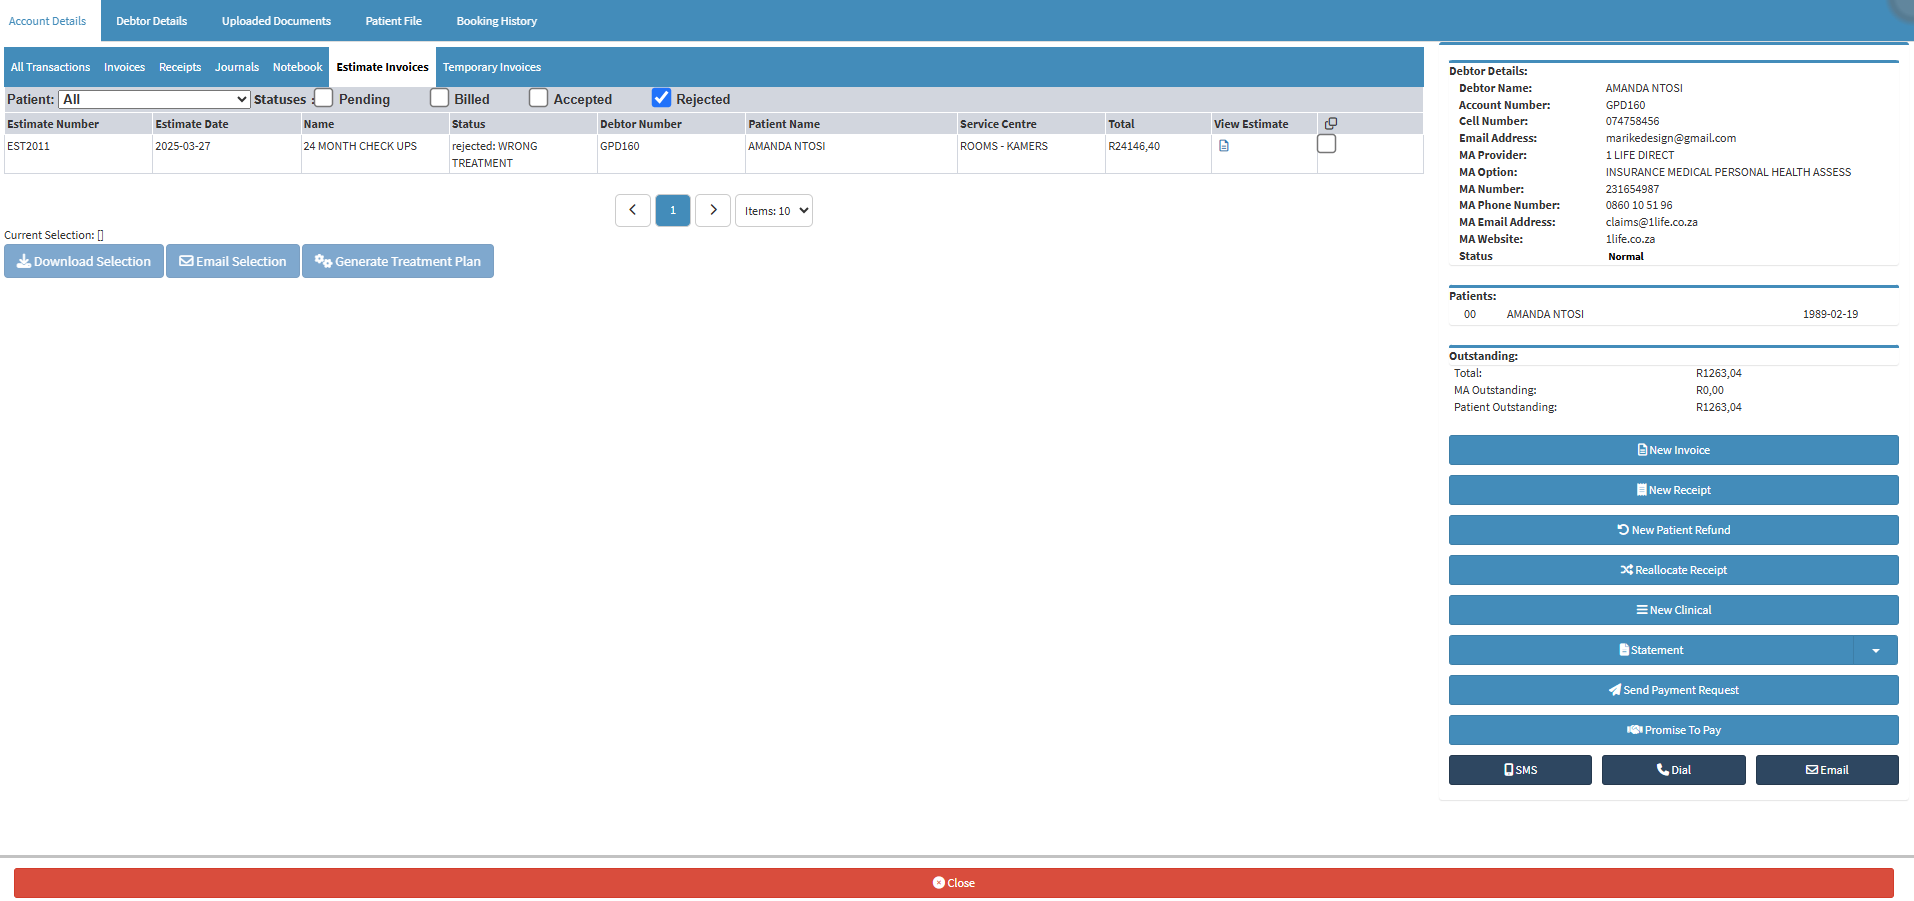
Allows you to narrow down or refine the results displayed on the Estimate Invoices tab.
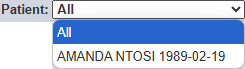
Click on the Patient drop-down menu to filter on all the Patients' Estimated Invoices or a specific Estimated Invoice.
Tick the Pending checkbox to filter on the Estimated Invoices that are still pending.
Tick the Billed checkbox to filter on the Estimated Invoices that have been billed already.
Tick the Accepted checkbox to filter on the Estimated Invoices that have been accepted by the Patient.
Tick the Rejected checkbox to filter on the Estimated Invoices that have been rejected by the Patient.
Columns
All the information on the Estimate Invoice screen is divided into Columns to logically group related information together.
Estimate Number: The uniqueEstimate Number for each Estimated Invoice.
Estimate Date: The Date the Estimate was created.
Name: The Estimate Invoices name given for the Estimated Invoice plan.
Status: Indicates if the Estimate was rejected, accepted, pending or billed.
Debtor Number: The unique number linked to the Debtor.
Patient Name: The Patient name is linked to the Estimated Invoices.
Service Centre: The location where the Estimate Invoice was made.
Total: The total amount of the Estimate Invoice.
View Estimate: The Estimated Invoice can be viewed in more detail on the Invoice Details screen.
Screen Options: If this is checked, options to download, email or generate a treatment plan will become available.
?Please Note: The options in the last section of this user manual will only be available if at least one Estimated Invoice is checked in the screen options column.
Estimate Invoice Options
Double-clicking on an Estimate Invoice provides a more detailed view of the Invoice Lines and additional action options. This allows for a clearer understanding of the estimated charges and gives quick access to useful tools like printing or downloading the invoice.
Double-click on the desired Estimate Invoice for the Actions tab to open, for actions to become available on the selected Estimate Invoice.
Click on the Download Estimate button to download the selected Estimate Invoice.
For more information on how to Download an Estimate, please refer to the user manual: Download an Estimate.
Click on the View/Edit Estimate button to view or edit the selected Estimate Invoice.
Click on the Email Estimates button to email the selected Estimate Invoice.
Click on the Switch Actions button to be redirected to the Switch Details screen.
Click on the Invoice Lines tab.
The Invoice Line Details tab will open
Selected Estimated Invoices Actions
Ticking an Estimate Invoices activates additional options that allow you to email, download, or generate multiple Invoices at once. This speeds up the workflow and reduces the time spent handling each invoice individually.
Click on the Download Selection button to download a detailed report on the selected Estimate Invoices.
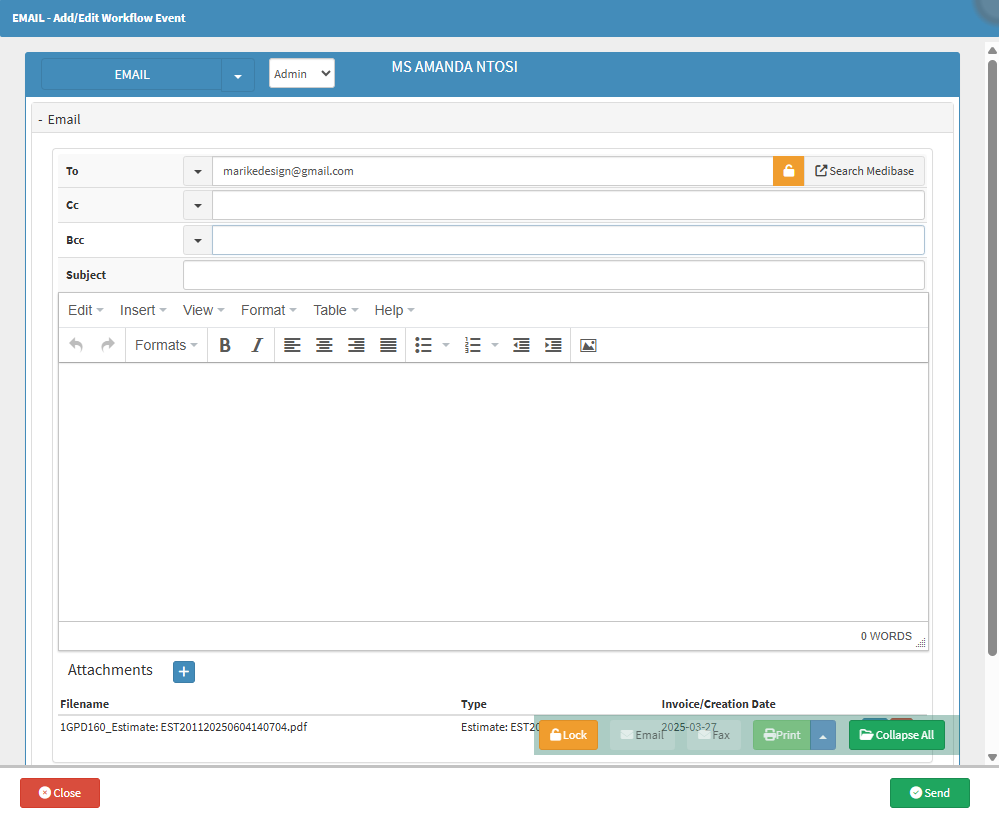
Click on the Email Selection button to email the selected Estimate Invoices.
The Email - Add/Edit Workflow Event screen will open with the selected Estimate Invoices attached.
For more information on the Email screen, please refer to the user manual: Send an Email.
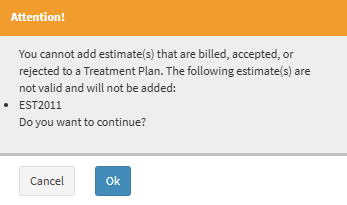
Click on the Generate Treatment Plan button to generate and add estimates.
💡Please Note: If you have selected an Estimate Invoice that has been billed, accepted or rejected, you will receive an Attention! pop-up.
Click on the Ok button.
The Treatment Plan - Add/Edit Workflow screen will open.