Surgery is when a patient goes for an operation. In the system, the practitioner can build a theatre/surgery/operation list with all the patient information who needs to undergo the operation/surgery.
The contents of this user manual will consist of the following information:
Set-up of the Theatre List
Staff types
Risk
Hospital
Instruments
Operation
Set-up of the Theatre View
Booking of Operations
Debtor / Patient Information
Procedure Information
Additional Doctors
ICD-10
Authorization
Operation Notes
Options (On the Operation list)
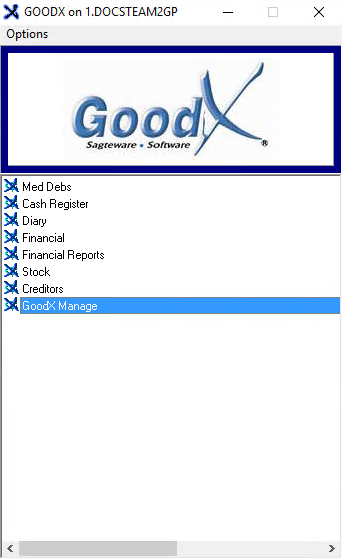
Log in to the GoodX Desktop using your GoodX username and password
From the Navigator Double Click on the GoodX Manager Module.
The GoodX Manager screen will open.
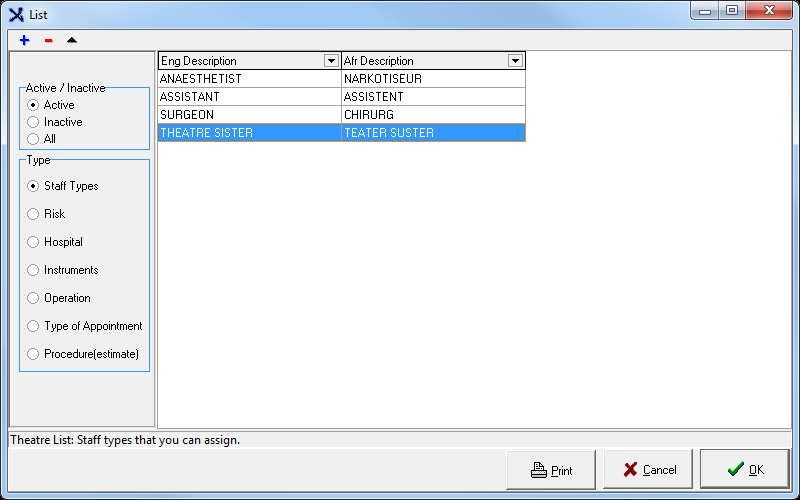
Set-up of the Theatre List
Select Diary from the drop-down Menu under Global lists on the Menu bar.
Click on Diary Lists.
The List screen will open.
Staff types
Click on the Staff Types radio button in the Type section.
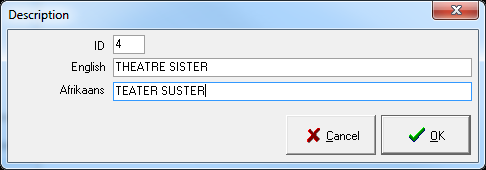
Click on the (+)Add button to add a Staff Type.
Enter the Information in the required fields and Click on the OK button.
The Staff Type is added to the list.
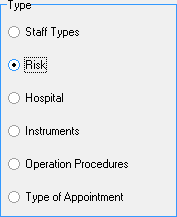
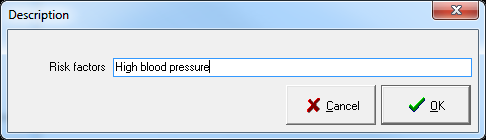
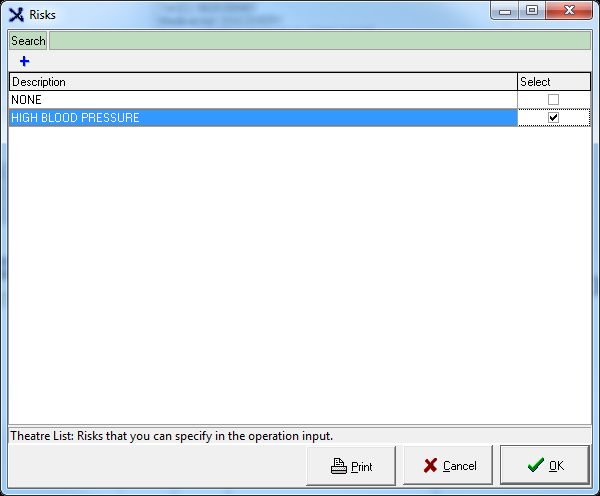
Risk
Click on the Risk radio button in the Type section.
Click on the (+)Add button to add a Risk.
Enter the Risk Factors and Click on the OK button.
The Risk is added to the list.
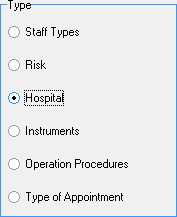
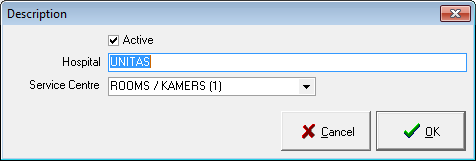
Hospital
These are the names of the Hospitals that are shown on the Theatre List.
Click on the Hospital radio button in the Type section.
Click on the (+)Add button to add a Hospital.
Enter the Name of the Hospital in the field provided and Click on the OK button.
The Hospital is added to the list.
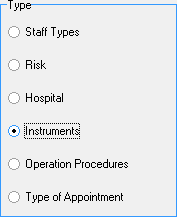
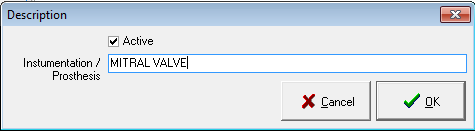
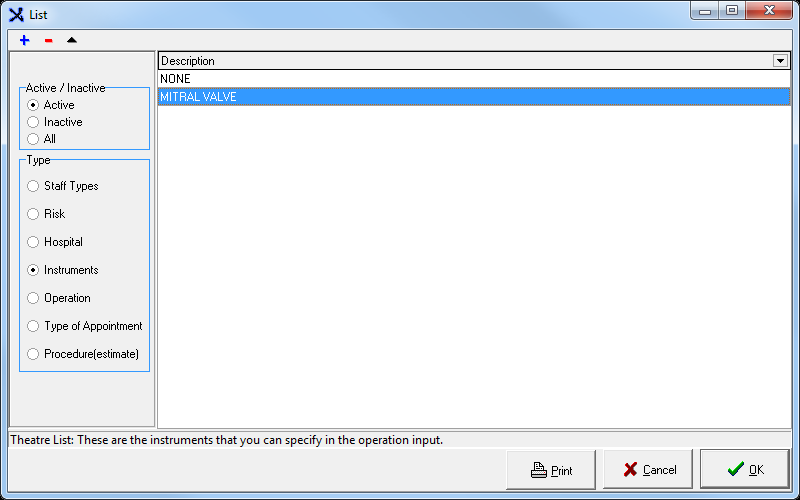
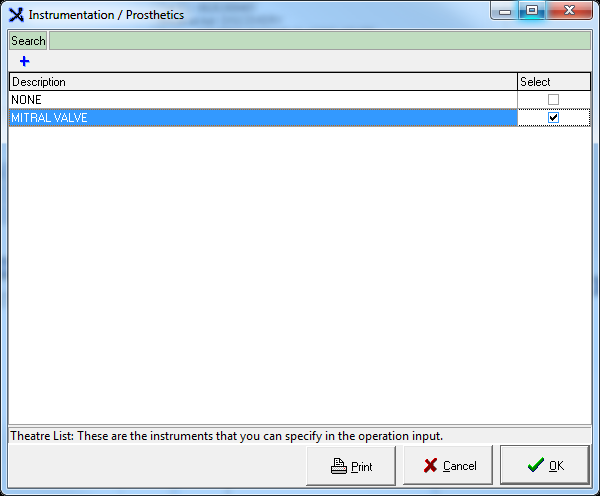
Instruments
You can specify these Instruments in the operation input.
Click on the Instruments radio button in the Type section.
Click on the (+)Add button to add a Instrument.
Enter the Instrumentation / Prosthesis and click on OK.
The Instrument(s) is added to the list.
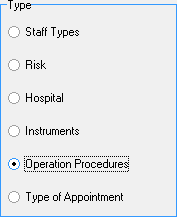
Operation
These are the names of the Procedures shown on the theatre list.
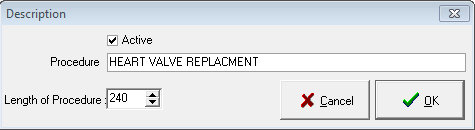
Click on the Operation Procedures radio button in the Type section.
Clickon the(+)Addbutton to add anInstrument.
Enter the name of the Procedure.
Select the Length of the Procedure by clicking on the arrows (the length is displayed in minutes).
The Operation is added to the list.
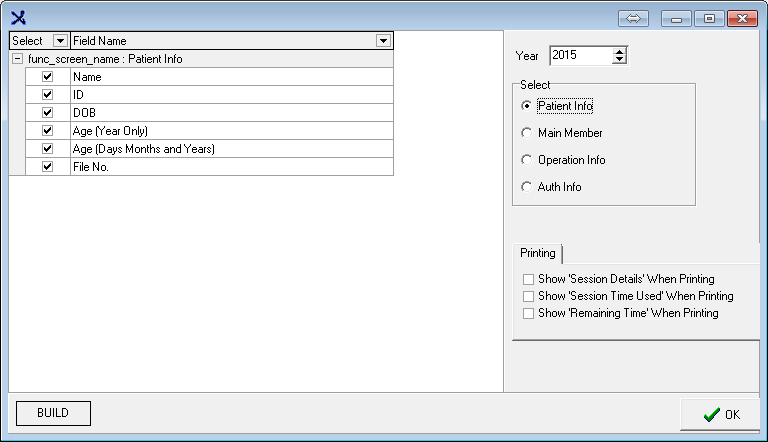
Set-up of the Theatre View
Select Diary from the drop-down Menu under Global lists on the Menu bar.
Click on Theatre View.
Select the current Year.
Select each of the radio buttons and click on Build separately.
Printing tab: Make a selection by marking the tick box.
Click on OK when done.
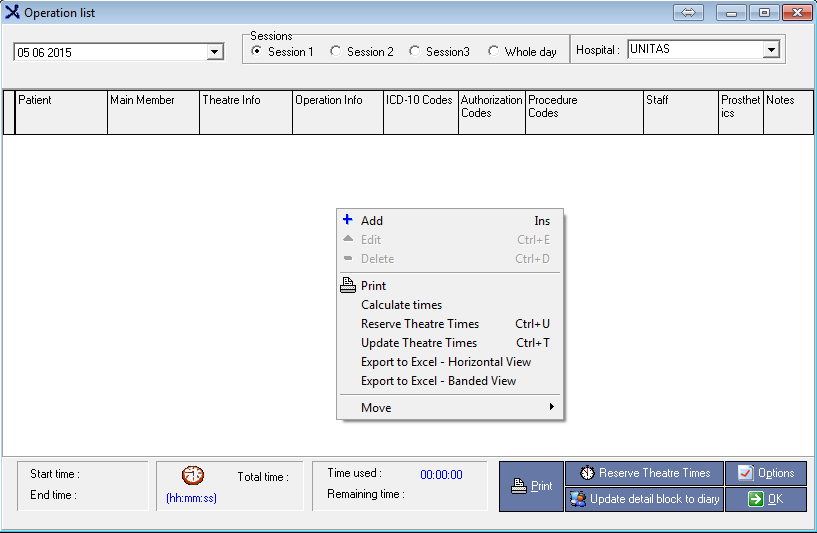
Booking of Operations
In the Diary Module, click on the Surgery Icon.
The Operation list is displayed.
Select the Date from the Calendar by clicking on the drop-down arrow.
Select the Session: This is a certain time frame that can be booked for the doctor per Theatre / Hospital / Time of day.
Select the Hospital from the list by clicking on the drop-down arrow.
Right click on the open field and select + Add.
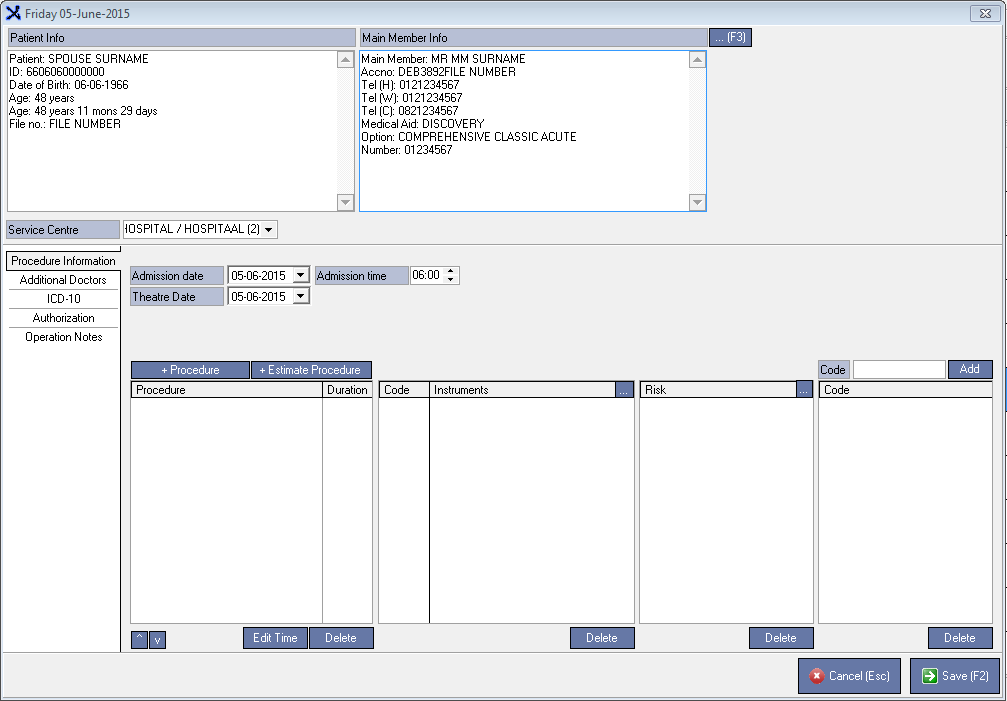
Debtor / Patient Information
Click on ...(F3) or press the shortcut key F3 to add a Patient.
Select the patient from the Debtor list.
Select the Service Centre from the list by clicking on the drop-down arrow.
Procedure Information
Select the Admission date and Time.
Select the Theatre Date.
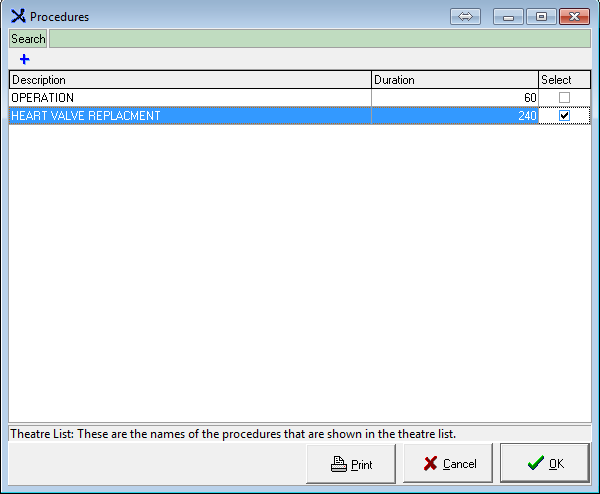
Click on + Procedure.
Select the Procedure from the list.
Click on OK.
The time can be edited by clicking on the Edit Time button and entering the new time.
Another procedure can be added by following the same steps.
Click on Estimate Procedure only if there is an Estimate for the Patient.
Click on the ellipse button next to Instruments.
Select the Instrument from the list and press OK.
Click on the ellipse button next to Risk.
Select the Risk and press OK.
A Code can also be added to the Procedure.
Enter the Code in the field provided and click on Add.
The screen is displayed as follows when finished with above-mentioned steps.
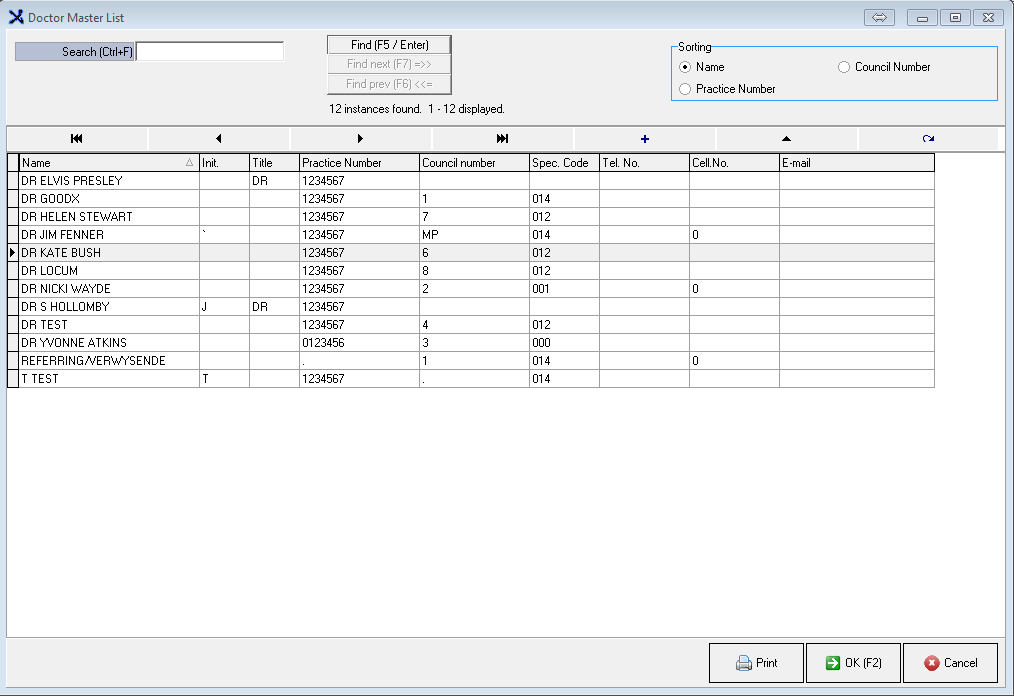
Additional Doctors
Click on the ellipsis (...) button.
Click on the + in the Operation Edit List.
Select the Doctor from the list and click on Exit.
Click on the drop-down arrow next to Role and click on the Role of the selected Doctor.
Add another Doctor by following the same steps.
Click on Done (F2).
When done, the Additional Doctors screen displays as follows.
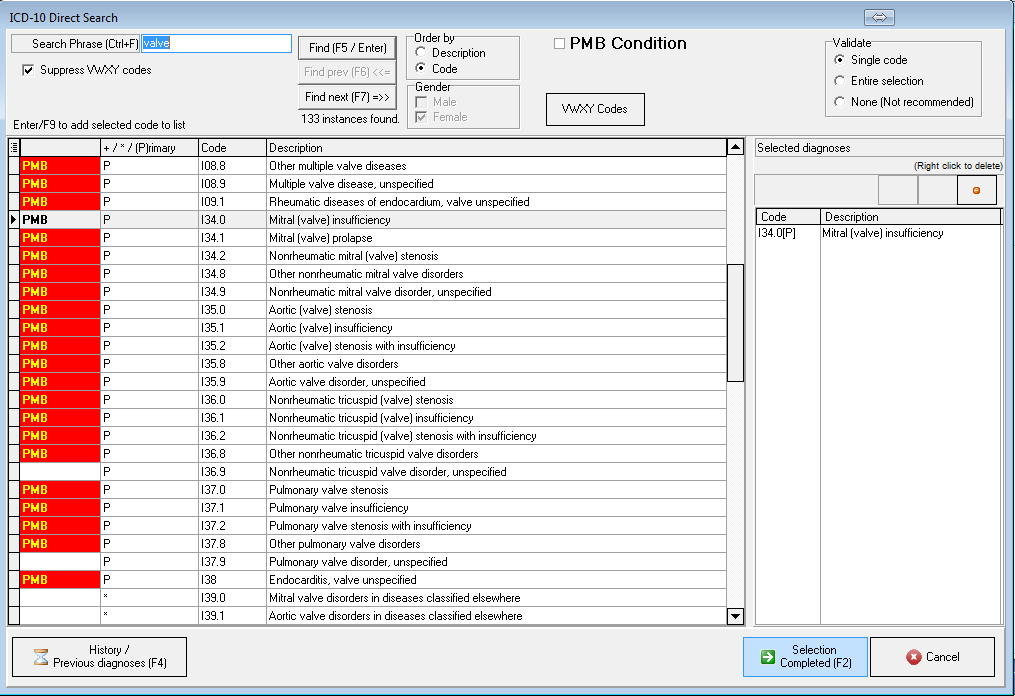
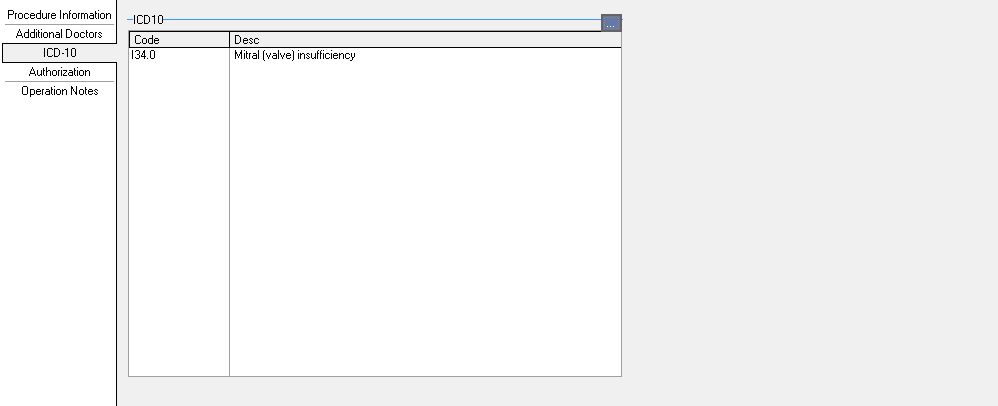
ICD-10
To add a Code to the Procedure, click on the ellipsis button.
Enter the ICD-10 code or the Description.
Press Enter or click on Find (F5 / Enter) to search for the ICD-10 code.
Press Enter to select the code or Double click on the selected code.
The code will be added to the Diagnosis selected window.
Repeat the process for additional, Multiple ICD-10 codes.
If the incorrect code was selected, right click on the code and click on Delete Item.
Click on Selection Complete (F2) or press F2.
Use the Previous diagnosis (F4) button to browse to the previous diagnosis that was used on the same dependant.
The ICD-10 list is based on International Standards. Spelling is important in the search for the correct code.
The ICD-10 code is added to the screen.
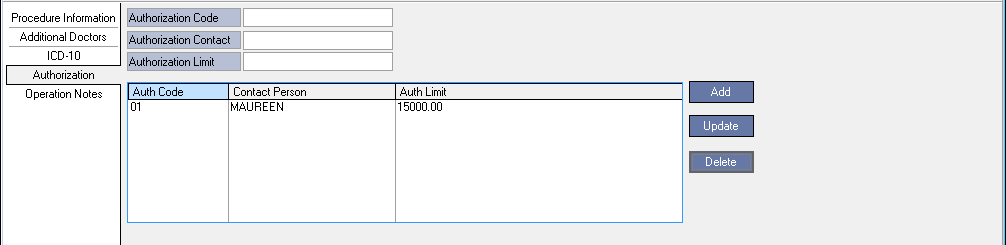
Authorization
Enter an Authorization Code, AuthorizationContact and Authorization Limit.
Click on the Add button.
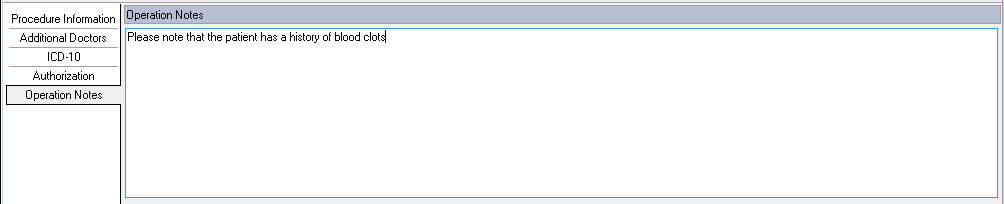
Operation Notes
You can use this screen to add notes for the Doctor regarding the Operation / Procedure.
Enter any relevant Information.
Click on Save (F2) when finished.
Another Patient can be added by following the same steps.
The Operations / Procedure for Session 1 at Unitas Hospital is displayed on the Operation list.
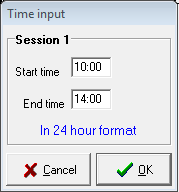
Click on Reserve Theatre Times to book the Theatre booking.
Enter the Start and End times of Session 1 on the Time Input screen.
Click on OK.
The times in the following blocks will be updated.
The StartTime and End Time in this block indicates the Theatre Time reserved for the Doctor.
This block indicates the Total time used for the Theatre.
In this block, the Time used is the actual time used for the Theatre.
It also shows the time Remaining.
Click on Update detail block to diary to book the time slots in the Diary.
Again enter the Start and End times.
Click on OK.
This bar indicates the progress of the update.
When finished, click on OK.
The time slots in the Diary for the Operation day will be updated with the Theatre Info.
You will notice that the extra time slots between the start and end time of a procedure have fallen away.
The next time slot available for the Doctor is 14:00 although the Theatre has been booked until 14:00.
The Heart icon in the Appointment status column indicates that this time slot has been booked for Theatre.
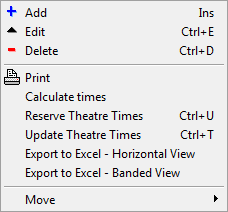
Options (On the Operation list)
Add (Ins) : Add a patient.
Edit (Ctrl+E) : Edit the Procedure.
Delete (Ctrl+D): Delete the Procedure from the list.
Print: Print the Operation list.
Calculate times: Calculate the total time of the Procedures.
Reserve Theatre times (Ctrl+U): Reserve the Procedure times to the theatre.
Update Theatre Times (Ctrl+T): Update the times of the theatre.
Export to Excel - Horizontal View: Export the Operation List to Excel in Horizontal view.
Export to Excel - Banded View: Export the Operation List to Excel in the Banded view.
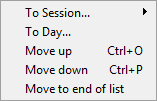
Move:
To Session: Move a Procedure to another session.
To Day: Move a Procedure to another day.
Move up (Ctrl+O): Move a Procedure up the Operation list.
Move down (Ctrl+P): Move a Procedure down the Operation list.
Move to the end of the list: Move a Procedure to the end of the Operation list.