Clinical Procedure Settings allow you to set up and maintain Clinical Procedure Macros that are used specifically for Procedures. These Macros streamline billing and ensure consistency by allowing Practitioners to select standard configurations for Procedures rather than manually entering each item every time.
Clinical Procedure Macros can also include option levels to reflect variations in materials, medicines, or quantities used during a Procedure, making it easy to adapt to different clinical scenarios. By using these settings, Practitioners save time, reduce errors, and maintain a consistent, high-quality approach to both clinical care and billing.
The Contents of This User Manual:
Add New Procedure
This user manual will start on the Settings screen, User Settings tab.
For more information regarding the Billing Settings tab, please refer to the user manual: Billing Settings.
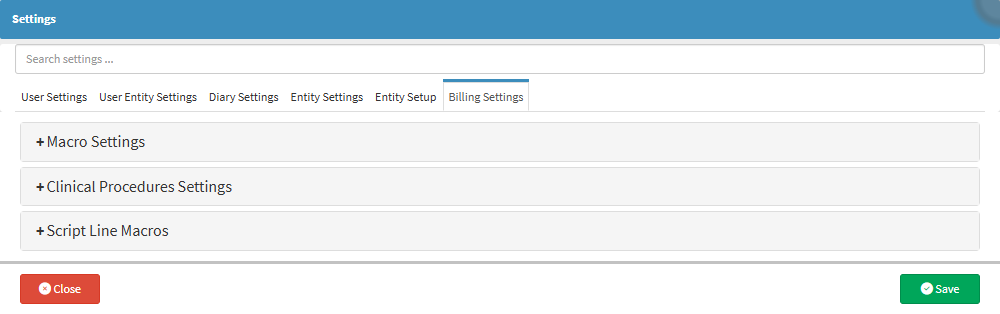
Click on the Clinical Procedures Settings panel.
The Clinical Procedures Settings panel will expand.
Add New Procedure
This button allows you to manually create a Macro according to the standards or preferences of the Practice or the Practitioners.
Click on the + Add New Procedure button.
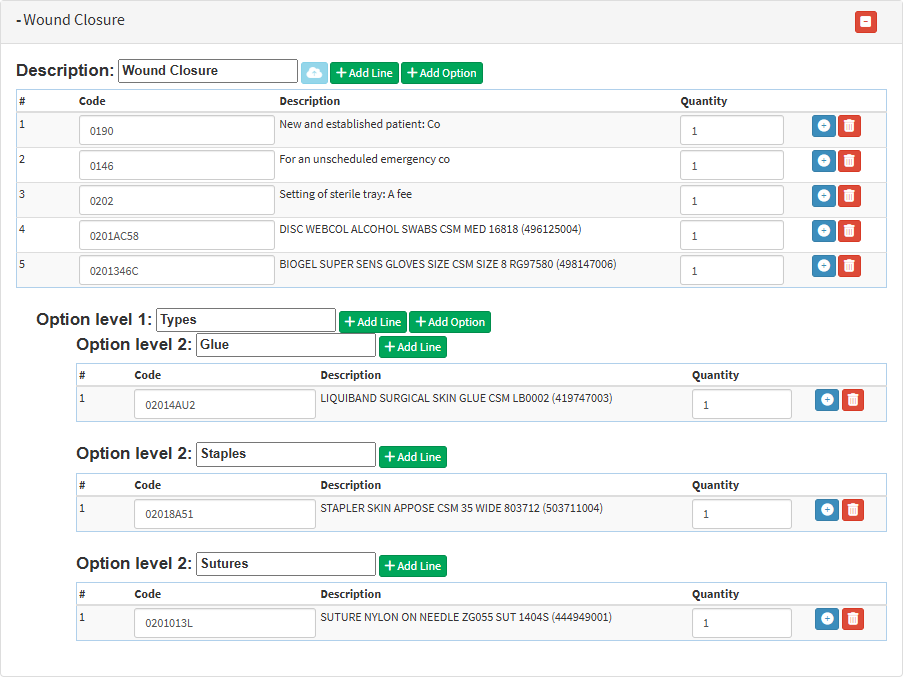
A new procedure No Description panel,will now be available.
Click on the newly created No Description panel to create your Macro.
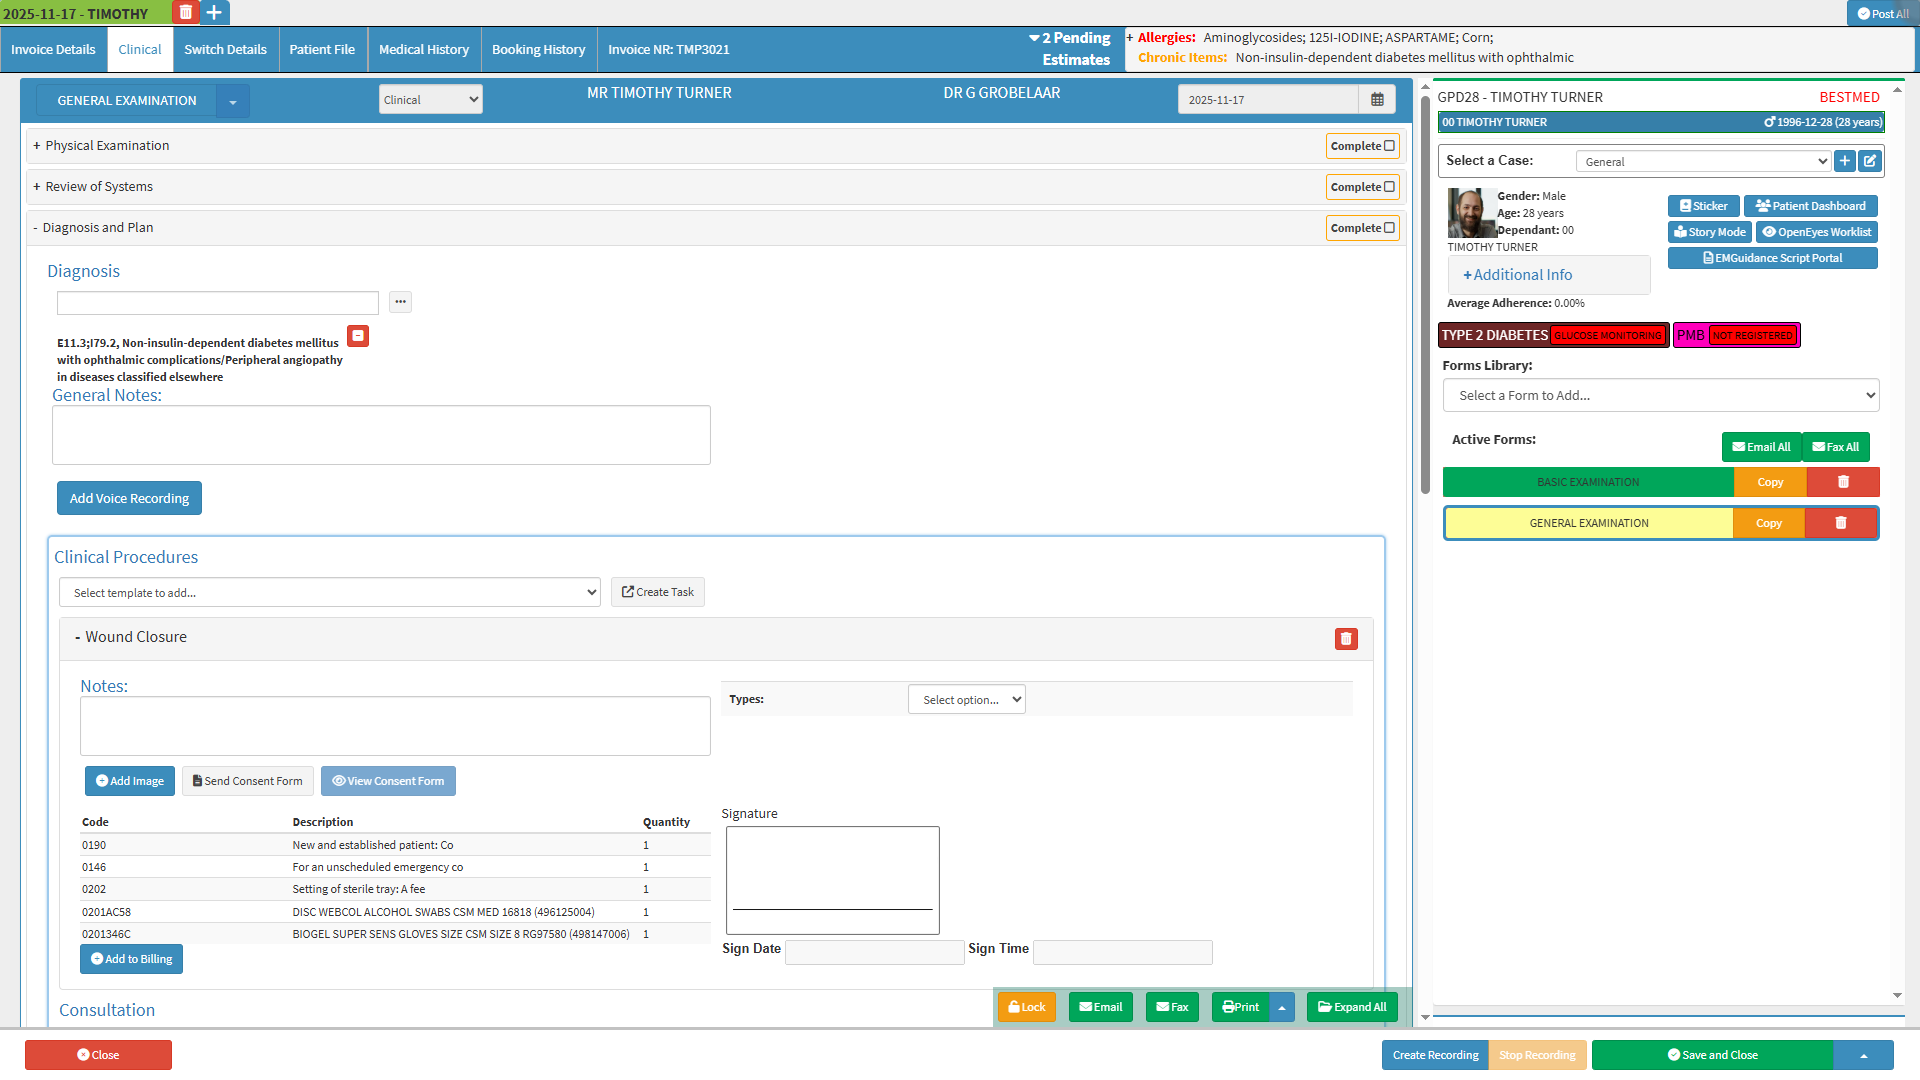
For the purposes of this user manual, a Wound Closure Macro has been created as an example.
An explanation will be given for all the options available in this panel:
Description: The description will be the name of the Macro, for example, Wound Closure.This is the unique code that will be used when billing the macro. The Practitioner can set any shortcut code here to make it easy to bill the Macro. For example, for a Wound Closure, the code can be WCL or WOCL.
Share: Uploads or saves the Macro settings to the server for the purpose of sharing the Macro with other GoodX Web Partners.
Add Line: This will add a new line to the base code that will be used in the Macro.
Add Option:You can add additional types by adding more options. Each option includes its own set of codes that are specific to that option.
Hash (#): Displays the line number for easy reference.
Code: These are the base billing codes for the Macro.
Description: Explains the item, service, or consumable linked to the code.
Quantity: Specifies the number of units of the item that will be added to the billing line by default.
Add Line: This will add a new line to the base code.
Remove Line: This will remove the selected Invoice line.
Option Levels: Allows for the detailed tailoring of Macros to suit the Practitioner's needs, creating additional variations of the same procedure.
An Explanation will be given for the options available:
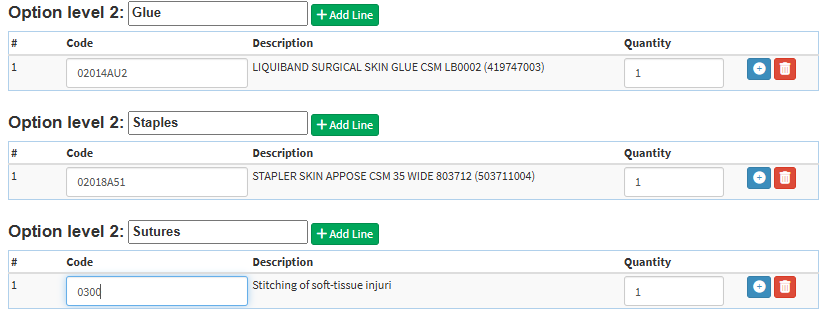
Option level 1: Creates a classification layer for selectable options within the Macro, where slightly different variations of the same procedure can be selected.
Option level 2: Creates additional, more detailed selectable sub-options for the Macro, for example, Glue, Staples, or Sutures.
Hash (#): Displays the line number for easy reference.
Code: These are the billing codes that will apply to a specific type of wound closure procedure.
Description: Explains the item, service, or consumable linked to the code.
Quantity: Specifies the number of units of the item that will be added to the billing line by default.
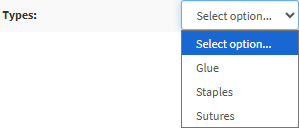
💡Please Note:Option Level 1 will create a drop-down menu within the Wound Closure Macro on the Clinical Procedure Form titled Types, where Option Level 2 will be displayed as options within the drop-down menu.
Click on the Savebutton to finalise any changes.
The new Clinical Procedure will now be available for use.