User Setup
Setting up a User within the GoodX Web enables the Practice to tailor the system precisely to the unique requirements of each individual User, taking into account their specific role within the Practice. By configuring the software to the specific needs of the User, the Practice can grant access to relevant features, tools, and information which is essential for the User's role. User Setup allows for the management of specific permissions and restrictions to ensure data security. By assigning permissions based on User Roles, the Practice can maintain POPIA compliance, reducing the risk of unauthorised access or data breaches.
Every User will have their own unique login details associated with their profile on GoodX Web. These login credentials are used to gain access to the system and authenticate the User's identity. The Practice sets up individual Users to facilitate the audit trail process, as every action or transaction performed by a User is linked to their specific username.
Please Note: Users will be created and set up by GoodX when the installation is done according to the Practice Analysis.
- The contents of this user manual will consist of the following information:
- User Information
- Edit User
- User Details
- Privileges
- Duplicate Privileges
- Builtin Privilege Groups
- Privileges List
- Disable User
- Enable User
- Add New User
- Privilege Groups
- User Entity Privilege Links
- This user manual will start on the Diary screen.

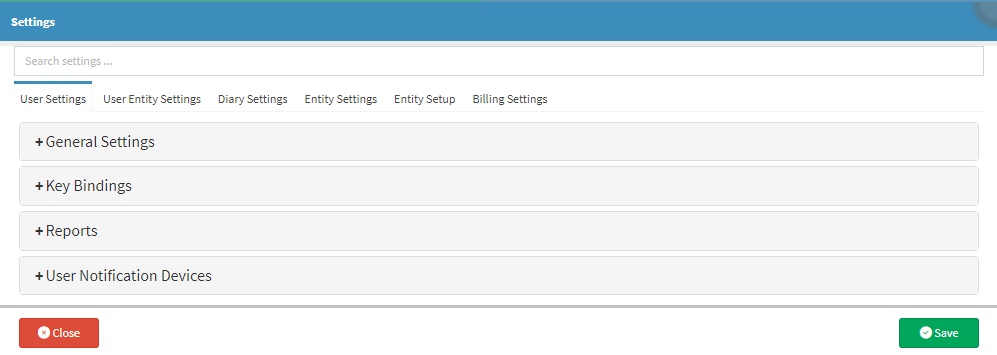
- Click on the Settings button in the top right corner.

- The Settings screen will open.
- Click on the Entity Setup tab.
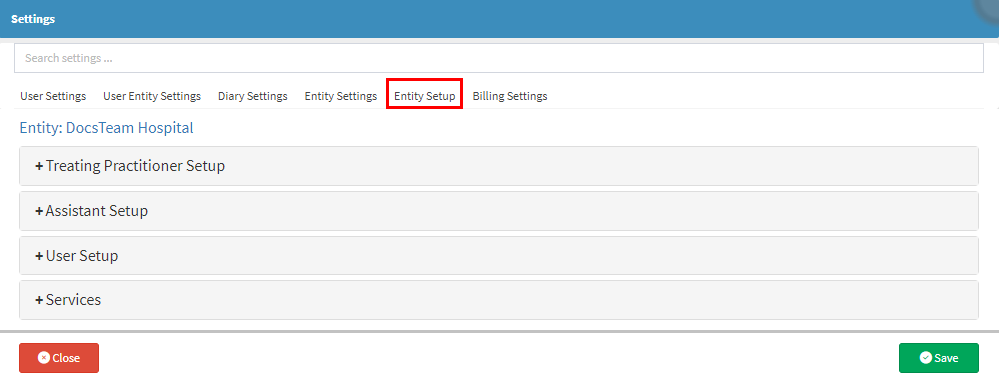
- Click on the User Setup panel.

- The User Setup panel will expand.
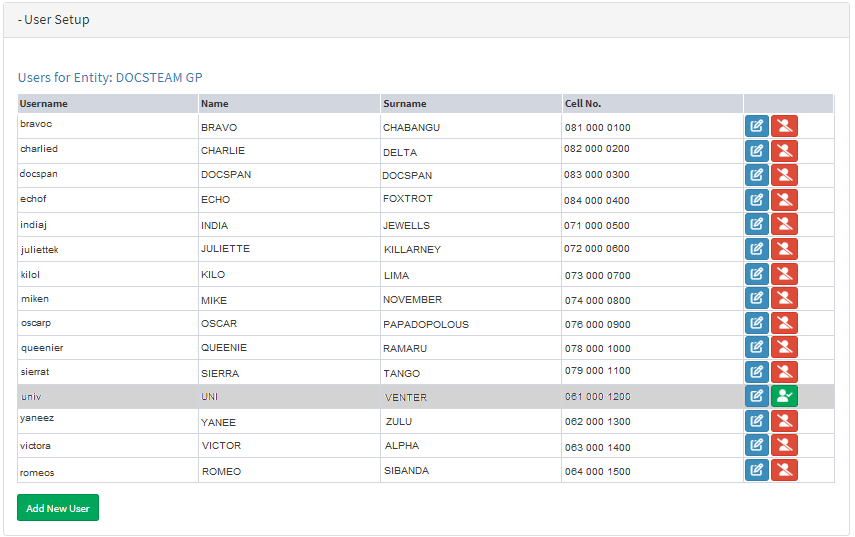
User Information
Details associated with the User profile on the GoodX system.
- The information which appears on the User Setup panel will be divided into columns.
![]()
- An explanation will be given for each column:
- Username: A unique identifier which is assigned to a User. Used in conjunction with a password or other authentication credentials to verify the User's identity and grant the User access to their profile on the GoodX system.
- Name: The First Name associated with the User which is linked to the Username.
- Surname: The Last Name of the User to whom the profile belongs.
- Cell No: A Mobile Number belonging to the User, where they can be reached by.
Edit User
Allows you to make changes to a User which has been set up.
- Click on the Edit button corresponding to the User, to which you would like to apply changes.
![]()
- The Add/Edit New User screen will open, for the User who needs changes made.
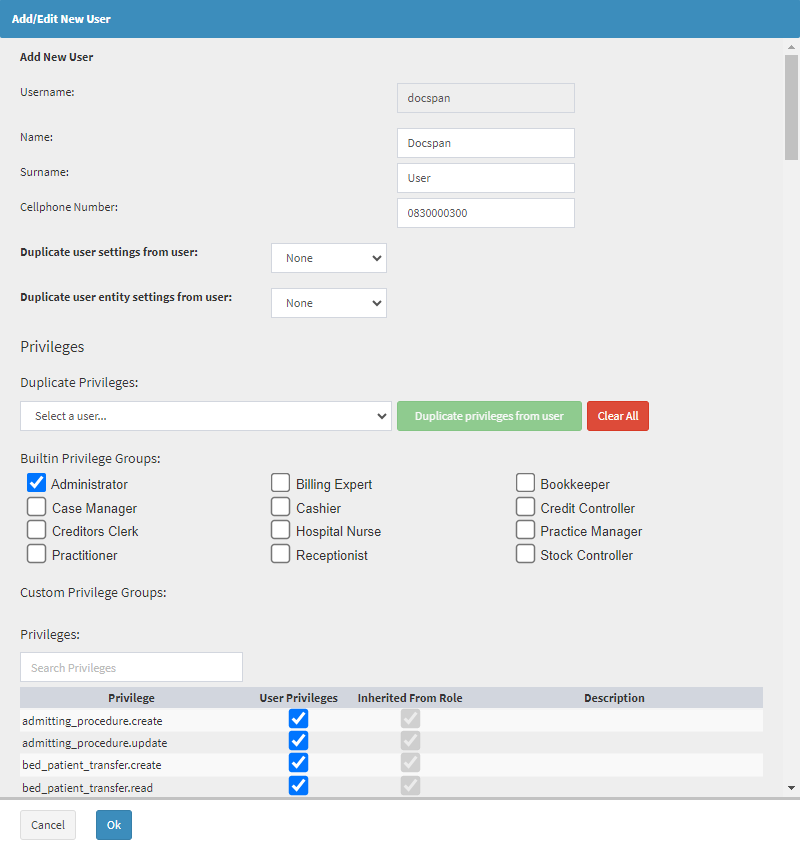
- An explanation will be given for each field and option on the Add/Edit New User screen:
User Details
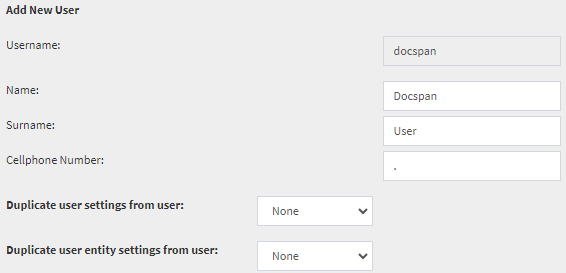
- An explanation will be given for each field in the User Details section:
- Username: A unique identifier which is assigned to a User. Used in conjunction with a password or other authentication credentials to verify the User's identity and grant the User access to their profile on the GoodX system.
- Name: The First Name associated with the User which is linked to the Username.
![]()
- Surname: The Last Name of the User to whom the profile belongs.
![]()
- Cellphone Number: A Mobile Number belonging to the User, where they can be reached.
- Click on the
Duplicate User Settings From User drop-down menu to select a User that has already been set up, to copy the User Settings from their profile.
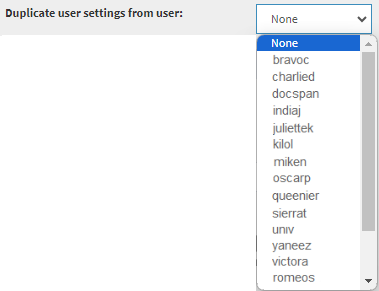
Please Note: All User Settings are duplicated from the desired User's profile, in order to have the same exact Settings applied to the User. Duplicating User Settings allow for the streamlining of the onboarding process and maintains consistency so that all Users with the same roles have access to the same features.
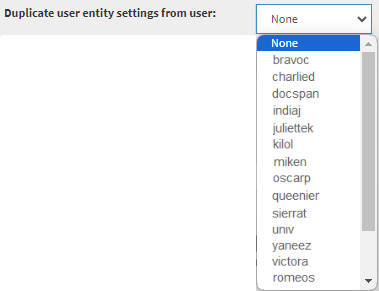
-
Click on the Duplicate User Entity Settings From User drop-down menu to select a User you want to copy the User Entity Settings over from, so that the current User has the same settings.
Privileges
Permissions or rights granted to a User within the GoodX system. These Privileges determine what actions a User can perform, what resources can be accessed, and what areas of the system can be used.
Please Note: Each role in the Practice will have different access, depending on their responsibilities. For more information regarding different roles in the Practice, please refer to the chapter in the Best Practice Guidelines: Healthcare Practice Management & POPIA Compliance Framework: Web App Roles & User Access.

Duplicate Privileges

- Click on the Select a User... drop-down menu to select a User, whose Privileges will be duplicated to the current User.
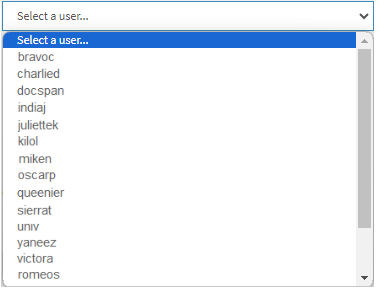
- Click on the Duplicate Privileges from User button to copy all the Privileges from the selected User. The User will now have exactly the same Privileges as the User from which the Privileges were duplicated.
![]()
- Click on the Clear All button to remove any previously added Privileges.
Please Note: Take caution when clearing all the Privileges as this action cannot be undone.
Builtin Privilege Groups

- Tick the Checkbox corresponding to the User type that best suits the User you are editing, to select the Builtin Privileges for the User.
Please Note: Once a Builtin Privilege Group has been selected, all the relevant Privileges will be suggested in the Inherited From Role column. These Privilege Groups have been carefully researched and the Privileges have been set to suit the role of the User the best. Selections can be made as you see fit. More than one Builtin Privilege Group can be selected for a User who fulfils more than one role in the Practice.
Custom Privilege Groups
If you create a Custom Privilege Group, you are able to select the Privilege Groups in this section.![]()
Please Note: The section will be blank until a new Custom Privilege is created. For more information please refer to the user manual: How to Create a New Custom Privilege Group.
Privileges List
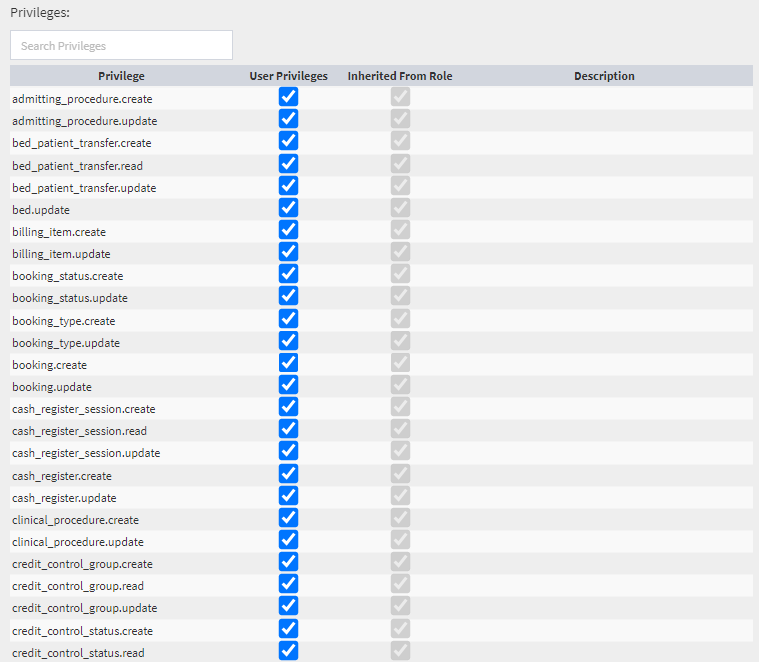
- Click on the Seach Privileges field to search for a specific Privilege that you would like to select.
![]()
Please Note: The list will shorten as you type. The more information you enter into the Seach Privileges field, the closer the results will be to the option that you are searching for.
- Tick the checkbox of the desired User Privilege which the User will have.
![]()
- Untick the checkbox to remove the Privilege from the User.
![]()
- For a detailed explanation of each User Privilege, please refer to the user manual: User Privileges.
Please Note: If Builtin Privilege Groups are selected, their indications will help you to make the relevant selections, that best suit the User.
- Click on the Ok button to save the changes, which has been made, the Add/Edit New User screen will close and return to the Settings screen.
![]()
Disable User
Allows you to revoke a User's access and permissions temporarily. When a User is Disabled, their account remains in the system, but they can no longer log in, access resources, or perform any actions associated with their account.- Click on the Disable User button.
- The user will now be Disabled and their name will be greyed out.
Enable User
Allows you to restore a previously disabled User's access and permissions and regain their ability to log in, access resources, and perform actions as they did before their account was disabled.- Click on the Enable User button.
- The user will now be Enabled once again.
Add New User
Allows you to create a new User profile.
- Click on the Add New User button to add a New User profile to the system.
![]()
- The Add/Edit New User screen will open.
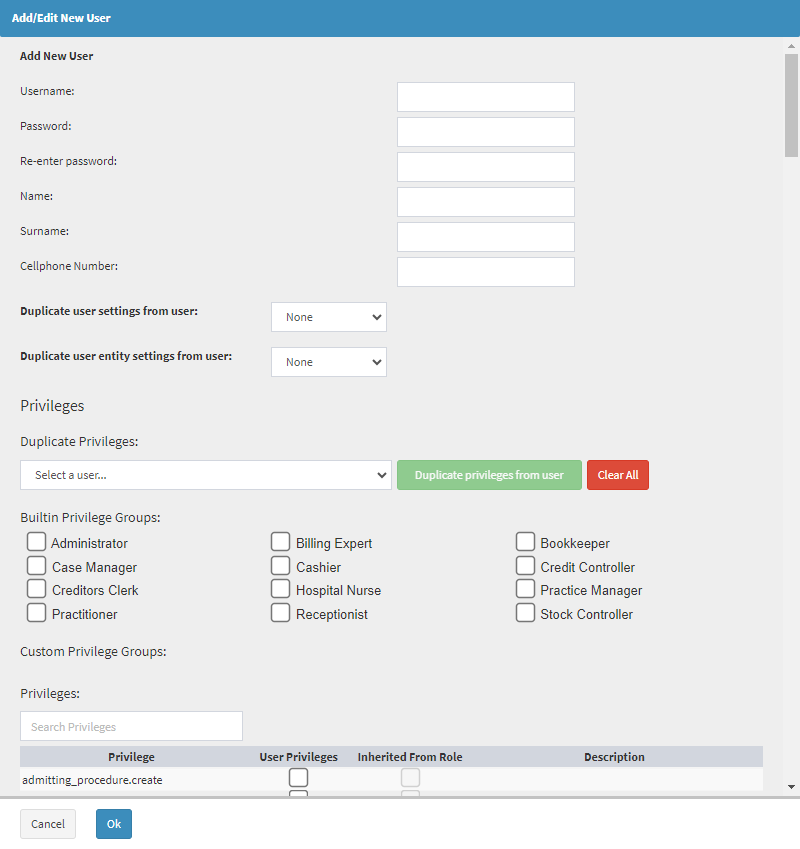
- An explanation will be given for each field and option on the Add/Edit New User screen:
- Click on the Username field to enter the relevant information.
![]()
- Click on the Password field to input a Password.
![]()
- Click on the Re-enter Password field to input the Password exactly as the initial entry.
![]()
- Click on the Name field to enter the Name of the New User.
![]()
- Click on the Surname field to enter the Surname of the New User.
![]()
- Click on the Cellphone Number field to enter the Mobile Number of the New User.
![]()
- Click on the Ok button to save the changes, which have been made.
![]()
- The New User will be added to the list of Users.
Privilege Groups
The Privilege Group List allows you to view and manage Custom Privilege Groups that have been set up for your Practice.
- Click on the Privilege Groups button to access Custom Privilege Groups.
![]()
- The Privilege Group List screen will open.
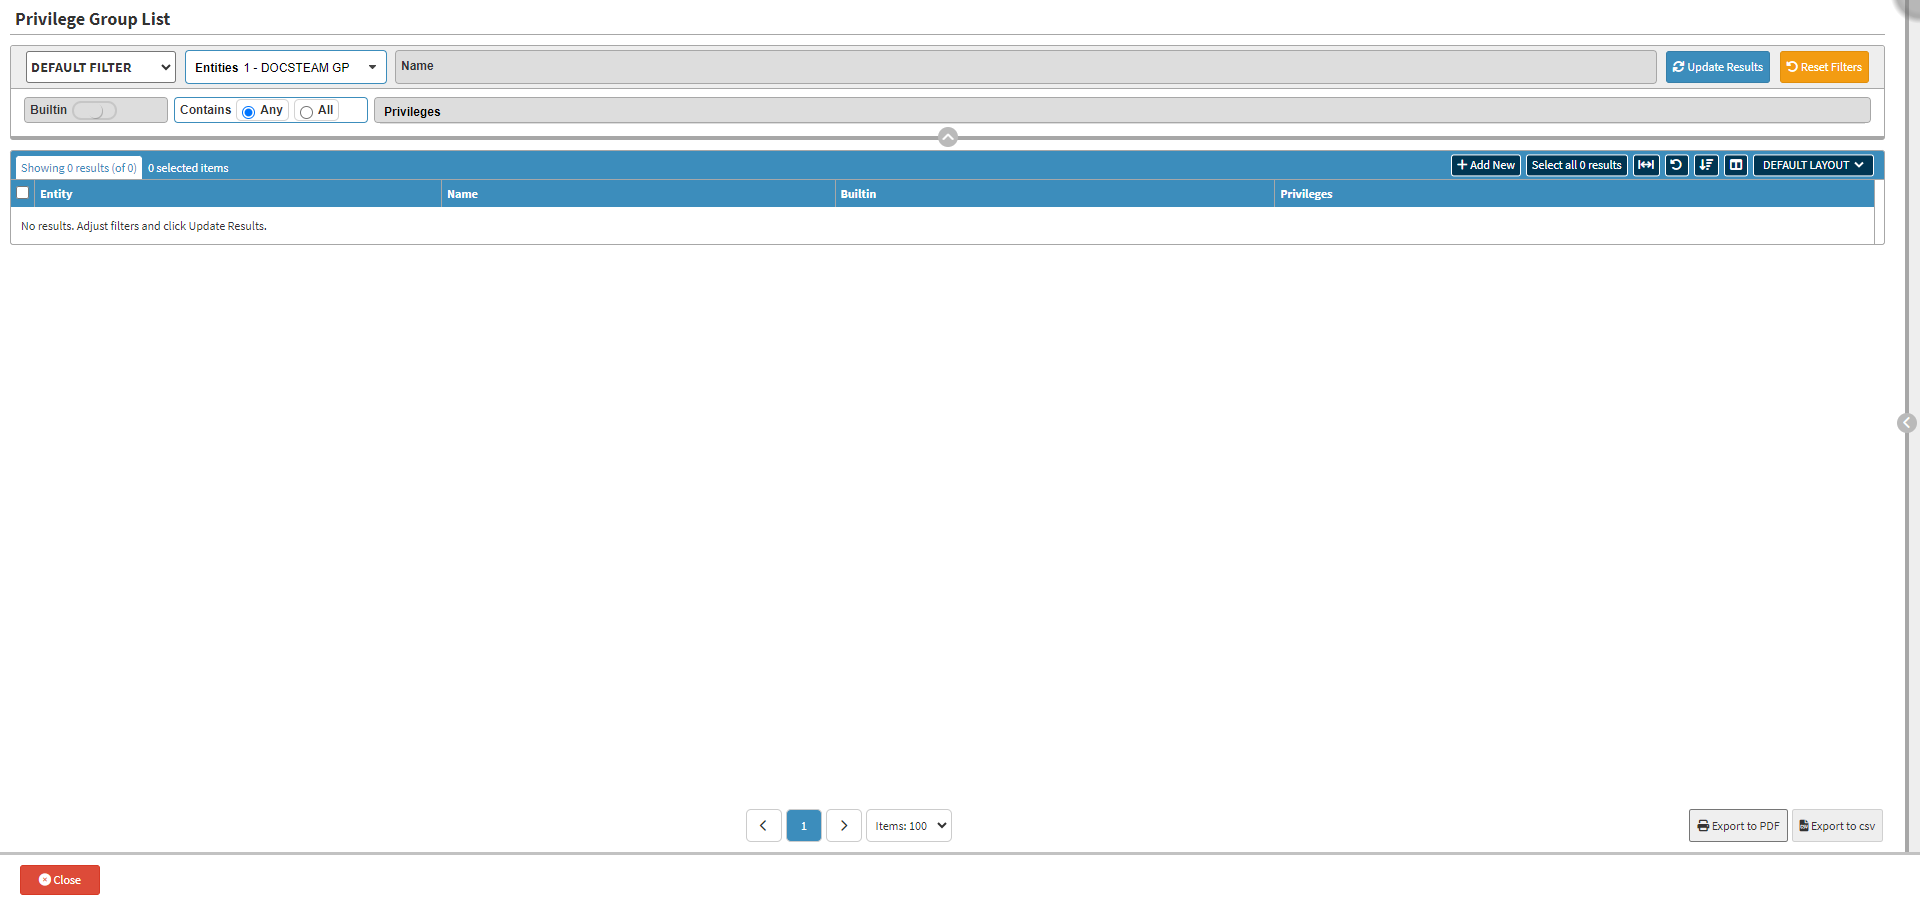
- For more information on how the Privilege Group List screen works, please refer to the user manual: Privilege Group List: Navigation and Use.
User Entity Privilege Links
The User Entity Privilege Link List allows you to view the specific Privileges and access levels linked to a User or a Group of Users within your Practice.
- Click on the User Entity Privilege Links button.
![]()
- The User Entity Privilege Link List screen will open.
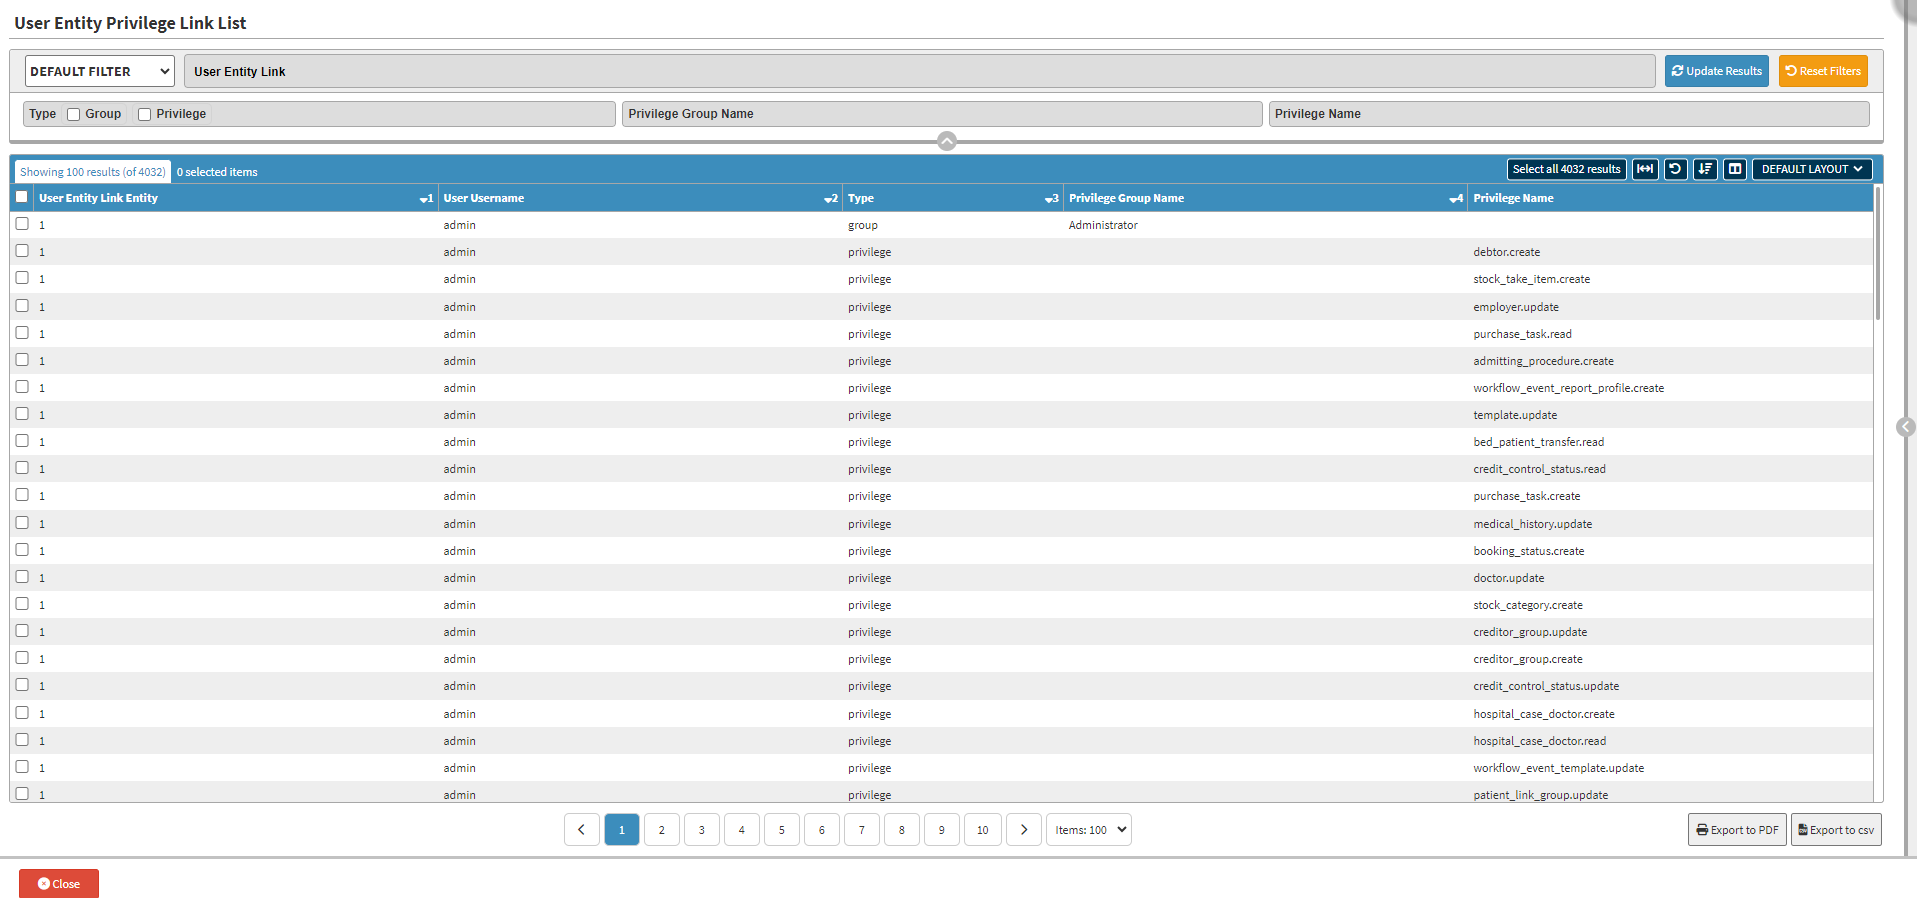
- For more information on how the Privilege Group List screen works, please refer to the user manual: User Entity Privilege Links: Navigation and Use.
- Click on the Save button to save and keep all the changes which have been made. The Settings screen will close and return to the Diary screen.