Stock Transfers is the process of moving stock items between different Warehouses within the system. This helps to maintain accurate Stock Levels at each Warehouse by ensuring that inventory is allocated where it is needed most. Keeping Stock Transfers up to date is essential for effective Stock Management, preventing shortages, and ensuring smooth operational flow within the Practice/Facility.
?Please Note: Transfers can only happen if your Practice has a multi-warehouse setup, where Stock is moved from the main distribution Warehouse to smaller warehouses where the Stock is used.
The Contents of This User Manual:
Date and Reference Information
Batch Options
Adjusting Quantities to Transfer
This user manual will start on the Stock Manager screen.
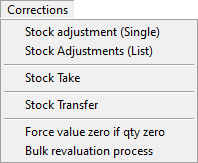
Click on the Corrections menu.
The Corrections menu will open.
Click on Stock Transfer.
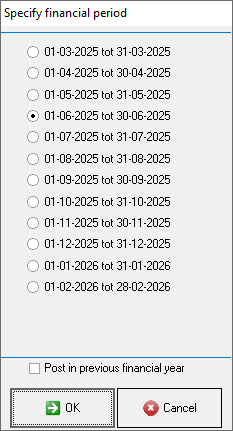
The Specify Financial Period screen will open, to select the desired financial period in which the transfer will take place.
Click on the OK button.
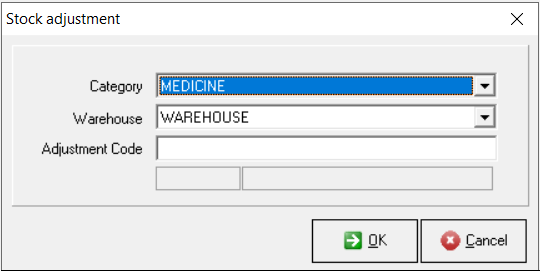
The Stock Adjustment screen will open.
Click on the Category drop-down menu to select the desired type of items that are being transferred.
?Please Note: The options on the list will depend on the options that have been set up for the Practice. For more information on how to create a new Category, please refer to the user manual: Setup of the Categories (Desktop App).
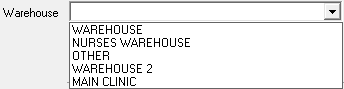
Click on the Warehouse drop-downmenu to select the desired Warehouse from which the items are being transferred.
?Please Note: The options on the list will depend on the set-up of the Practice. For more information on how to create new Warehouses, please refer to the user manual: Setup of the Warehouses (Desktop App).
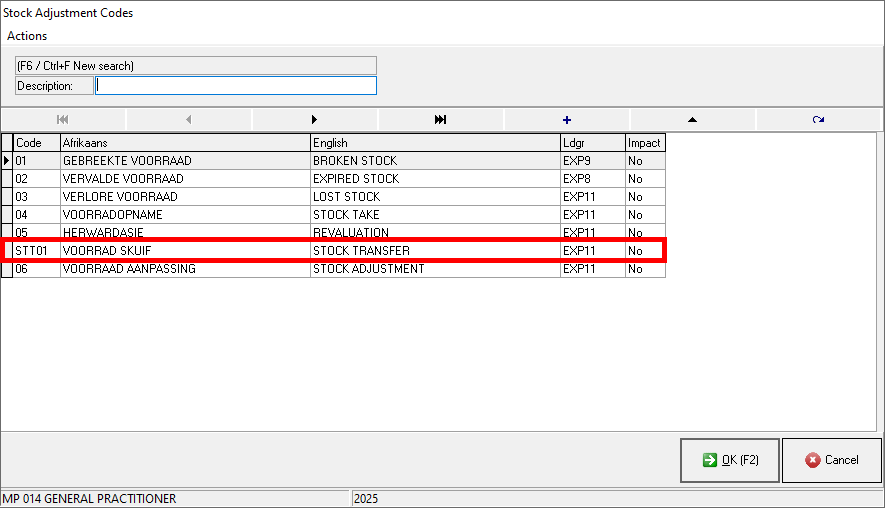
Press theTab key on the keyboard to access the Stock Adjustment Codes screen.
Click on the desiredAdjustment Code (in this case, Stock Transfer) to make a selection.
Click on the OK (F2) button.
The Stock Adjustment screen will open with all the previously captured information.
Click on the OK button.
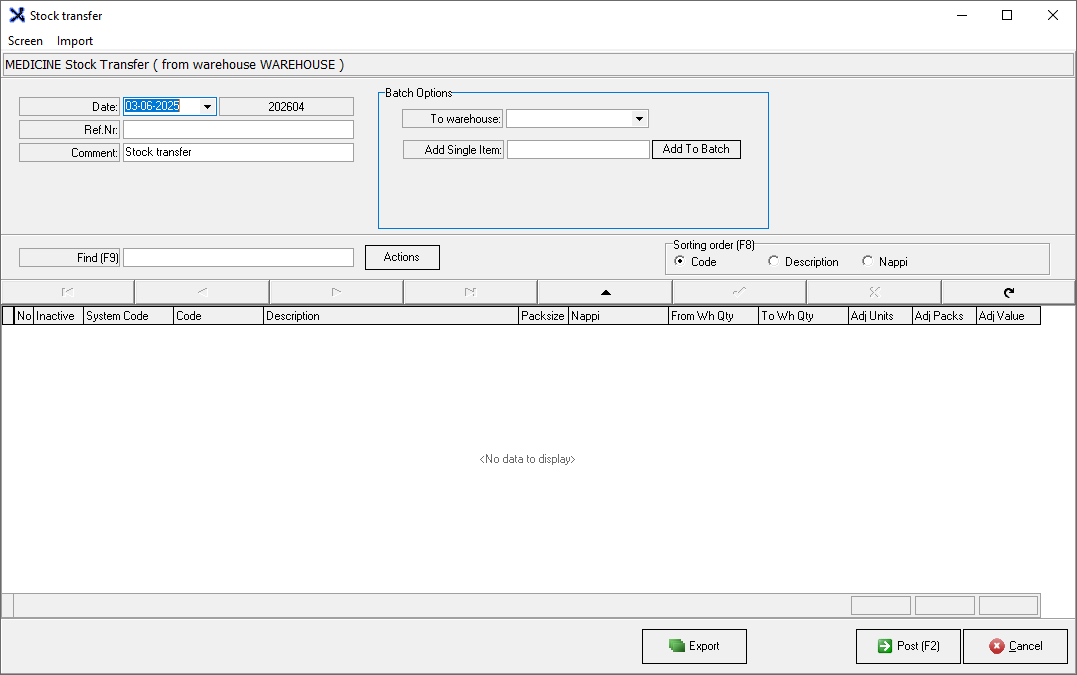
The Stock Transfer screen will open.
Date and Reference Information
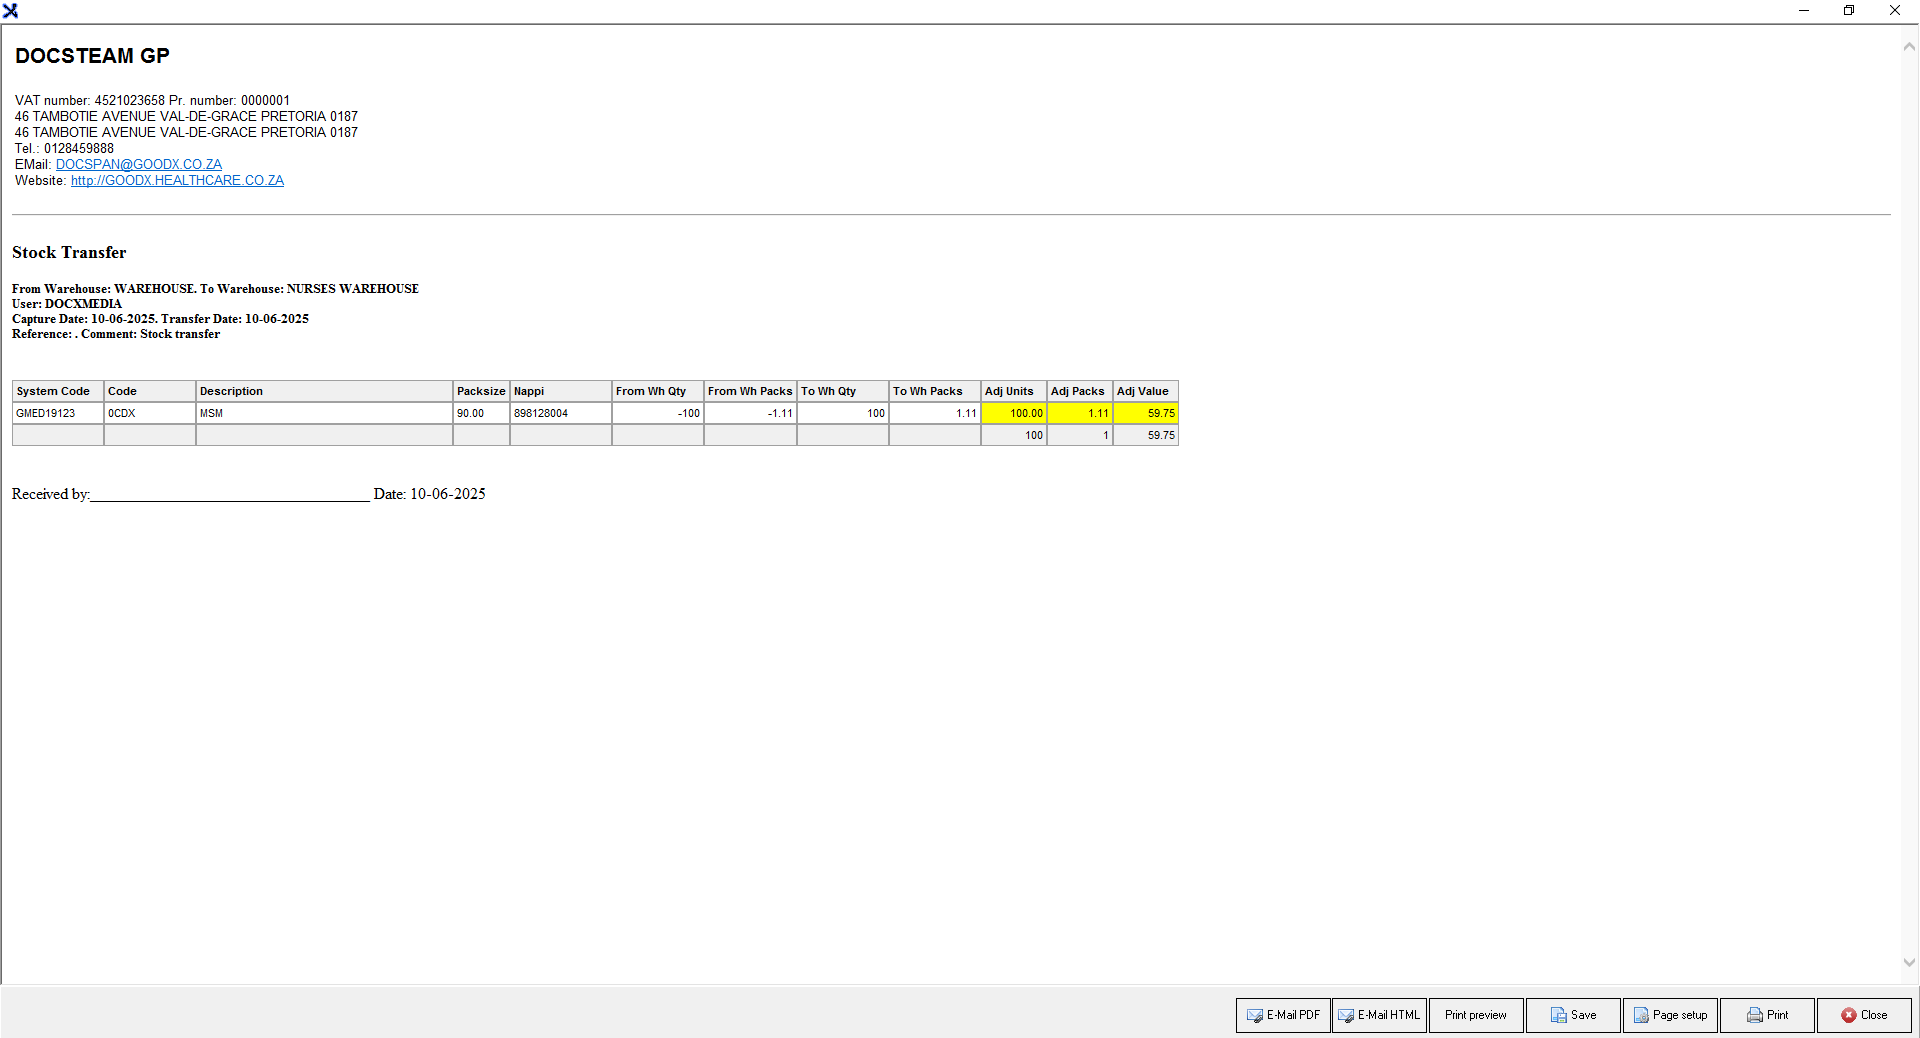
These details are for your own record keeping and are essential for maintaining an audit trail to track when and why Stock Items were transferred.
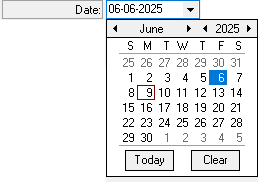
Click on the Date field to select the desired date on which the transfer is taking place from the Date Picker that becomes available.
?Please Note: Today's date will be selected by default, but can be changed if the need arises.
The Financial Period which was selectedwill automatically be indicated and cannot be changed.
Click on theRef.Nr field to enter the relevant information, which can be used as a reference for this transfer.
The reason for the Stock Transfer will be completed automatically, based on the reason selected in the Comment field. You are able to change the information if the need arises.
?Please Note: This field will automatically populate the information from the adjustment screen and can be changed if the need arises.
Batch Options
Records the source and destination for Stock Transfers. These details appear on all Stock Movement Reports, helping to track when and why items were moved. It ensures consistent and accurate reporting across transfers.
Click on theTo Warehouse drop-down menu to indicate where the Stock Item needs to be transferred.
?Please Note: The Warehouses on the list will depend on the setup of the Practice.
Click on the Add Single Itemfield to enter the code of the item that you want to add to the transfer batch.
Alternatively, Press the Tab key on the keyboard to open the relevant Stock screen.
?Please Note: Once the Item has been entered or selected, the Stock Item code will appear in the Add Single Item field and the Name/Description will be added below the field.
Click on the Add To Batch button to addthe Stock Item to the batch that will be transferred.
The Item will be added to the Stock Transfer list.
?Please Note: More items can be added to the list by following the same steps.
Adjusting Quantities for Transfer
Allows you to adjust the number of items that will be moved to the desired Warehouse.
Click on the Adj Units field and enter the number of items that are being transferred.
The Adj Packs field will automatically update according to the number of Units that have been entered. The Adj Value column will also update with the Value of the Total Amount of the products.
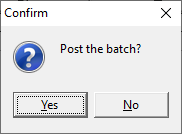
Click on the Post (F2) button to post the transaction.
A Confirm pop-up will appear, to ask you to confirm that you want to Post the batch?.
Click on the Yes button to confirm.
An Information pop-up will appear to advise that the Adjustment Batch has been posted successfully. Do you want to print the batch?.
Click on the Yes button to confirm.
The Stock Transfer will open.
?Please Note: You are able to use this sheet as confirmation that the stock has been received by the intended recipient at the desired warehouse, by signing therefore.