Medprax Updates
 It is important to do weekly Medprax updates so that the following information will be kept up to date:
1. Medical aids and plans (new or discontinued plans);
2. Routing codes for switching purposes;
2. Medicine and material prices;
3. Nappi codes (discontinued codes removed and new codes added)
4. Pack sizes.
This article provides step by step instructions on how to:
A Save the Medprax update file
B Update Medprax in GoodX.
A SAVING THE MEDPRAX UPDATE FILE
There are two ways to save a Medprax update file onto your server:
1. Saving the update file which was received via email.
2. Using the Medprax Updater tool.
1. Saving the update file which was received via email:
If you are registered with Medprax, you should receive your update files via emails. Download those files, and extract them to your Medprax folder on your GoodX drive (eg X:\medprax). Follow this link if you are unsure which drive your GoodX runs on.
Extracting a file:
Copy the Medprax file that you've downloaded from the email and navigate to My Computer - your GoodX Drive - Medprax

Right click on that file and choose Extract Here

Click on - Yes to all

2. Using the Medprax Updater tool:
The Medprax updater tool is available directly from Medprax. They will install and set up the tool for your practice.
Open the Medprax Updater tool and simply follow the on-screen prompts to import your updated Medprax file
B UPDATING MEDPRAX IN GOODX:
Once the new Medprax file has been imported into the correct GoodX folder, navigate to GoodX Manage in your navigator. Follow all three steps to complete a full Medprax update.

1. Update Medical Aids:
Navigate to Updates > Medprax > Update Medical Aids.

Click OK to continue

2. Update stock:
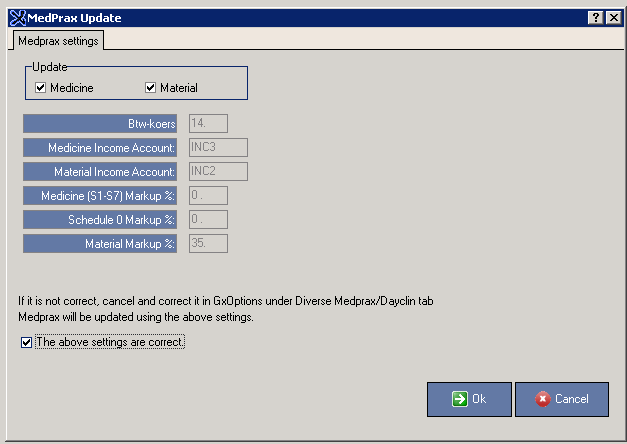
To update stock (medicine & material), navigate to Updates > Medprax
Take note - there are four options to choose from:
1. Pharmaceuticals - Update and Add: will update the items and add all new items as active
2. Pharmaceuticals - Update only: will update the items, but not add new items
3. Pharmaceuticals - Update new items as inactive: will update items and will add all new items as inactive
4. Pharmaceuticals - Set all items to default markup values: will add all items to the default markup value as setup under system options.
You can update both medicine and materials at the same time.

Click OK to continue.
3. Medical Aid enablement for the switch: (A VERY IMPORTANT STEP TO UPDATE ROUTING CODES FOR SWITCHING PURPOSES)
When the program has finished loading, go to Med Debs

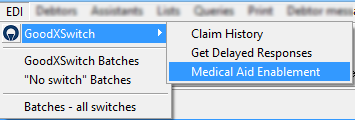
Go to EDI > GoodX Switch > Medical Aid Enablement

Click Yes to confirm

Click on OK
