Case Screen - Case Documents Tab
Why Use This Function:
You can upload documents directly to the Case file, allowing for easy access and viewing without the need for printing or downloading. This feature streamlines document management by enabling quick and secure access to important files, such as medical records or reports, from within the system. It also reduces the need for physical storage and minimises the risk of lost or misplaced documents, ensuring that all relevant information is readily available when needed.
The Contents of This User Manual:
- Upload Documents
- View Documents
- Upload
- Update
- Download
- Delete
- This user manual will start on the Case Management screen.
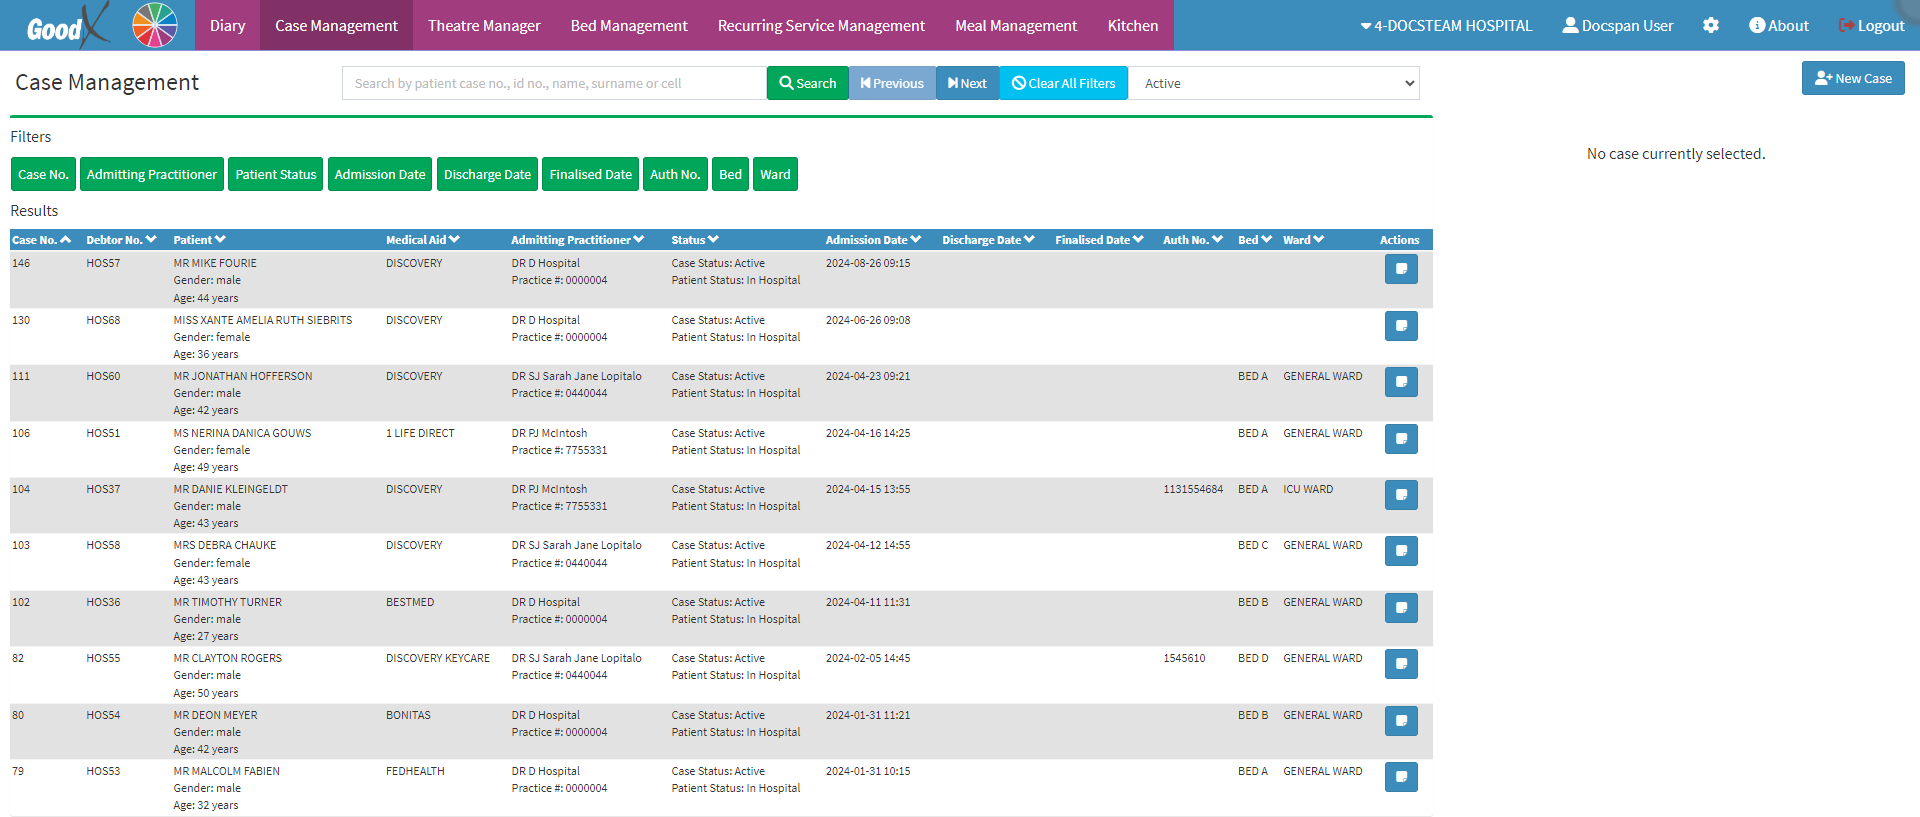
- Click on the Desired Case.

- The Case Management sidebar will open.
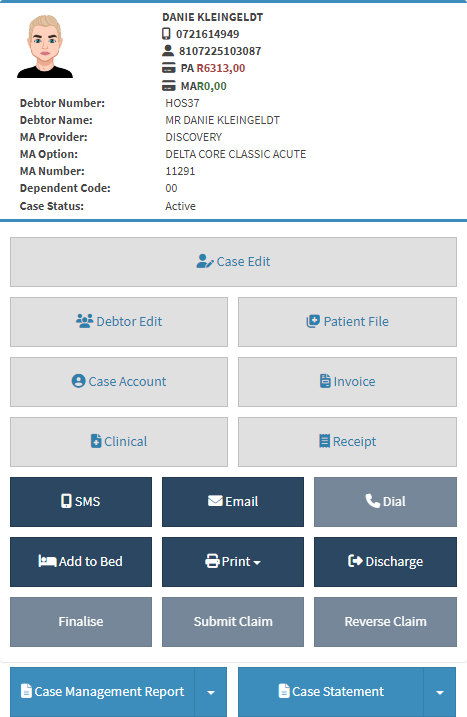
- For more information regarding the Case Management sidebar and an explanation for every option please refer to the user manual: Case Management Screen Sidebar: Navigation and Use.
- Click on the Case Edit button.

- The Hospital Case screen will open.
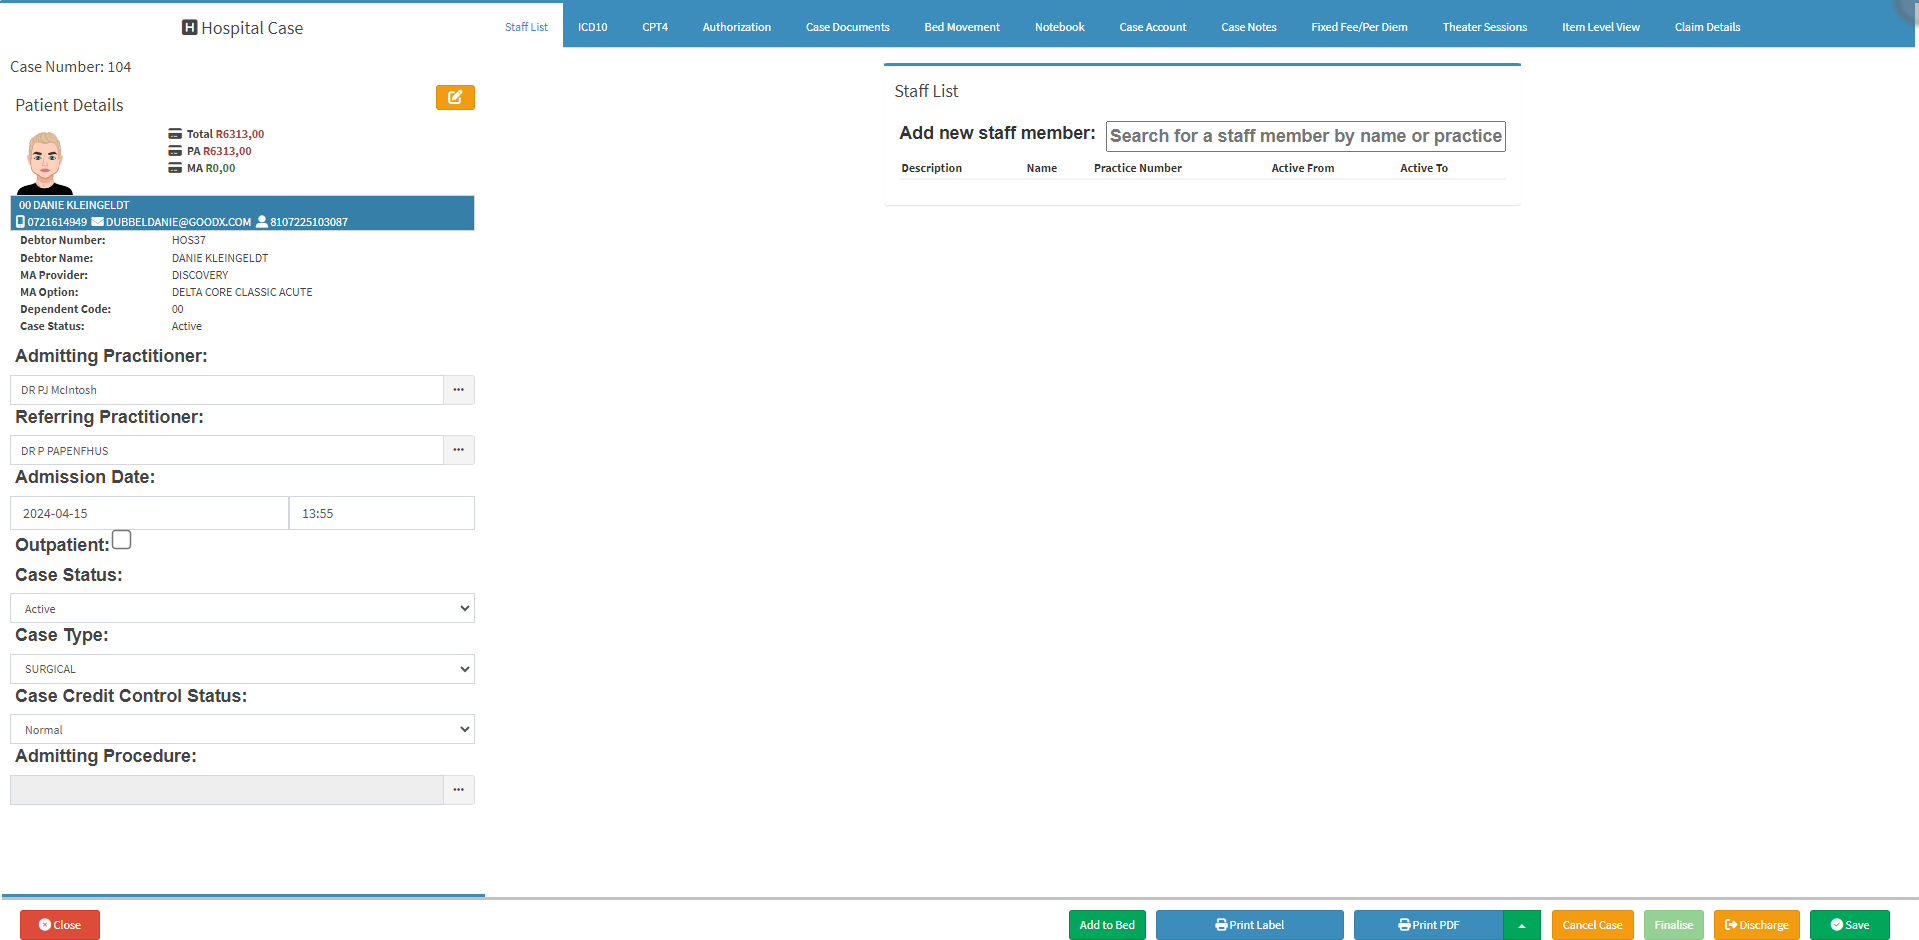
- For more information regarding the Hospital Case screen, please refer to the user manual: How to Create a New Hospital Case.
- Click on the Case Documents tab.
![]()
- The Case Documents screen will open.

Upload Documents
Documents such as Medical Aid Cards, Proof of Identification, Proof of Employment, Other Practitioner Notes etc. can be uploaded onto the Debtor/Patient's file.
- Click on the +Add New button to add a new document to the Debtor/Patient's file.
- The Document Upload screen will open.
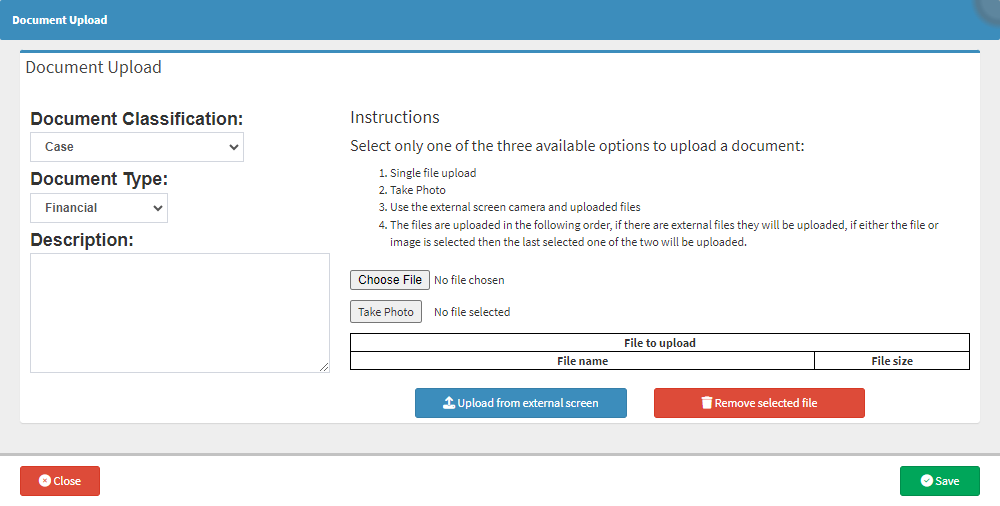
- The abovementioned screen will be explained below:
- Click on the Document Classification drop-down menu and Select the correct Classification Type to which the documents will be uploaded.

- Document Classification: When uploading a document, it can be categorised to ensure it is directed to the appropriate location. There are three different types of categories that you will be able to choose from:
- Case: Documents related to the Case will be uploaded and allocated directly to the Case's file.
- Debtor: Documents related to the Debtor will be uploaded and allocated directly to the Debtor's file.
- Patient: The documents that are being added are documents directly related to the Patient, for example, their ID.
- Printouts: When a Debtor/Patient or Patient brings along printouts from other Practitioners or maybe blood tests, the documents can be uploaded and will be allocated to the Debtor's file.
- Click on the Document Type drop-down menu and Select the most appropriate type of document that you are uploading.

- Financial: Documents related to the financial aspects of the Case, such as Invoices, payment records, or insurance details.
- Personal: Documents containing personal information about the Case, such as identification details, personal history, or consent forms.
- Practice: Documents related to the medical Practice, including treatment plans, medical notes, or clinical procedures relevant to the case.
- Complete a Description of the document being uploaded. There is no character limit within the Description box.

- Instructions are given, advising you what type of documents can be uploaded.

- Click on the Choose File button to choose a file to be uploaded. The file will be saved on your computer.
![]()
- Click on the Take Photo button to take a photo with your webcam that will be uploaded to the file.
![]()
- The Video Capture screen will open.

- For more information on how the Video Capture screen works, please refer to the user manual: Video Capture Screen: Navigation and Use.
- The File/Image that has been selected will then appear in the File to upload block, to indicate which file will be uploaded.

- Click on the Remove selected file button to remove the file.
![]()
- Click on the Save button to Upload the document to the Debtor/Patient's file.
![]()
- All uploaded documents and images will now appear on the Uploaded Documents screen under the Saved Documents section.

💡Please Note: The files that have been uploaded can be updated with new documents if needed. New documents can be uploaded using the steps explained above in the section of this user manual: Upload Documents.
View Documents
All the uploaded documents or images can now also be viewed without having to download them to your computer first.
- Click on the View button.
![]()
- The Viewing screen will open.

Update
All the uploaded documents or images can now be updated without uploading them to your computer again.
- Click on the Upload button.
![]()
- The Document Upload screen will open.
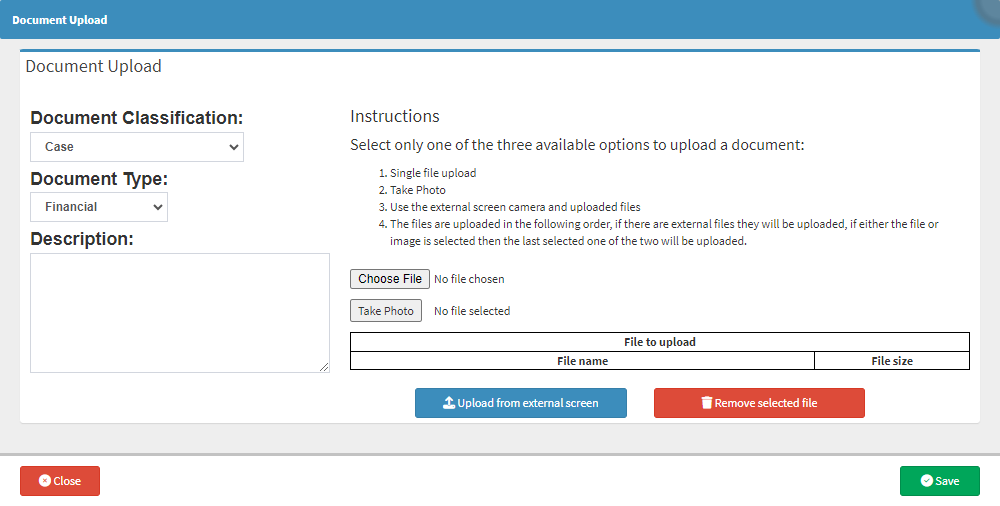
- For more information on how to use the Document Upload screen, please refer to the above mentioned sections.
Download
The uploaded documents can be downloaded to your computer.
- Click on the Download button to download the document and save it to your computer.
Delete
Uploaded Documents can also be deleted from the system.
- Click on the Delete button to delete an uploaded file.
![]()