How to Create a New Clinical Review Report Template
Completion requirements
Creating, Saving, and Editing Clinical Review Report templates simplifies the Report generation process, reducing the time spent on selecting criteria for each new Report. This approach enhances efficiency by allowing users to quickly generate consistent and comprehensive clinical reports using predefined templates.
This user manual will consist of the following information:
Creating a Clinical Review Report
Saving a Clinical Review Report Profile
Editing a Clinical Review Report Profile
This user manual will start on the Debtors screen.
For more information regarding the Debtors screen, please refer to the user manual: Debtor List.
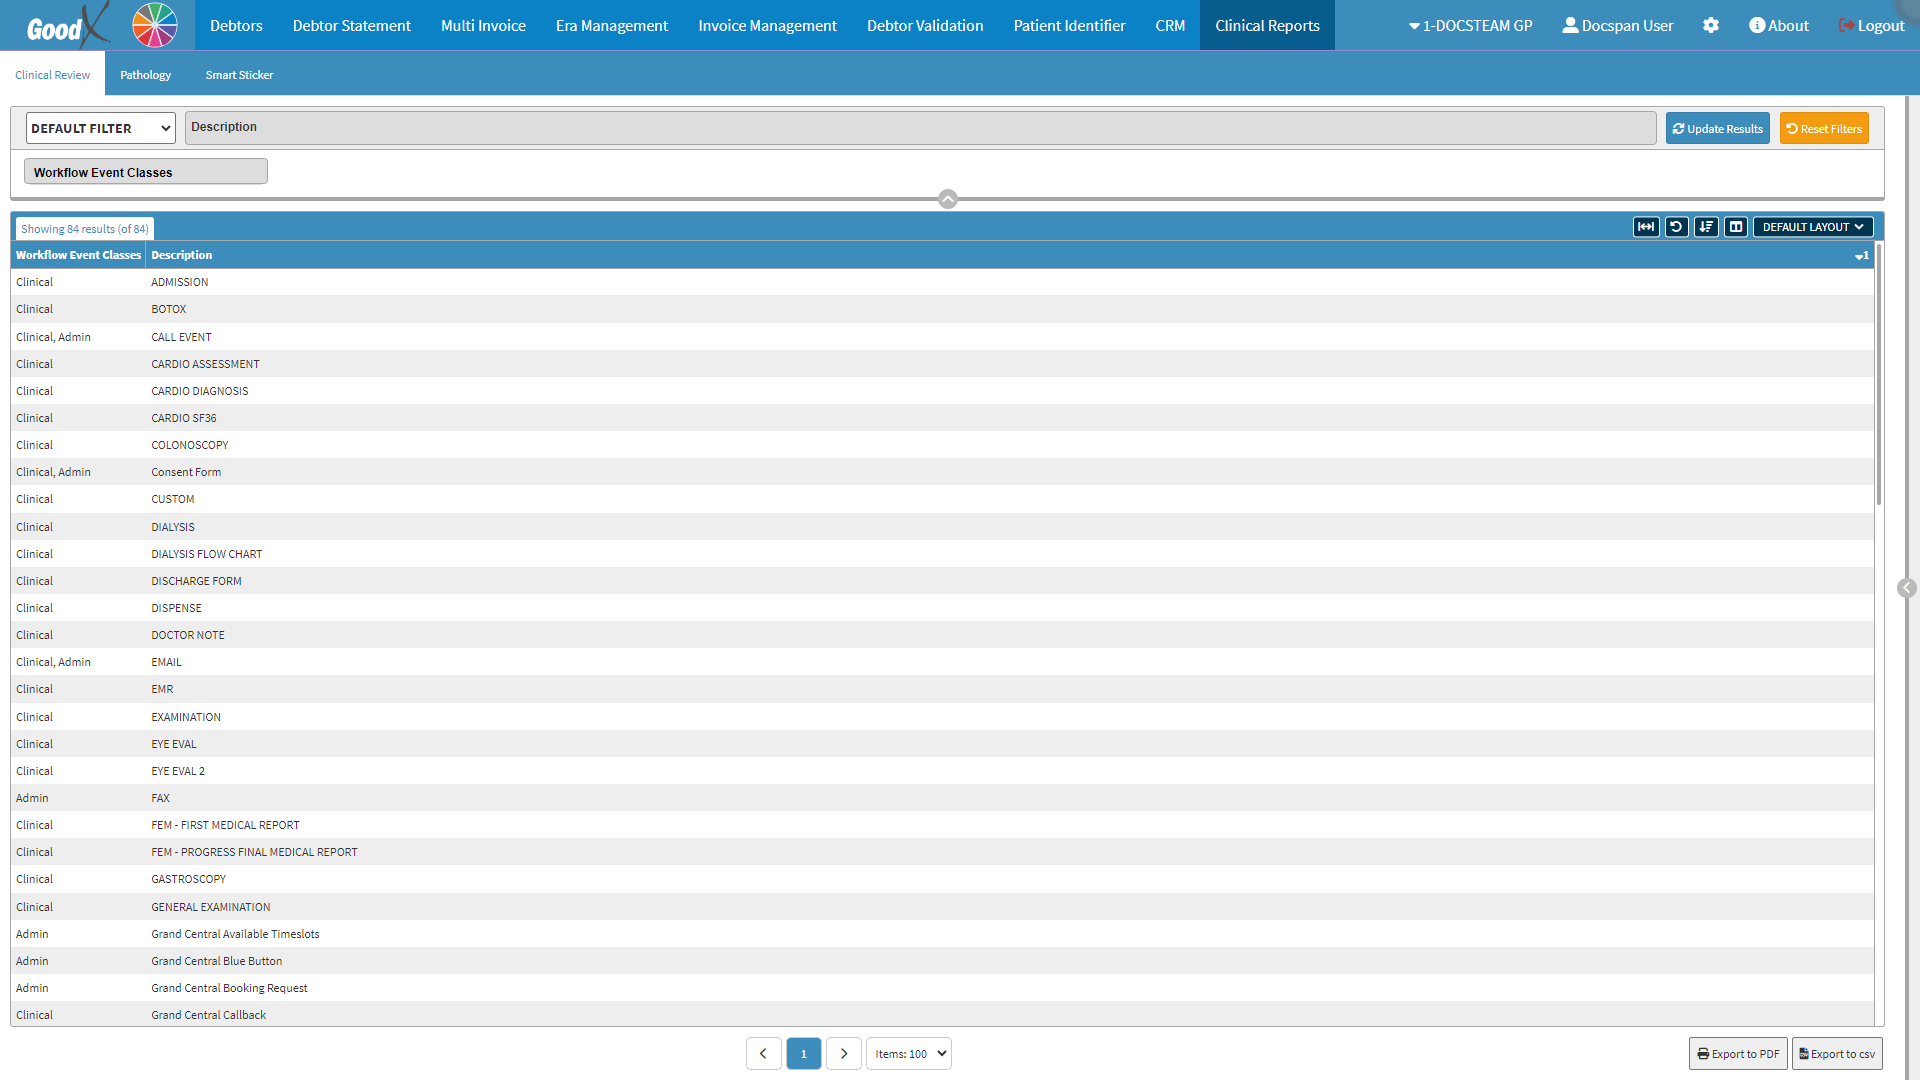
Generating a Clinical Review Report allows you to select the specific data that you would like to see on the Clinical Review Report.
Double-click on the desired Workflow Event you would like to Generate a Report for.
Please Note: For the purpose of this user manual the Sick Note will be used.
The Criteria screen will open.
Please Note: Not all Workflow Events will have Criteria by which they can be filtered.
Click on the Workflow Event Template drop-down to select the desired Template.
Please Note: These are the Templates that have been set up for this particular Workflow Event. For more information regarding how to set up Workflow Event Templates, please refer to the user manual: Workflow Event Templates.
Click on the Report Profiles drop-down menu to select a Report Profile that was previously saved.
Saving a Clinical Review Report Profile enables you to conveniently access your Report without the need to reselect all the parameters each time. Saving time and ensuring consistency in the displayed information, streamlining your reporting process.
Double-click on the desired Workflow Event you would like to Save & Generate a Report for.
Please Note: For the purpose of this user manual the Sick Note will be used.
The Criteria screen will open.
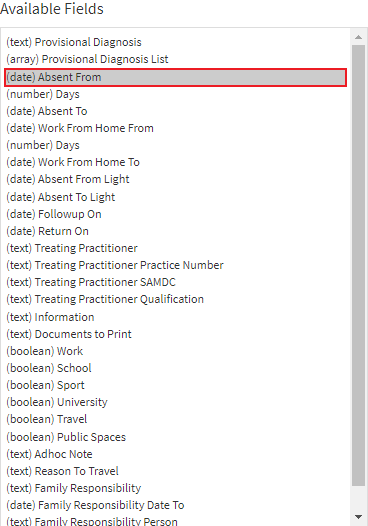
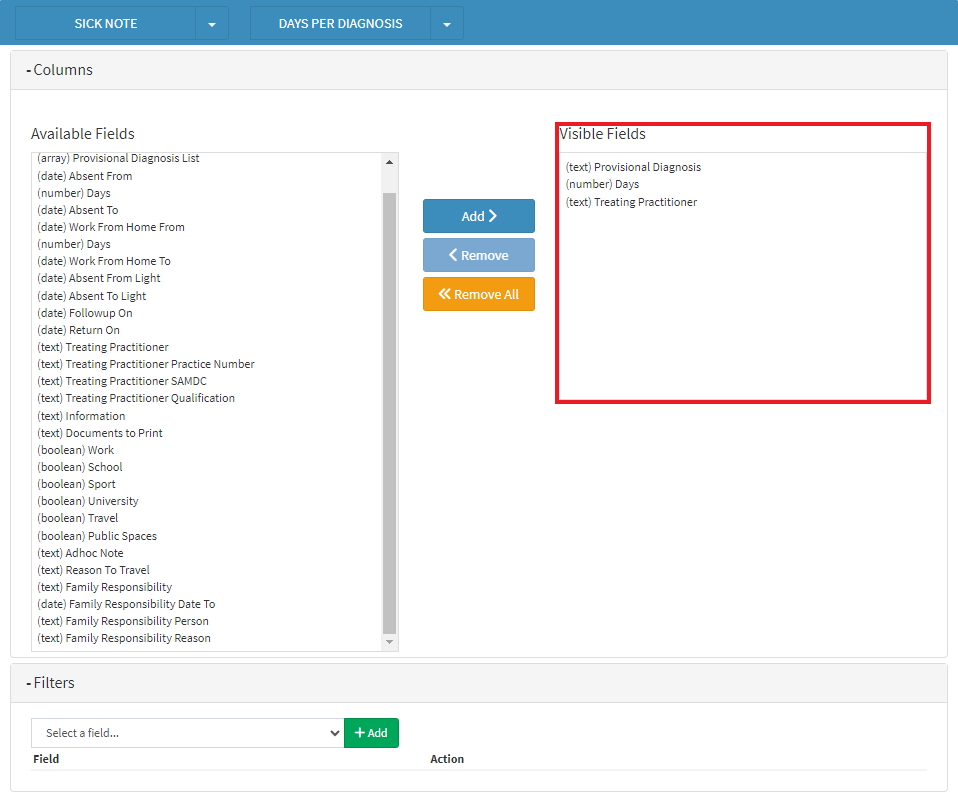
Select all the Parameters and Criteria of the information you wish to display on the Clinical Review Report.
Please Note: Certain Workflow Events will not have any Criteria that can be used to create a Report Profile.
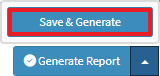
Click on the drop-up menu on the Generate Report button.
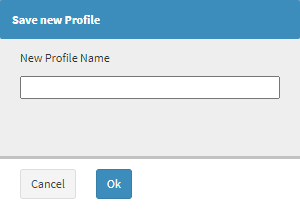
Click on the Save & Generate button.
The Save New Profile screen will open.
Click on the New Profile Name field to enter the Name that you want to allocate to the Report Profile.
Click on the Ok button to save.
The Report will be generated accordingly.
Your Report Profile will now be available on the Report Profile drop-down menu.
Please Note: The Profile will only be available on the Workflow Event on which it was set up.
Editing a Clinical Review Report Profile
Editing a Clinical Review Report Profile enables you to conveniently edit your Report without the need to create a Report Profile each time.
Select the desired Report that needs to be changed.
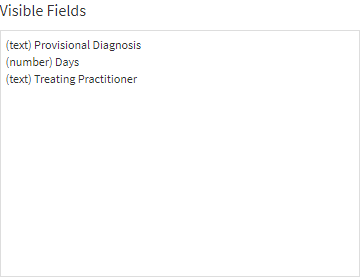
The Visible field will be updated with the Contents of the selected Report.
Click on the desired option in the Available Fields section.
Click on the Add button to move the selected option to the Visible Fields section.
The selected option will move to the Visible Fields section.
Click on the Remove button to move the option back to the Available Fields section.
Click on the Generate Report drop-up menu after any necessary editing has been done.
Click on the Save & Generate button.
An Attention! screen will open.
Click on the Ok button to save changes made.
The Clinical Review Report will be generated according to the data that was selected.