New Admissions (Hospital Rounds List)
A Practitioner can add new Hospital Round Cases to the Hospital Round Management screen and update current Hospital Round Cases, using the New Admissions screen. The Practitioner is thus responsible for adding and updating cases on the Hospital Round Management screen. The Hospital Round Management screen is used for scheduling and maintaining the Practitioner's Hospital Round visit.
- The contents of this user manual will consist of the following information:
- Hospital Admission Information
- Demographic Information
- The Hospital Admission information fields
- Staff List Tab
- ICD10 Tab
- Auth and Daily Codes Tab
- Notebook Tab
- Log in to the GoodX Web App with your GoodX username and password.
- The Diary screen will open.

- Click on the Hospital Round Management tab on the Navigation Bar.

- The Hospital Round Management screen will open.
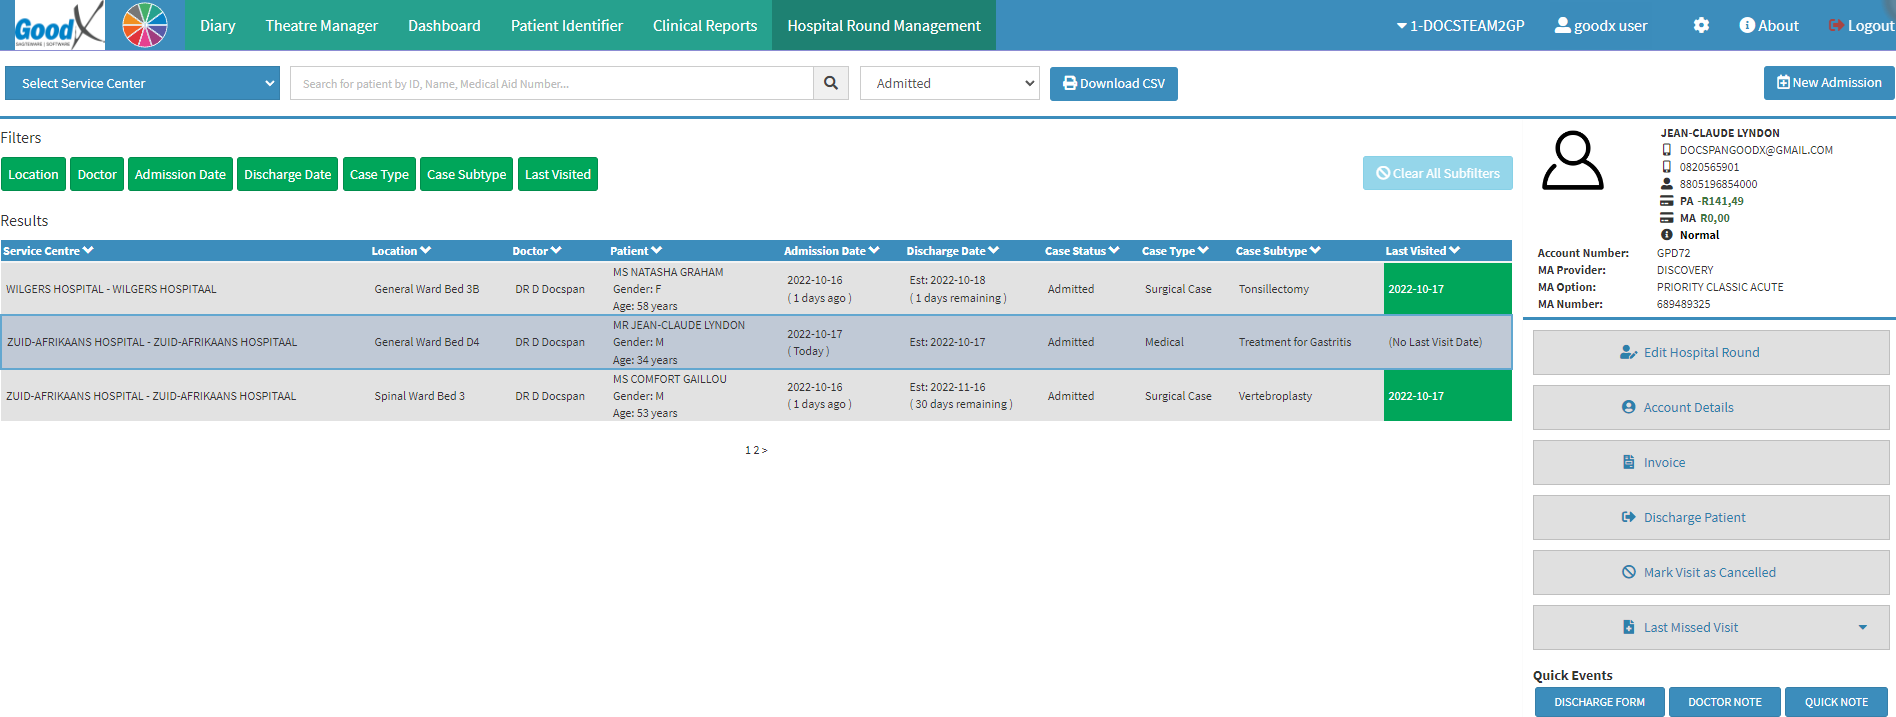
- For more information regarding Hospital Round Management, please refer to the user manual: Hospital Round Management (Overview).
- Click on the New Admission button.
![]()
- The Hospital Admission screen will open.

- An explanation will be given for each field and option on the Hospital Admission screen:
Hospital Admission Information
The Hospital Admission Information consists of information that creates a new Hospital Case and that has information about the case and the Patient. The Hospital Admission Information is used to create a case on the Results List of the Hospital Round Management screen.
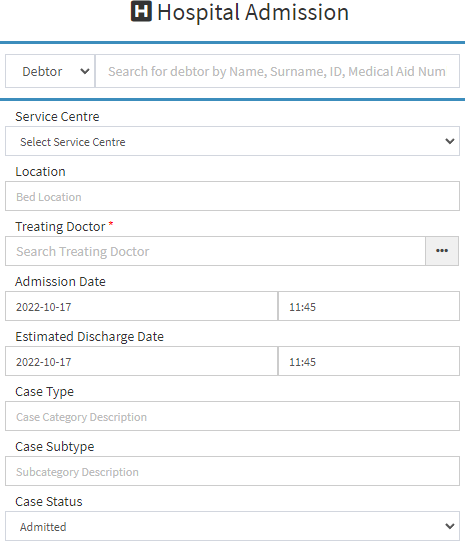
- The Hospital Admission screen is split into two sections:
- Demographic Information
- The Hospital Admission Information fields
Demographic Information
- An explanation of the Demographic Information fields will be given:
- Debtor/Patient search: The details of the person that the Practitioner would like to add to their Hospital Round List.
- Click on the Debtor drop-down menu, to select an appropriate option.

- Select an option from the list that has become available:
- Debtor: Search for a Patient based on the Debtor's Demographic Information.
- Patient: Search for a Patient based on the Patient's Demographic Information.
- Click on the Search for Debtor by Name, Surname, ID, Medical Aid field and start typing the name of the desired person. Only 1 character is required before the list becomes available.

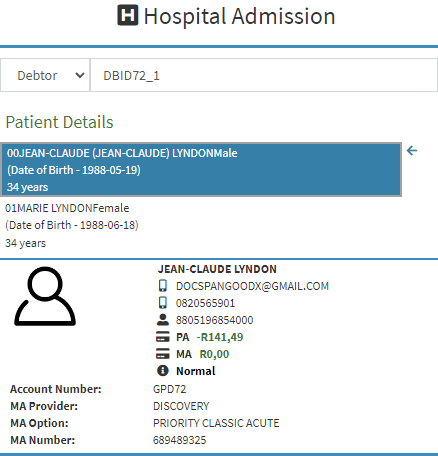
- Select the desired Patient on the drop-down menu that will become available whilst typing, to link the Patient to the New Admission.
- The Patient Details panel will appear once the desired Debtor is selected.
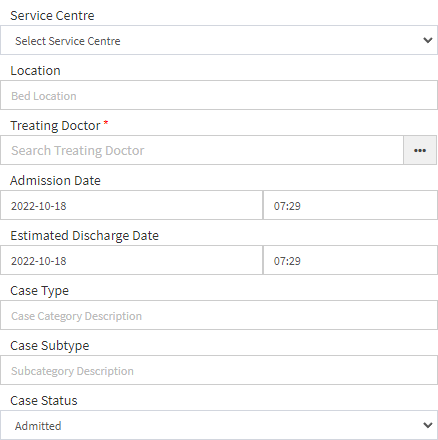
- An explanation of the Hospital Admission Information fields will be given:
- Complete the relevant fields or select an appropriate option:
- Fields marked with an asterisk (*) are compulsory fields.
![]()
- Select Service Centre: The place where the Patient will receive medical or surgical treatment.
- Click on the Select Service Center drop-down menu.

- Select an option from the list that has become available.
Please Note: The options that become available will be dependent on how the Practice is set up.
![]()
- Location: Where the Patient can be found within the Hospital, for example, Ward 6, Bed 12A.
- Click on the Location field and type in the relevant information.
![]()
- Treating Doctor: The Practitioner who is or has been in charge of treating a Patient's condition.
- A Treating Practitioner can also be linked to a case with the Treating Doctor's List. For more information regarding Linking a Treating Doctor please, refer to the following user manual: Linking Treating Doctor to Hospital Rounds.
![]()
- Admission Date: The year, month and day (yyyy-mm-dd) when the Patient was admitted into the Service Centre.
- Click on the Admission Date field, to open the Admission Date picker, if the user would like to change the date.
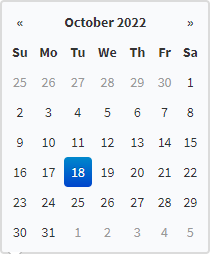
- Click on the desired date to make a selection.
- Admission Time: The hour and minute (hh:mm) when the Patient was admitted into the Service Centre.
- Click on the Admission Time field, to open the Admission Time picker, if the user would like to change the time.

- Click on the desired time to make a selection.
![]()
- Estimated Discharge Date: The year, month and day (yyyy-mm-dd) on which the Practitioner believes that the Patient will be ready to be released from the Hospital.
- Click on the Estimated Discharge Date field, to open the Estimated Discharge Date picker, if the user would like to change the date.
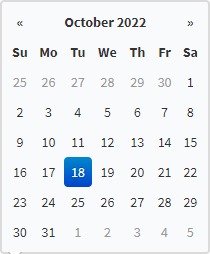
- Click on the desired date to make a selection.
- Estimated Discharge Time: The hour and minute (hh:mm) on which the Practitioner believes that the Patient will be ready to be released from the Hospital.
- Click on the Estimated Discharge Time field, to open the Estimated Discharge Time picker, if the user would like to change the time.

- Click on the desired time to make a selection.
![]()
- Case Type: The type of case the New Admission will be, for example, medical case.
![]()
- Case Subtype: The procedure that will be performed to treat, manage or cure the diagnosis.
![]()
- Case Status: The current position of the Patient in the Hospitalisation process.

- Admitted: The Patient has been taken up in Hospital.
- Pre-Admitted: The Patient has arrived at the Hospital to complete the necessary documentation before the Patient is admitted to the Hospital.
- Discharged: The Patient has recovered enough to either be sent home or transferred to a recovery facility.
- Finalised: The Case has been completed and the Patient has been fully billed.
- Cancelled: The Hospital case has been cancelled and the Patient will no longer be admitted to the Hospital.
Staff List Tab
The Staff List displays a list of the facility staff involved with the Patient's treatment.
- The Staff List tab will be open by default.

- An explanation of the Staff List section will be given:
![]()
- Add New Staff member: Allows the user to link a Hospital employee to the Hospital Round Case by adding them to the Staff List. Staff members on the Hospital Round Cases are all employees who are involved in the treatment or care of the Patient.
- Click on the Search for a Staff Member by Name or Practice Number... field to add the details of the staff member that the user would like to add to the Staff List. Only 2 characters are required for the list to appear.

- Select the desired option from the list that has become available.
Please Note: The options available on the list will depend on the staff that has been set up at the Practice.
- The selected staff member will be added to the Staff List section.

- The Staff List is divided into columns.

- An Explanation of the Staff List columns will be given:

- Description: The role that the staff member has been assigned with regard to the treatment of the Patient.
- Click on the Choose a Role... drop-down menu to select the desired role.
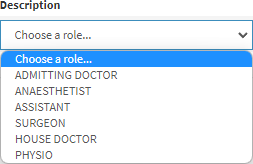
- Select an option from the list that has become available:
- Admitting Doctor: The Practitioner that admitted the Patient to the Hospital.
- Anaesthetist: A medical professional responsible for administering anaesthesia to the Patient.
- Assistant: An Assistant Practitioner assists the Treating Practitioner in certain procedures in the Practice or in the theatre. The Assistant Practitioner conducts physical exams, diagnoses and treats illnesses, orders and interprets tests, counsels on preventive health care, assists in surgery, and can also write prescriptions.
- Surgeon: A Surgeon is a Practitioner who specialises in a certain Medical field and treats conditions that may require Surgery. The Surgeon is the Practitioner who will perform the Surgery on the Patient.
- House Doctor: The primary healthcare provider of the Patient. The Practitioner with whom the Patient has a history and with whom the Patient has a longstanding medical relationship.
- Physio: A Physiotherapist assists Patients to recover by means of movement and exercise and manual therapy such as massage to manage pain and prevent any further deterioration. Physiotherapists encourage development and facilitate recovery for Patients who have injuries, illnesses, or disabilities.
- Name: The last name of the staff member.
- Practice Number: The Practice Number of the staff member as registered with the BHF (Board of Healthcare Funders).
- Click on the Remove button to delete the staff member from the Staff List.
![]()
- The staff member will be removed from the Staff List.
ICD10 Tab
Practitioners and other healthcare professionals identify and label all diagnoses, symptoms, and procedures using the ICD10 (International Classification of Diseases) codes. These codes can be added via the ICD10 Code tab, which will be added to an invoice when the Patient's treatment is complete at the Service Center.
- Click on the ICD10 tab on the Navigation Bar.
![]()
- The ICD10 screen will open.
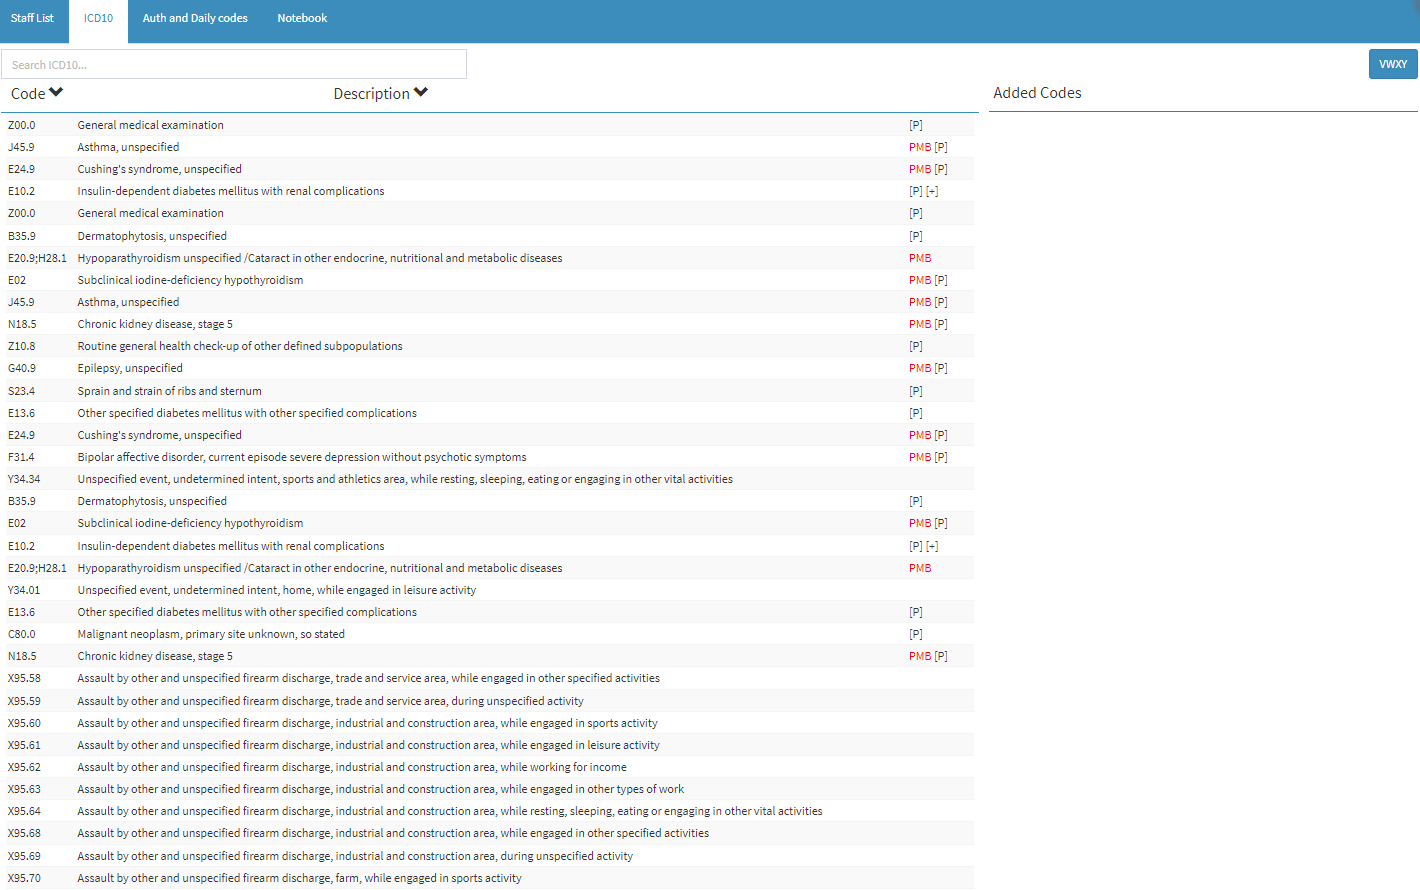
- Click on the Search ICD10 field and start typing the name or code of the desired Diagnosis Code. One character is required before the list becomes available.
![]()
- Click on the desired ICD10 Code.
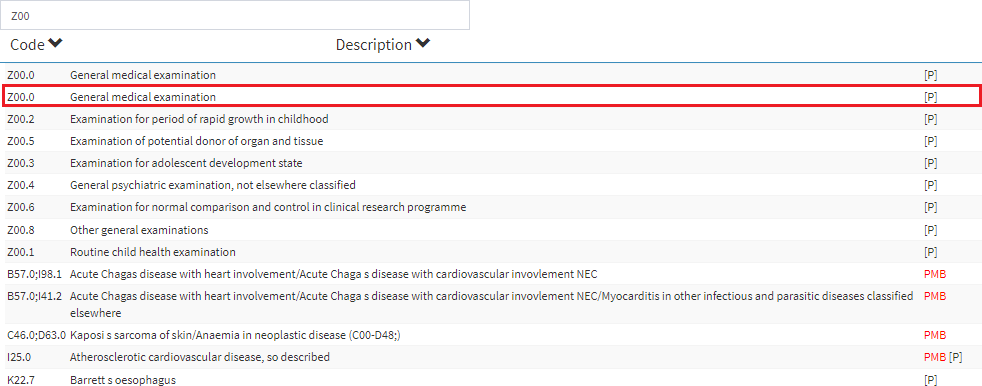
- The ICD10 Code will be added to the Added Codes list, the selected ICD10 Code will be linked to the case.
![]()

- Click on the Remove button to remove the ICD10 Code from the Added Codes list.
![]()
- The ICD10 Code will be removed from the Added Codes list
Auth and Daily Codes Tab
Authorisation codes are given by the Medical Aid to approve the procedures, treatment, consumables and medicine items that are required whilst the Patient is admitted to the Hospital. Daily codes enable Practitioners to add billing codes daily for items that have been used so that the Patient only receives one invoice at the end of the Patient's Hospital stay.
- Click on the Auth and Daily Codes tab on the Navigation Bar.
![]()
- The Auth and Daily Codes screen will open.

- Click on the Add an Authorisation Code field, to add the Medical Aid authorisation codes, as received by the Medical Aid.
![]()
- Click on the Add Line button, to add a Billing Code.
![]()
- The Daily Codes fields will appear in the Default Lines section.

- The Default Lines are divided into columns.
![]()
- An explanation of the Default Lines fields will be given:
- Code: The Billing code that identifies the procedure/item.
- Click on the Code field and start typing the name or code of the desired Diagnosis Code. One character is required before the list becomes available.
Please Note: The list will become shorter as the user types. The list will search according to the Billing Code or the Description of the item or procedure that the user is looking for.
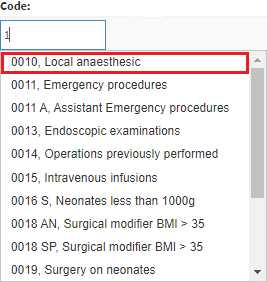
- The Billing code will be added to the Default Lines section.

- Description: A short explanation of the item or procedure that the Billing Code is linked to.
- Quantity: The number of items/procedures that will be billed to the Patient.
- Multiple Billing Codes can be added to the Default Lines section.
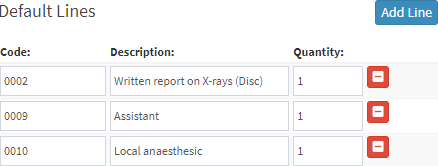
- Click on the Remove button to delete the corresponding Billing Code line.
![]()
Please Note: The Billing Codes that are added will always be linked to the case. When the case is re-opened the billing codes will automatically be added to the case's Invoice screen.
Notebook Tab
The Notebook Tab will allow the Practitioner to schedule Clinical Events with the Patient or create Clinical Notes of the Patient during their treatment period. The Notebook shows all previous communication and communication history with the Patient that relates to the Hospital Round Case.
- Click on the Notebook tab on the Navigation Bar.
- The Notebook screen will open.

- For more information regarding where to access and how the Notebook works, please refer to the user manual: Notebook.
- Click on the Close button to return to the Hospital Round Management screen without adding a New Admission.
![]()
- Click the Save button to return to the Hospital Round Management screen and to add a New Admission.
![]()