Event Subtypes and Colour
Event Subtypes are smaller categories that Clinical Workflow Events can be divided into, by the means of using colours as a visual indicator by which Clinical History Event types can be identified. Users are also able to set up separate colours for Workflow Events Templates that have been configured, that differ from the default Workflow Event. Using colours in the Clinical History allows the Practitioner to easily identify and navigate to the desired event on the Clinical History screen.
- The contents of this user manual will consist of the following information:
- Adding Colours to Workflow Events
- Colour Bar
- Colour Selection
- RGB (Red, Green and Blue Values)
- Adding Colours to Workflow Event Templates
- Log in to the GoodX Web App using your GoodX username and password.
- The Diary screen will open.

- Click on the Settings button in the top right corner.
- The Settings screen will open.
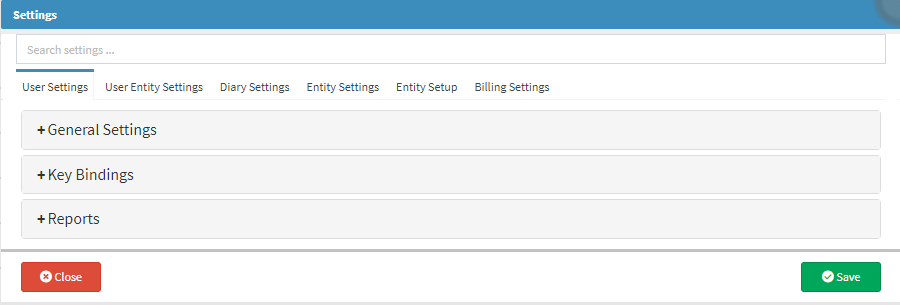
- Click on the Entity Settings tab.
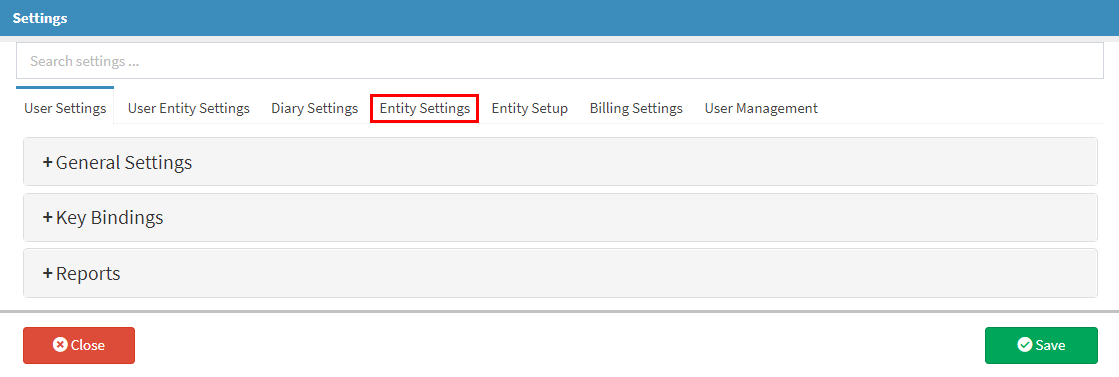
- The Entity Settings tab will open.
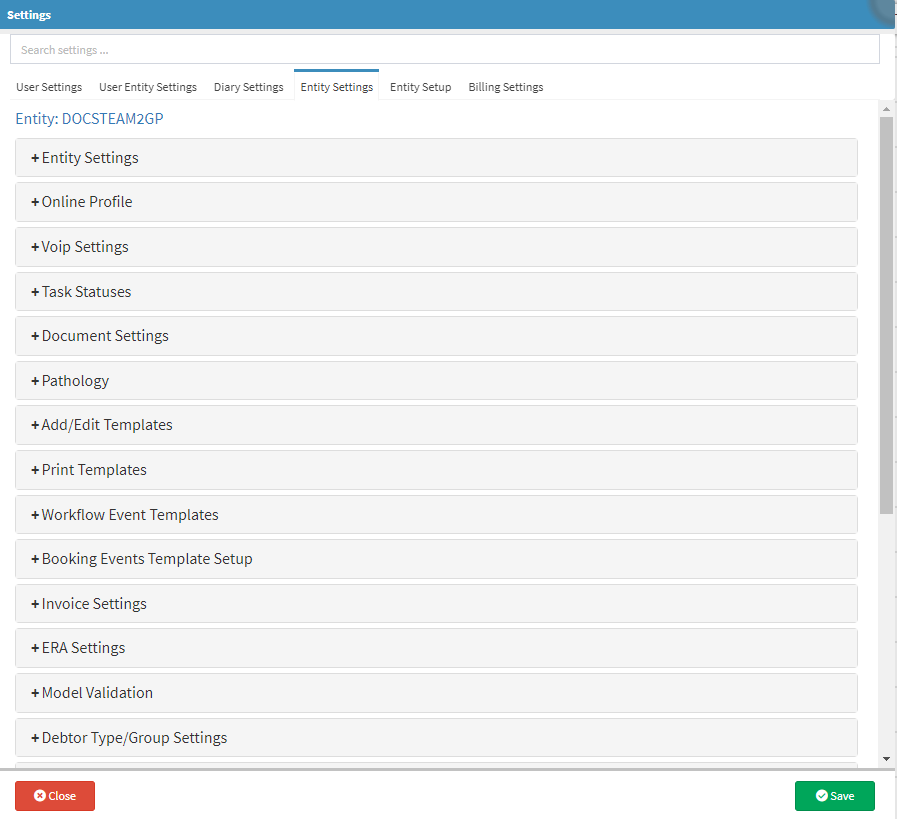
- Click on the Clinical History Settings panel.
![]()
- The Clinical History Settings panel will expand.

- For an extensive explanation of the Clinical History Settings, please refer to the user manual: Clinical History Settings.
- Click on the Event Subtypes and Colours sub-panel.
- The Event Subtypes and Colours sub-panel will expand.
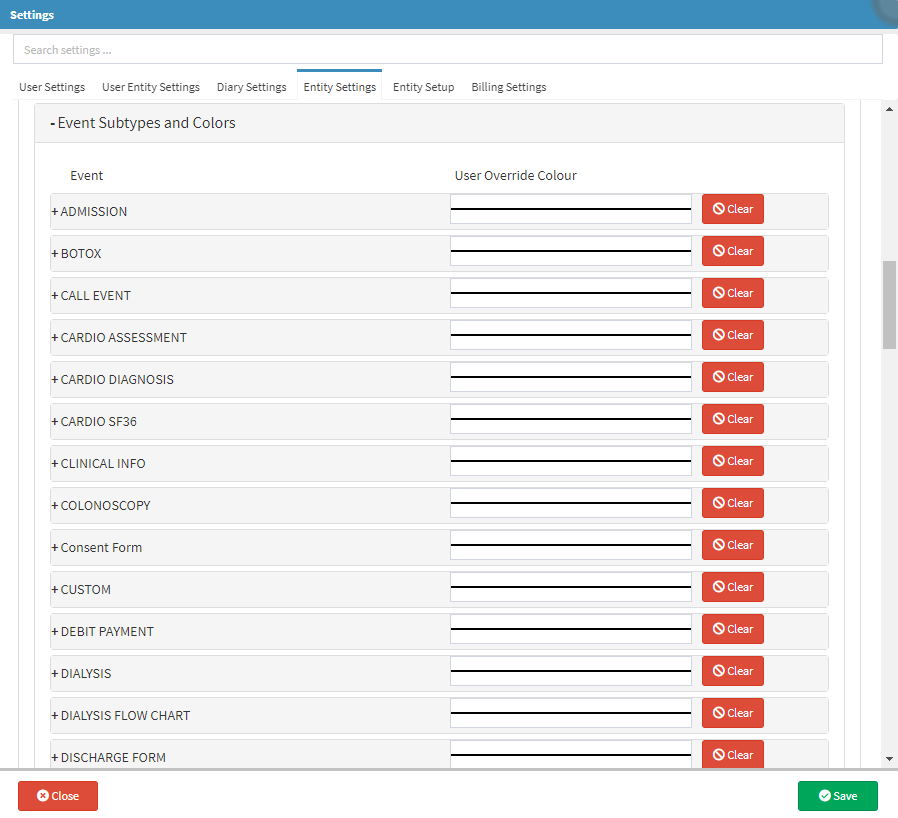
Please Note: The Events that will appear on the list, are determined by the Workflow Event forms that are available in the Forms Library. For more information regarding each form, please refer to the following sections in the Clinical Information book: General Examination Forms and Special Investigation Forms.
Adding Colours to Workflow Events
Users are able to set up custom colours to identify Workflow Events that have been previously added to the Patients Clinical History.- Click on the corresponding User Override Colour field of the form whose colour the user wishes to modify.
![]()
- The Colour Selector will open.
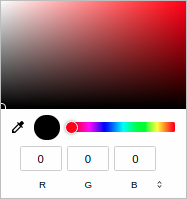
- One of the following methods can be used to select a colour:
Colour Bar
- Click on a colour on the colour bar.

Colour Selection
- Click on the desired colour to make a selection.

- Click on the dropper and navigate to the colour of choice to select the desired colour. The dropper tool can be used to select any colour on the screen.

RGB (Red, Green and Blue Values)
- Click on the respective RGB colour field to enter the colour codes (if known)

- Press Enter on the keyboard to use the selected colour, the colour will fill the block. The colour that is selected will be used to highlight the corresponding form on the Clinical History screen.

- Click on the Clear button to remove the selected colour from the form, and revert the colour back to default. The default colour is blue.
- The colour will be removed from the User Override Colour field.
![]()
Please Note: If the user does not save the changes that have been made, the colours will revert back to the last colours that were saved by the user, and the colours that have been cleared will not be clear.
Adding Colours to Workflow Event Templates.
Allows the users to set up separate colours on custom templates that the user has previously set up. For more information on how to set up these templates, please refer to the user manual: Workflow Event Templates.
- Click on the panel of the desired form for which the user has set up templates.
![]()
- The panel will expand.

- The user is able to set up the colours per template, as explained in the Workflow Event Colours section of this user manual.
- Click on the Close button to close the screen without saving.
![]()
- An Attention! pop-up will open to advise the user that they may have unsaved changes.
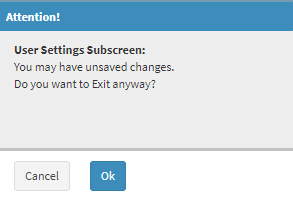
- Click on the Cancel button to ignore the request to close the screen and return to the Settings screen.
![]()
- Click on the Ok button to exit the screen without saving changes that have been made. The Settings screen will close and return to the Diary screen.
![]()
- Click on the Save button to save all the changes that have been made. The Settings screen will close and return to the Diary screen.
![]()
- For more information regarding how the colours will be displayed on the Patient's Clinical History, please refer to the user manual: Clinical History Panel Colours.