myGC is a web and mobile application which is integrated into the GoodX Web App and GoodX Desktop. The application makes general administration a paperless and pleasant experience. It's important that myGC settings are set up correctly.
The Configuration Settings for myGC allow the Practitioner to set up the use of Online Bookings, how the Practitioner's information will display, what type of bookings can be made online and all the other features that myGC has to offer. For more information regarding the functionality of the myGC App, please refer to the myGC Module.
System Options allow the user to set up the system to suit the needs of the Practice and activates/deactivates certain functions in the system.
The contents of this user manual will consist of the following information:
myGC Configuration
Practice Information
Doctor/Diary Information
Doctors
Diary Setup
Appointment Types
myGC Behaviour
T's & C's
SyncVites
Log into the GoodX Desktop as the Supervisor.
From the Navigator, Double Click on the OptionsModule.
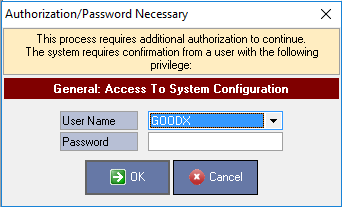
An Authorisation/Password Necessary pop-up will appear.
Select the user from the User Name drop-down menu.
Enter the password in the Password field.
Click on the OK button to proceed.
Please Note: Only users with Supervisor access will be allowed to access the System Options.
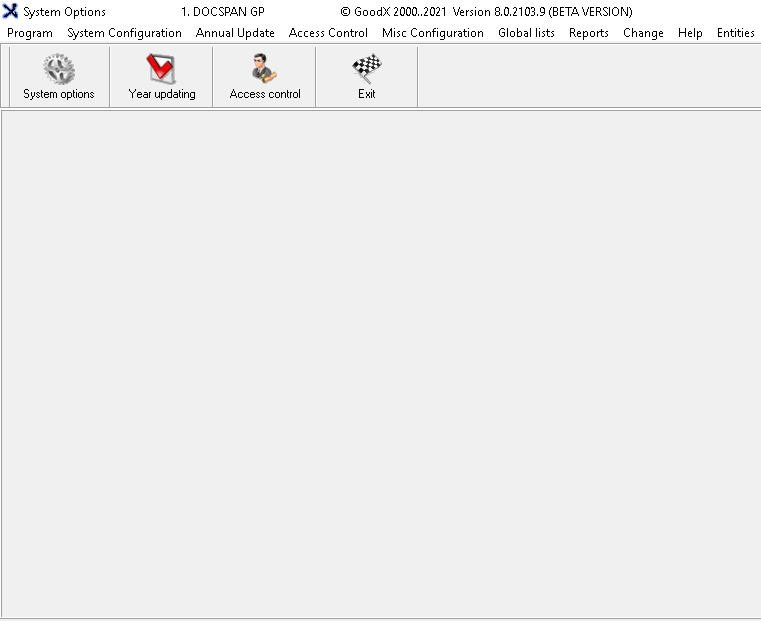
The main System Options screen will open.
Click on the System options button on the toolbar.
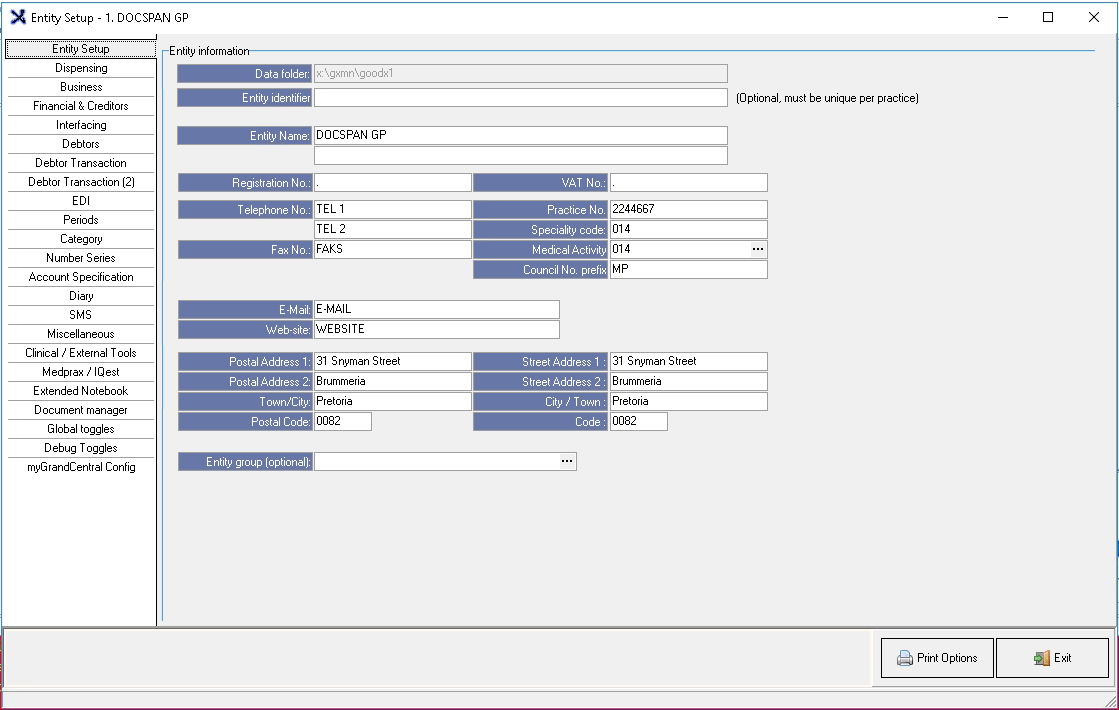
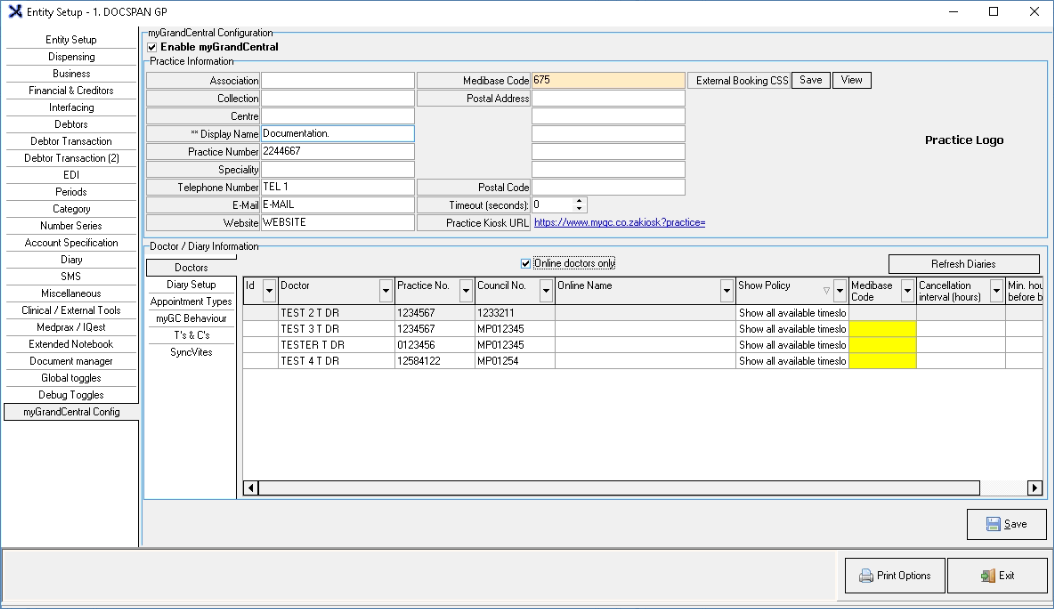
The System Options Entity Setup screen will open.
myGC Configuration
Allows the user to set up their online presence settings for myGC at the Practice. The user is able to set up Booking Types and Day Setup specifically for Online Bookings and also customise myGC. The settings will enable the Practitioner to utilise all the features of the myGC App to suit the needs of the Practice and Practitioner's.
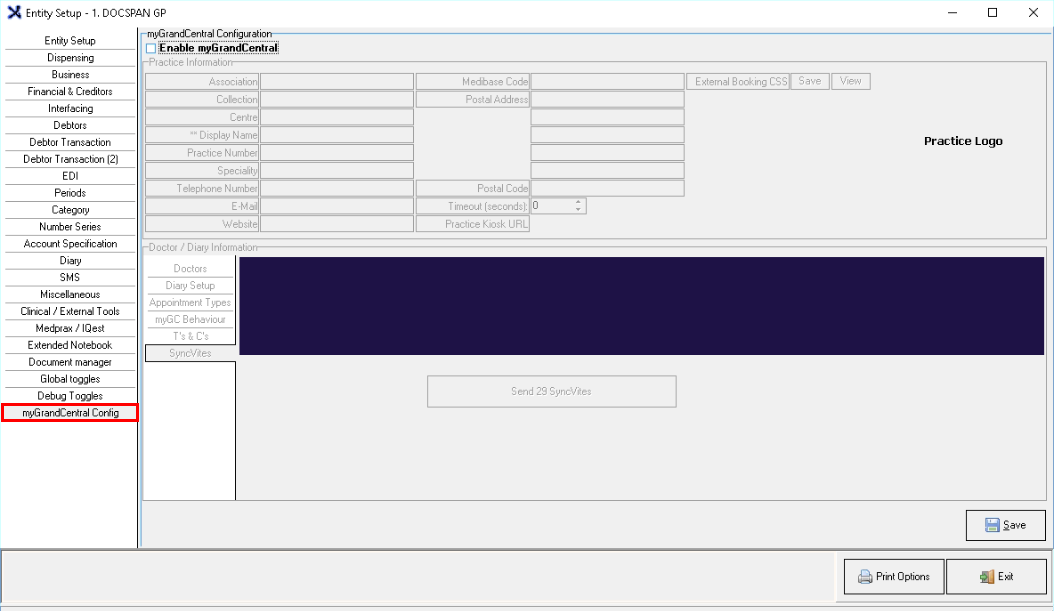
Click on the myGrandCentral Configtab on the left side of the screen, to open myGrandCentral Configuration.
An explanation will be given for all the options:
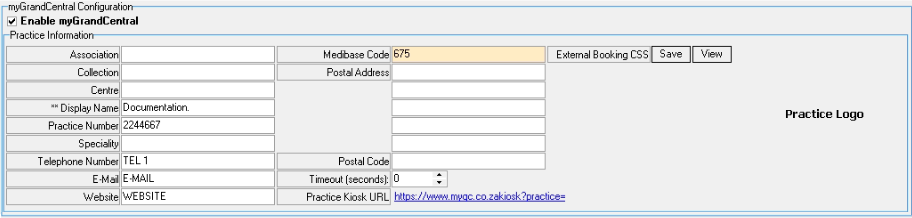
Enable myGrandCentral: Allows the user to activate and set upmyGC at the Practice.
Tick the Enable myGrandCentral checkbox to activate myGC.
Please Note: If the enable myGC option is not ticked, the settings will be greyed out and the user is not able to set up myGC.
The myGC screen will become editable and the user can complete and set up the different settings.
Practice Information
All the information that relates to the Practice such as the name of the Practice, the Practice Number, Speciality, Addresses, Contact Information etc. The information will be displayed online when Patients make a booking to visit the Practice.
An explanation will be given for each field:
Association: The name of the association the Practitioner is registered at, for example, a GP - Asaipa.
Collection: The name of the group that the Practice belongs to, for example, Dr G Docspan, but the collection is GX Healthcare Group.
Centre: The place where the Patient is being treated or where the Practitioner is consulting. If the Practice has different Service Centres, for example, GX Health Care Centre Pta and GX Health Care Centre Jhb, they will add the name of the Service Centre where myGC is being set up.
Display Name: The name of the Practice name that will be displayed on myGC.
Practice Number: The Practice number is the 7 digit Practice number of the Practitioner. A Practice number is allocated based on the authority granted to the BHF by the Council for Medical Schemes to allocate Practice numbers to Practitioners for relevant healthcare services.
Speciality: The speciality code indicates what field of medicine the treating Practitioner practices in, for example, a General Practitioner's code is 014. These codes are allocated to the different specialities by the BHF (Board of Healthcare Funders).
Telephone Number: The contact number that is associated with the landline number of the Practice. Patients can use the number to make contact with the Practice for a booking or more information.
E-Mail: The electronic mailing address for the Practice. If there is more than one, separate the addresses with a semicolon (;). Booking requests will be sent to this booking mailing address.
Website: The web URL (Uniform Resource Locator) link associated with the website of the Practice. The website address will only be used for contact details and will not reflect on the myGC App.
Medibase Code: Medibase is a comprehensive and up to date source of healthcare Practitioner's contact information. The Medibase Code in myGC will automatically be created by the system when the Practitioner's information is imported from Medibase.
Please Note: A Practice will need to be linked to Medibase before they are able to use myGC.
Postal Address: An address for the Practice, where letters and parcels can be sent.
Line 1: Street Name/Complex Name/Office Park and number associated with the postal address.
Line 2: Suburb that is associated with the postal address.
Line 3: City that is associated with the postal address.
Line 4: Province that is associated with the postal address.
Line 5: Country that is is associated postal address.
Postal Code: The area code associated with the postal address of the Practice.
Timeout (seconds): The number of seconds before the Kiosk will time out. If the network is down or slow, the system will advise the Receptionist that the request has timed out (within the period that was set up here). For more information regarding the Kiosk, please refer to the book section: myGC Kiosk.
Click on the up/down selectors to increase or decrease the number of seconds before the Receptionist will be warned that the request that has been sent to the Kiosk has timed out.
External Booking CSS: Feature has been discontinued and is no longer in use.
Practice Logo: Allows the user to upload the logo of the Practice that will be displayed on myGC.
Click on the Practice Logo text to upload the image from the user's computer.
The Open screen will open.
Disclaimer: Depending on the operating system of the user's computer, the Open screens may differ.
Navigate to and select the desired logo on the computer that would like to be used as the Practice Logo.
Click on the Open buttonto upload the desired file.
The chosen logo will upload.
Please Note: Ensure that the image that is uploaded is of high image quality, GoodX recommends that a JPEG image is used with resolutions of 192 x 75 pixels.
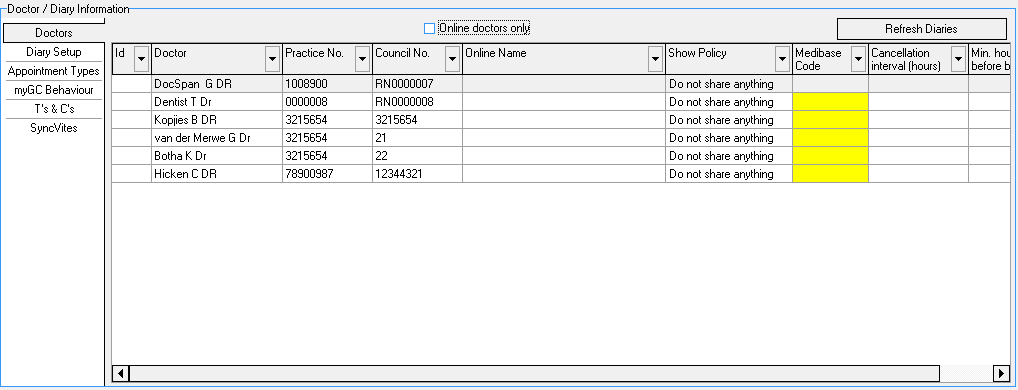
Doctor/Diary Information
All the information regarding the Practitioner's personal details and the details of the diary that the settings will be set up for.
Doctors
All the information regarding the Practitioners that have been set up at the practice.
Clickon the Doctors sub-tab for the Doctors section to open.
An explanation will be given for all the information and options available:
Online doctors only: Shows only the Practitioners that will appear as online on the myGC App.
Tick the Only doctors only checkbox to only display the Practitioners that are set up to use myGC.
Please Note: The Online doctors only tick works together with the Show Policy column. If the Show Policy option is set to Show all available timeslots for the Practitioner, the Practitioner will appear online on myGC.
Click on the Refresh Diaries button to refresh all the diaries from all the Practitioners that are set up to use myGC.
The Practitioner's information is divided into columns.
An explanation will be given for each column:
Id: The identification number that has been generated by the system when a new myGC Practitioner is created.
Doctor: The surname, initials and title of the Practitioner that will display on myGC.
Practice No.: The Practice number is the 7 digit Practice number of the Practitioner. A Practice number is allocated based on the authority granted to the BHF by the Council for Medical Schemes to allocate Practice numbers to Practitioners for relevant healthcare services.
Council No.: The Practitioner's registration number from the South African Medical and Dental Council.
Online Name: The name of the Practice as it will appear on myGC.
Click on the Online Name field to enter the name that the Practice would like to appear.
Show Policy: Which information the user has selected to be shown on myGC.
Medibase Code: Medibase is a comprehensive and up to date source of healthcare Practitioner's contact information The Medibase Code in myGC will automatically be created by the system when the Practitioner's information is imported from Medibase.
Cancellation interval (hours): The minimum number of hours before the start of a booking that the booking can be cancelled.
Click on the Cancellation interval (hours)column to enter the number of hours before the start of a booking that the booking can be cancelled.
Min. hours before booking: The minimum number of hours that a booking can be scheduled before the booking begins.
Click on the Min. hours before bookingcolumn to enter the number of hours before the start of a booking that the booking can be made.
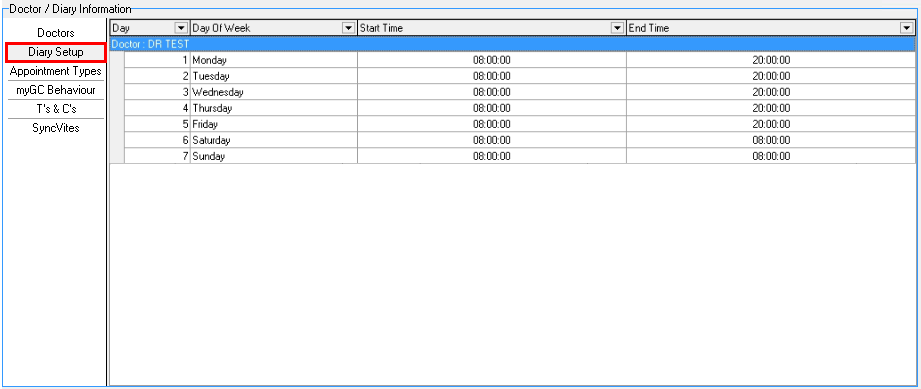
Diary Setup
The setup of Appointment Types and timeslots that will be available on myGC for Patients to book will need to be set up for every diary, if a Practice has multiple diaries. The user will set up the Days of the Week,StartTime and End Time for the Practitioner's diaries, which will then display on myGC so the Patient can select when they would like to book an appointment.
Click on the Diary Setup sub-tab for the Diary Setup to open.
Please Note: The myGC Diary Setup can differ from the main diary setup, for example, it is possible for the user to only make Wednesday afternoons available for online bookings.
The Doctor/Diary Information will be divided into columns.
An explanation will be given for each column:
Day: The position of the day of the week, for example, Monday will be Day 1 on the calendar.
Day Of Week: The days that the Practitioner is available for online bookings. For example, if the Practitioner works from Monday to Wednesday, the days of the week online, will only be from Monday to Wednesday.
Start Time: The time from which the Practitioner is available for online bookings corresponding to the day. The Practitioner is able to set the time from which they would like online bookings to start and not necessarily
the time of their first appointment.
End Time: The time to which the Practitioner is available for online bookings corresponding to the day. The Practitioner is able to set the time to which they would like online bookings to end, which is not necessarily the last booking at the Practice.
Appointment Types
The types of bookings that will be able to be booked via myGC. The default Booking Types will be pulled through from the regular Booking Types that have been set up, and will assist the Practitioner to be advised what type of appointment the Patient is coming in for.
Click on the Appointment Types sub-tab to access what Booking Types will be enabled for myGC.
For more information on Appointment Types and how to set them up, please refer to the user manual: Diary Lists: Appointment Types.
Please Note: The types of bookings that will be able to be booked via myGC. The default Booking Types will be pulled through from the regular Booking Types that have been set up.
Tick the corresponding checkbox of the Booking Type that the Practice would like to enable for online bookings.
Please Note: If no Booking Types are selected, a message will appear on myGC advising the Patients that the Practitioner has no booking types shared, and Patients will not be able to make bookings for that particular Practitioner.
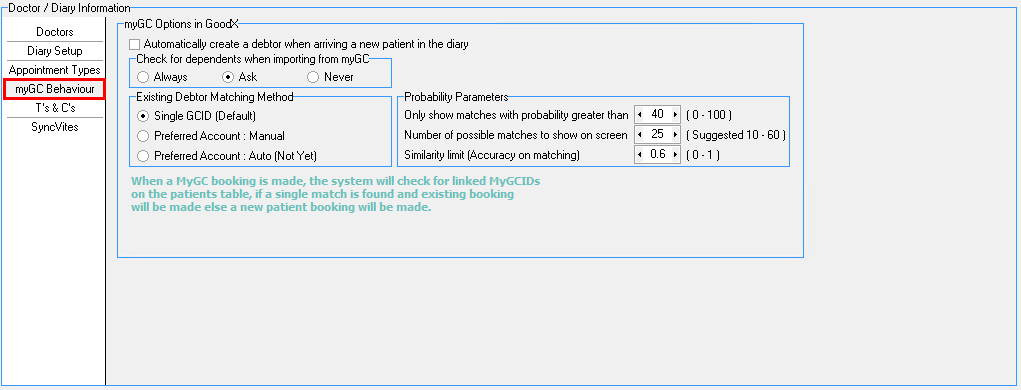
myGC Behaviour
Allows the user to select how certain myGC functions will affect the GoodX Desktop, when they are actioned.
Click on the myGC Behaviour sub-tab to open myGC Options in GoodX.
An explanation will be given for each option:
Automatically create a debtor when arriving a new patient in the diary: Allows the system to automatically create a new debtor account when the Patient's booking is marked as Arrived on the diary, which will save the Receptionist time as the Patient has already completed their details on their myGC profile.
Check for dependants when importing from myGC: Allows the user to import dependant demographic data from the main members' myGC account.
Select an option by clicking on the relevant radio button:
Always: The system automatically checks if there are any dependants saved on the myGC account and import it into the system for future use and reference.
Ask: The system will ask the user whether to check if there are is any dependant data to import from the main members' myGC account.
Never: The system will not import any dependant data when importing the details of the Patient from myGC.
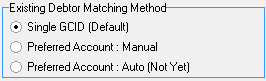
Existing Debtor Matching Method: Allows the system to check whether there is an existing Debtor with the same details as the Debtor that is being imported from myGC.
Select an option by clicking on the relevant radio button:
Single GCID (Default): One single match is done on one account that has a myGC identification number (GCID) and will immediately link the details with the matched account. Single GCID (Default) will be selected by default by the system.
Preferred Account (Manual): Shows the existing account on the system and the user can then manually link the myGC account to the existing account.
Preferred account (Auto): Still in development.
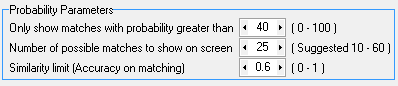
Probability Parameters:Each probability has a set of parameters that define the outcome of the results. The Probability Parameters will match a Name, Surname or ID number as close as possible to the Name, Surname or ID Number that has been searched.
An explanation will be given for each Probability Parameter:
Only show matches with probability greater than: If a Surname matches 100% and the Name is 95% match, the system will add the percentages and give a % of the two together. The Patient who has the highest probability percentage on myGC to the GoodX system search percentage will be a match. The user is able to select a percentage between 0 and 100 to show only the matches that exceed the chosen amount.
Number of possible matches to show on screen: The number of matches that the system will show when the search has been completed to show the closest matches to the search. The suggested number is between 10 and 60.
Similarity limit (Accuracy on matching): The accuracy of the search, matching to 1, will display the one person who has the highest percentage match.
Please Note: When a myGC booking is made, the system will check for linked myGC ID's on the Patient's table. If a single match is found, an existing Patient booking will be made, otherwise a new Patient booking will be made.
T's & C's
The Terms and Conditions that are in place, which stipulates the policies for the use of myGC as set out by GoodX.
Click on the T's & C's sub-tab to access the terms and conditions for myGC.
For more information and to view the Terms and Conditions of myGC, please refer to the user manual: Privacy Policy.
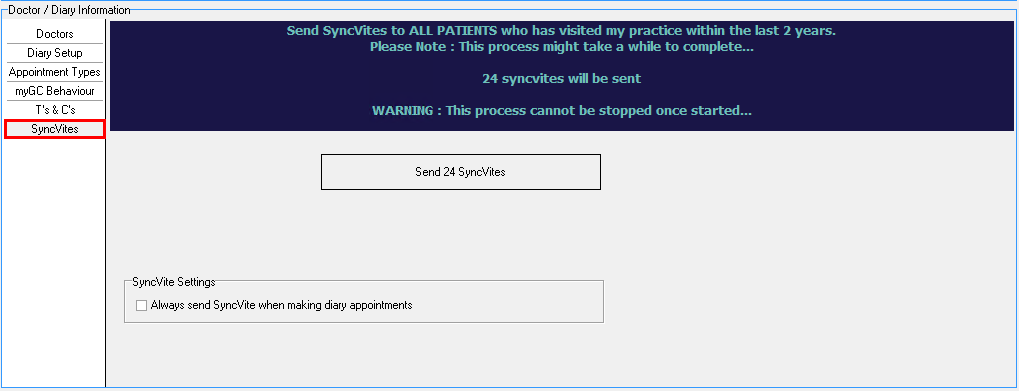
SyncVites
SyncVite settings allow the user to turn on/off the automatic sending of requests for Patients to update their demographic information.
Click on the SyncVites sub-tab to access the SyncVite Settings.
For an extensive explanation of the SyncVite settings, please refer to the user manual: myGC: SyncVite Settings.
Click on the Save button to save the settings that have been set up.
Please Note: If the user does not save, all the settings will be lost.
Click on the Print Options button to print out a *pdf sheet of all the settings in the Supervisor Module.
Click on the Exit button to close the Entity Setup screen and return back to the System Options main screen.