The Age Analysis report displays all the outstanding balances of the Debtors on the system and the age of the outstanding balance as per the information selected from the report set-up.
The Age Analysis report indicates all the outstanding accounts of both Medical aid and Patient outstanding accounts.
The Age Analysis report can be found in MedDebs Module.
Open the MedDebs module.
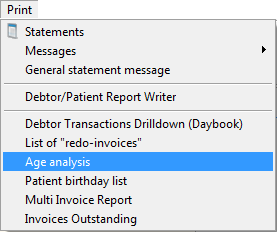
- Click on Print and select Age Analysis from the list.
Profile options and function
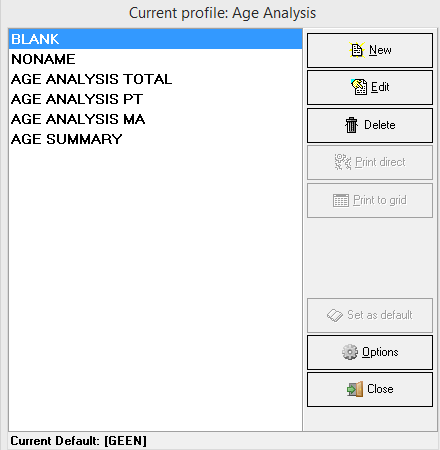
The following Age Analysis profiles will be loaded by default with new installations.
- Click on New to add a new profile.
- Click on Edit to edit an existing profile.
- Click on Delete to delete an existing profile.
- Click on Print Direct to print the report directly to your printer without viewing the report.
- Click on Print to Grid to view the report in a grid format.
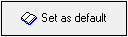
Click on Set as Default to set a specific report profile as the default, the system will highlight the report that is set up as the default report when the Age Analysis report profiles have been opened.
When a report is set up as the default report the report cannot be deleted. The default report must first be removed, by using the options button and then only the report profile can be deleted.
Click on Options, 3 options will be available.
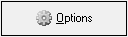
- Rename - Will allow to rename the report profile that is highlighted.
- Save as - Will take the report setting from the profile that is highlighted and save a duplicate of the report with the new name that was entered.
- Unset current default - Will take the default report of but not delete the report, only remove the default option from the report.

- Click on Close to exit the Age Analysis profile list.

The following report setting is available to minimize the information in the report to the correct result that is wanted.
The Report Parameters
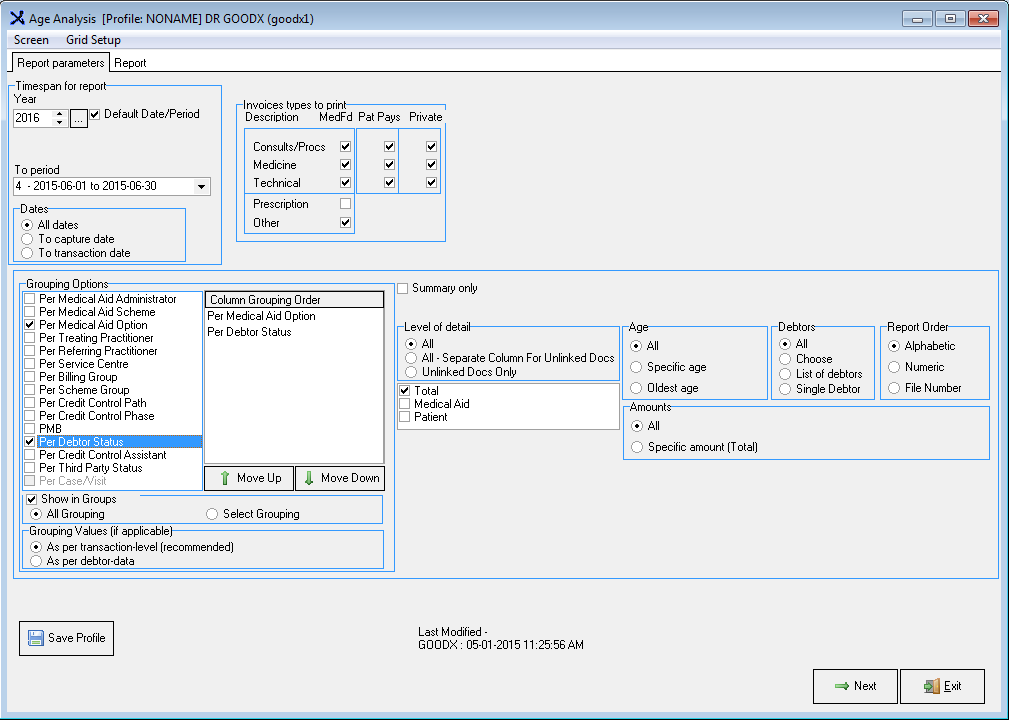
Date settings:
Select the Timespan for Report.
TAKE NOTE: Tick the Default Date/Period block to default the report profile setup to the current financial year and period. The report will always default the current period and the financial year according to the computer date.
- Select the Financial Year.
- Select the To Period - Age analysis can only be pulled until a period or specific date and not between periods or between dates. The age of the transactions can only be calculated from the beginning of when the transaction took place.
- Select the Type of Dates (From the beginning when the system was used until the date in this section).
- All dates - The financial period.
- To capture date - The date the transaction was captured on the system.
- To transaction date - The date the patient was treated and when the treatment took place.

NB. Please take note of the differences between the types of dates:
- Capture date: the date on which the transaction is captured onto the system (is not necessarily the same as the transaction date).
- Transaction date: the treatment date, when the patient was treated.
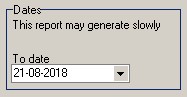
When the Capture date or transaction date options are used the following extra setting will display to put in the date of the last transaction must be included.
The different date setting will not have the same information and amounts, these reports cannot be compared with each other. The information is using different parameters and will not be the same information displayed.
Invoice Types to print
Select the relevant tick boxes under
Invoices Types to Print.
The following options can be included or excluded from the report information when the tick is on the information will display, if there is not tick mark the information will not be included.
- Consults/Procs - The procedure and consultations that was charged on the patient account. This is billed from the Tariff lists in GoodX.
- Medicine - The medicine that was billed (used) on the patient.
- Technical - Only for Oncology equipment rent or Lab equipment what is rented.
- Prescription - The prescriptions that were made on the patient's account, this will be normally billed as a Zero amount when the billing was done.
- Other - Any other transactions that were billed on the account that is not included in the top settings.
- MedFd (/P) - All the transaction that was posted on a medical aid on the patient account, the Invoice will post with a "/P" after the invoice number.
- Pat Pays (/Q) - All transactions that were posted as a tariff 2, 3, 4, of 5. The invoice number will have a "/Q" at the back of the invoice number.
- Private (/X) - All transactions that the Medical aid was set to post as Private in the Medical aid option, or when the patient file was marked as a private patient file of when an item on the billing screen was marked to post as private. The invoice number will have a "/X" at the back of the invoice number.
Grouping Options:
Select the Grouping Options and the Column Grouping Order to choose how the report should display.
The column grouping will show when 2 or more Grouping options were selected.
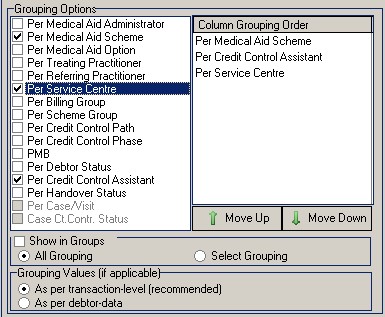
Grouping Options:
- Per Medical Aid Administrator - Group the accounts according to the Medical Aid Administrator.
- Per the Medical Aid Scheme - Group the accounts according to the Medical Aid Scheme, this grouping assists in following up on all the outstanding account that is at the same medical aid.
- Per Medical Aid Option - Group all accounts according to the plan or option the invoice was posted.
- Per Treating Practitioner - Grouping the accounts according to the Practitioner who did the treatment. This grouping assists in follow up on the outstanding accounts on the treating doctor when it is a Group Practice.
- Per referring Practitioner - Grouping the accounts according to the Dr who referred the patient to the practice.
- Per Service centre - Grouping the accounts according to the Service centre the patient was treated in.
- Per Billing Group - Grouping the accounts according to the Billing Group what the invoice was done on. The billing group is for example 300% on the standard rate.
- Per Scheme Group - Grouping the accounts according to the grouping on the Medical aid schemes that is set up. The Medical scheme can be linked to a group to assist in allocating a group of schemes to one person to follow up on the outstanding accounts.
- Per Credit Control Path - Grouping the accounts according to the Credit control assistant path set up. The Path the account follows in the Credit control assistant. The Credit Control assistant must be set up before this Grouping can be used.
- Per Credit Control Phase - Grouping the accounts according to the Credit control assistant phase the accounts are in. The Credit Control assistant must be set up before this Grouping can be used.
- PMB - Grouping the accounts according to if the account is a PMB or not.
- Per Debtor Status - Grouping the accounts according to the status the Debtor is linked to.
- Per Credit Control Assistant - Grouping the accounts according to the Credit control assistant what is linked to the account. The Credit Control assistant must be set up before this Grouping can be used.
- Per Handover status / Per third-party status - Grouping according to the handover process.
- Per Case/visit - Grouping for hospitals and when cases are used.
- Case Ct.Ctrl. Status - Grouping the accounts according to the case credit control status that is set up on the Case.
Column Grouping order:
- Click on the Move Up or Move Down buttons depending on which order the Grouping should display.
- Show in Groups - All Grouping means that the report will show in the order of the Grouping Options selected.
- Show in Groups - Select Grouping means that you can select (in this case) which Medical Aid Scheme and which Service Center should display.
Grouping Values can be chosen for:
- As per transaction level - reports are drawn with the information reflected on the invoices posted in the system.
- As per debtor data - reports are drawn with the information captured for the debtor to ignore the invoice data, specifically the Doctor, Referring Doctor and Service Centre as captured on the debtor information screen.
Summary Only:

Summary Only will print the Totals only, NO Debtor information. The accounts will be added together and summarized according to the grouping levels and age of the accounts.
Level of detail:

Select the Level of Detail of the transaction that must be displayed in the report.
- All: Will display all the detail.
- All - Separate Column For Unlinked Docs: This option will display two extra columns in the report.
- Overpaid - This is all the accounts that are in credit, this means the patient or the medical aid has paid to much on the account.
- Unallocated amounts - This is all the receipts that were not allocated to the invoices. This is the R line on the account screen and in the receipt allocation.
- Unlinked Docs Only: This option will show only the Unlinked transactions.
Age:
The Age of the accounts, how many days is the account outstanding.
Select the Age to display on the report.
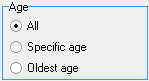
TAKE NOTE: When printing the report, a screen will display where you can make your selection.
- All: The report Will display All the ages in separate columns for each age.
- Specific Age: Select a specific age to display on the next screen.

- Ages - Can be selected which age the accounts must be included in the report.
- Filter - Where the Age is applicable to Total ( The account total, medical aid plus patient) or Medical Aid (Only if the Age is on the Medical Aid account) or Patient (Only if the Age is on the Patient account).
- The amount can also be chosen by typing in the amount and selecting if the amount must be included or between. The following options are available, for the explanations on each read the bottom of this page under the specific amount:

- Oldest Age: This will enable you to view all the outstanding accounts with the oldest age.
Debtors:
Select the Debtors to display on the report.
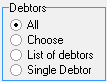
TAKE NOTE: When printing the report, a screen will display where you can make your selection.
- All: Displays all the Debtors with an account balance.
- Choose: To print from a specific debtor to a specific debtor. The Debtors Surname can be filled in the columns and the Debtors will be included in the report.

- List of Debtors: Will populate a screen where a list of debtors can be selected. The account number or surname can be typed in, the patient details will complete if the correct debtor can be selected, otherwise, the list of all Debtors will open and the correct Debtor can be selected.
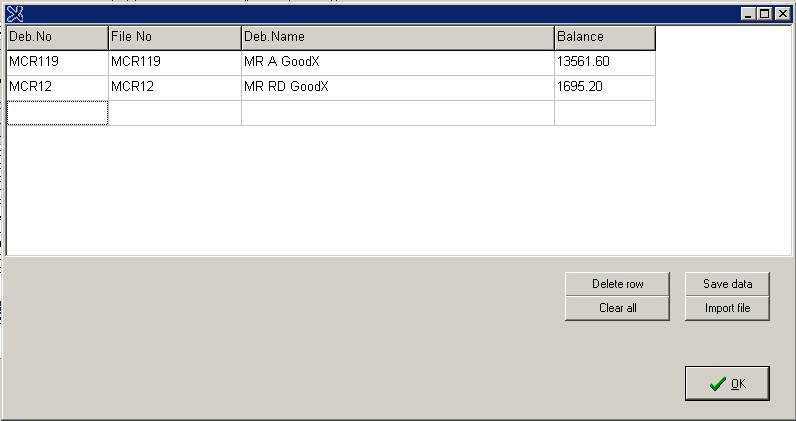
Import file - A list can also be imported from a notepad file or a file that was saved previously by clicking on the Import file button.
Delete Row - A Row can be Deleted if the incorrect Debtor was chosen.
Save data - The list can be saved and imported next time when the list function is used.
Clear all - Will clear all the Debtors in the list and can start again with a new list.
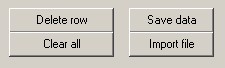
OK - Will take the list and show the information on this Debtors.

- Single Debtor: To select a specific debtor.

The Debtor surname or account number can be used.
Report Order:
Select the Report Order on how the report should display.
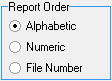
- Alphabetic: The report displays in Alphabetical order (ABC on Debtor Surname).
- Numeric: The report displays in Numeric order (Account number order).
- File Number: The report displays in File number order.
Columns
Select which Columns to display on the report.
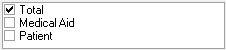
- Total: This will reflect the Total amount outstanding on the Debtor, Patient plus Medical Aid liable. The columns will display Green in the report. No Medical aid or Patient split will display on the report.
- Medical Aid: This option will reflect only on the Debtor, Medical Aid liable accounts. The columns will display Blue in the report.
- Patient: This option will reflect only on the Debtor, Patient liable accounts. The columns will display Grey in the report.
- All three options can be tick and all three will display on the report in different columns according to the colours.
Amounts
This will assist in shortening the information in the report to target the accounts that you want to see.
Select the Amounts to reflect on the report.

- All: Will reflect all the outstanding amounts - Debits, Credits as well as the Zero balances.
- Specific amount (Total): This option will enable you to specify the amounts to reflect on the report. The following option is available when the Specific amount is chosen:
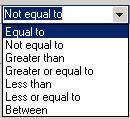
- Equal to - Will only display the amount that is the same as the amount that has been entered.
- Not equal to - Will display all the amounts except the amount that was entered. This can be used to filter out all the Zero accounts.
- Greater than - Will display only the amount that is bigger than the amount that was entered. This can allow that only amounts bigger than R 10.00, for example, can be displayed.
- Greater or equal to - Will display only the amount that is bigger than the amount that was entered and will include the amount that was entered.
- Less than - Will display only the amount that is smaller than the amount that was entered. This can allow that only amounts smaller than R 5000.00 for example, can be displayed.
- Less or equal to - Will display only the amount that is smaller than the amount that was entered and will include the amount that was entered.
- Between - Will display 2 fields to put in amounts, and only the amounts between that 2 amounts will be displayed.
Contact details and Last Payment date:

Contact details - When the tick is on the contact details will display of the Debtor on the age in a separate column.
Print Last Payment Date - When the tick is on the date of the last payment that was received on that account will be displayed.
TAKE NOTE: The following report profiles can be set-up and is a guideline only.

To Add a new profile:
- Highlight the BLANK report profile.
- Click on New.
- Enter the name of the report profile.
- Click OK.
- Select the Report Parameters.
- Click on Save Profile.
To Print the Report:
- Highlight the report profile.
- Click on Print to Grid.
- Choose the applicable options under the drop-down boxes.
- Click Next.
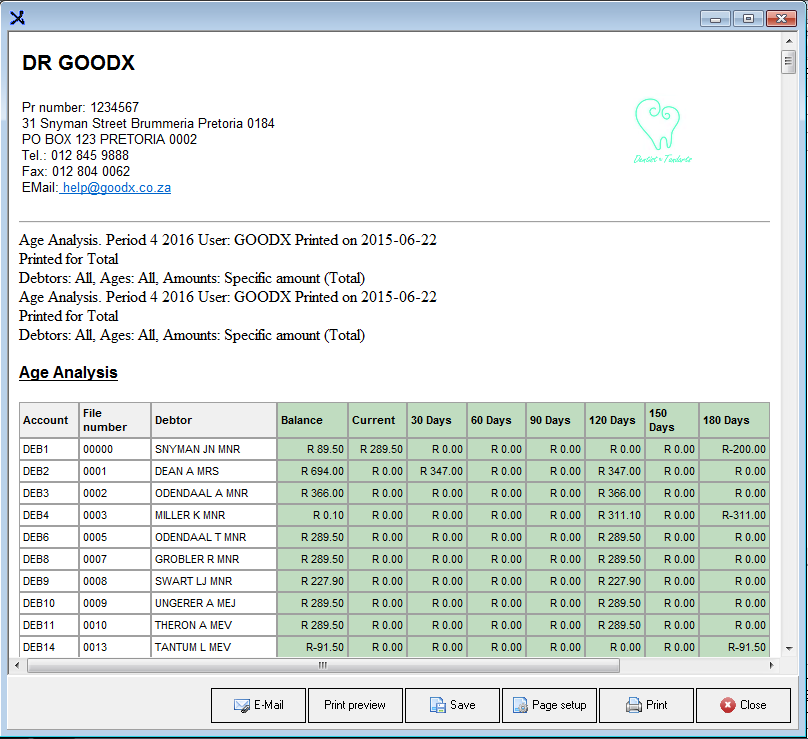
The report will display as follows:

When clicking on Print the report will display as follows:
- From here you have the option to E-mail, Print Preview, Save or Print the report.