Text size
Line height
Text spacing

What is the "Tasks" feature?
Tasks are multifunctional and can be tailored to the specific requirements of your practice. They may be used as manual reminders, for assigning duties to colleagues, or can be triggered automatically based on practice setup and events. These triggers include, but are not limited to, claim rejections, the approval of scheme authorization billing codes, and subsequent authorization follow-up tasks such as creating or updating smart sticker protocols or making the necessary follow-up calls.
What can be created as a Task in GoodX?
You can create a wide variety of tasks tailored to your practice’s specific needs. For practices managing authorizations, a task can be automatically generated by selecting the relevant checkbox when adding an authorization number to a debtor or patient profile. Similarly, pathology results imported into GoodX can be linked directly to a patient and assigned as a task to a specific representative or practitioner using their verified mnemonic code.
If you utilize the automated credit control management system or the reports management screen, tasks will automatically populate as call events. To streamline repetitive workflows, task templates allow you to pre-define responsible users; when a task is created using a template, it is automatically assigned to the designated staff member. Alternatively, tasks can function like digital sticky notes, serving as simple reminders for general instructions or daily practice to-dos.
What does a task look like?
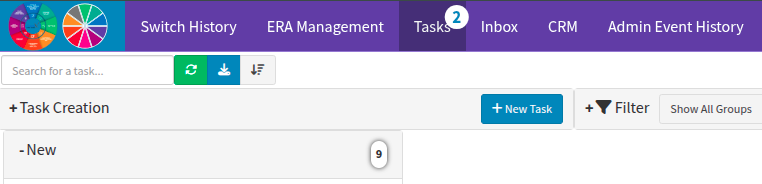
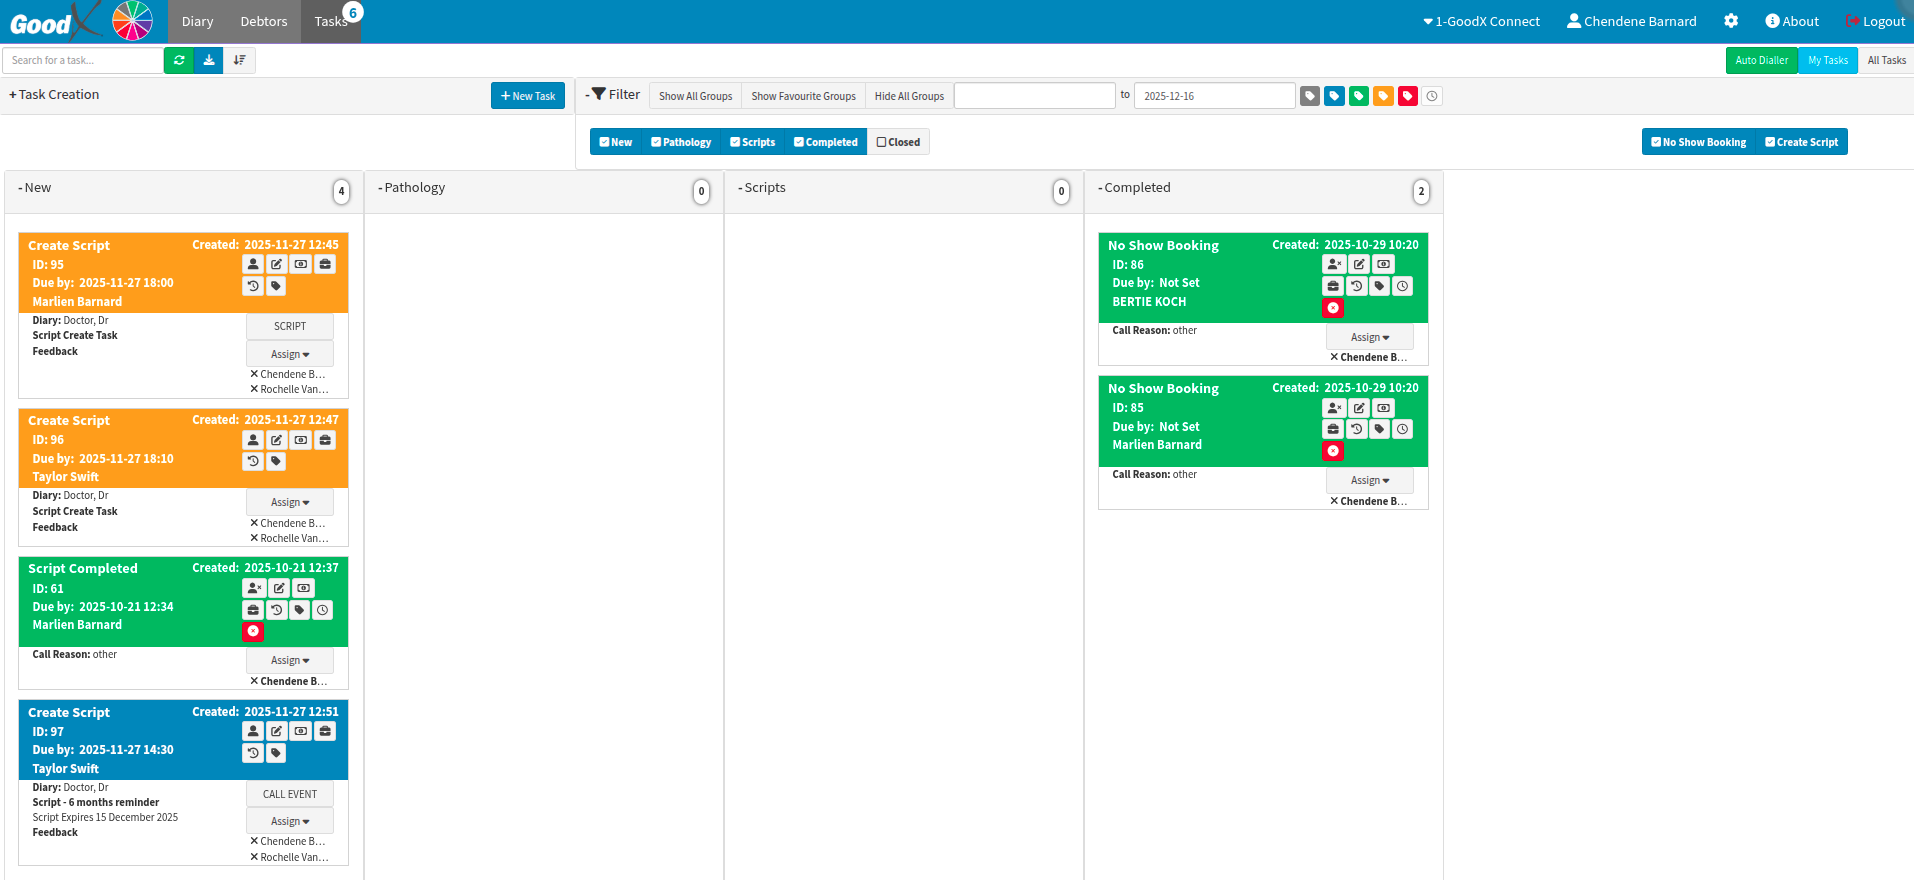
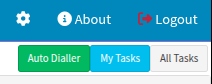
Within the Communication Wheel, the Task tab will automatically display the default tasks assigned to the currently logged-in user.
These columns can be customized and renamed to suit your entity’s specific requirements. To manage your workflow effectively, you can filter tasks to view all entries or exclude those already marked as completed. Additionally, tasks are not restricted to a single individual and can be assigned to multiple people simultaneously.
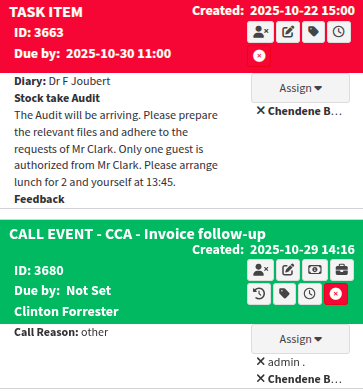
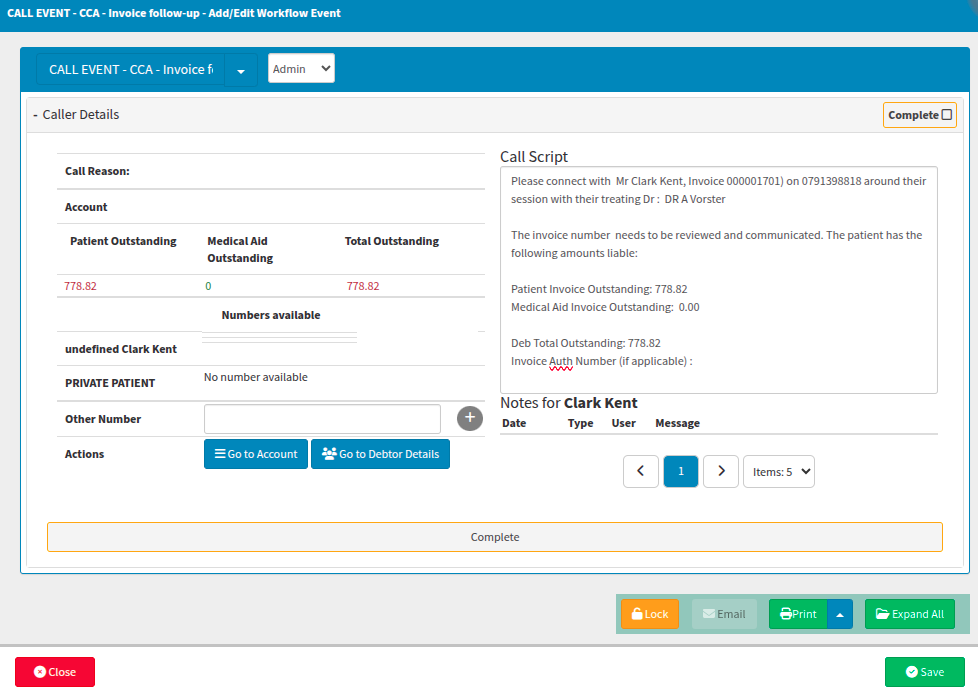
The numbered bubble above the "Tasks" tab indicates the total count of assigned tasks pending for that user. Below is an example of a manual task configured with a "Call Event," requiring a follow-up call to be completed.
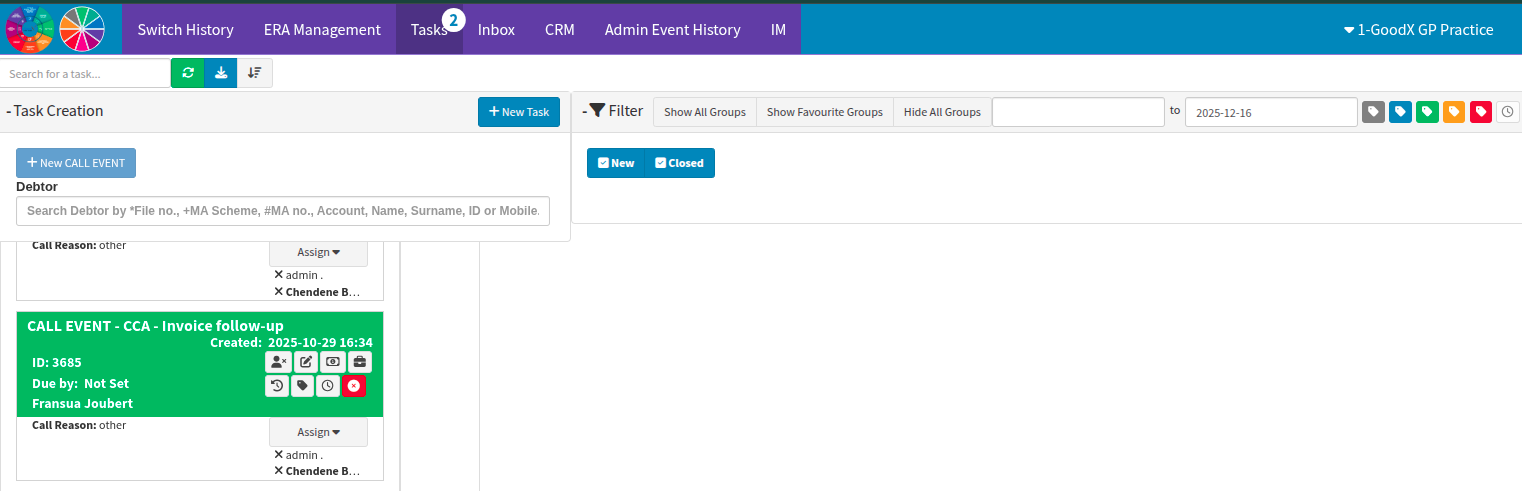
Users have the flexibility to filter the task list to view all entries or exclude those already completed.

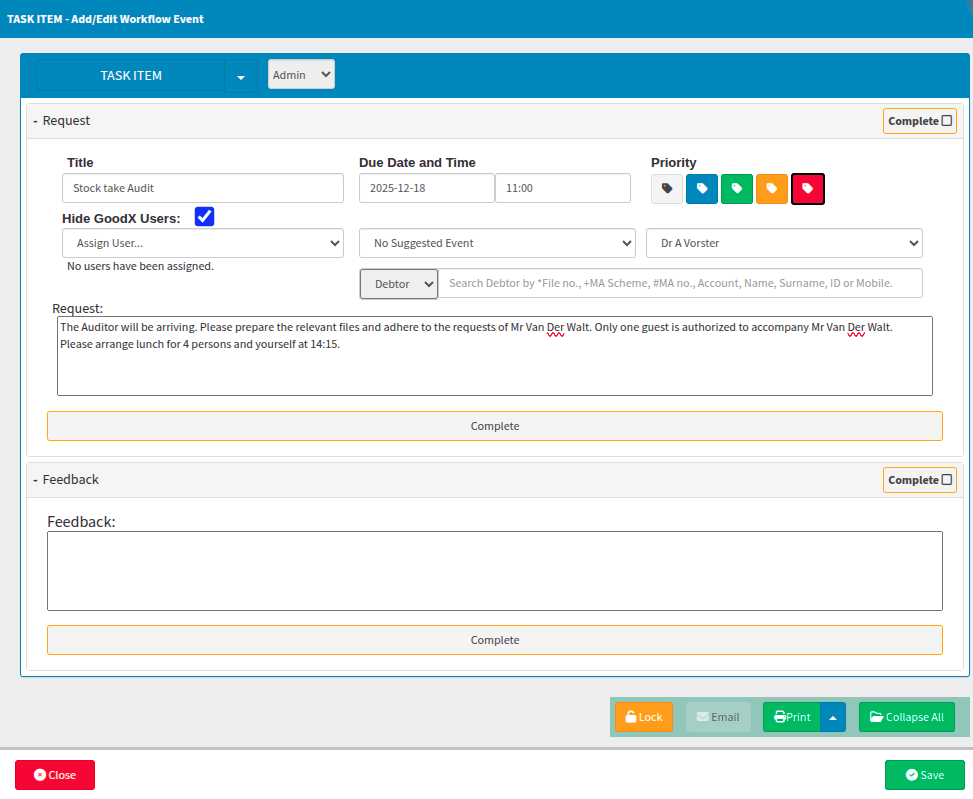
A standard task is categorized and listed as a "Task Item" within the system. Where a template is selected, the task will be renamed to the template name.
When a call request is generated via the Automated Credit Control Management (ACC/CCM/CCA) system, it will be categorized as a "Call Event" task type for easy identification.
How are tasks identified as assigned?
If your practice has dedicated personnel for specific workflows, you can create tasks in GoodX to notify the relevant team. These tasks are flexible: they can be left open for the next available staff member to claim or specifically assigned to a particular individual for completion.
To determine if a call request is assigned, look for these two indicators:
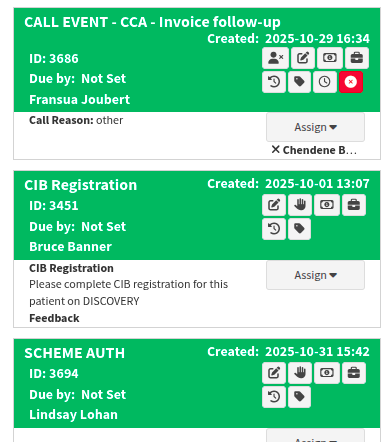
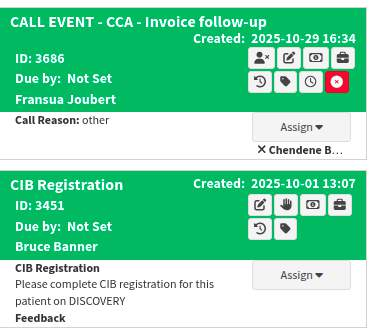
Assigned Tasks: These feature a person icon alongside the name of the user responsible for the task.
Unassigned Tasks: These feature a hand icon.
By clicking the hand icon, you are "claiming" the task and taking responsibility for its completion.
How is a Task created?
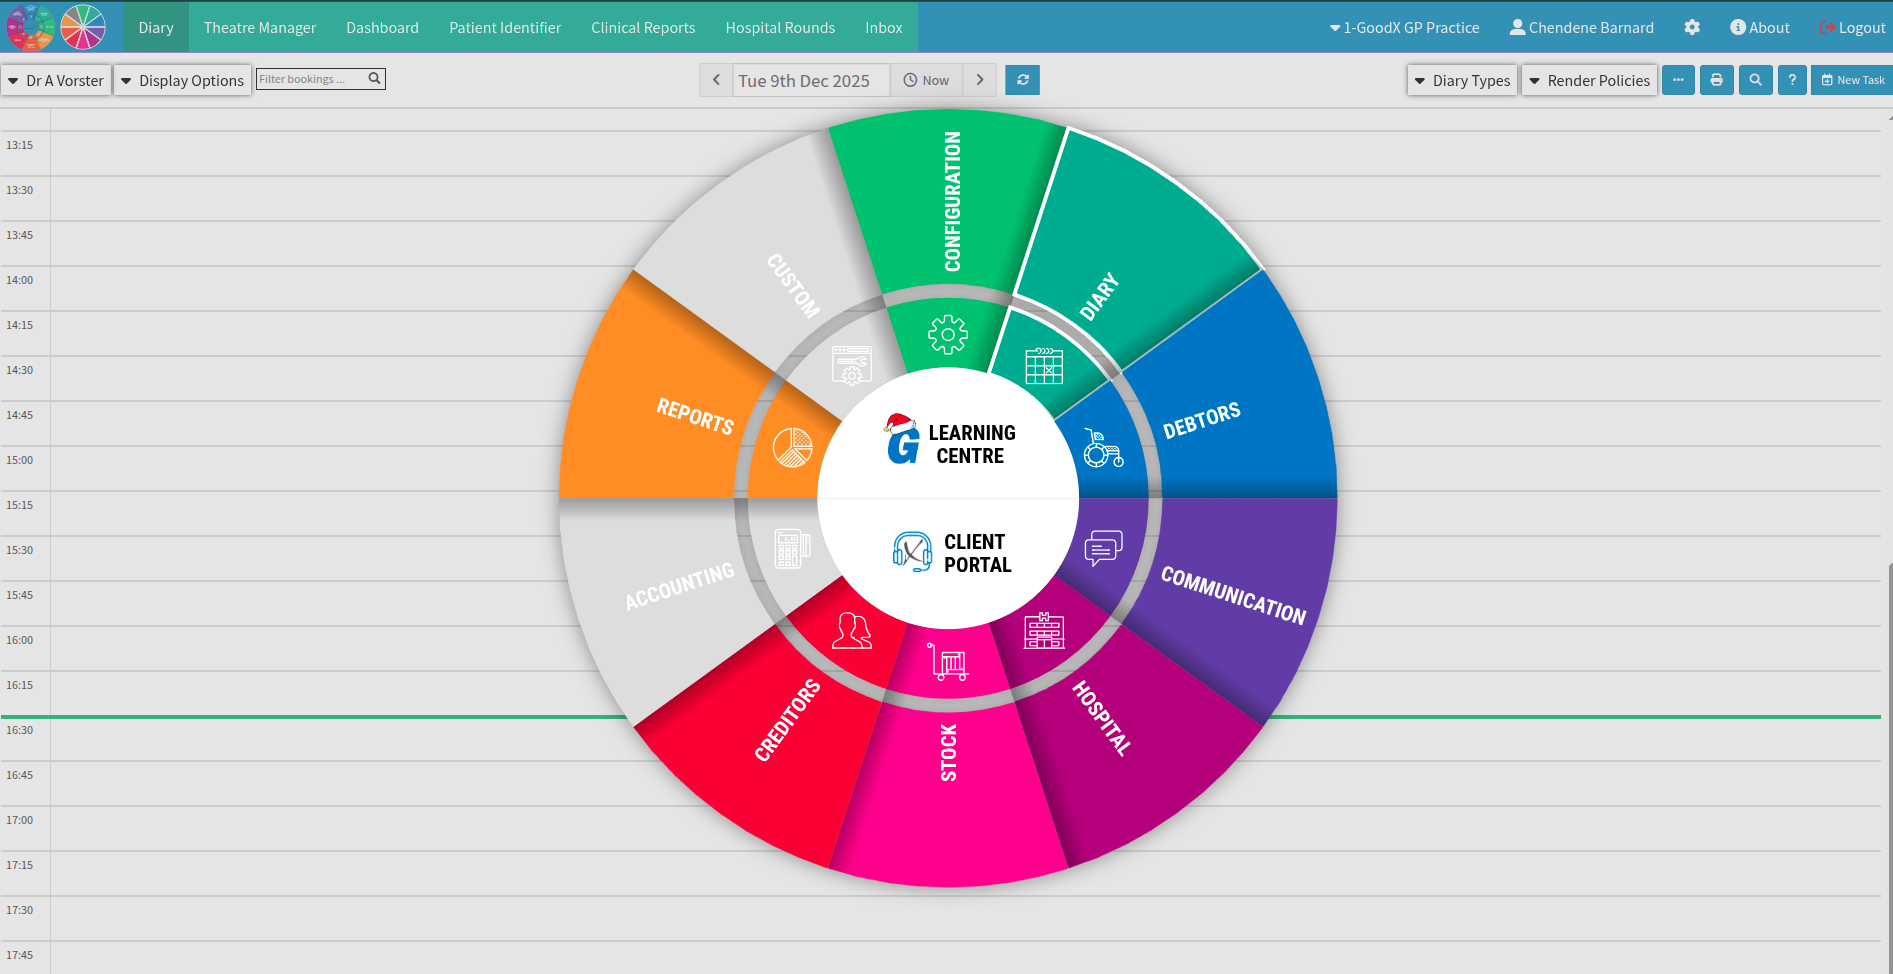
The navigation wheel is your most efficient tool for moving through the software. To begin, simply select "Communication" from the navigation wheel to access your messaging and task management features.
Navigate to the Tasks tab and select "+ Task Creation" to generate a new task for your team.
Once the menu is expanded, you can choose to create either a Task Item or a Call Event. While standard tasks can be created without being linked to a specific debtor, a Call Event requires a debtor to be specified first.
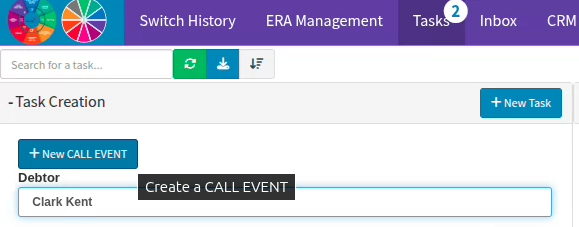
To manually create one from the tasks screen, expand the "+Task Creation" menu and select "+ New CALL EVENT". Keep in mind that this option will remain inactive until a patient has been defined.
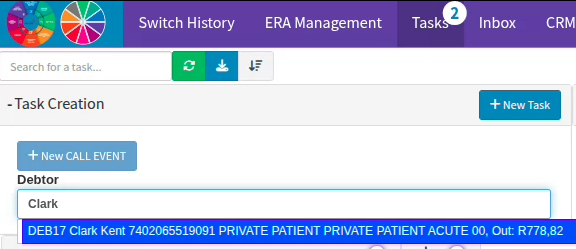
If your practice has established templates, the drop-down menu will display all available options configured under your CALL EVENT templates. Selecting a template will automatically populate the relevant information for the specific patient, saving time and ensuring consistency. Similarly, when creating a new task, the drop-down menu will present pre-loaded templates specific to your entity for common actions. For example, you can select a template for script requests, allowing the practice to quickly route client requests to the practitioner for completion.

In the scenario above, the payment team creates a "Call Event" task for the reception team to action. To access these, select "Communication" from the GoodX navigation wheel. By default, the "Tasks" tab displays tasks assigned to the currently logged-in user.
If the request is uncommon and no template fits, you can manually complete the setup. Assign the relevant user responsible for the task, set a priority level (if applicable), and provide specific instructions or details regarding the required action. Once the details are finalized, select "Save" to create the task.
How are tasks managed?
The newly created task will appear based on your active date filter. To keep your workspace organized and clutter-free, you can also filter by open or closed tasks; this ensures that resolved items are hidden and do not distract from pending work.
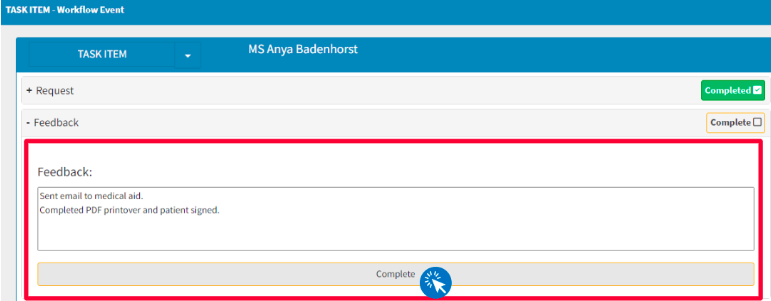
To manage a task, double-click it to open the details. From here, you can add notes for documentation and mark the task as completed once finished.
If the workflow changes, the task can be reassigned to a different staff member. You also have the option to add additional users to the task, which is useful if you require feedback or collaborative input to resolve the item.
The assigned user can add comments directly into the Feedback section of the task. Any notes entered here are visible to all users assigned to that task, ensuring clear communication across the team.
Depending on your practice’s preferred workflow, the task creator can either add themselves as an assignee to stay updated or request that the task be reassigned back to them (or another relevant user) once the initial action is completed.
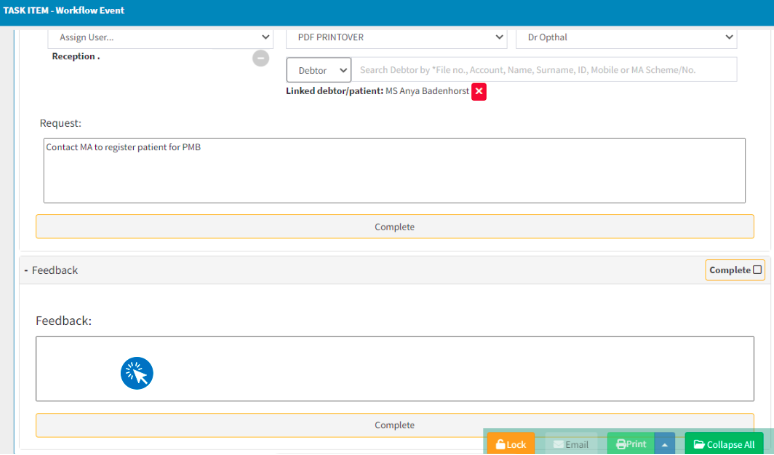
Feedback can be added at any time, even after the initial task setup. In cases where multiple users are assigned to review or manage the same task, it is important to note that the system tracks status individually: a task marked as finished will only reflect as completed for the specific user who ticked it off. This ensures that every assigned team member has the opportunity to review the task before it disappears from their personal queue.
To resolve diary tasks, you can either mark them as completed or select "X Close" directly within the diary view of the doctor linked to the task. Tasks can be dragged-and-dropped between designated columns.
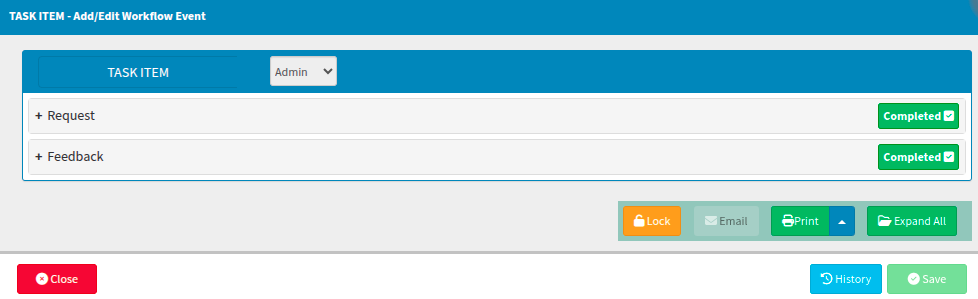
If you need to switch perspectives, use the "Display Options" dropdown menu on the diary screen; this allows you to toggle back and forth between the Diary view (for appointments) and the Task view (for pending actions). To finalize a task, select the lighter-colored button depicting "X Close". This will close the task and remove it from your current list, depending on your specific diary settings.

How are Pathology results handled as tasks in GoodX?
Practitioners have the ability to transmit lab test requests directly to pathologists manually or electronically; with the subsequent results being returned electronically and automatically linked to the patient’s profile. This integrated workflow reduces the risk of manual errors and improves turnaround times. By facilitating faster and more informed clinical decisions, this feature ultimately enhances the standard of patient care.
Please contact your relationship liaison to ensure that your preferred pathology providers are correctly activated and registered on your GoodX Web platform. When requesting the addition of pathology providers, you are required to submit the official documentation confirming the practitioner’s mnemonic code to complete the setup process.
Pathology results typically arrive within three to five business days, though certain cases may require up to ten business days for processing. Should the results remain unavailable on the eleventh business day, please notify us if the pathology report has not appeared as an automated task or if the data is missing from the GoodX pathology integration report system.
Whilst we are continuously working to expand our support for additional laboratories, we currently facilitate integrations with several specific systems.
You can currently transmit lab requests to:
Skylims
Prelink
Chiron
Afrilims
Lancet Lab (Ampath Lab)
Pathcare
Vermaak & Partners Lab
Dynacare [Canada]
You can currently receive the results from the following laboratories:
PathPoint
Hamadilab
Ampath
Sapath
JDJ
Lab24
Bledlab
Afrilims
GlobalLabs
Vermaak
TogaLabs
IVC
Lancet
Pathcare
Dynacare
Path24
Nanolabs
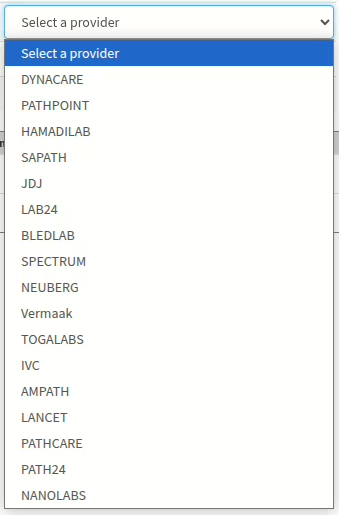
Pathology results may also be accessed through a dedicated report view by navigating to the GoodX Wheel and selecting Reports. From there, proceed to the Clinical Reports tab and select the Pathology sub-tab. When configuring the report filters, ensure that the correct treating practitioner is selected and that the search criteria is set to Pathology from the drop-down menu.

To refine your search for a specific laboratory result, you may also apply a filter based on the particular lab involved.
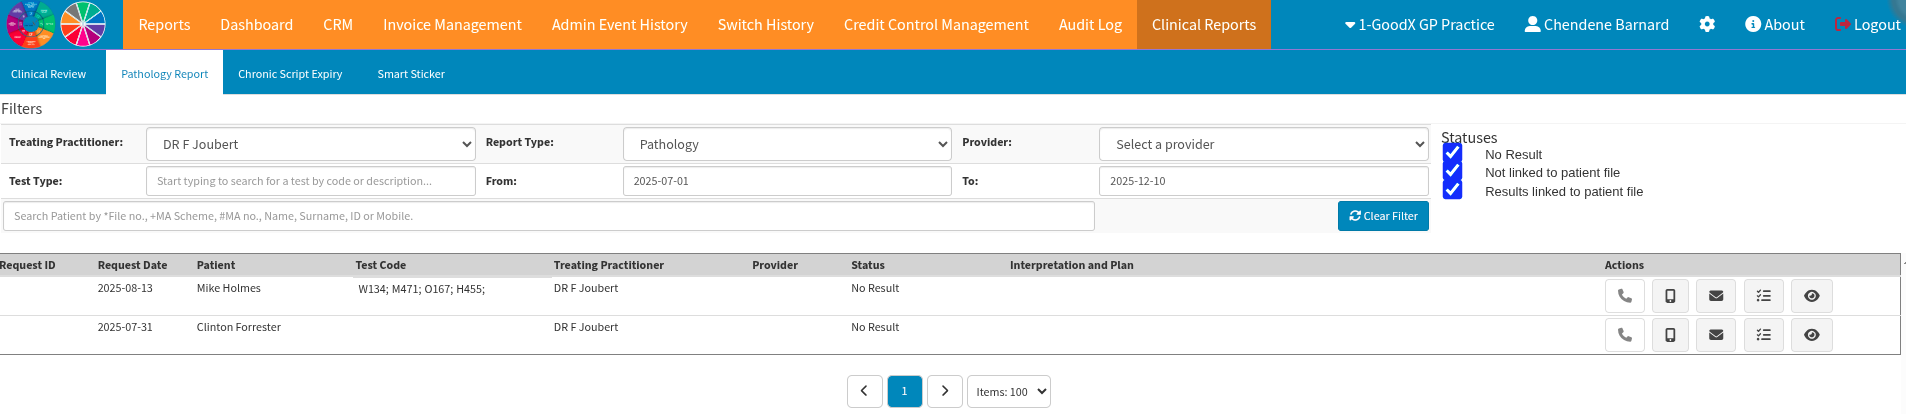
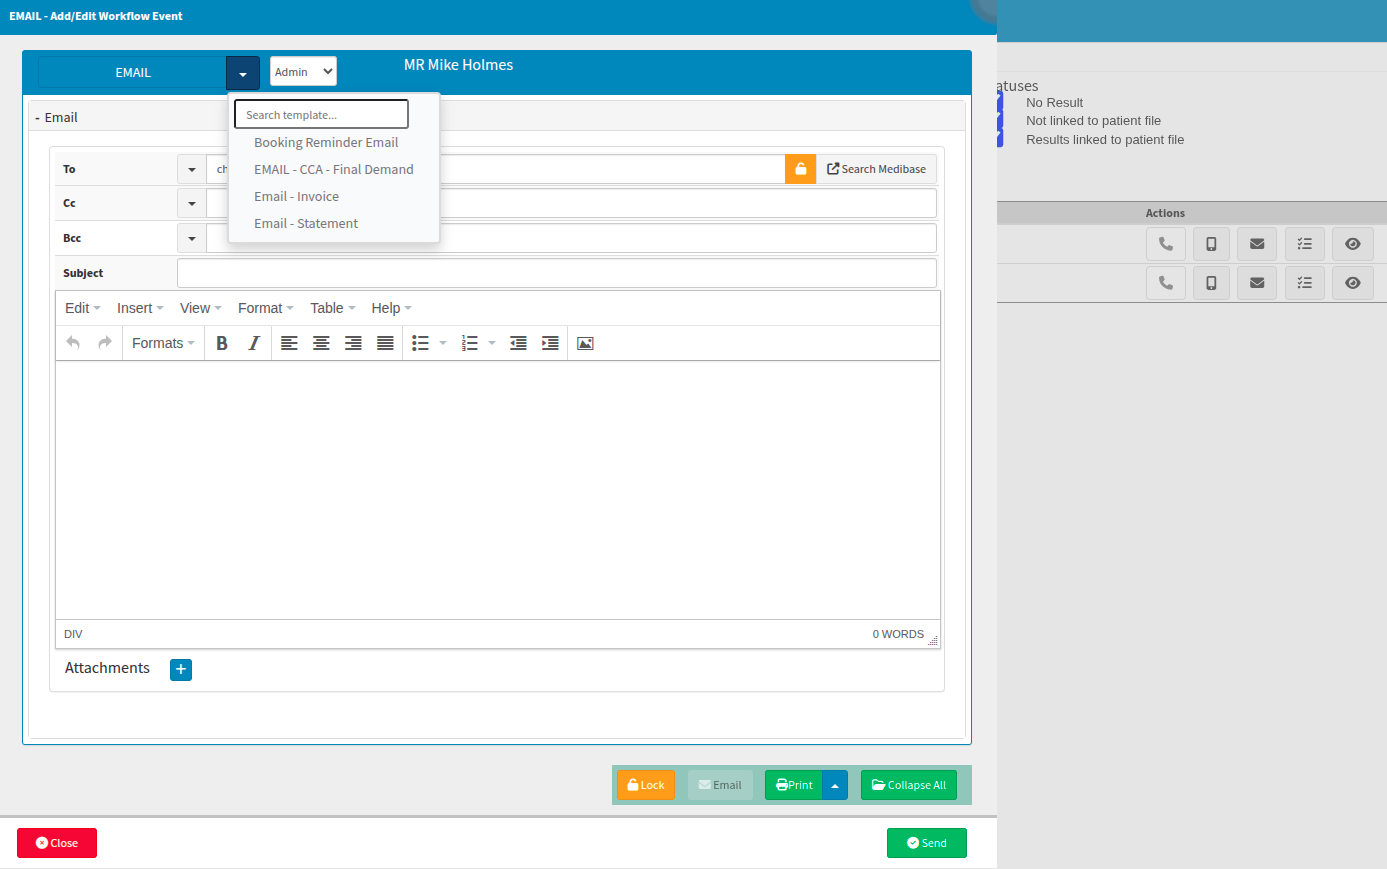
Once the necessary results have been identified, the practitioner has several methods available to contact the patient. By selecting the eye icon, you can review the original pathology results and initiate a direct call to the patient from the report screen.
By selecting the menu view icon from the actions bar, practitioners can generate tasks for staff members to complete. These tasks may include scheduling follow-up calls or initiating other actions based on the patient’s results or the practitioner’s specific requirements. To further enhance efficiency, task templates can be created to minimise administrative input, allowing for more dedicated time for patient care.
Please note that a lighter grey phone icon indicates that your VoIP calling function is currently inactive. Alternatively, if a telephone conversation is not required, the system provides options to send an email or a text message.
Gentle reminder on “Dial” options versus the “Auto Dialler”
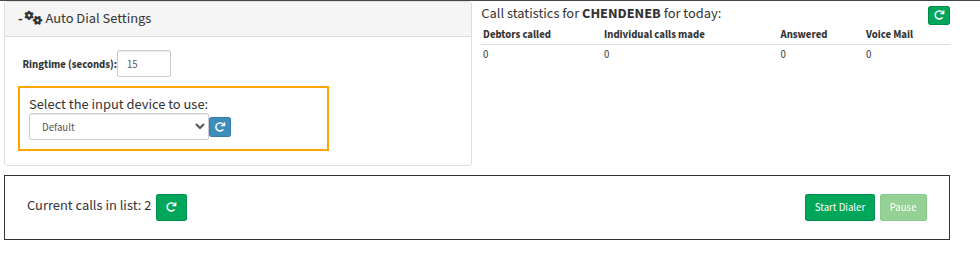
The auto dialler is integrated with the Automated Credit Control Management system for continuous calling and becomes available for selection only once the VoIP service is fully activated. Any Automated Credit Control Management call tasks or manual call events created within the system will automatically populate under the auto dialler task list for streamlined processing.
Please note that utilising the Automated Credit Control Management system may incur a service fee depending on the specific application, and users might be required to subscribe at an additional cost.
The Automated Credit Control Management is designed to automate repetitive processes, such as managing call requests to multiple debtors or triggering specific responses to system actions. Given the extensive customisation possibilities available, you are encouraged to contact your client liaison for additional software support and further information on how the Automated Credit Control Management can best serve your practice.

By manually selecting the relevant debtors to be contacted and clicking the Dial button, you generate bulk Call Event task items. These items will be allocated either as unassigned tasks or directed to a designated representative within your practice for further action. These calls will be reflected on the auto dialler interface and will proceed as a continuous calling cycle until a practice representative chooses to pause or stop the process.
Once a task is assigned, the designated staff member can record relevant notes and mark the action as completed during the continuous calling as each call populates a linked call event task for scripts or notes.
For further assistance or detailed information regarding task management, please contact your client liaison for additional software support.
Where to learn more about Tasks within GoodX?
The GoodX YouTube Channel https://www.youtube.com/@GoodXSoftware
The GoodX Click&Learn Courses https://courses.goodx.co.za/
The GoodX Learning Centre : https://learning.goodx.co.za/
Please note these courses are only modules and are different from the Click&Learn courses. To learn more about Tasks, you can apply these search terms:
| Date of Change | Changes | Editor |
| 2026 05 13 | Established Page | Chendene Barnard |