Text size
Line height
Text spacing

What is the "Cloud Capture" feature?
Cloud Capture is an external tool designed to streamline the addition of voice notes, videos, or photos directly to patient records. This tool is particularly effective for practitioners on hospital rounds, as it allows for mobile voice-to-text note-taking; spoken observations are automatically transcribed into text within the system, ensuring rapid and efficient documentation.
While Google Chrome is the recommended browser for accessing the Cloud Capture application, it is also compatible with Safari.
By utilizing Cloud Capture for images, the file is not stored on the local device used to take the photo. This allows the practitioner to quickly and efficiently upload images from a webcam or external source directly into the clinical form they are currently working on.
Where to access the Cloud Capture App from?
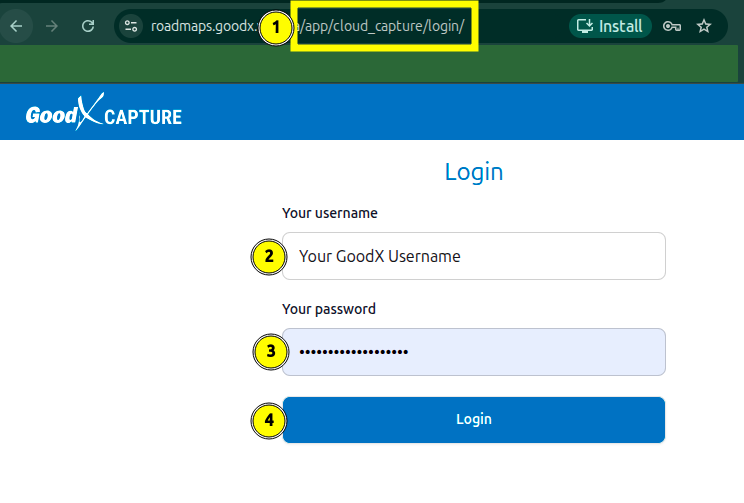
To access the application, you must be logged into your GoodX web page. By appending "/app/cloud_capture/" to your browser’s URL, the system will automatically open the Cloud Capture user interface screen.
If you navigate away from your current login page, all active work and clinical notes will close, resulting in the loss of any unsaved changes. To prevent this, it is recommended that you log in using a separate device or a different browser tab.
Alternatively, you may append “/app/cloud_capture/login/” to the URL to log in to the capture application within a new tab or window.
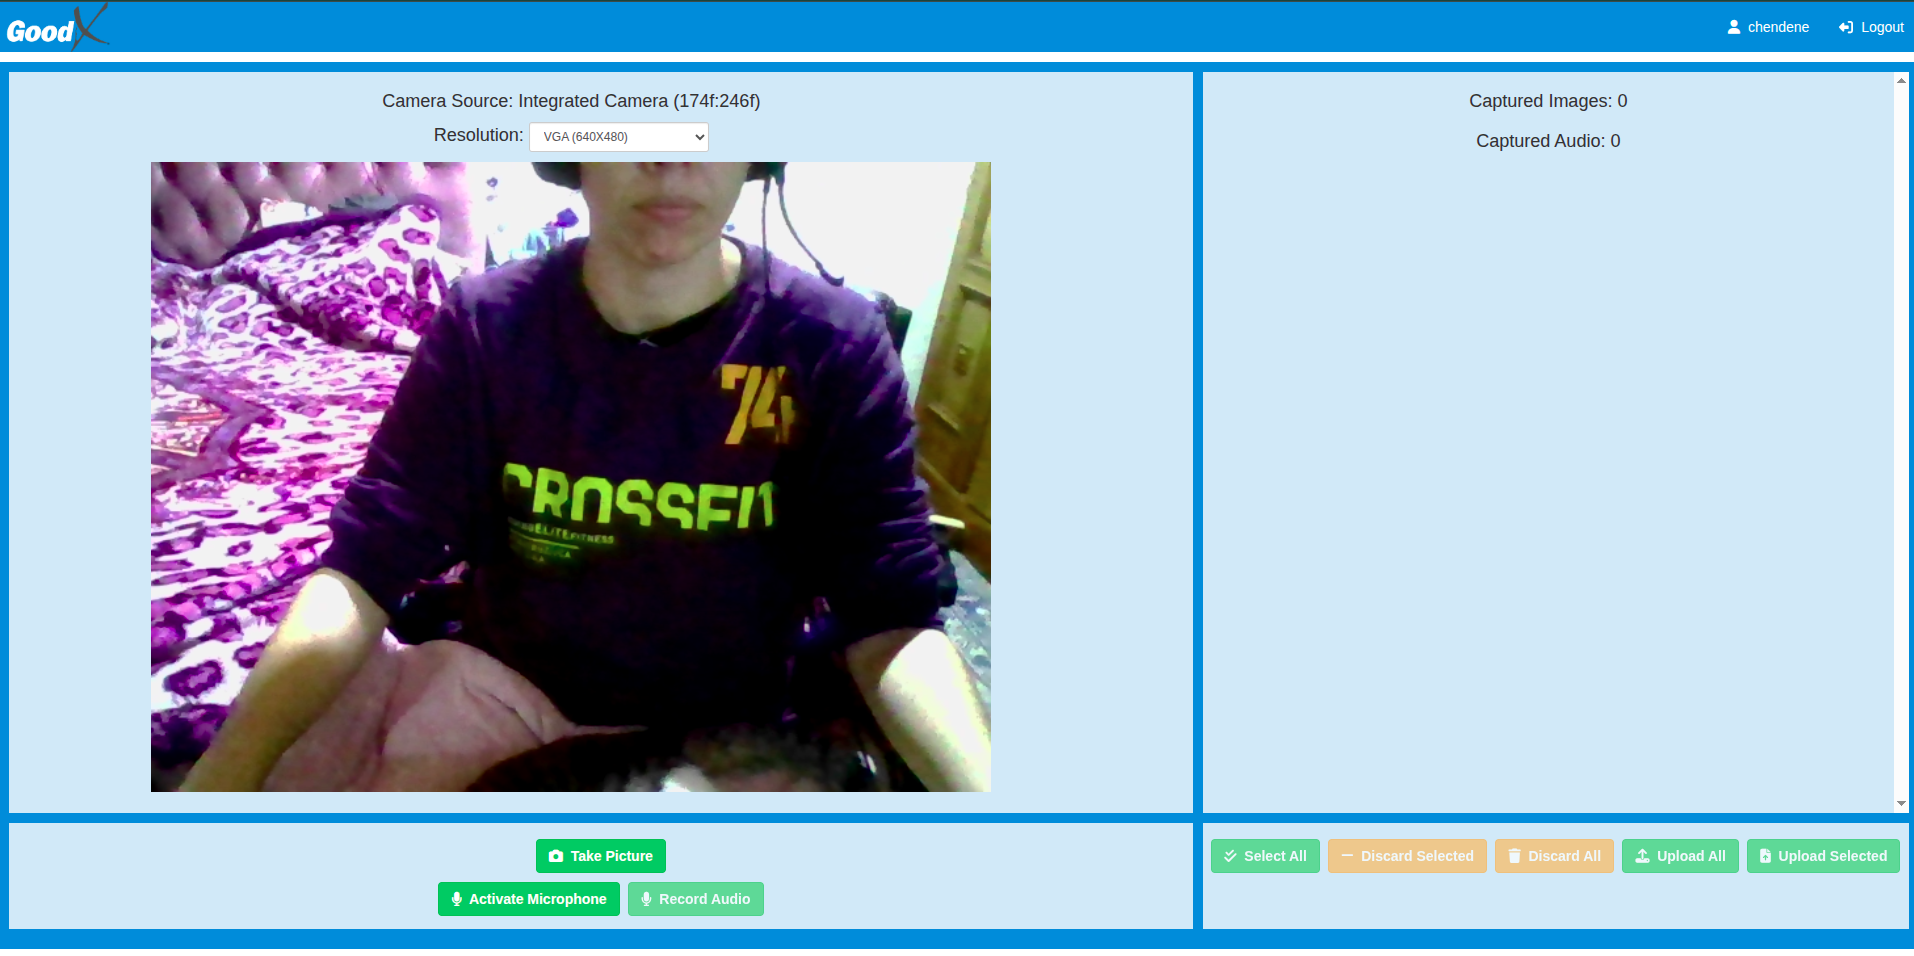
The Cloud Capture application defaults to the photo page with the lowest resolution setting preselected. This serves as the primary landing screen when you select the V2 link from the clinical form prompt to upload an image. The V2 interface represents the latest system update and is the recommended version for all users.
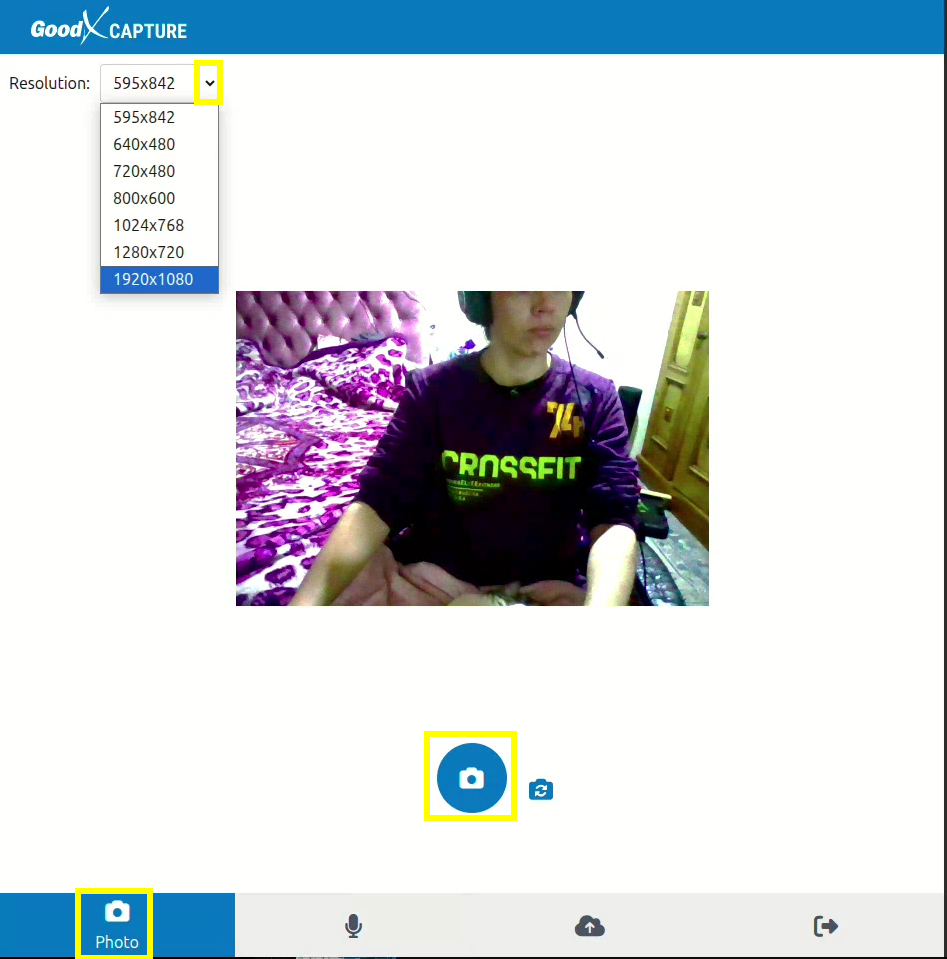
To increase the resolution, select your preferred setting from the drop-down menu. Once you are ready to capture the image, select the camera icon. Should you need to use the flip camera option, select the smaller icon displaying the flip arrows before selecting the larger camera icon to take the photo.
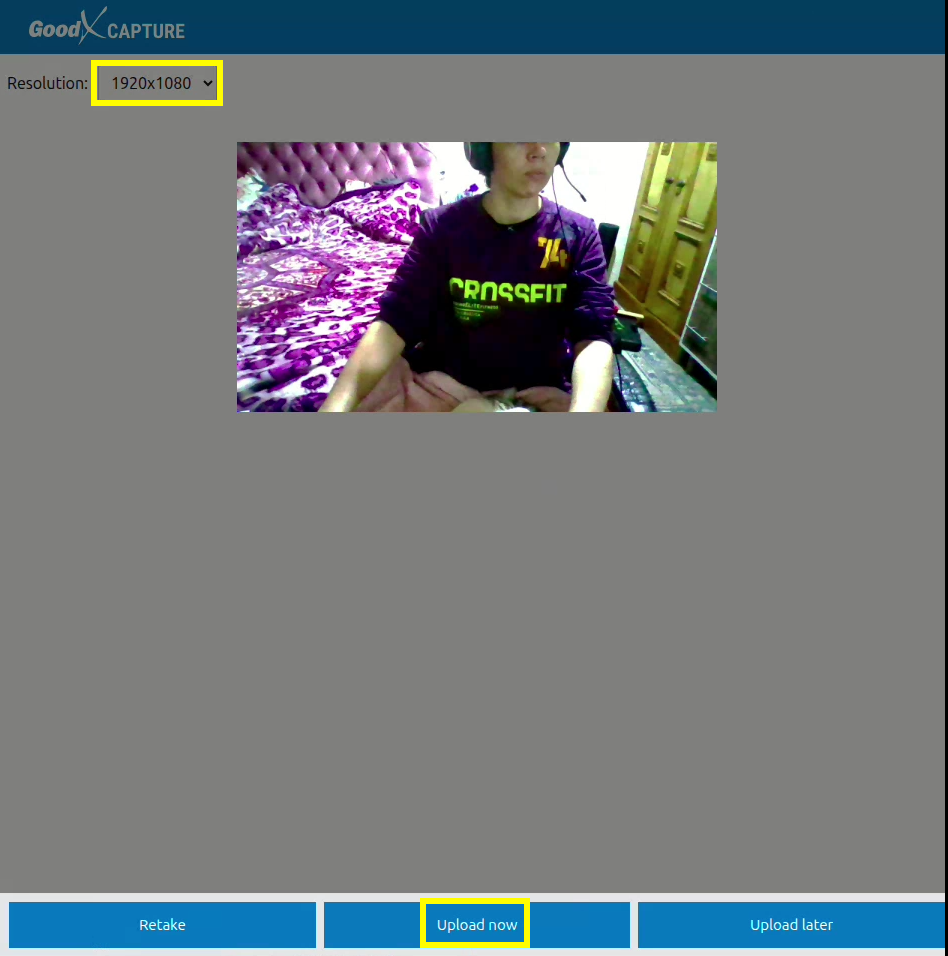
Once the image has been captured, additional prompts will appear allowing you to either retake the photo or, if satisfied, select "Upload now". This action uploads the image to the Cloud Capture storage space. Instructions on how to access these uploaded images will be detailed in the following sections.
How to use the Capture App in the GoodX Clinical space?
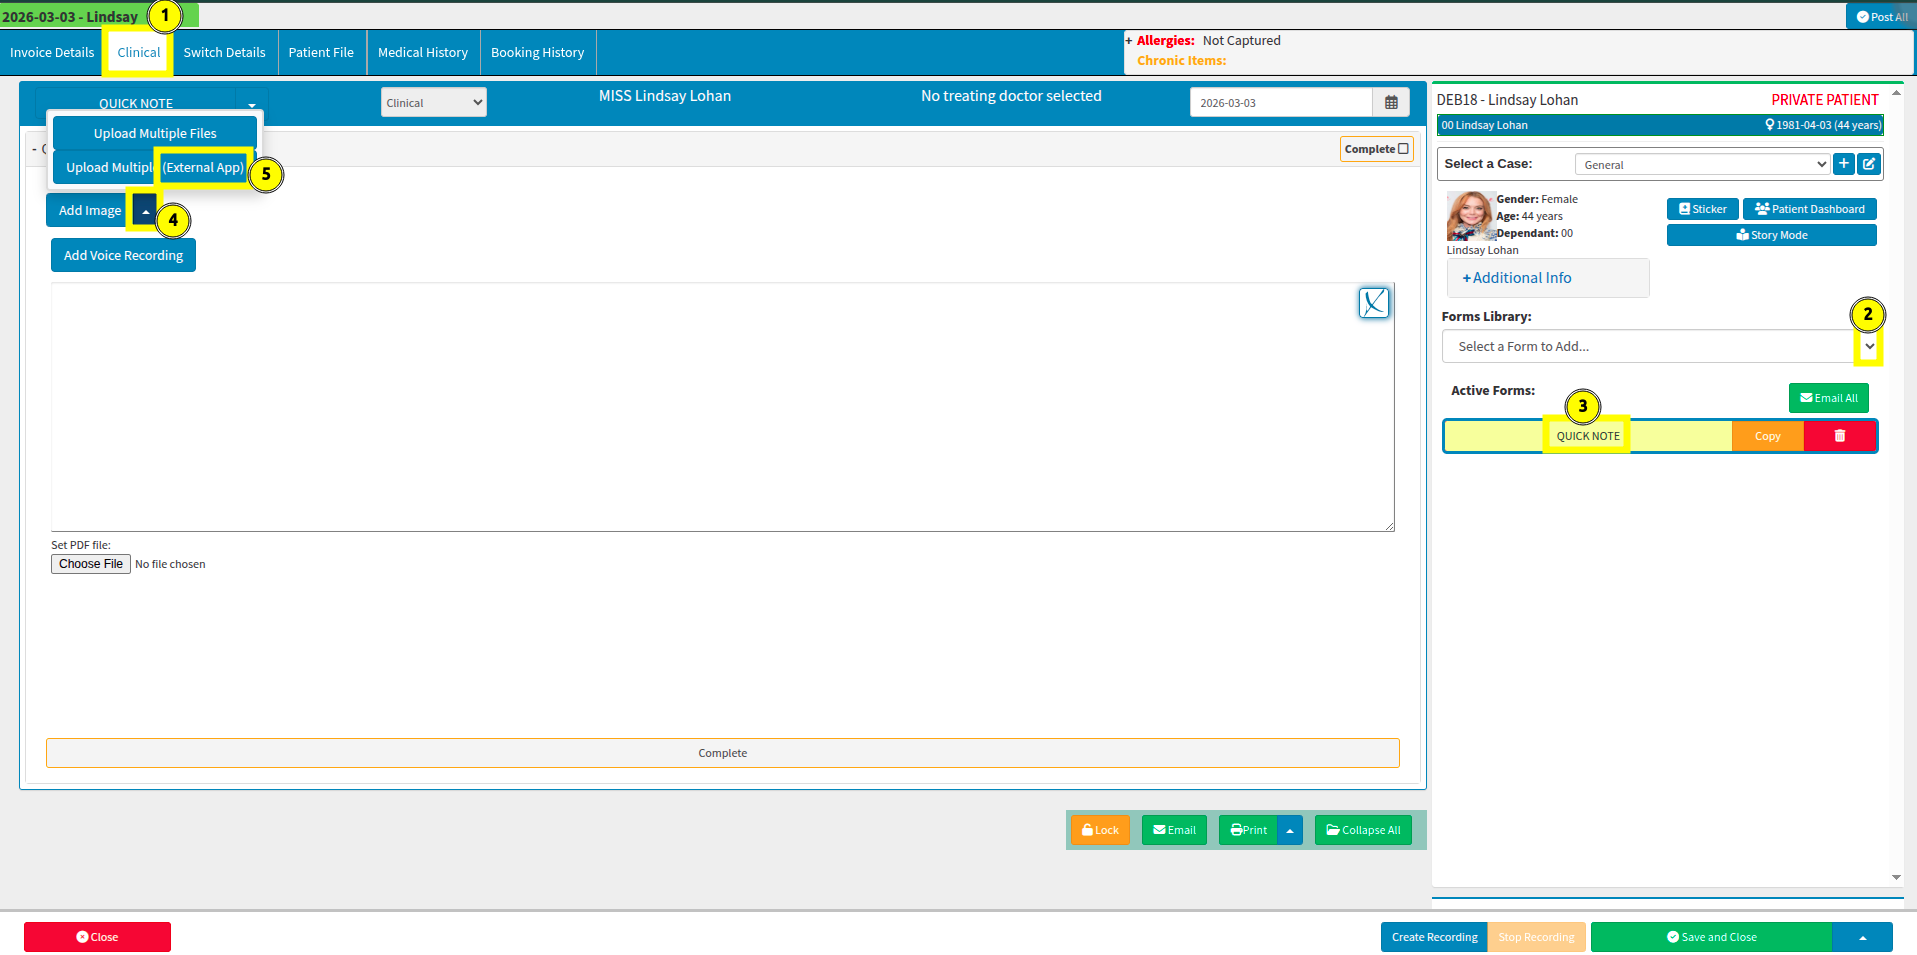
Any clinical form that includes the option to record audio or upload an image allows for the selection of an external source. The Cloud Capture application is categorised as an external tool specifically designed for the purpose of uploading images or capturing voice recordings.
These voice recordings should not be confused with GoodXpert feature, which is indicated by a blue “X” icon in the text field. GoodXpert utilises voice recordings to complete AI prompts for clinical documentation support. Furthermore, this should be distinguished from voice recordings used with pre-configured AI integrations embedded within specific clinical forms. Detailed information regarding these configurations is available in the dedicated Clinical Forms and GoodXpert feature guides.
Bubble 4 displays a drop-down menu that provides access to the external application by selecting the option highlighted in bubble 5. Upon making this selection, a new window will appear on the screen.
There are two versions of the capture application available. The V2 interface, as previously detailed, is the updated version and is recommended for use. Conversely, V1 represents the legacy interface which is no longer being maintained, as depicted below.
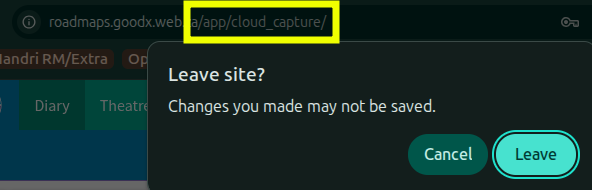
It is recommended that you access the Cloud Capture application from a separate device or a different browser tab. Selecting the V2 link directly may result in the loss of any notes, forms, or other unsaved information currently open in your session as it warns the user "Leave site?".
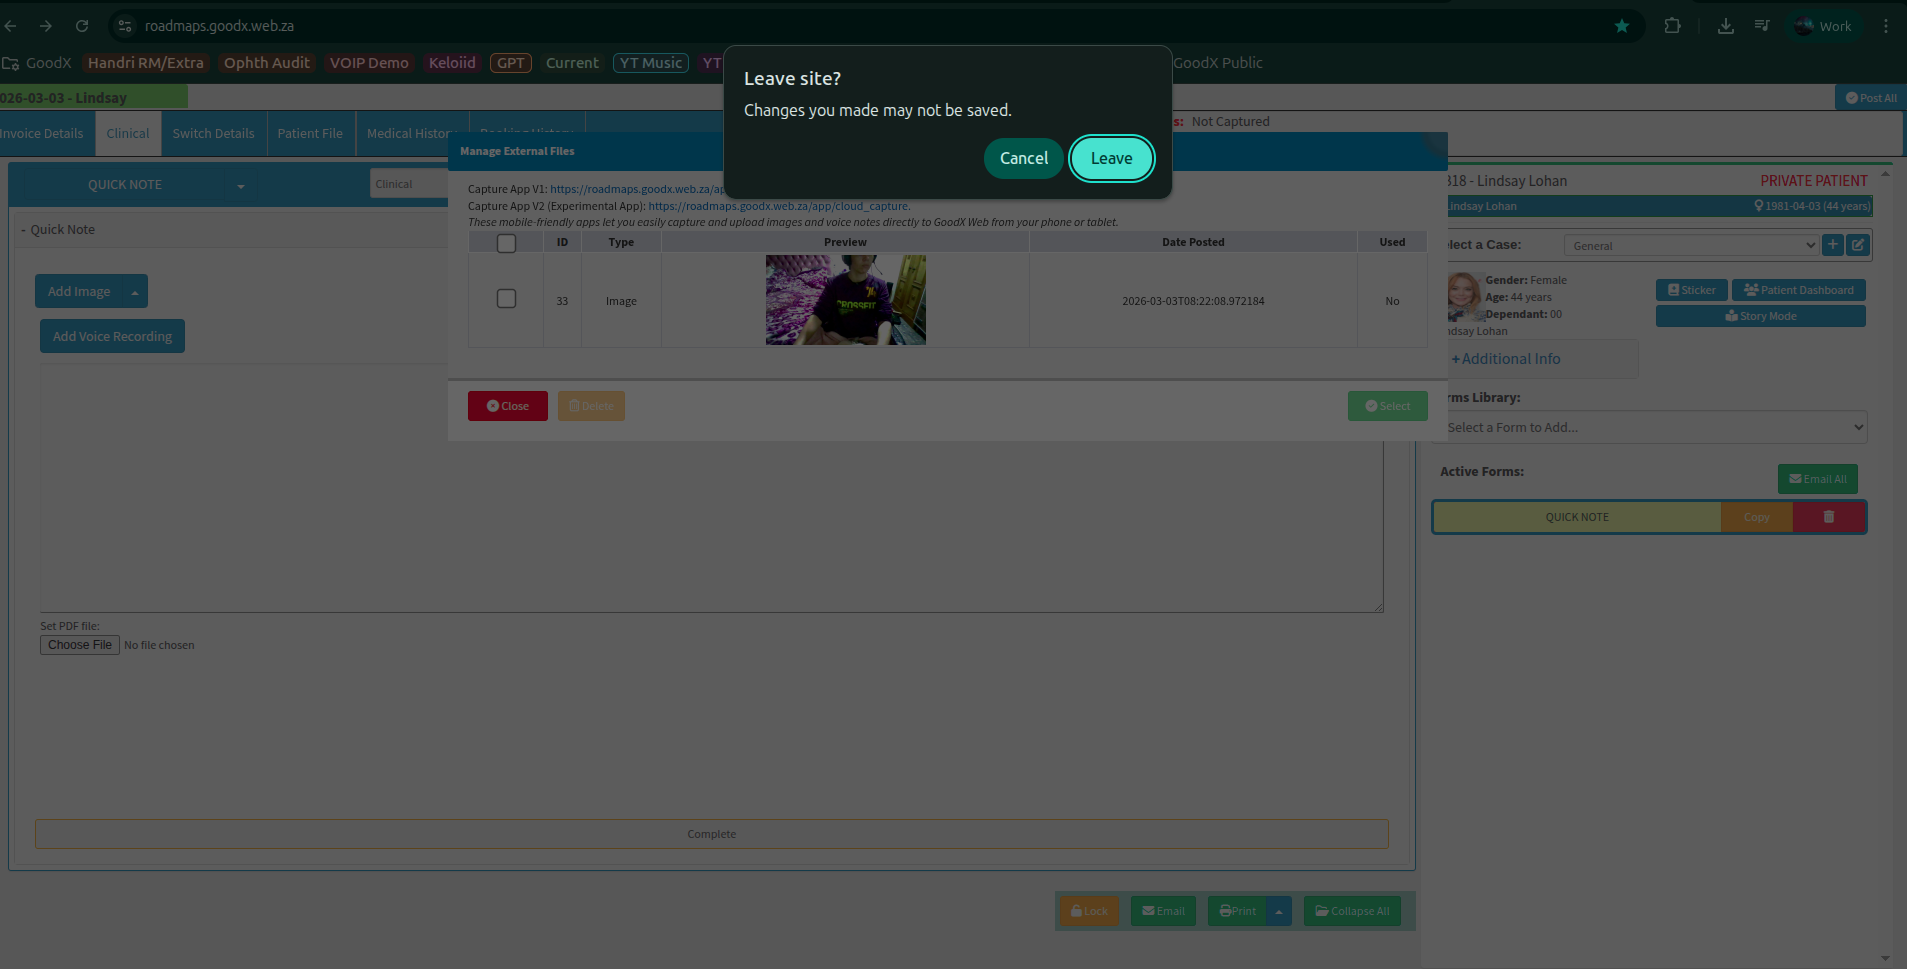
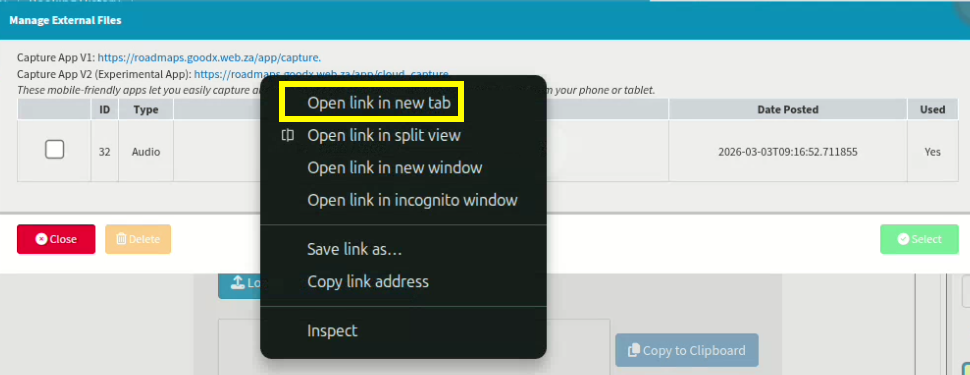
To add further notes from another device, you may navigate to the V2 link as indicated in prompt bubble 3; however, please be aware that all current progress and notes will be discarded if you use the same browser tab. Alternatively, you can right-click the blue V2 link with your mouse and select the "Open link in new tab" option to prevent any loss of information or progress on your current workflows.
Key Considerations for uploaded files
Centralized Storage: Just like images, audio files are stored in the Cloud Capture space until you manually clear them.
Selection: You can preview or select the specific recordings and images you wish to attach to the clinical record.
Data Management: It is best practice to delete recordings and images once they have been successfully attached to a form to maintain optimal application performance.
How to add images to the Cloud Capture App?
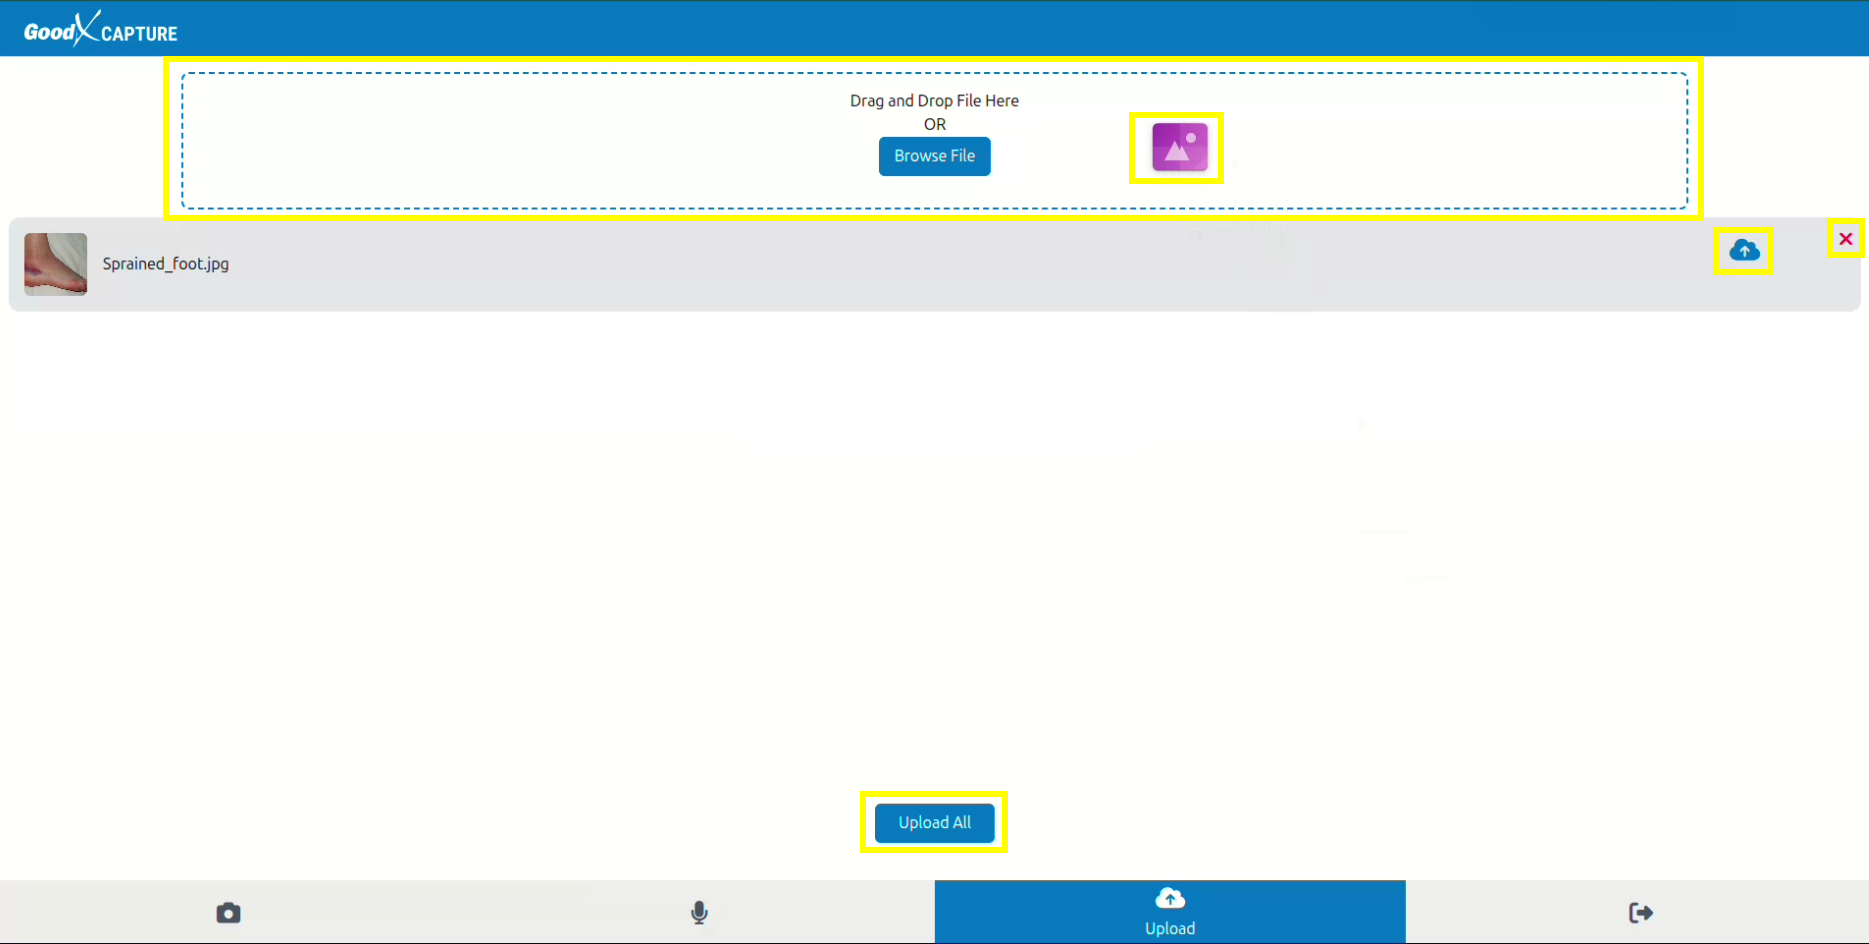
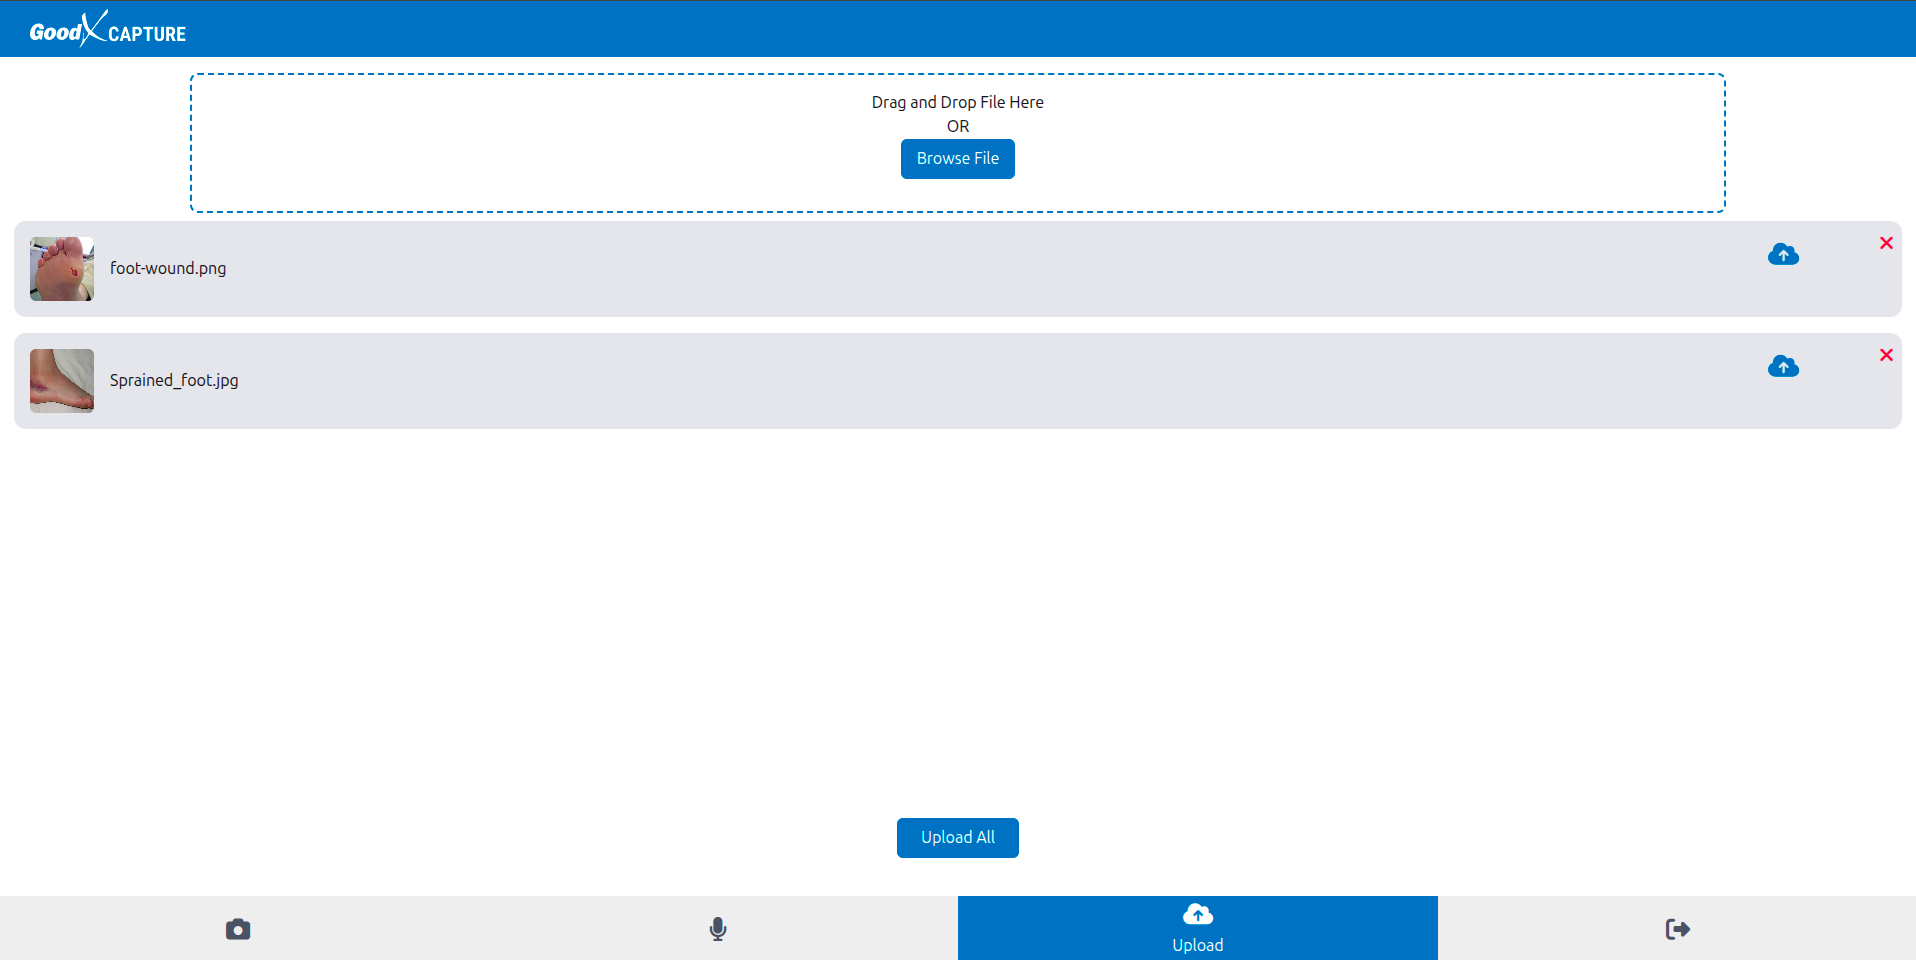
By holding and dragging the image file on your primary device, you can move photos from another source to the Cloud Capture "Upload" screen. Images positioned here can be uploaded simultaneously by selecting "Upload all", or individually by clicking the cloud icon adjacent to the specific image.
The appearance of the file during the drag-and-drop process may vary depending on the device being used; for instance, a dragged image may be represented by a purple icon. It is essential to drop the image strictly within the designated dotted area, as dropping it outside this boundary will prevent the file from uploading. Once correctly placed, the image will be listed within the application, allowing you to either delete or upload the file as required.
How to add images to the Clinical forms?
Once you have navigated to the clinical section of the selected debtor, you may choose the preferred clinical form from the library drop-down menu. In this example, the standard Quick Note clinical form has been selected. From within the form, select “Add Image” and then choose the option to upload from an external source.
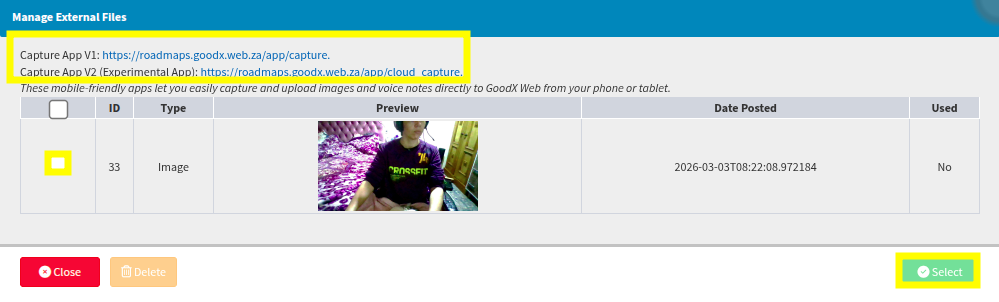
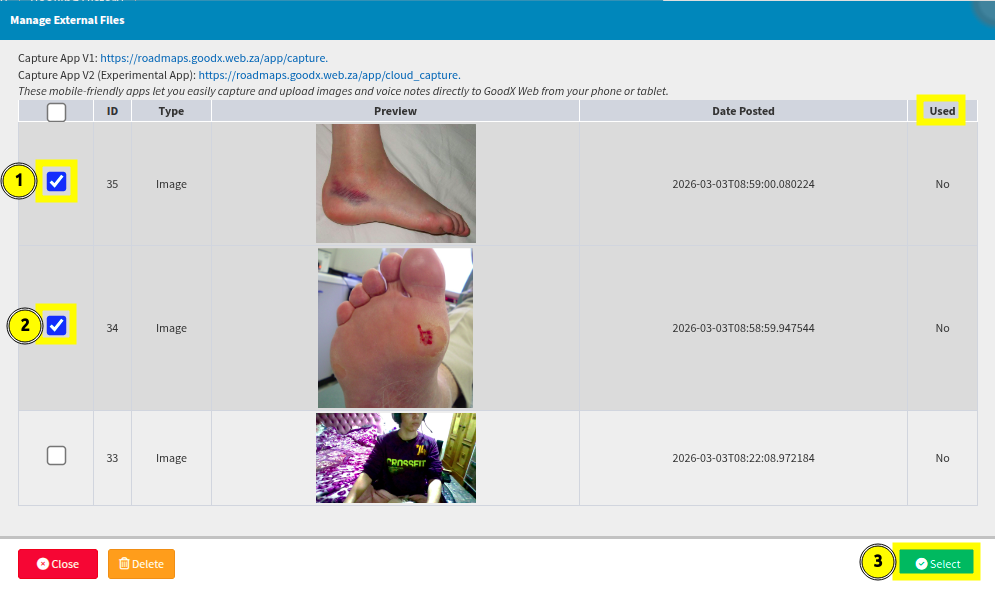
A new window will open displaying all images previously uploaded to the Cloud Capture application. From this view, you can select the specific photos you wish to import. It is advisable to delete any duplicate or unnecessary images to prevent the Cloud Capture interface from becoming slow as redundant files accumulate.
After selecting the specific images you wish to include in the debtor's clinical form, select “Save” to finalize the addition.
How to add audio to the Clinical forms?
Following the same procedure as the image upload, select “Add Voice Recording” and navigate to the “Load from External Upload” option. A new window will then appear, displaying all audio files currently stored in the Cloud Capture application that have not yet been removed.
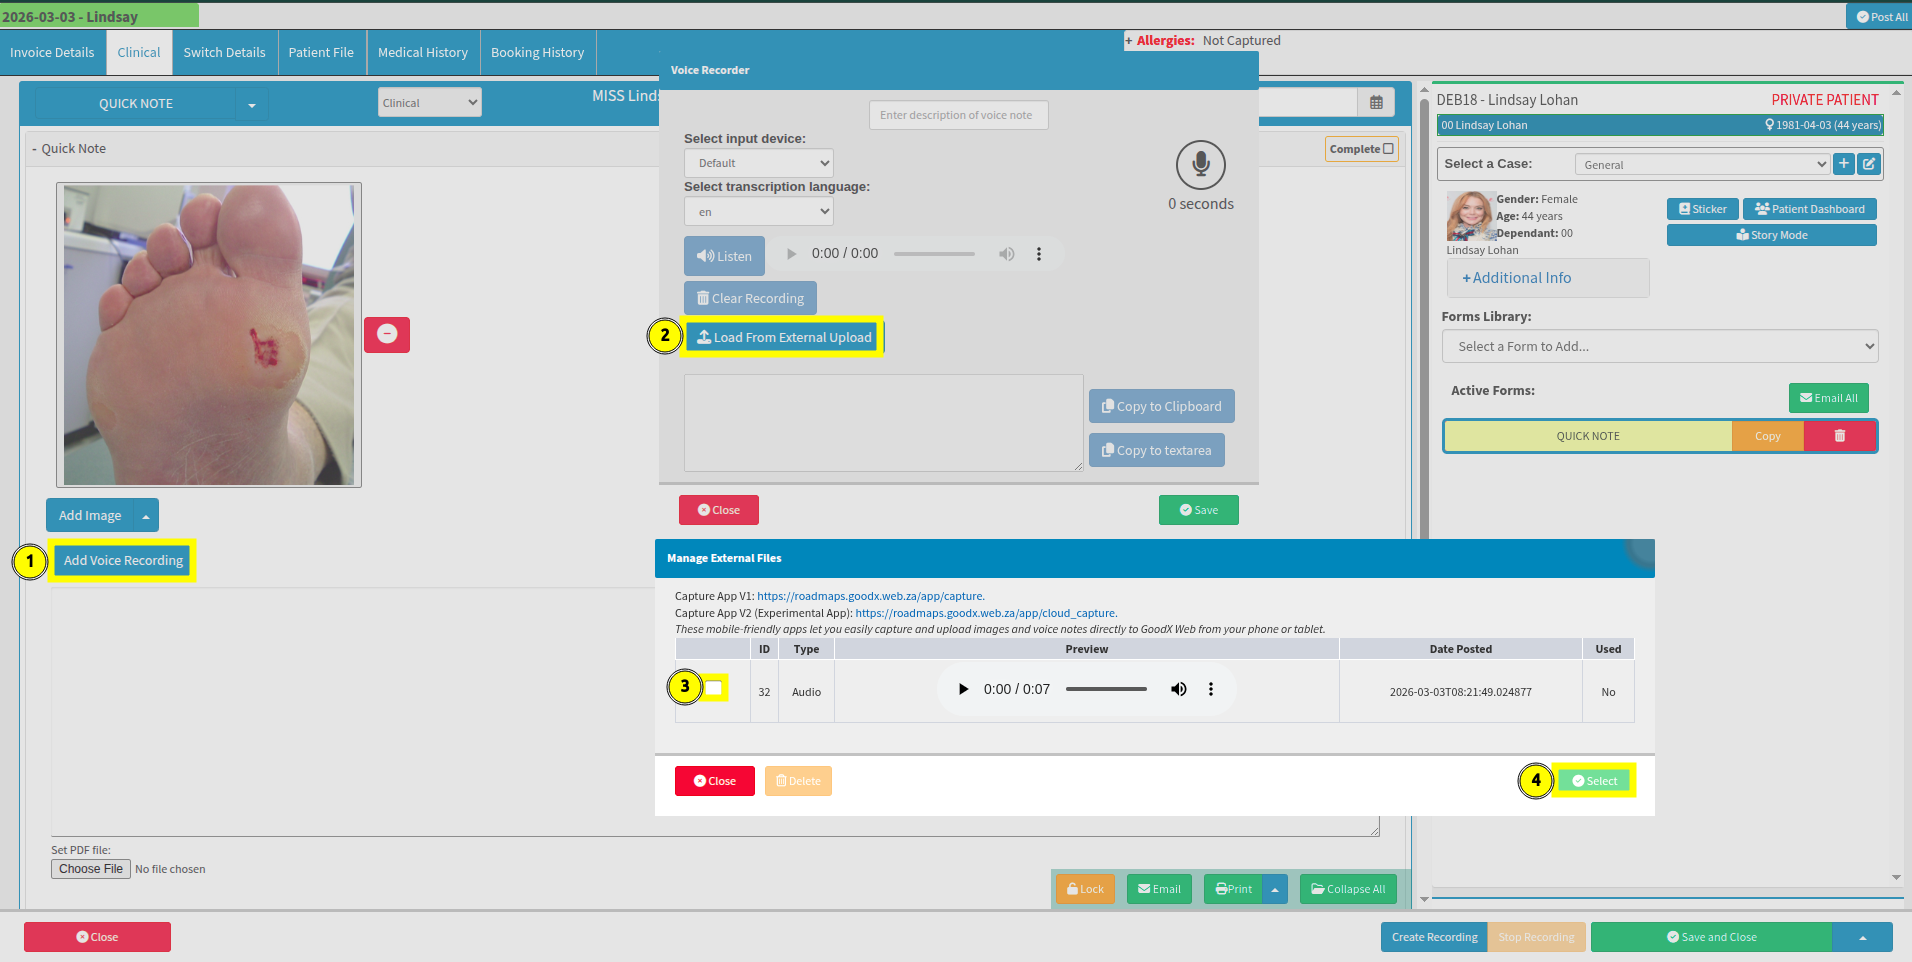
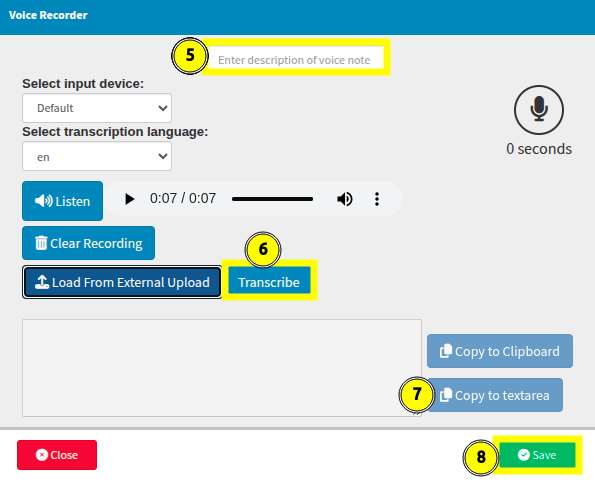
If no additional recordings need to be uploaded, you may choose to name and transcribe the current recording as indicated in bubble 5. After recording the session and completing the transcription, ensure that both the recording and the transcribed text are saved.
How to manage audio from the voice recorder in progress?
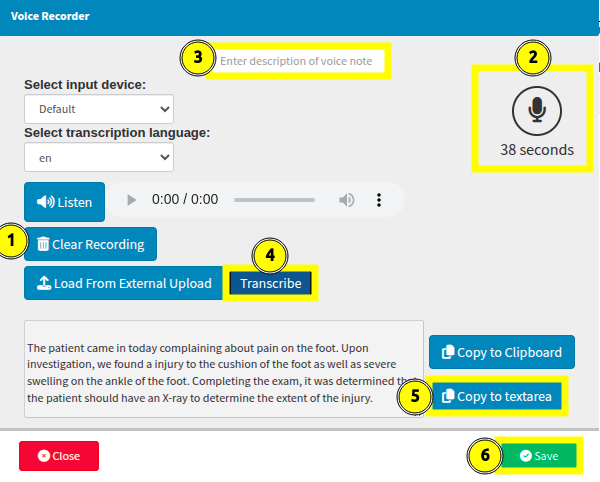
If you prefer, you can remove the existing recording and create a new one for the patient by selecting "Clear Recording". You may then select the microphone icon to initiate the recording and provide a name for the session. The audio will be added automatically as you speak, after which you can select "Transcribe" to allow the system to correct any spelling or grammatical inaccuracies.
To transfer the information to the clinical form, select "Copy to textarea" and save the record to finalise the entry.
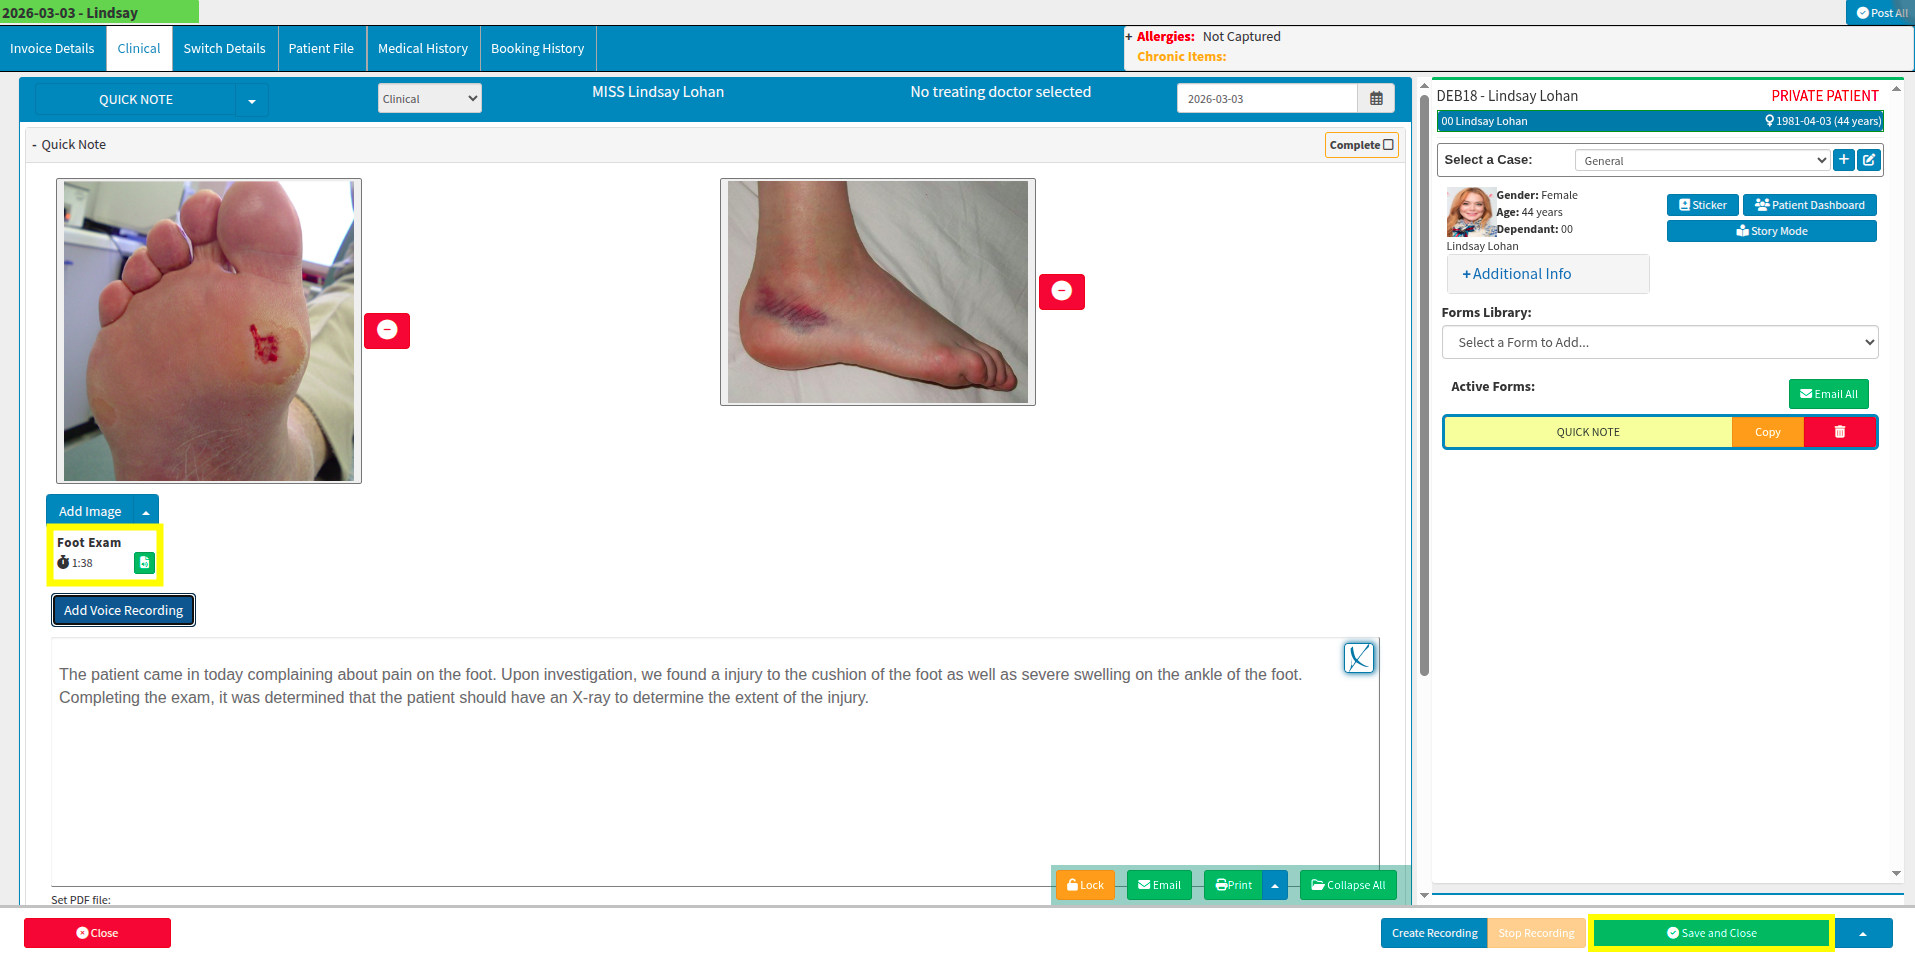
The audio files and images will now be displayed within the selected clinical form. Select "Save and Close" once more to save the form to the patient or debtor record.
Where to learn more about Cloud Capture within GoodX :
The GoodX Click&Learn Courses https://courses.goodx.co.za/
The GoodX YouTube Channel https://www.youtube.com/@GoodXSoftware
The GoodX Learning Centre https://learning.goodx.co.za/
Please note these courses are only modules and are different from the Click&Learn courses. To learn more about Cloud Capture, you can apply these search terms:
| Date of Change | Changes | Editor |
| 2026 05 13 | Established Page | Chendene Barnard |