Referral Letter
The user manual is currently being updated with new features. An updated version will be available shortly. We thank you for your patience.
The Referral Letter is used by the Practitioner to refer the Patient to another Medical Practitioner or Specialist, for additional observations. The Referral Letter can also be referred to as a recommendation letter.
- The contents of this user manual will consist of the following information:
- Referral Letter Contents
- Diagnosis
- Specialist Details
- Appointment Details
- Log in to the GoodX Web App with your GoodX username and password.
- The Diary screen will open.
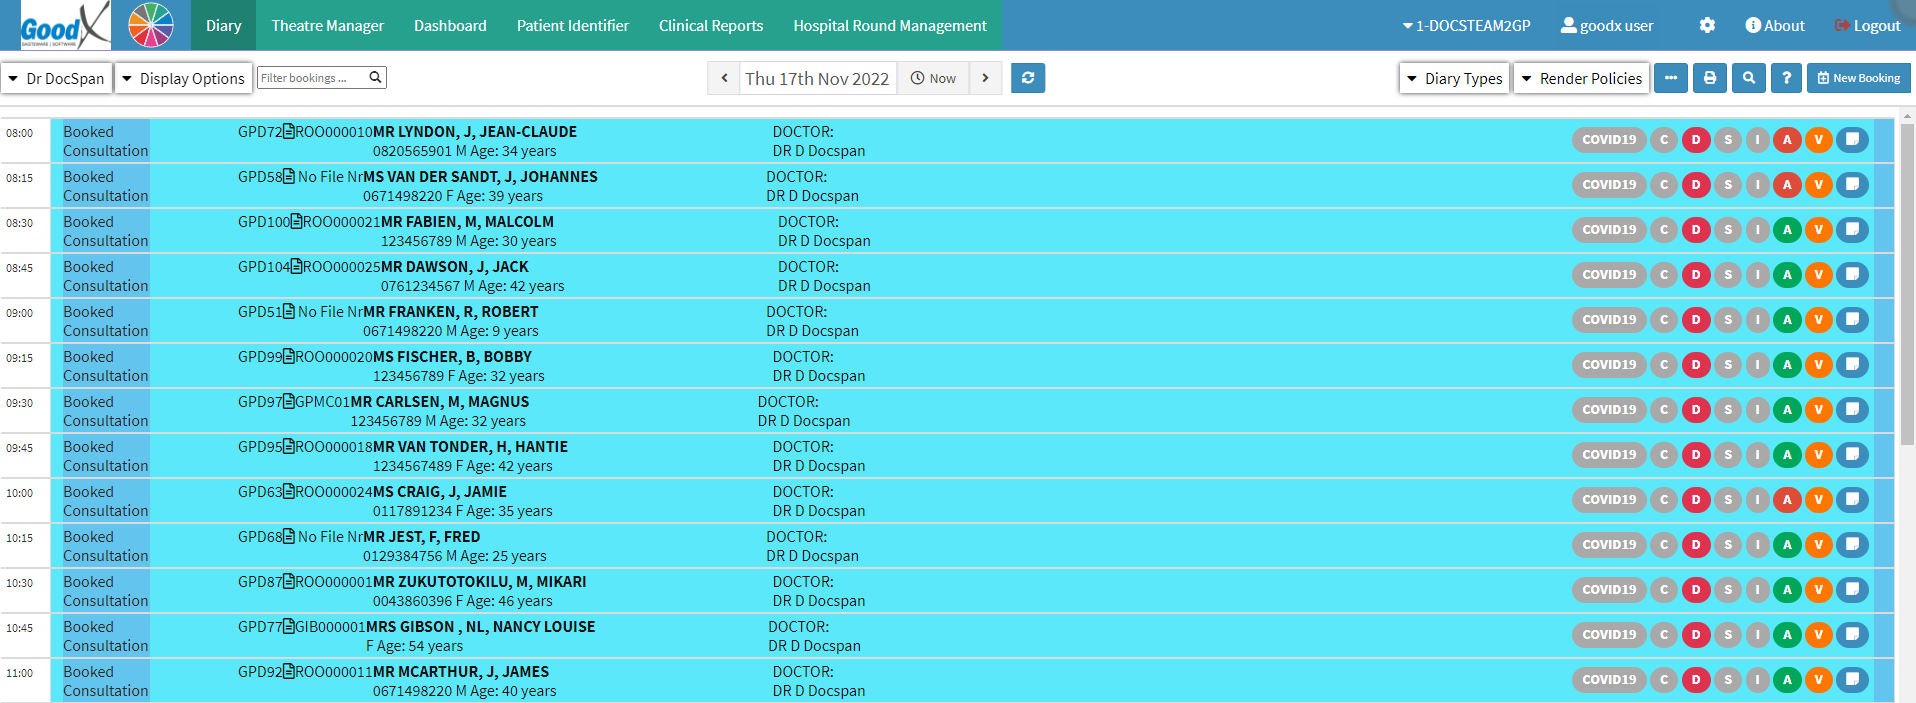
- Click on the desired booking to open the Diary Sidebar.
![]()
- The Diary Sidebar will open.
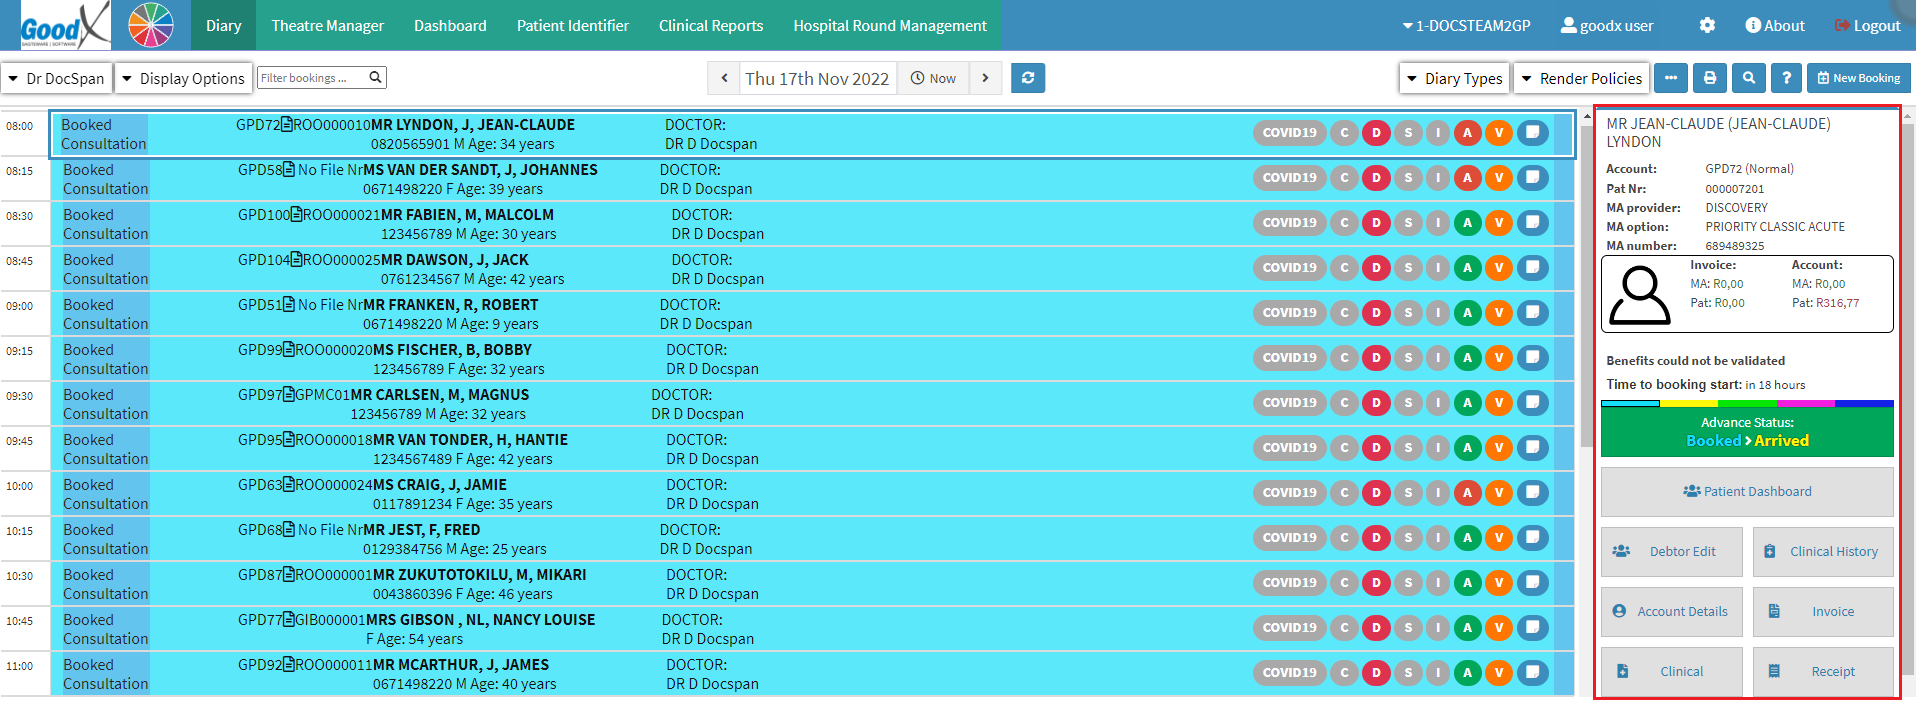
- Click on the Clinical button, located on the Diary Sidebar.

- The Clinical screen will open.

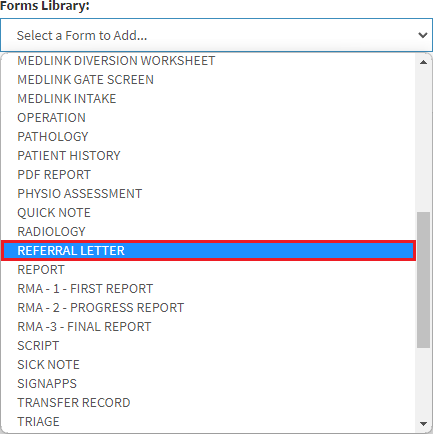
- Click on the Forms Library drop-down on the Clinical Sidebar.
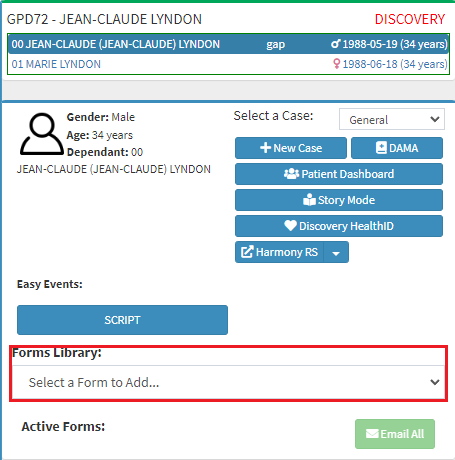
- The Forms Library drop-down menu will open.
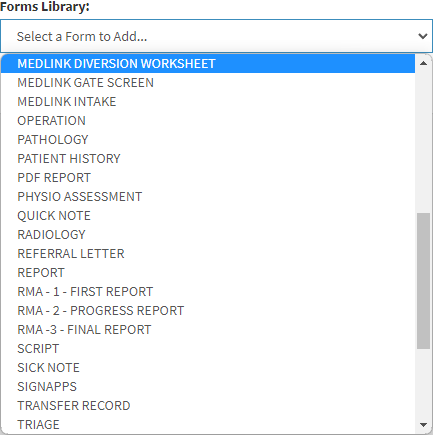
- For more information regarding each form found in the Forms Library, please refer to the full list of forms, and their corresponding user manuals, found in the Learning Center: General Examination Forms and Special Investigation Forms.
- Click on the Referral Letter form option.
- The Referral Letter form will open.
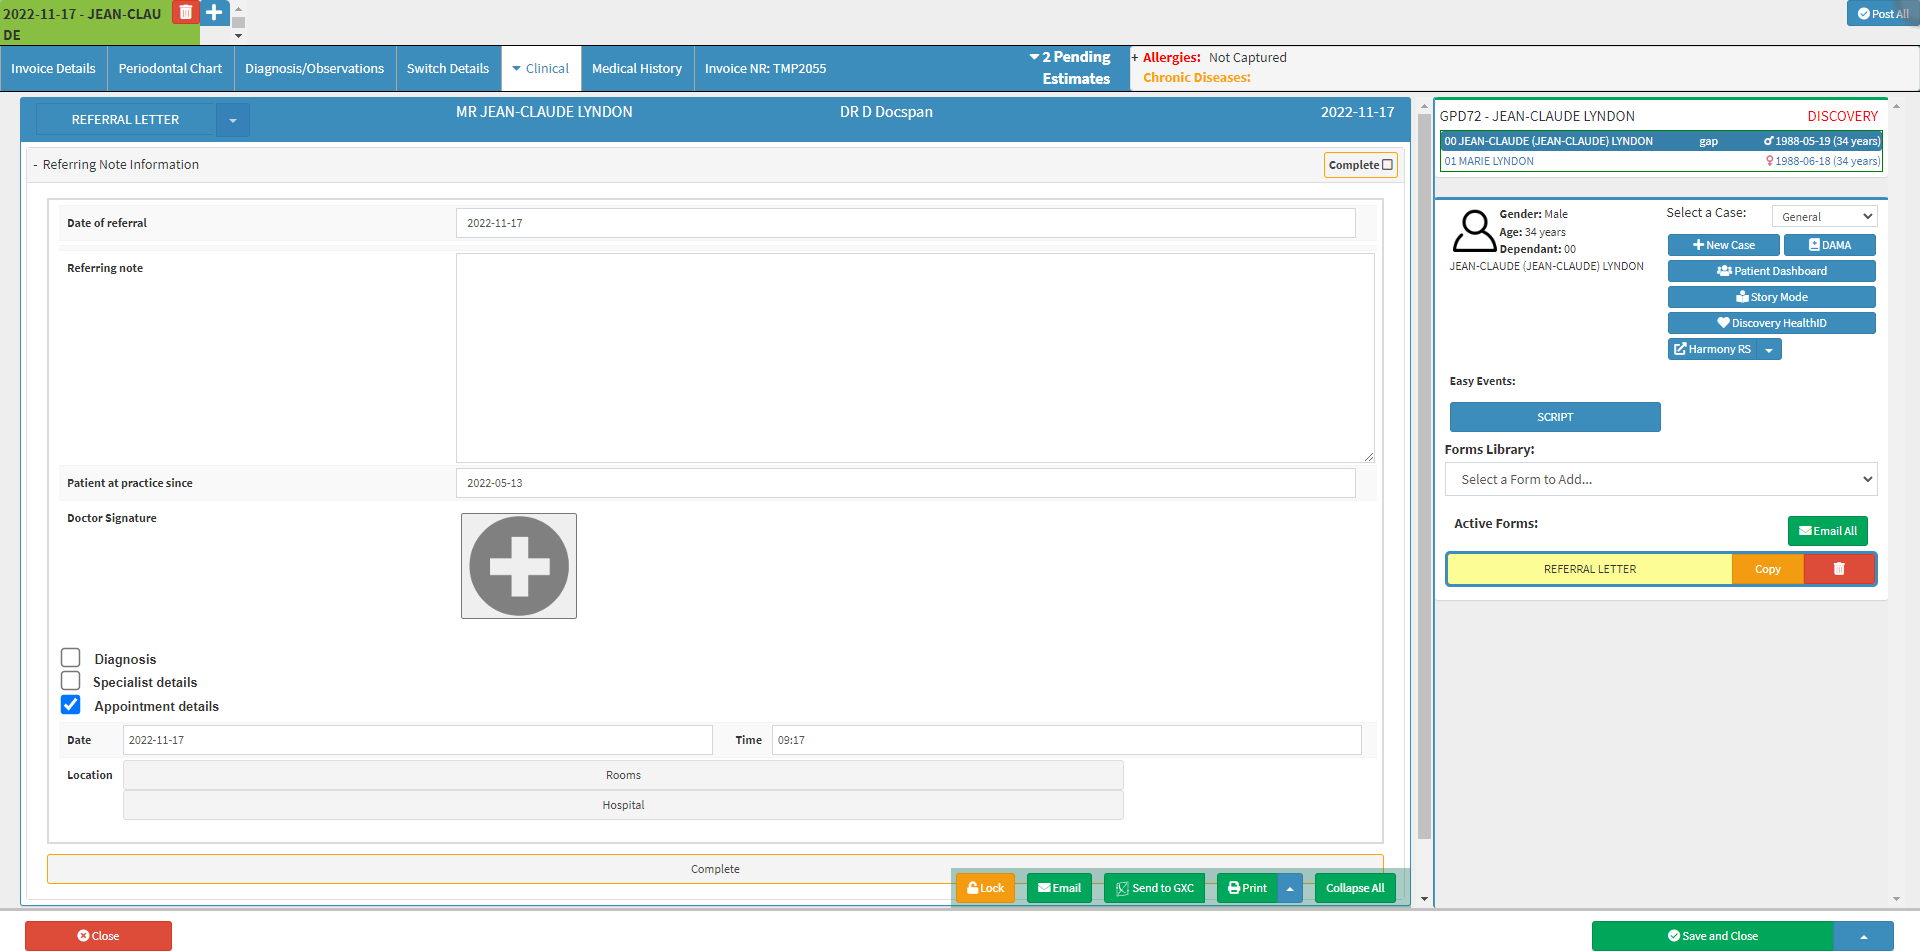
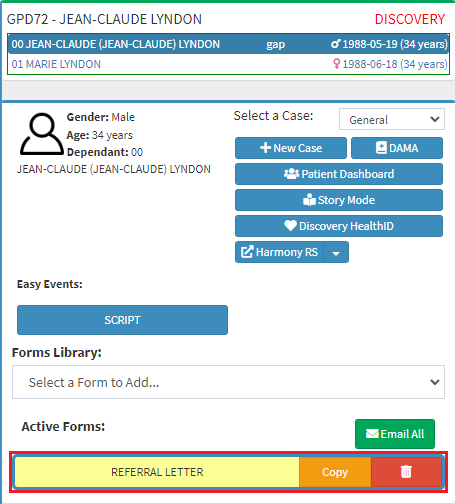
Please Note: The Referral Letter form will now be placed under the Active Forms in the Clinical Sidebar.
Referral Letter Contents
The Referral Letter contains various fields which allow the Practitioner to easily fill in the required information for the referral Practitioner or Specialist.
- Additional fields will be explained:
![]()
- Date of referral: The year, month and day (yyyy-mm-dd) the Practitioner referred the Patient to another Medical Practitioner or Specialist.
![]()
- Referring Note: The reason for referral, as well as any specific information that the Practitioner writing the referral, would like the Specialist/Medical Practitioner to know. The Referring Note field is a free text field.
![]()
- Patient at Practice Since: The year, month and day (yyyy-mm-dd) from which the Patient has been seeing the Practitioner making the referral.

- Doctor Signature: The signature of the current Treating Practitioner, who is giving the referral.
- For more information regarding the Doctor Signature function, please refer to the user manual: How to Add a Doctor Signature.
- Tick any of the desired checkboxes to access additional fields, and add more detailed information to the Referral Letter.

Please Note: The Appointment Details checkbox is automatically selected when the Referral Note is opened for the first time. The user is able to deselect the Appointment Details checkbox if necessary.
Diagnosis
- An explanation will be given for each field within the Diagnosis section:

- Diagnosis: The Referring Practitioner will write down the identification of the nature of the Patient's illness, or other problems, by examination of their symptoms to the referred Practitioner. If the user ticks the Diagnosis checkbox, the following details will appear:
- Chronic Diagnosis: If the Patient has a chronic condition/symptoms that are persistent, or otherwise long-lasting in their effects, the Practitioner will note it here for the Referring Practitioner.
- Previous Diagnosis: If the Practitioner previously diagnosed the Patient with any Medical conditions, it will be noted here for the Referring Practitioner.
- Reason for Referral: The Practitioner will send the Patient to a Specialist or Authority that is more highly qualified to handle their medical matters. The Practitioner will fill in the reason for the Referral here as to why the Patient needs to see the Specialist.
Specialist Details
- An explanation will be given for each field within the Specialist Details section:

- Specialist Details: The details of the Specialist that the Patient gets referred to. If the user ticks the Specialist Details checkbox, the following details will appear:
- Name: Name of the Specialist to whom the Treating Practitioner is referring the Patient.
- Practice Number: Practice Number of the Specialist, as registered with the HPCSA and BHF.
- Address: Where the Specialist's place of business/consultation rooms is located.
Appointment Details
- An explanation will be given for each field within the Appointment Details section:

- Appointment Details: Date, Time and Location (Rooms or Hospital) for when the appointment has been scheduled.
- Date: The day on which the Patient is visiting the Referring Practitioner.
- Time: At what point of the day is the Patient visiting the Referring Practitioner.
- Location: Is the appointment taking place in a consultation room or at a hospital?
- Click on the Hospital button to open additional fields.

- Name: The name of the Hospital at which the Practitioner is consulting with the Patient.
- Ward: The Hospital Room in which the Patient is being kept for consultation.
- Click on the Complete button to save any changes once all of the necessary information has been completed on the Referral Letter form.
![]()
- The Complete button will turn green.
![]()
- An explanation will be given for the additional options that are available for the Referral Letter.
![]()
- Lock: Will permanently lock the form for all users, making it will be impossible to edit it again and cannot be undone.
![]()
- Email: Allows the Practitioner to Email the Referral Letter to the Patient, which will automatically mark the Referral Letter as Completed.
- For more information regarding sending an Email, please refer to the user manual: Email/Print Forms.
- Click on the Send button to send the Referral Letter to the desired Practitioner via grandXchange.
- Click on the Drop-up next to the Print button.
![]()
- The Drop-up menu will open.

- Click on one of the options that become available:
- Download: Downloads a PDF form of the Referral Letter to the user's device.
- Click on the Print button to open a preview to allow the Practitioner to print a hard copy of the Referral Letter which will automatically mark the Referral Letter as Completed.
![]()
- Click on the Close button to exit the Clinical screen without saving the Referral Letter.
![]()
- Click on the Drop-up next to the Save and Close button.
![]()
- The Drop-up will open
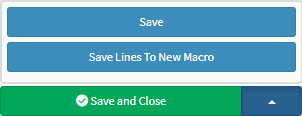
- Select one of the options that become available:
- Save: Saves the content of the Referral Letter.
- Save Lines to New Macro: Allows the user to save all the lines on the Referral Letter as a Billing Macro in Billing Settings.
- For more information regarding Billing Settings, please refer to the user manual: Billing Settings.
- Click on the Save and Close button to save any changes and exit the Clinical screen.
![]()
Last modified: Thursday, 17 November 2022, 11:27 AM