Setup Debtors' Status
The user manual is currently being updated with new features. An updated version will be available shortly. We thank you for your patience.
Setting up the Debtors' Status allows the Practice to display a pre-setup warning on a Debtors' file. The warning will be displayed every time a booking is made. An icon will also display on the booking timeslot when a booking is made for a patient to whom the Practice has allocated a status. Statuses can be set up to suit the needs of the Practice. For example, a status can be added to indicate that the Debtor is a slow payer, the Patient has a payment arrangement, is eligible for discounts/special rates, pays on time or the Debtor's account has been handed over for collection.
- Log in to the GoodX Desktop App with your username and password.
- From the Navigator, Double Click on the GoodX Med Debs Module.

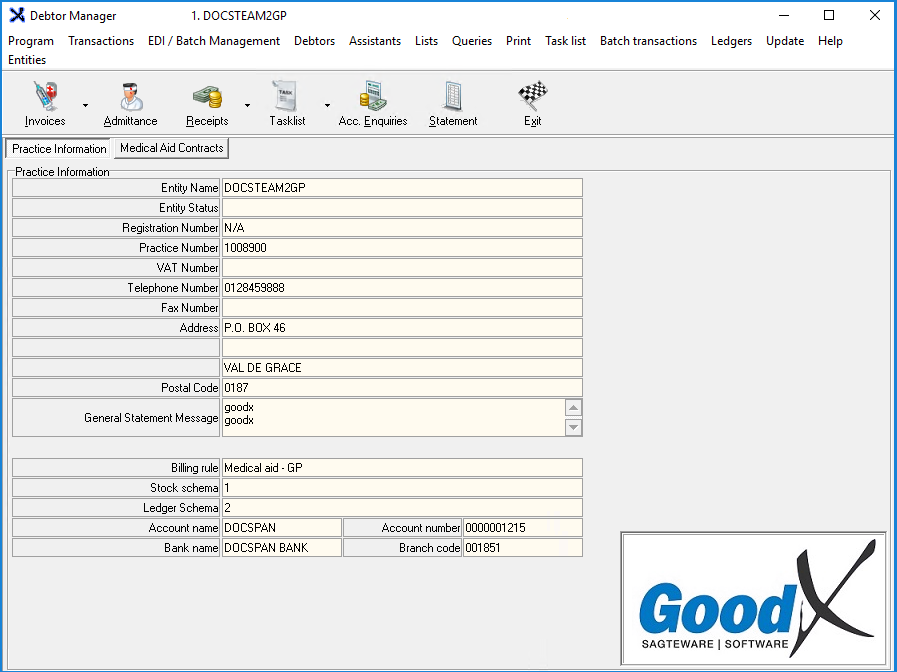
- The Debtor Manager screen will open.

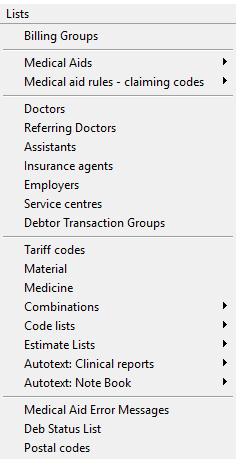
- Click on Lists on the menubar.

- The Lists sub-menu will open.

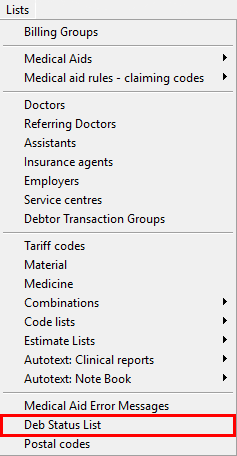
- Click on Deb Status List on the submenu.

- The Status screen will open.

- Click on the + button to create a Status.
![]()
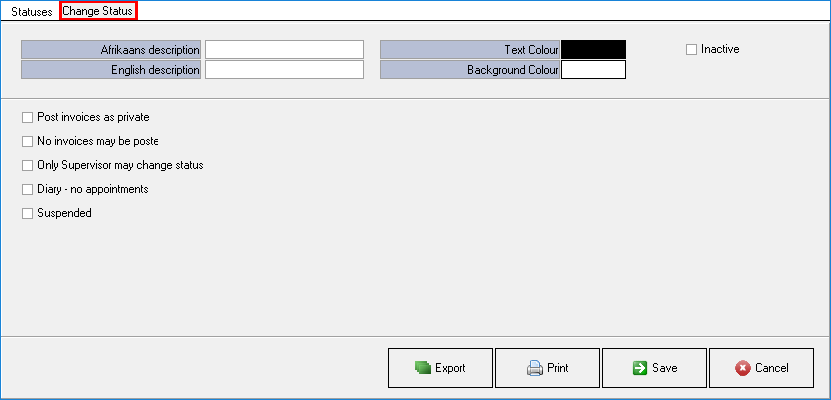
- The Change Status Tab will open.

- All the fields on the Status screen will now be explained.
![]()
- English Description: The unique detailed explanation and description of the procedure in English.
![]()
- Afrikaans Description: The unique detailed explanation and description of the procedure in Afrikaans.
![]()
- Post Invoice as private: If a patient is private, meaning the patient does not have medical aid the user will check the box.
![]()
- No Invoice may be posted: If the user does not want to post the Invoice the user will check the box.
![]()
- Only Supervisor may change status: If the user checks the box only the Supervisor may change status.
![]()
- Diary - no appointments:
![]()
- Suspended:
- Click on the Text Colour field to change the colour of the text.
![]()
- Click on the Background Colour field to change the Background Colour.
![]()
- The user will be able to Change the colours of the Text and Background.

- Once the user changes the colours, the Afrikaans description and English description fields will change to the colour the user has selected.

- Click on the Save button to save any changes that have been made.
![]()
- Click on the Cancel button to go back to the previous screen, the changes will not be saved.
![]()
- The Status will be added to the Status list once the user is done adding the Status.

Last modified: Tuesday, 4 April 2023, 7:09 AM