eRA Setup
This User Manual is currently under construction. Please revisit this page on 31 March 2022 to see the latest version of the User Manual. Thank you for your patience.
The eRA Setup tab allows the user to do the Cashbook, Journal Action, Debtor eRA setup. There are also options to select from on the Period default date and the date to be used on a Batch.This user manual will start on the System Option EDI Connection screen.

- For more information on how to navigate to the System Options EDI Connection screen please refer to the user manual: EDI
- Click on the eRA Setup tab to open the screen.
eRA Setup

- An explanation of the eRA Setup tab will be given.
![]()
- eRA Cashbook: The cashbook selected for all eRA transactions. The eRA Cashbook is the cashbook where the eRA transactions will post to when the eRA is imported and posted in the system.
- Default Discount Journal Action: The default journal that is set up for the short payments on the eRA. The default discount journal action is the default ledger account that is set up for the journal amount to post to.
![]()
- eRA Journal Debtor: When the Medical Aid overpaid the debtor account on the eRA and cant match the amount, the eRA will post it into the eRA journal debtor account.
- eRA Suspense Debtor: When the eRA can match a Medical Aid payment to any debtor account, the eRA will post it into the eRA suspense debtor account.

- eRA date: The eRA date is the date the ERA was created by the Medical Aid and sent.
- System date: ON by default. The system date is the date of the computer. The system date will be used as the current date of your computer and system when the ERA is posted.

- System date: The system date is the date of the computer. The system date will be used as the current date of your computer and system when the ERA is imported.
- eRA date: The eRA date will be the date of the eRA when it was imported into the system. It is selected by default.
- Own date: You can select your own custom date to use on the batch.
![]()
- Check for new eRA's when opening eRA Batch Screen: the check for new eRA's when opening the eRA batch screen option will automatically check for new eRA's when the eRA batch screen is opened instead of the user having to check manually for new eRA's.
![]()
- Use Local Era Dictionary: The use local dictionary option will use the local codes that are mapped with the codes from the Medical Aids with GoodX's local codes in the DB when importing the eRA's. For example, the savings depleted local code can then be 1, 9, 18 for all Medical Aids. The Era Dictionary is called a reference dictionary.

- When the Use Local Era Dictionary option is ticked, the 'Populate Mapping Dictionary' button will appear.
- Click on the Populate Mapping Dictionary button to populate the ERA Rejection Messages Dictionary.

- Click on Yes to proceed to populate the Messages Dictionary or No to cancel.
Please Note: Manual Mapping between Local and Medical messages can be done from Manage >> Global Lists > Lists > ERA Rejection Dictionary > Dictionary Mapping. Click on the link or related button at the beginning of this manual to open the Manual on how to do the Manual Mapping.
- Click on the Print Options button to print the setup of all System Options Tabs.

- Click on the Save button to save the changes that have been made.

Please Note: The Save button will only appear if changes have been made to the settings.
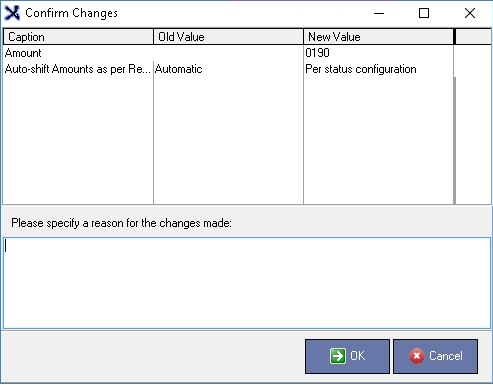
- The Confirmation Changes screen will open.

- Please specify a reason for the changes made: To confirm and save why changes have been made.

- Click on the free text field to start typing the reason.
- Click on the Cancel button to go back to the EDI screen, no changes will be saved.
![]()
- Click on the OK button to save changes made.
![]()
- Click on the Exit button to close the Entity Setup screen and return back to System Option main screen.

Last modified: Monday, 28 February 2022, 1:33 PM