Bedside Special Investigations refer to advanced diagnostic tests and procedures performed at the Patient's bedside. These investigations are often used to quickly assess a Patient's condition and guide immediate clinical decisions. Examples include: Portable imaging, ultrasounds, glucose monitoring, electrolyte analysis, or haemoglobin levels using fingerprick samples and echocardiograms (ECG) etc. These investigations are valuable for providing rapid, on-the-spot information about the Patient's health status, facilitating timely medical interventions.
This user manual will start on the EMR Form screen.
For more information regarding how to navigate to the EMR form, please refer to the user manual: EMR Form Overview.
Click on the Special Investigations panel.
The Special Investigations panel will expand.
Click on the Bedside button.
The Bedside section will be added, with a timestamp of when the test was performed.
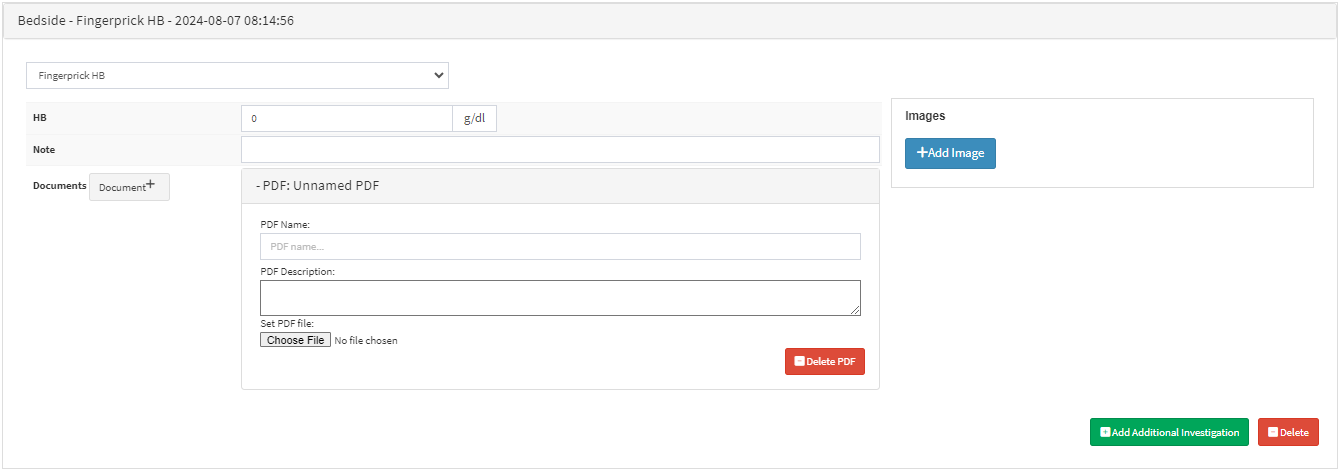
💡Please Note: The added Bedside Investigation will default to the Bedside - Fingerprick HB section.
Fingerprick HB
Measures the Haemoglobin levels in the Patient's blood.
Click on the HB field to enter the results in a g/dl format.
Click on the Note field to add additional information regarding the test.
Click on the Add Image button, to upload any relevant Images relating to the test.
Click on the Add Additional Investigation button to add a new Bedside Investigation to the form.
Click on the Delete button to delete the investigation from the form.
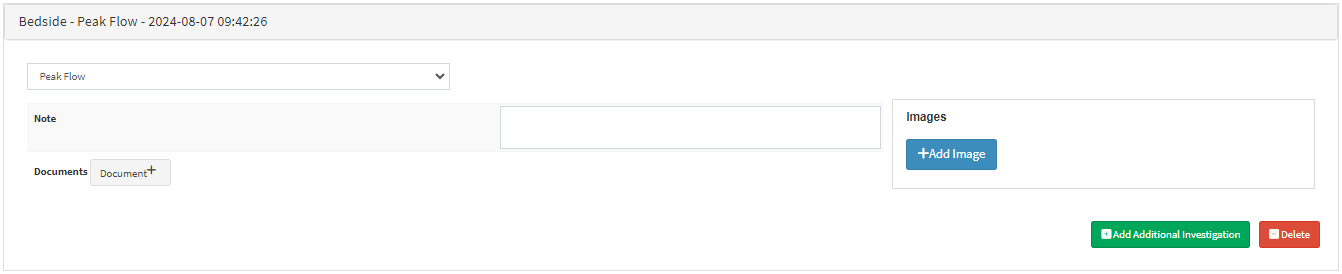
Peak Flow
Measures how well the lungs are functioning. It specifically measures the peak expiratory flow rate (PEFR), which is the highest speed at which air can be blown out from the lungs after taking a deep breath.
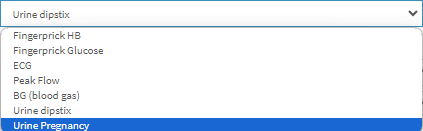
Click on the Test drop-down menu and select Peak Flow.
The Bedside - Peak Flow section will open.
Click on the Note field to add additional information regarding the test.
Click on the Add Image button, to upload any relevant Images relating to the test.
Click on the Add Additional Investigation button to add a new Bedside Investigation to the form.
Click on the Delete button to delete the investigation from the form.
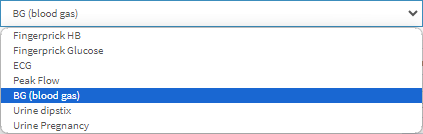
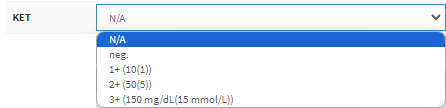
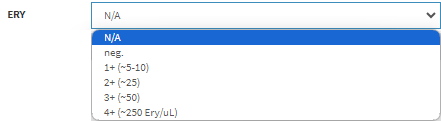
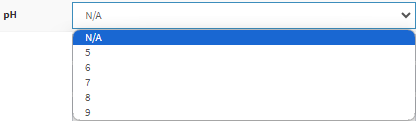
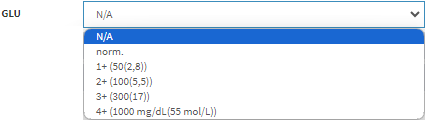
BG (Blood Gas)
Determines the exact quantities of oxygen and carbon dioxide in the body. This will assist in determining the condition of the Patient's lungs and kidneys. It can also be used to determine the pH, or acidity, of the Patient's blood.
Click on the Test drop-down menu and select BG (Blood Gas).
The Bedside - BG (Blood Gas) section will open.
Click on the Blood Gas Test drop-down menu to select how the test was conducted.
Arterial: Blood is drawn from the radial artery, femoral artery or the brachial artery.
Venous: Blood is drawn from the peripheral vein.
Click on the pH field to enter the findings, from measuring the acidity or alkalinity of the blood.
Click on the pO2 field to enter the findings, from measuring the Partial Pressure of Oxygen - the amount of oxygen gas in the blood.
Click on the pCO2 field to enter the findings, from measuring the Partial Pressure of Carbon Dioxide - the amount of carbon dioxide gas in the blood.
Click on the HCO3field to enter the findings, from measuring the bicarbonate level in the blood.
Click on the BE field to enter the findings, from measuring the amount of excess or insufficient base in the blood.
Click on the HB field to enter the findings, from measuring the concentration of haemoglobin in the blood.
Click on the Glu field to enter the findings, from measuring the blood sugar level.
Click on the Lac field to enter the findings, from measuring the level of lactate in the blood.
Click on the K+ field to enter the findings, from measuring the potassium level in the blood.
Click on the Na+ field to enter the findings, from measuring the sodium level in the blood.
Click on the Other field to enter the findings of any other tests performed using Blood Gas.
Click on the Note field to add additional information regarding the test.
Click on the Document button to upload PDF Documents to this test section.