DA: Batches - All Transactions


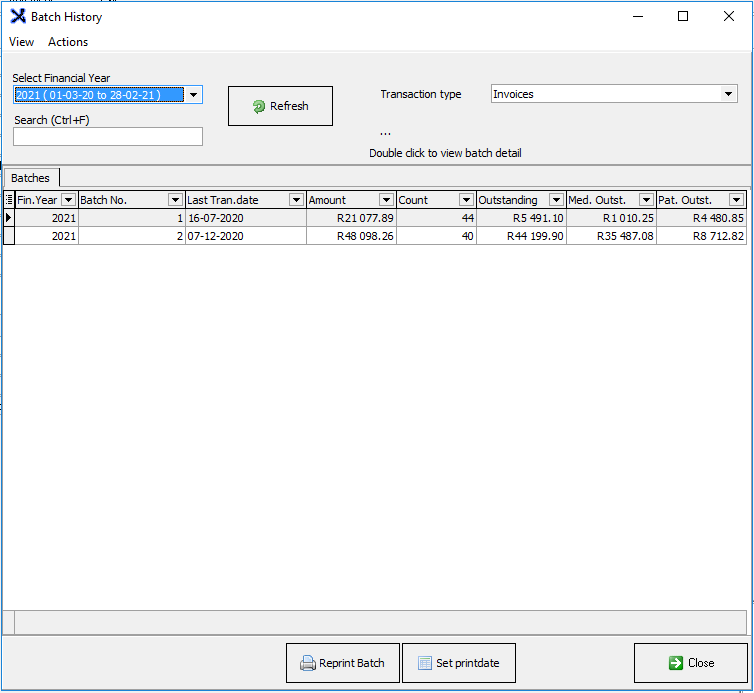
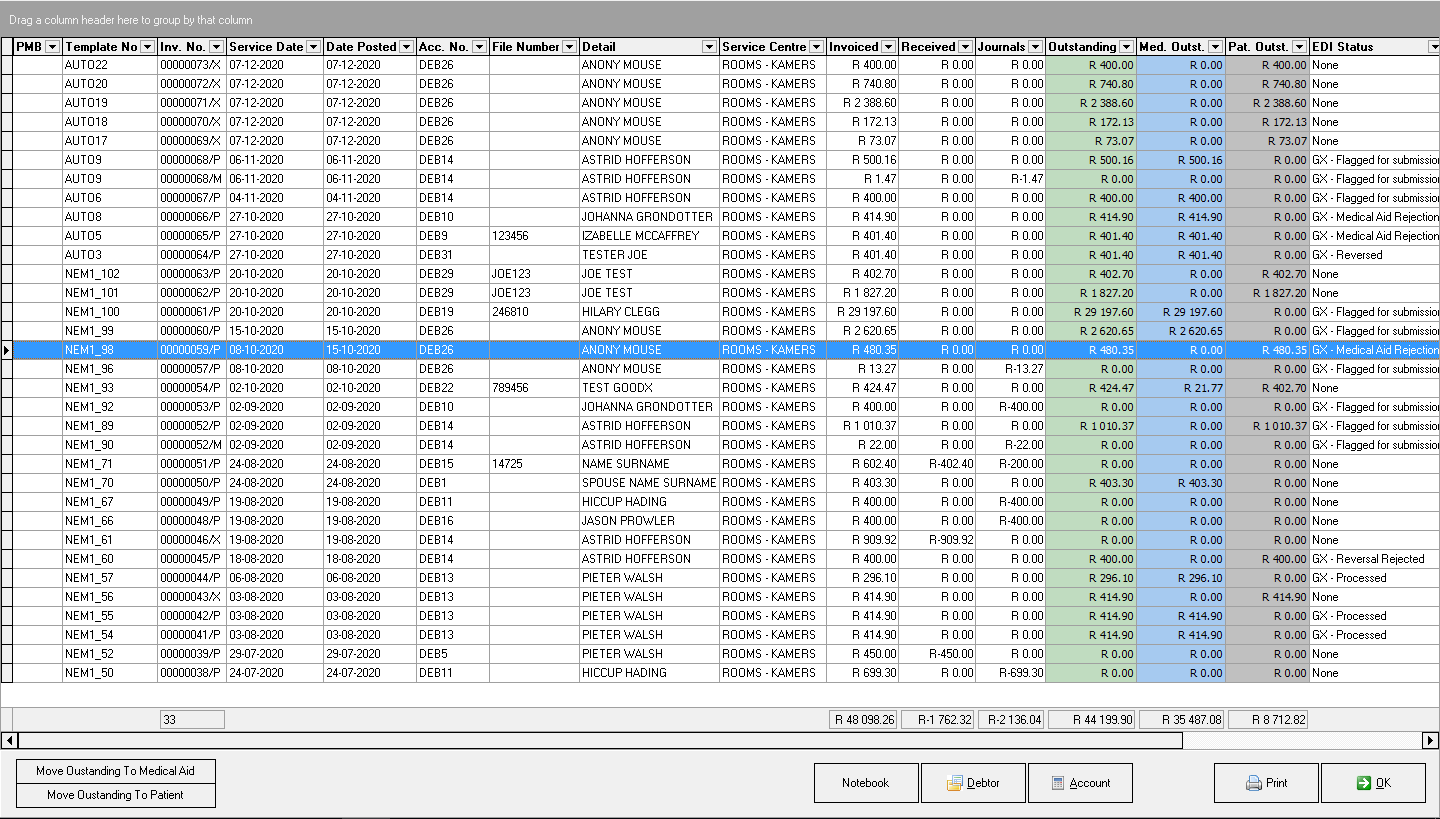
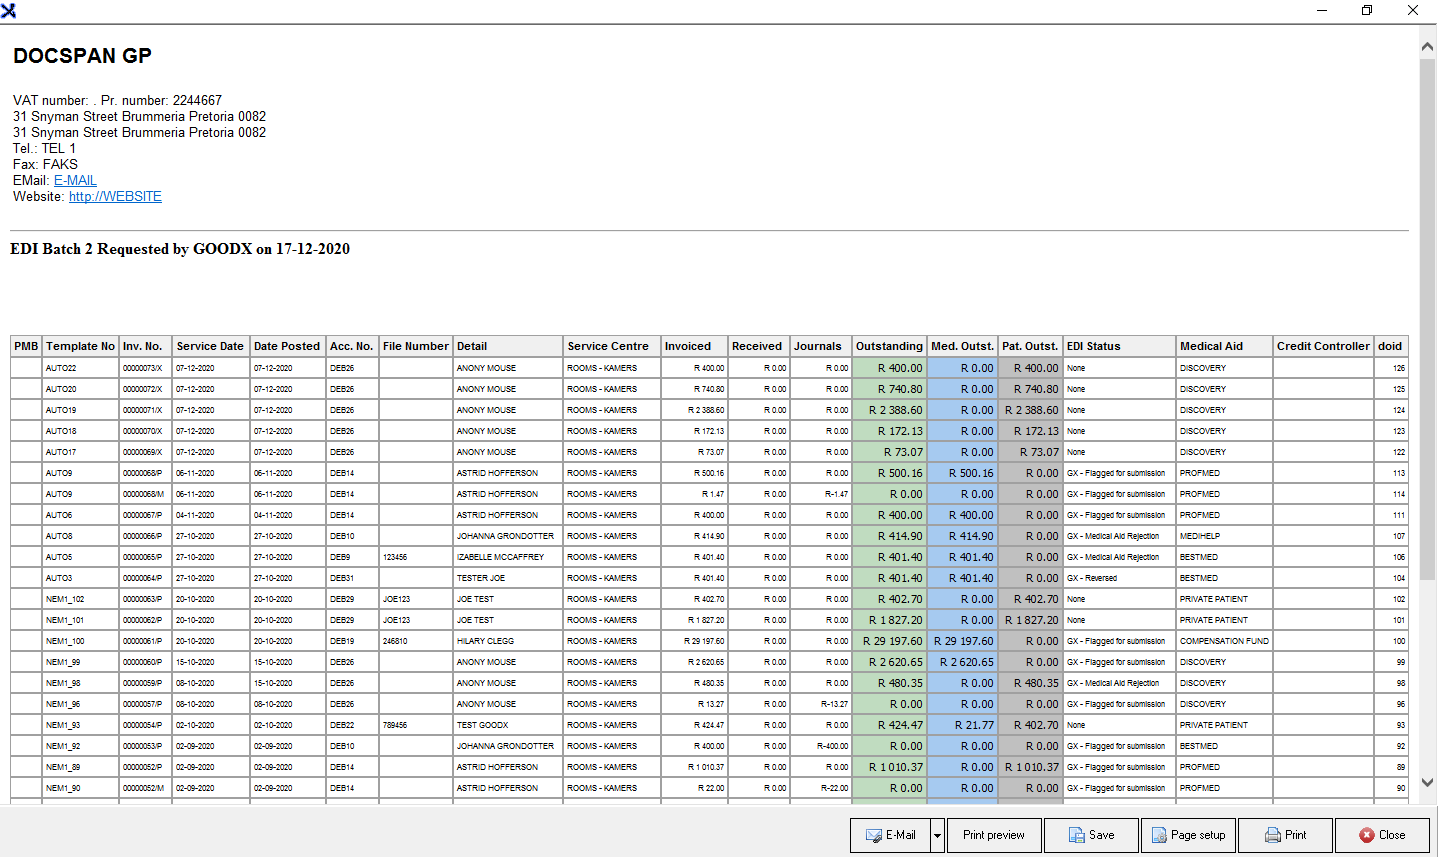
Claim/Switch History is used to view all the claims and their statuses that have been sent through to the Medical Aid.
It is very IMPORTANT for the Practice to go through the Switch History every day to make sure all claims are processed successfully. 

  • Sign in to the GoodX Desktop using your GoodX username and password.
  • From the Navigator Double Click on the MedDebs Module 


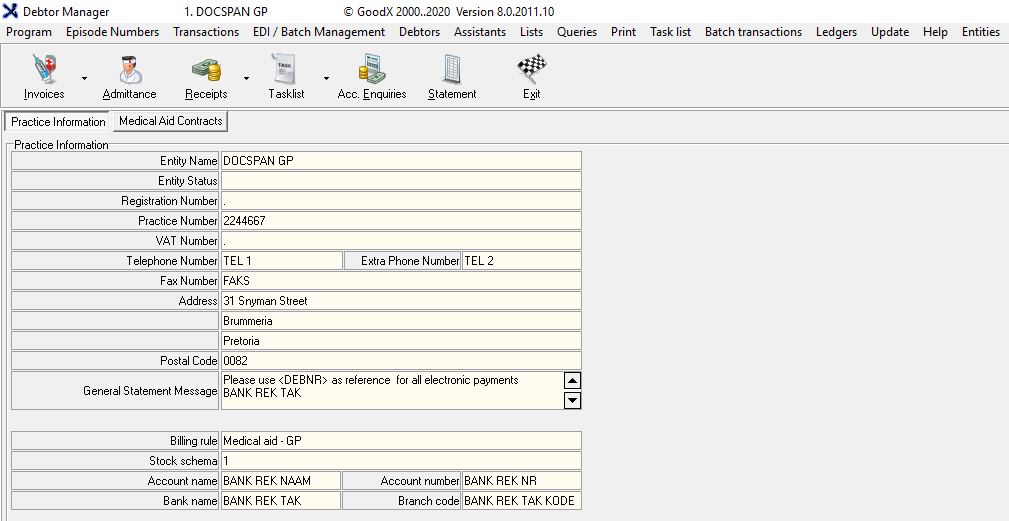
  • The Main MedDebs screen will open

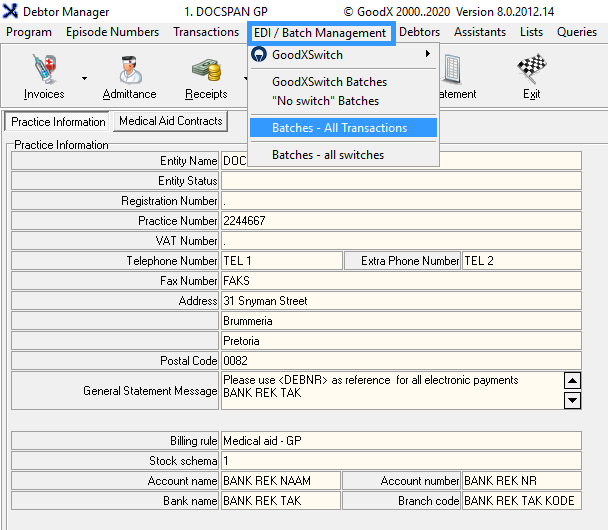
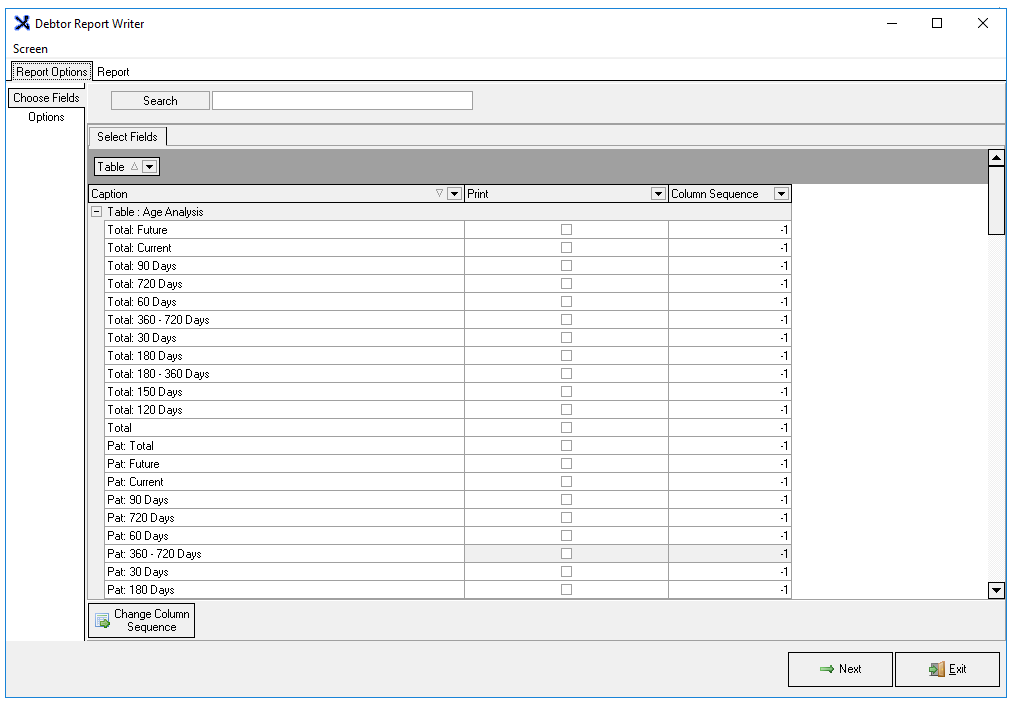
  • From the Menu bar, click on EDI Batch Management 
  • From the drop-down, click on Batches - All transactions 


  • You will be directed to the Batch History Screen 


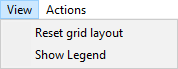
  • From the menubar, click on View


  • From the dropdown there are options 
  • Reset Grid Layout: Resets the layout to the default layout   


    • Click Yes to confirm that you would like to reset the layout to default 
    • Click Cancel if you do not want to reset the layout to default
  • Show Legend: Shows the legend to enable the user to interpret the EDI screen 


  • From the Menubar, click on Actions 


  • Statements for all transactions on this batch: Allows you to print statement for all the transactions  from the statement enquiry screen  


  • Reprint Batch: Allows you to do a batch reprint of the debtors' invoices 


  • Select Financial Year: Select the financial year from the drop-down 


  • Search: Search for a transaction on the list by typing in the search textbox field 


  • Click on the refresh button to refresh the transactions on the list
 

  • Select the Transaction Type from the drop-down box 
    • Invoices: All Invoice batches 
    • Credit Notes: All Credit Note batches 


Columns 

  • Fin. Year: The financial year in which the batch was processed 
  • Batch No: The batch number 
  • Last Tran. date: The last transaction date on the batch 
  • Amount: Total batch amount 
  • Count: How many transactions are in the batch
  • Outstanding: The outstanding amount in the batch 
  • Med. Outstanding: Total outstanding from the Medical Aid in the batch
  • Pat. Outstanding: Total outstanding from the Patient in the batch


Batch Details 

  • Double click on the batch line to open the details of the batch the EDI Batch screen will open 


Batch Columns 

  • PMB: Prescribed Minimum benefit condition  
  • Template No.: The template number used for the document that was created
  • Inv. No.: The invoice number associated with the transaction 
  • Service Date: The date the patient was  at the practice 
  • Date Posted: The date the invoice/credit note was  posted 
  • Account Number: The debtors' account number  
  • File Number: The file number that is associated transaction  
  • Detail: Debtor information 
  • Service Centre: Where the appointment of the transaction took place  
  • Invoiced: The total amount of the invoice
  • Received: Payment toward the invoice that was received  
  • Journals: Journal amount if applicable  
  • Outstanding: Total amount of the invoice that is outstanding  
  • Med. Outstanding: The total amount owed by the Medical Aid  
  • Pat. Outstanding: The total amount owed by the Patient 
  • EDI Status: Electronic Data Interchange status 
  • Medical Aid: The medical aid who the patient belongs to 
  • doid: Global reference identification number 
Journals

  • Select a transaction 
  • Click on Move Outstanding to Medical Aid to do a journal directly from the batch screen and move outstanding amount to the Medical Aid 


  • Click on Move Outstanding to Patient to do a journal directly from the batch screen and move outstanding amount to the Patient 


Other options 
  • Click on Notebook to access the Debtor Notebook 


  • Click on Debtor to access the Main Member Input screen 


  • Click on Account to be directed to the Account Query screen 


Print 

  • Click on Print to generate a preview of the list on your screen 


  • Preview of the list 


  • You will have the following options to do with this list :
    • Email: Email the list 

    • Print Preview: Preview how your list will look when you print a hard copy 

    • Save: Save a digital copy to your computer 

    • Page Setup: Opens the page setup screen 

    • Print: Prints to the Set-up printer

    • Close: Closes the screen and returns to the EDI Batch screen 

Close & Exit 
  • Click on Ok to return to the Batch History Screen 


  • From the Batch History screen, click on Close  to Exit to the main MedDebs screen 


Last modified: Thursday, 17 December 2020, 3:07 PM