Opening Balances: Patients

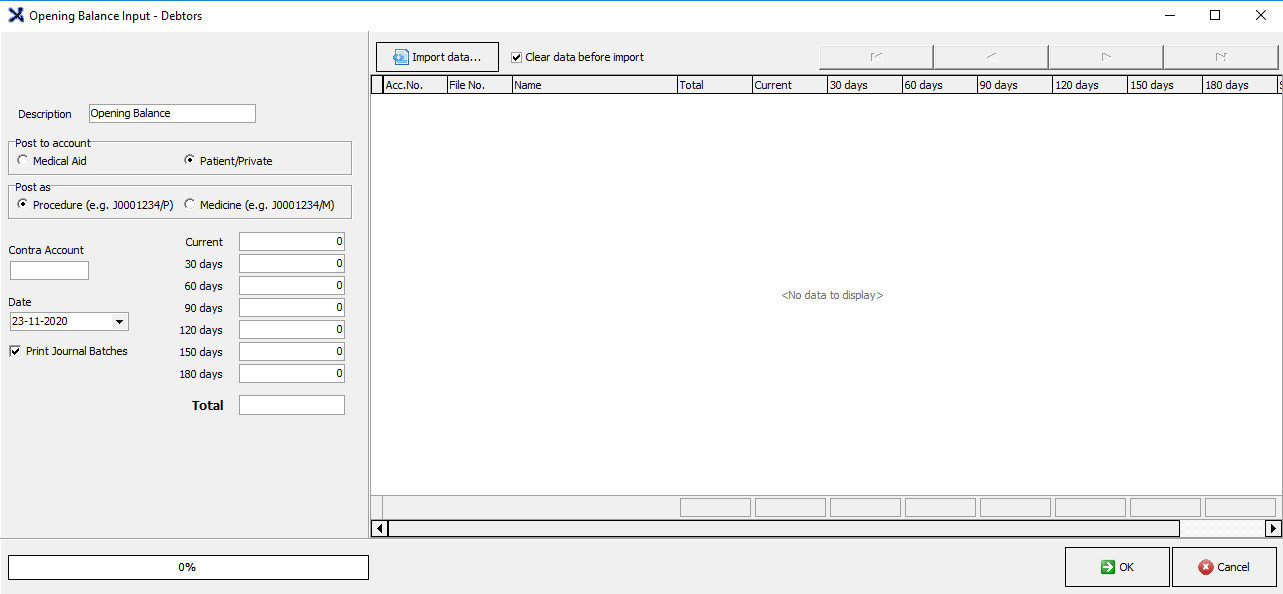
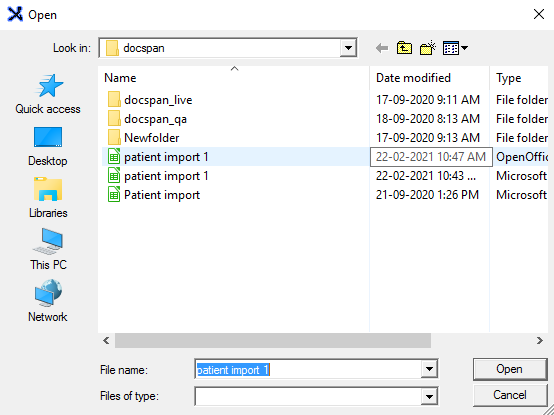
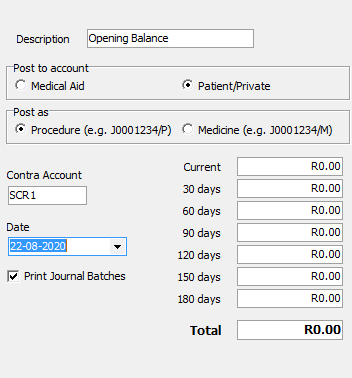
The function will be used when the practice starts on GoodX for the first time and wants to bring debtors patient closing balances from a previous system. These are amounts that still need to be collected from the patient. This assists the practice and ensures a correct age analysis. 

  • Log in to GoodX Desktop App with your username and password.
  • Double click on the MedDebs module.

  • Click on the Batch transactions tab.


  • From the drop-down, click on the Opening balances: Patients.


  • The Select Period screen will appear.

  • Click on the OK button or F2 on your keyboard.


  • The Opening Balance Input screen will appear.


  • Choose the Patient/Private option in the Post account.


  • Contra account: This will always be SCR1.
  • Click on the Import data button to import the new data.


  • Select From external file (e.g. CSV).


  • There are two options to import a profile:
    • Already saved profile.
    • Create a new profile.
Already saved profile:
  • Click on the ellipse (...) to import the correct file and complete the information.


  • Upload the profile file that you created before.

  • Click on Open to open the Debtors Opening Balance screen.
Please Note: Because the user already created a profile, the system will automatically pull the data through according to the profile created.


  • Click on the Text file to Import ellipse to import the CSV file that the user created.


  • Click on the Open button to continue.


  • The user will again be directed to the Debtors Opening Balance screen.
  • Click on the Process text file button.


  • The Display Report screen will appear.


  • The following information will display on the screen:
    • Records Read: The total amount of records that the system picked up.
    • Records Accepted: The total amount of records that the system accepted. This option needs to be the same as the records read.
    • Records Rejected: If any of the records were rejected it will show on this line.
  • Click on the Close button to continue.


  • The imported data will appear on the Opening Balance Input - Debtors screen.


  • Click on the OK button.


  • A confirmation screen will pop up, click on the OK button.


  • The Journal summary screen will appear.


  • Click on the Close button to exit the Opening Balance screen.


Create a new profile:

  • Complete the following information:


    • Delimiter: It is normally a comma (,) or a dash (/)
    • Data Heading Length: The first few rows of the excel spreadsheet before the data that is captured.
    • Data Footer Length: The total amount of rows left at the bottom of the excel spreadsheet after the data is captured.
    • Debtor Identifier Type: Choose between Account Number or File number. The user will identify the patient via what they selected.


    • Debtor Identifier: Enter the column number of the Excel spreadsheet where the Debtor name is stated.
    • Transaction Description: Enter the column number of where the transaction amount is allocated.
    • Current: Enter the column number of the current amount of the debt that needs to be collected.
    • 30 days: Enter the column number of the amount on 30 days that still needs to be collected.
    • 60 days: Enter the column number of the amount in 60 days that still needs to be collected.
    • 90 days: Enter the column number of the amount on 90 days that still needs to be collected.
    • 120 days: Enter the column number of the amount on 120 days that still needs to be collected.
    • 150 days: Enter the column number of the amount on 150 days that still needs to be collected.
    • 180 days: Enter the column number of the amount on 180 days that still needs to be collected.
  • Click on the Save profile button to save the import profile data.


  • Click on the Process text file button to continue.


  • Click on the Close button.
  • Choose the correct Contra Account and date

  • Click on the OK button
  • Click on OK (again) to confirm journal batch

Last modified: Thursday, 11 March 2021, 11:34 AM