DA: ERA Intervention Manager
ERA: An Electronic Remittance Advice is a way of importing receipts captured by the Medical Aids against debtors or cases into GoodX in a structured way.
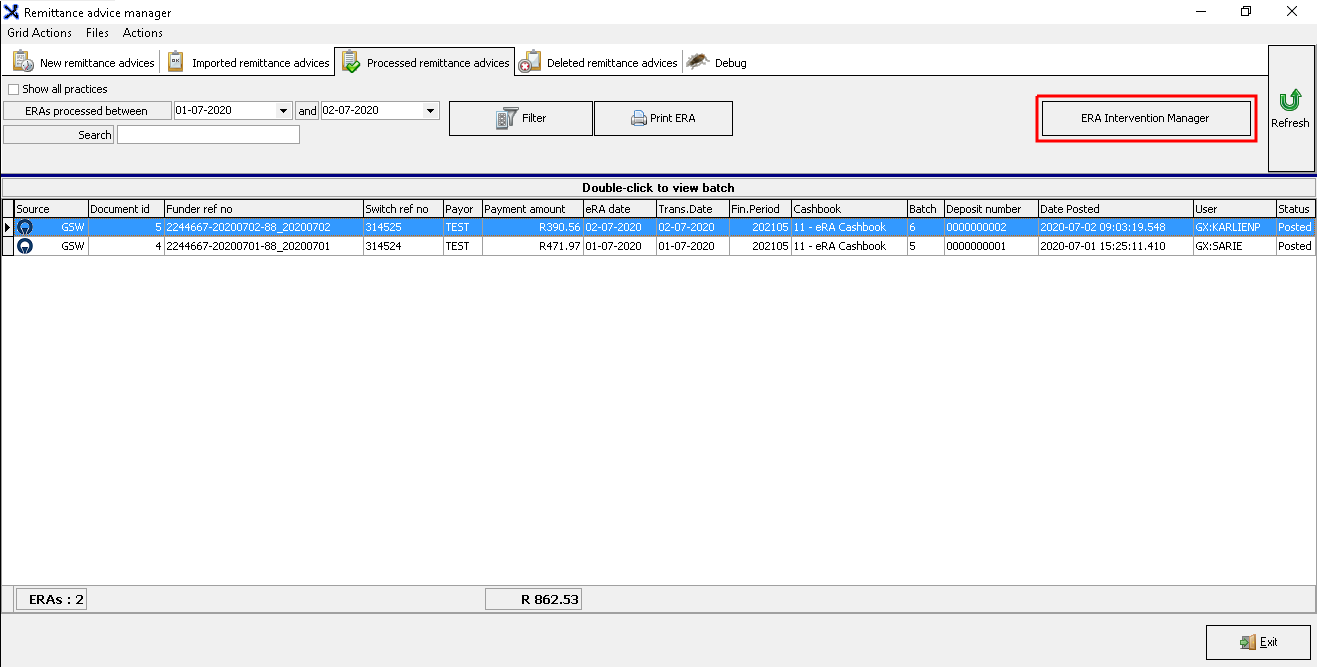
The Intervention Manager is only available from the Processed Remittance Advice screen. Please click on the Related button at the beginning of this Manual to open the ERA Process Manual to see how to get to this part of the Process.
The ERA Intervention Manager:
- After the Electronic Remittance Advice was Imported and Posted successfully, you can access the Intervention Manager to manage the claims directly from here.
- Click on the ERA Intervention Manager button to open the Manager.

The ERA Intervention Manager screen will open.
- The Patient's personal details will be displayed at the top of the screen.
- Language: Afrikaans/English. (This option will be read-only)
- ERA Messages: If the Medical rejected any of the claims or certain lines on a claim, the 'Reason Message' sent on the ERA will display under the ERA Messages. This way the user can attach a note on the SMS or Email informing the Patient why the Medical Aid rejected or short paid their claim.

- Payment ID: This is an internal ID for the payment as displayed on the ERA payload.
- Sorting: Numeric representation of the Debtor account number (can be used for sorting).
- Account No: This is the debtor number of the account that was paid
- Debtor: This is the debtor/patient name and surname who the payment was for
- Invoice No: The Invoice number is a unique number generated by the system on the invoice for the patient. This number is included on the invoice and it is used for payment tracking purposes.
- Invoice Date: The date the Invoice was created and posted.
- Balance: The balance column will show the total outstanding balance of the debtor account (Medical Aid or Patient outstanding).
- Patient Outstanding: The amount rejected or short paid by the Medical Aid that is patient liable will be displayed in this column
- Medical Aid Outstanding: The amount paid by the Medical Aid will be displayed in this column
- Outstanding: The total amount outstanding after the ERA was posted for a specific debtor will be displayed in this column
- Age (Capture): The age in which the outstanding amount is according to the capture date of the invoice
- Age (Service): The age in which the outstanding amount is according to the service date of the invoice
- Collection Cycle: N/A
- Current Status: N/A
![]()
- EDI Status: This is the response status from the Medical Aid after submitting a claim. This status informs you what happened to the claim eg. if it was submitted successfully or short paid or rejected.
- Paid Amount: The amount paid by the Medical Aid for this specific claim will be displayed in this column
- Claim Amount: This is the total amount of the claim that was submitted to the Medical Aid for payment
- Discount: This is the amount journaled as settlement discount on the invoice.
- Write Off Amount: This is the amount journaled as a write-off on the invoice.
- Shift: Indicates whether the user has shifted amounts on any invoice for this specific payment on this ERA.
- Unlinked: Indicates whether amounts have been posted as unlinked for this specific payment on this ERA.
- Messages: Indicates whether messages exist for this specific payment on this ERA.
- Short Paid: Indicates whether any short-payments exists for this specific payment on this ERA.
- Document No: This is the document number of the receipt which was posted on this invoice in this ERA.
- Messages Text: If the Medical rejected any of the claims or certain lines on a claim, the 'Reason Message' sent on the ERA will display here in the Message Text column. This way the user can attach a note on the SMS or Email informing the Patient why the Medical Aid rejected or short paid their claim.
![]()
TAKE NOTE: The user can choose which columns to display. Click on the small button as seen below, a list will expand with all the available options. After the user chose which options to display the system will save the preferences for this specific user.

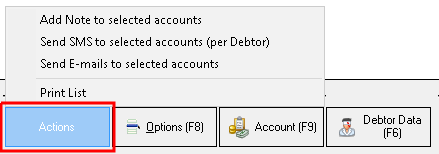
- Actions button:
- Add Note to selected accounts: This option will allow you to add a free text note on the Debtors Notebook
- Send SMS to selected accounts (per Debtor): This option will allow you to send an SMS to the Debtor regarding the outstanding amount or claim
- Send E-Mails to selected accounts: This option will allow you to send an Email to the Debtor regarding the outstanding amount or claim
- Print List: This option will allow you to print a list of the payments that were paid on the ERA in *pdf format

- Options (F8) button:
- Check All: This option will select (tick) all the processed ERA's on the screen in the 'Select' column
- Uncheck All: This option will un-select (untick) all the processed ERA's on the screen in the 'Select' column
- Message book:
- Notebook: This option will allow you to make electronic notes on the Debtor account to keep track of all communication sent to the Debtor without having to write it down on paper or a file.
- Tasklist: This option will allow you to create a Task on the Debtor account if you need to complete an 'activity' eg Phone the Patient regarding the outstanding account and it needs to be accomplished within a defined period of time or by a deadline.
- Med.Aid/Patient Outstanding: This option will pop up a small summary of the outstanding amounts and in what age (current, 30, 60, 90, 120 days) the amount reflects.
- Print Statement (Normal): This option will open the Statement Query screen where you can choose the type of Statement that you want to print OR email in a *pdf format and you can print it from the print screen.
- Print Statement (Direct): This option will immediately open the Statement in a *pdf format and you can print it from the print screen
- Print Statement (E-Mail): This option will open the Email Query screen and you can email it directly to the Debtor

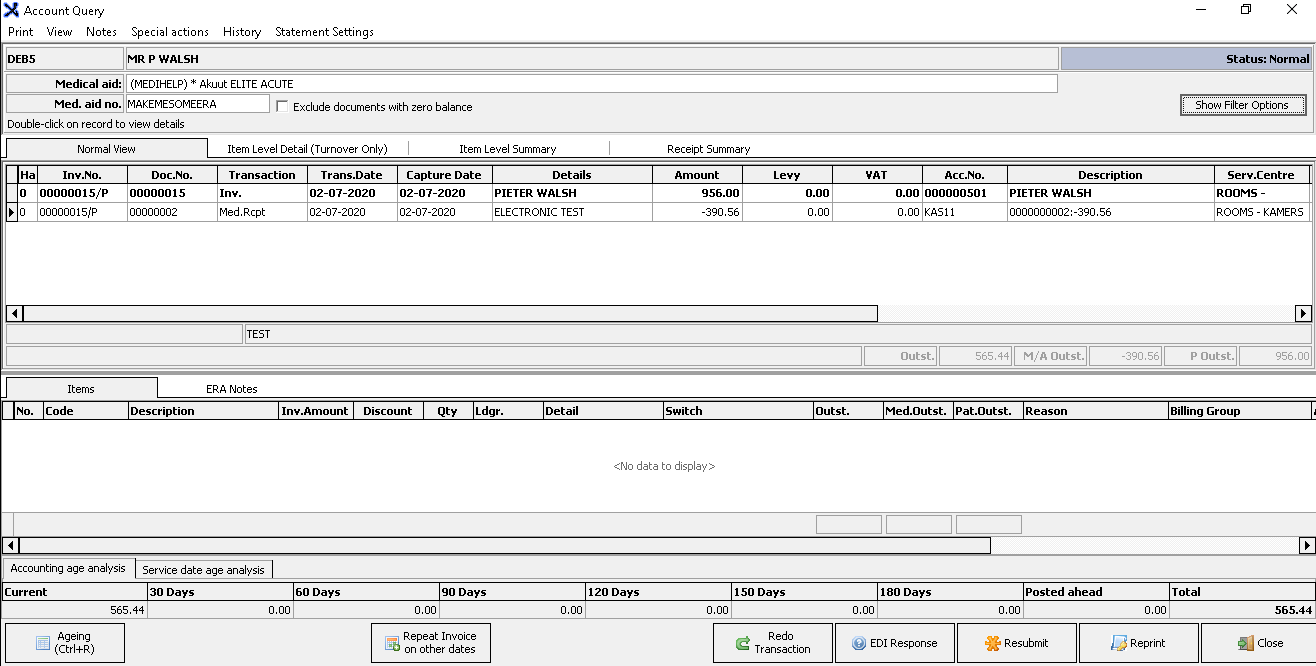
- Account (F9) button:

- The Account Query screen will open. On this screen, you can view all previous Invoices, Receipts, Journals of the Debtor. Basically any account-related information of the Debtor or Dependants of this Debtor.

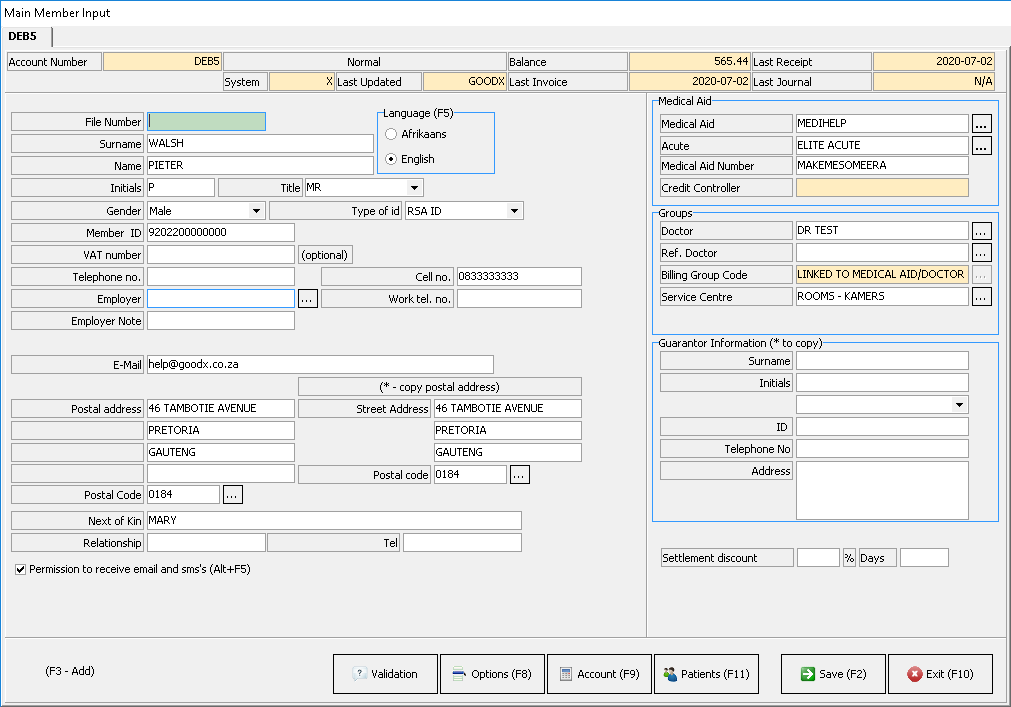
- Debtor Data (F6) button:

- The Main Member Input screen will open. On this screen, you can update/edit any personal, medical aid or guarantor information of the Debtor.

- Remember to Save (F2) all changes that were made on any screen before Closing the screen.
![]()
- To Close a screen click on Exit (F10)
![]()
Last modified: Friday, 7 August 2020, 8:57 AM